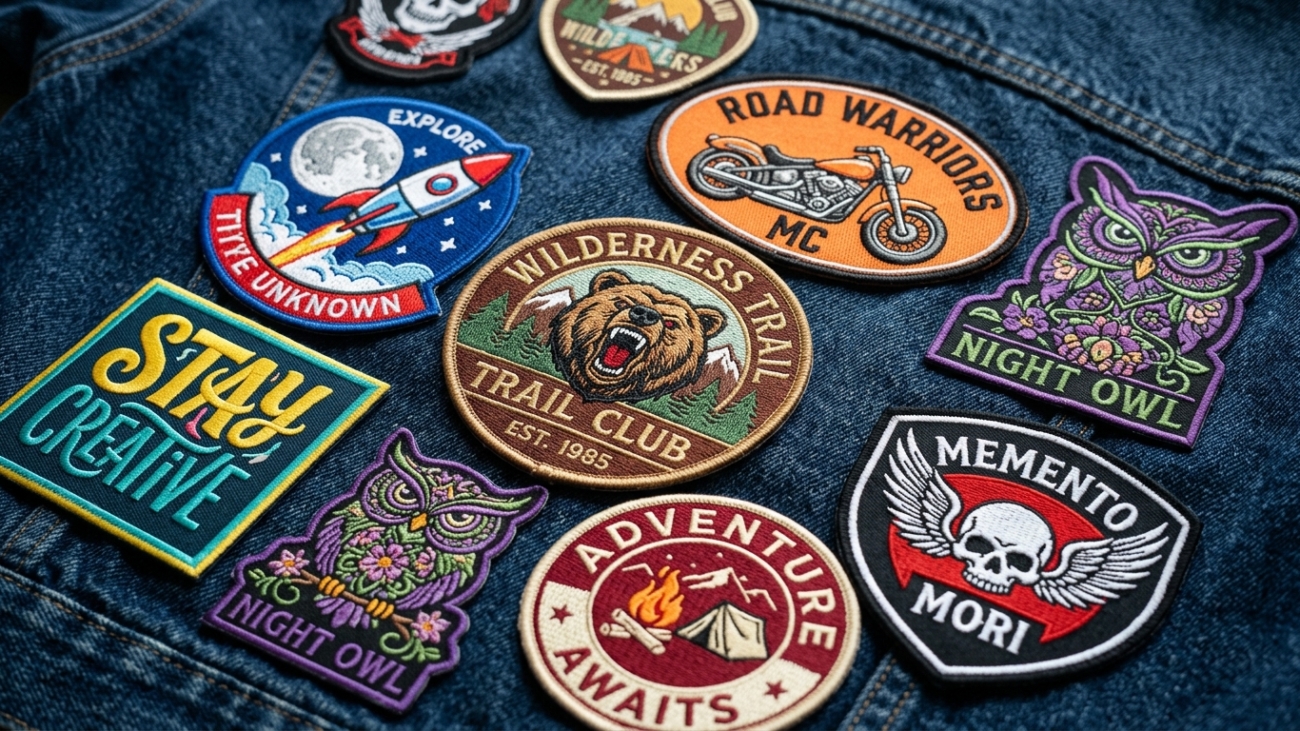
How to Care for Custom Patches

How to Care for Custom Patches: Complete Washing, Drying & Maintenance Guide

You’ve invested in beautiful custom embroidered patches for your team uniforms, brand merchandise, or personal collection. They look absolutely stunning—sharp details, vibrant colors, professional quality that immediately elevates any garment.

Then laundry day arrives.

And you start wondering: Will my patches survive the washing machine? How do I keep them looking perfect? What’s the best way to care for custom patches long-term?

The answer is actually encouraging: Custom embroidered patches are incredibly durable and can maintain their appearance for 50+ wash cycles with proper care.

This comprehensive guide covers everything you need to know about washing, drying, maintaining, and preserving custom patches so they look professional for years to come—whether they’re embroidered patches, PVC patches, woven patches, or any other type.
Why Proper Custom Patch Care Matters (More Than You Think)

The Business Impact of Patch Quality

If you’re a business owner, embroidery service provider, or custom apparel company, your reputation depends on patch quality.

What happens when patches aren’t cared for properly:

  • Colors fade after a few washes
  • Stitches unravel or loosen
  • Patches peel away from garments
  • Embroidered details blur or fray
  • Customer dissatisfaction and complaints
  • Negative reviews: “The patches fell apart after one wash”
  • Loss of repeat business

What happens with proper patch care:

  • Colors stay vibrant and sharp
  • Stitching remains secure and tight
  • Patches last 50+ wash cycles
  • Professional appearance maintained
  • Customer satisfaction and loyalty
  • Positive reviews: “Patches held up perfectly”
  • Repeat business and referrals

The difference? Understanding how custom patches work and how to care for them properly.

How Custom Patches Actually Work

Before you can care for patches properly, you need to understand what they are and how they’re attached.

What are custom embroidered patches?

Custom patches are dimensional textile embellishments made from thread stitched onto fabric backing. Unlike digital prints or transfers, embroidered patches have:

  • Physical structure — Raised, 3D appearance
  • Thread stitching — Each design element is individually stitched
  • Fabric backing — Provides stability and attachment point
  • Durability — Designed for 50+ wash cycles
  • Professional appearance — Premium look that elevates any garment

How are patches attached?

Most custom patches are applied using heat pressing:

  • Temperature: 350°F (typically)
  • Duration: 15-20 seconds
  • Pressure: Uniform pressure across entire patch
  • Result: Adhesive backing bonds patch to garment fabric

The key point: The adhesive bond is durable but requires proper care to maintain.

How to Wash Custom Embroidered Patches (Step-by-Step)

The Basic Washing Method for Custom Patches

Caring for custom embroidered patches during washing doesn’t require specialized equipment or complicated procedures. Follow these steps:

Step 1: Turn Items Inside Out (Critical)

Before washing any garment with custom patches:

  • Turn the item completely inside out
  • This protects patch edges from catching on other fabrics
  • Reduces direct friction against patch surfaces
  • Prevents stitches from snagging on zippers or buttons

Why this matters: Patch edges are the most vulnerable part of the embroidery. Direct contact with other garments during washing can cause edge lifting, fraying, or premature separation.

Step 2: Choose the Right Water Temperature

  • BEST: Cold water (50-60°F)
  • GOOD: Lukewarm water (80-90°F)
  • AVOID: Hot water (above 100°F)

Why temperature matters: Heat weakens the adhesive bond between patch and fabric. Each hot wash cycle stresses the connection. Over time, hot water washing causes premature lifting and separation.

Step 3: Select Appropriate Wash Cycle

  • BEST: Delicate or gentle cycle
  • GOOD: Normal cycle
  • AVOID: Heavy-duty or extra-agitation cycles

Heavy wash cycles create excessive friction and tumbling that stresses patch edges and loosens stitching.

Step 4: Use Mild, Quality Detergent

  • BEST: Mild, gentle laundry detergent
  • ACCEPTABLE: Regular laundry detergent (reasonable amount)
  • AVOID: Harsh chemicals, bleach, or strong detergents
  • AVOID: Liquid fabric softeners (damage adhesive)
  • AVOID: Oxygen-based bleach alternatives

Strong detergents, bleach, and fabric softeners degrade both patch materials and adhesive bonds over time. They also fade thread colors.

Step 5: Don’t Overload the Washing Machine

  • Load the machine only 2/3 full
  • Overcrowding creates excessive friction
  • Patches rub against other garments repeatedly
  • This causes premature edge lifting and wear

The Complete Washing Process:

  1. Turn garment inside out
  2. Place in washing machine
  3. Fill with cold/lukewarm water
  4. Add mild detergent (normal amount)
  5. Select gentle or normal cycle
  6. Avoid fabric softeners or bleach
  7. Run wash cycle
  8. Remove immediately after cycle completes (don’t let items sit wet)

Result: Your custom patches are clean and protected.

Caring for Different Types of Custom Patches

Different patch materials require slightly different care approaches:

Embroidered Patches (Most Common)

Standard embroidered patches are made from thread stitched on fabric backing. They’re incredibly durable.

Washing instructions:

  • Follow basic washing method above
  • Cold water is best
  • Turn inside out
  • Gentle cycle acceptable
  • Air dry preferred

Special care:

  • For stubborn stains or dirt, spot-clean before washing
  • Use a soft cloth with mild detergent
  • Gently dab the stained area (don’t scrub)
  • Rinse with clean water
  • Allow to air dry
  • Then wash normally

Durability: Embroidered patches typically last 50-75 wash cycles with proper care.

3D Embroidered Patches (Raised/Puffy)

3D embroidered patches have raised, dimensional elements that create texture and depth.

Special washing care:

  • Turn inside out (always)
  • Gentle cycle (recommended)
  • Use mesh laundry bag for extra protection
  • Cold water only

Cleaning trapped dirt:

  • For dirt trapped in raised elements, use a soft toothbrush
  • Gently brush in the direction of the thread
  • Work carefully to avoid damaging stitches
  • Do this BEFORE washing in machine

Drying:

  • Air dry only (never machine dry)
  • Heat can damage raised elements
  • Allow complete air drying before wearing

Durability: 40-60 wash cycles with proper care.

PVC Rubber Patches (Modern Alternative)

PVC patches are made from molded rubber with colored layers.

Washing instructions:

  • Follow basic washing method
  • Cold water preferred
  • Gentle cycle recommended
  • Turn inside out

Heat sensitivity:

  • ⚠️ PVC patches are sensitive to heat
  • Never use hot water
  • Never machine dry (heat damages PVC)
  • Always air dry

Stubborn stains:

  • Spot-clean gently before machine washing
  • Use soft cloth and mild detergent
  • Don’t scrub aggressively

Durability: 60-80+ wash cycles (PVC is very durable).

Woven Patches

Woven patches are created on looms with tightly woven threads, creating flat, detailed surfaces.

Washing:

  • Follow basic washing method
  • Cold to lukewarm water
  • Gentle cycle preferred
  • Turn inside out

Care:

  • Woven patches can be more delicate than embroidered
  • Avoid heavy scrubbing or aggressive brushing
  • Use gentle drying only

Durability: 40-60 wash cycles depending on construction.

Leather & Faux Leather Patches

Leather patches are specialty items requiring careful handling.

Washing:

  • DO NOT machine wash leather patches
  • Hand wash only
  • Use barely damp cloth with mild soap
  • Gently wipe surface
  • Avoid soaking

Drying:

  • Air dry at room temperature
  • Never heat dry
  • Never expose to direct sunlight (fading)

Storage:

  • Store in cool, dry location
  • Avoid moisture and humidity
  • Keep away from heat sources

Durability: 20-30 wash cycles (leather is more delicate).

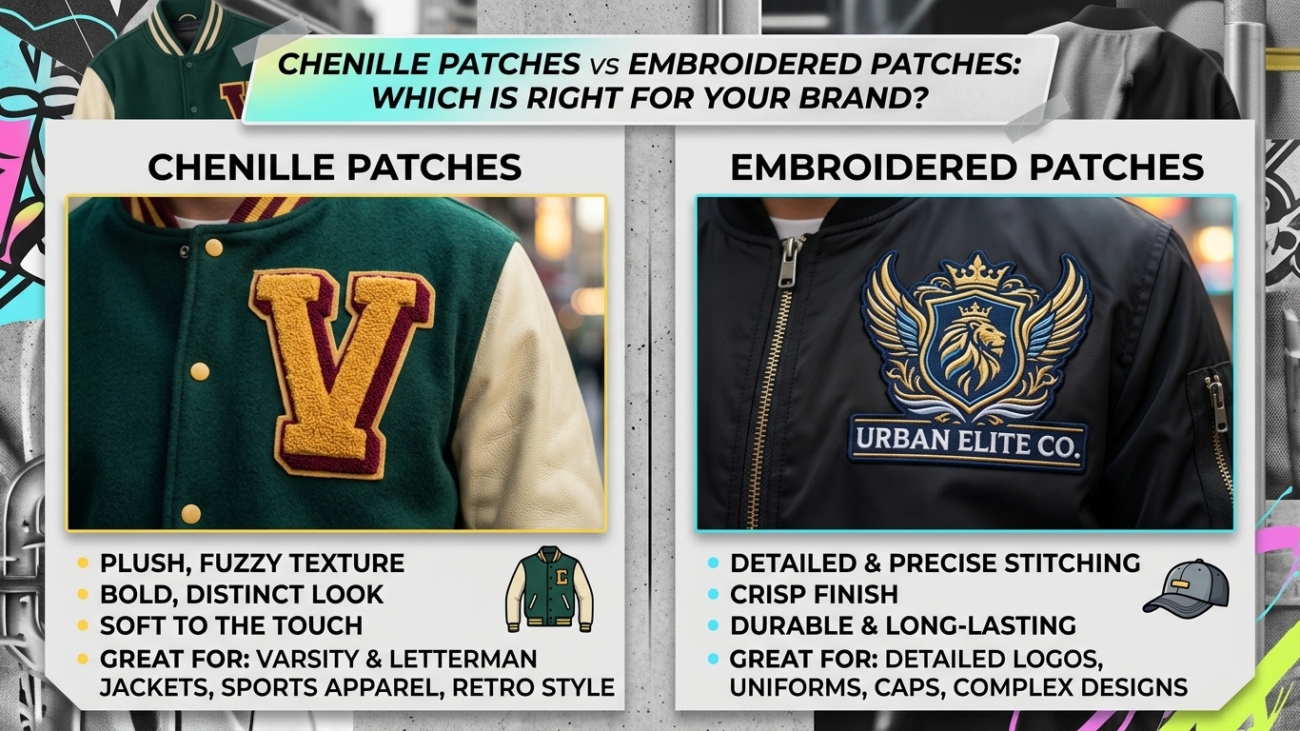
Chenille Patches (Plush Fabric)

Chenille patches have a soft, velvety texture.

Washing:

  • Follow basic washing method
  • Cold water only
  • Gentle cycle
  • Turn inside out
  • Use mesh laundry bag

Texture restoration:

  • After washing, chenille fibers may flatten
  • Use soft brush to gently brush in direction of fibers
  • This restores plush texture
  • Work gently to avoid damaging stitches

Drying:

  • Air dry only
  • Never machine dry

Durability: 30-50 wash cycles.

Rhinestone & Sequin Patches (Decorative)

Rhinestone patches have gemstones attached to fabric backing.

Special washing care:

  • Use mesh laundry bag (essential)
  • Gentle cycle only
  • Turn inside out
  • Cold water

After washing inspection:

  • Check rhinestones for security
  • Look for any loose stones
  • If stones loosen, they can fall off

If stones loosen:

  • Stop washing the item
  • Contact a professional for repair
  • Don’t continue wearing/washing until secured

Durability: 20-40 wash cycles (rhinestones can loosen with washing).

Velcro-Backed Patches (Removable)

Velcro patches have hook-and-loop backing for removable attachment.

Special washing instructions:

  • REMOVE BEFORE WASHING
  • Do not machine wash with velcro backing
  • Velcro can come off in wash
  • Velcro can stick to other garments
  • Wash separately by hand if needed

Hand washing velcro patches:

  • Use mild detergent and lukewarm water
  • Gently wash in sink
  • Rinse thoroughly
  • Air dry completely
  • Reattach to garment after drying

Velcro longevity:

  • Velcro backing weakens with repeated washing
  • After 10-15 wash cycles, velcro may need replacement
  • Professional repair recommended

How to Wash Hats with Custom Patches (Special Instructions)

Hats with custom patches require a gentler approach than regular garments because:

  • Hat shape is fragile
  • Hats can shrink in hot water
  • Machine tumbling distorts hat structure
  • Patches are subjected to more stress on curved surfaces

Best Method: Hand Washing Hats with Patches

What you need:

  • Cool or lukewarm water
  • Mild detergent
  • Soft cloth or soft-bristled brush
  • Towel for reshaping
  • Flat surface for drying

Step-by-step hand washing:

  1. Fill sink with cool water — Use lukewarm water, not hot
  2. Add mild detergent — Small amount only (1 teaspoon)
  3. Submerge hat — Let soak for 5 minutes maximum
  4. Gently clean — Use soft cloth to wipe crown and bill
  5. Pay special attention to patches — Gently clean patch areas with soft cloth
  6. Rinse thoroughly — Use clean cool water to rinse away all soap
  7. Remove excess water — Gently squeeze (don’t wring) to remove water
  8. Reshape hat — Reshape crown and bill while damp
  9. Air dry — Place on clean towel or hang to air dry
  10. Complete drying — Allow 24 hours to fully dry

Why not machine wash?

  • Washing machine tumbling distorts hat shape permanently
  • Heat stresses patches on curved surfaces
  • Risk of fading and color bleeding
  • Can shrink or misshape hat

Why not dishwasher? (Yes, some suggest this!)

  • Dishwasher heat is too high
  • Harsh detergents damage both hat and patches
  • Spray jets can loosen patch edges
  • Not recommended under any circumstances
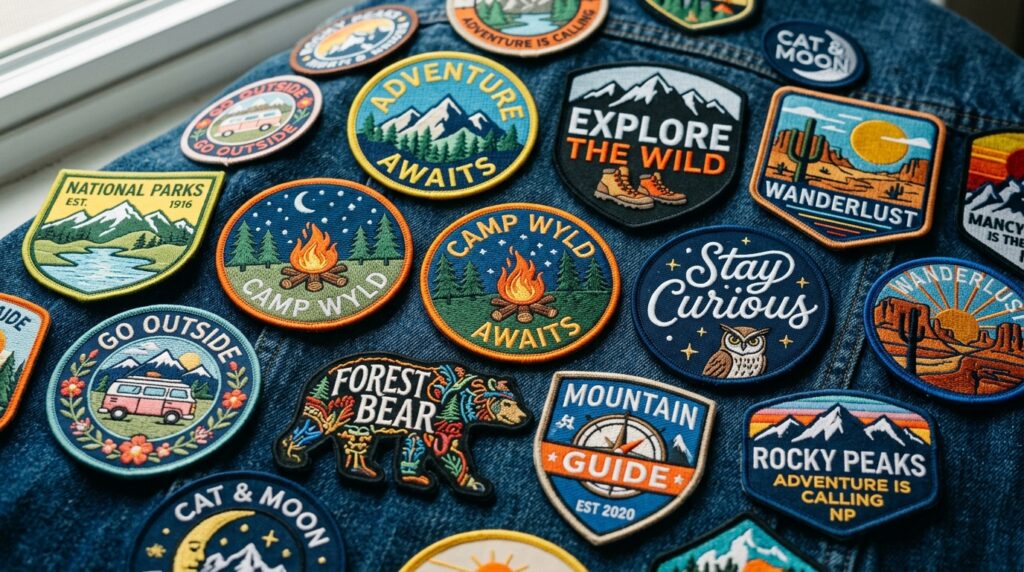
How to Dry Custom Patches Properly

Proper drying is critical to patch longevity and appearance.

Best Drying Method: Air Drying

Why air drying is ideal:

  • No heat damage
  • No adhesive stress
  • No friction or tumbling
  • Gentle on all patch types
  • Preserves colors and stitching

How to air dry patched garments:

  1. Turn inside out — Continue protecting patches
  2. Hang on clothesline or drying rack — Never toss in dryer
  3. Ensure proper air circulation — Patches need air flow to dry
  4. Avoid direct sunlight — Can fade colors over time
  5. Allow complete drying — Don’t remove from line until completely dry
  6. Check for moisture — Feel inside garment to confirm dryness

If You Must Use a Machine Dryer

Minimum heat settings only:

Acceptable (if necessary):

  • Delicate or air-dry setting
  • Lowest heat possible
  • 15-20 minutes maximum
  • Remove while slightly damp (don’t over-dry)

Not recommended for:

  • PVC patches (heat damage)
  • Leather patches (heat damage)
  • 3D embroidered patches (heat damage)
  • Rhinestone patches (stones can loosen)

Best practice: Avoid machine drying entirely. Air drying is always better.

Tips for Long-Term Custom Patch Care & Maintenance

Daily Wearing & Care

Before washing:

  • Pre-treat stains promptly
  • Don’t let stains set (becomes harder to remove)
  • Use mild detergent for spot-cleaning
  • Gently dab with soft cloth (no scrubbing)

Allow proper curing before first wash:

  • Wait minimum 24-48 hours after patch application
  • Allow adhesive to fully cure/bond
  • This ensures strong, lasting attachment
  • Rushing the first wash risks loosening the patch

Check patch edges periodically:

  • Inspect for signs of edge lifting
  • Look for separation starting at corners
  • Address minor edge lifting immediately
  • Use heat press (or household iron) to reseal
  • Small touch-up prevents larger problems

Use mesh laundry bags:

  • Protective bags reduce friction
  • Especially helpful for delicate patch types
  • Great for items with multiple patches
  • Minimal cost for major protection

Avoid overloading washing machine:

  • Don’t fill beyond 2/3 capacity
  • Overcrowding increases friction
  • Patches rub against other garments excessively
  • This causes premature wear and loosening

Storage of Patched Items

Proper storage extends patch life:

Folding:

  • Fold with patch side facing outward
  • This prevents pressure on patch surface
  • Use soft tissue to separate layers if stacking
  • Avoid sharp creases across patches

Hanging:

  • Best storage option for special items
  • Prevents pressure on patches
  • Allows air circulation
  • Good for items with sentimental value

Temperature & humidity:

  • Store in cool, dry location
  • Avoid excessive heat (damages adhesive)
  • Avoid high humidity (promotes mildew)
  • Good ventilation is important

Protection from pests:

  • Store away from moths and insects
  • Use cedar blocks or lavender sachets (not naphthalene)
  • Inspect periodically for pest damage

Resealing Loose Patch Edges

Patches can sometimes loosen at edges. Here’s how to fix:

Early detection is key:

  • Inspect patches regularly
  • Catch lifting early before it spreads
  • Minor lifting is easy to fix

Heat press resealing:

  • Use commercial heat press at 350°F
  • Press for 10-15 seconds
  • Light pressure (don’t crush the patch)
  • Reseal all four corners

Household iron resealing:

  • Use on low-medium setting
  • Place pressing cloth between iron and patch
  • Press for 5-10 seconds on each corner
  • Be careful not to scorch

When to seek professional help:

  • If lifting is extensive (entire patch edge)
  • If patch is separating completely
  • If previous resealing didn’t hold
  • Professional repair may be more durable

What NOT to Do: Common Custom Patch Care Mistakes

❌ Mistake #1: Hot Water Washing

Why this damages patches:

  • Heat weakens adhesive bonds
  • Stitches can loosen faster
  • Colors fade more quickly
  • Each hot wash cycle stresses the patch

Solution: Always use cold or lukewarm water.

❌ Mistake #2: Using Harsh Chemicals

Don’t use:

  • Bleach (damages thread colors and adhesive)
  • Strong detergents (degrade materials)
  • Fabric softeners (weaken adhesive)
  • Oxygen bleach alternatives (fade colors)

Why: These chemicals damage both patch materials and the bond between patch and garment.

Solution: Use mild, gentle laundry detergent only.

❌ Mistake #3: Direct Ironing on Patches

Never:

  • Iron directly on patch surface
  • Use iron on high heat near patches
  • Apply pressure directly to embroidery

Why: Direct heat can:

  • Melt adhesive backing
  • Warp PVC or heat-sensitive materials
  • Damage thread colors
  • Flatten 3D elements

Solution: Iron from inside the garment, or use pressing cloth between iron and patch.

❌ Mistake #4: Right-Side-Out Washing

Never wash with patches facing outward.

Why:

  • Patch edges catch on other fabrics
  • Stitches can snag on zippers, buttons, velcro
  • Direct friction damages design surface
  • Premature edge lifting occurs

Solution: Always turn inside out before washing.

❌ Mistake #5: Industrial Laundry Services

Never use commercial laundry without notification.

Why:

  • Commercial services use high heat
  • Aggressive chemicals are standard
  • Heavy-duty cycles with extra agitation
  • Commercial drying uses high heat
  • All of these damage patches

Solution: If using commercial service, clearly inform them about patches. Better: hand wash yourself.

❌ Mistake #6: Dry Cleaning Without Warning

If you must dry clean, notify the cleaner.

Why:

  • Dry cleaning solvents can affect adhesives
  • High temperature pressing can damage patches
  • Professional might not know to protect them
  • Patches can be ruined

Solution: Alert dry cleaner about patches. Ask them to handle with care or avoid dry cleaning entirely.

❌ Mistake #7: Aggressive Cleaning Methods

Avoid:

  • Heavy scrubbing or brushing
  • High-pressure spray nozzles
  • Stiff brushes (use soft brushes only)
  • Rough cloth or towels

Why: Aggressive cleaning can:

  • Fray embroidered threads
  • Damage detailed designs
  • Loosen rhinestones or decorative elements
  • Separate patches from garment

Solution: Use gentle touch and soft materials only.

❌ Mistake #8: Machine Drying

Never use heat dryer unless absolutely necessary.

Why:

  • Heat stresses adhesive bonds
  • PVC patches can warp or melt
  • Tumbling creates friction
  • Colors can fade
  • Can cause shrinking

Solution: Air dry exclusively when possible.

❌ Mistake #9: Washing New Patches Immediately

Don’t wash patched items right after application.

Why:

  • Adhesive needs time to fully cure
  • Premature washing can loosen patches
  • Wait 24-48 hours minimum

Solution: Allow proper curing time before first wash.

❌ Mistake #10: Ignoring Early Signs of Wear

Watch for:

  • Edge lifting (corners)
  • Color fading
  • Thread loosening or fraying
  • Separated areas

Why early action matters:

  • Minor issues are easily fixed
  • Ignored problems become major damage
  • Prevention is easier than repair

Solution: Inspect regularly and address issues immediately.

Frequently Asked Questions: Custom Patch Care

How long do custom patches last?

With proper care, quality embroidered patches last 50-75+ wash cycles. Some patches maintain excellent appearance for 100+ washes. Durability depends on:

  • Patch quality (professional vs. cheap)
  • Patch type (embroidered, PVC, woven, etc.)
  • Care methods (proper vs. improper)
  • Washing frequency and harshness
  • Storage conditions

Pro tip: Proper care can double or triple patch lifespan.

Can I machine wash patches?

Yes, but with conditions:

  • Must turn inside out
  • Cold or lukewarm water only
  • Gentle cycle only
  • Mild detergent only
  • Don’t overload machine
  • Use mesh laundry bag for extra protection

Better option: Hand wash for longest-lasting results.

What’s the best water temperature for washing patches?

Best: Cold water (50-60°F)

Cold water is gentlest on adhesive bonds and colors. Lukewarm water (80-90°F) is acceptable. Hot water (above 100°F) should be avoided—it weakens adhesive and fades colors.

Can I use bleach to clean stubborn stains?

No. Never use bleach on patches.

Bleach damages:

  • Thread colors (causes fading)
  • Adhesive bonds (weakens attachment)
  • Patch materials (can degrade)

Better alternative: Spot-clean with mild detergent and soft cloth before washing.

Should I use fabric softener with patched items?

No. Avoid fabric softeners entirely.

Fabric softeners:

  • Weaken adhesive bonds
  • Leave residue on patches
  • Can damage thread colors
  • Reduce patch durability

Better option: Use mild detergent without softener.

How do I remove stains from patches?

For stubborn stains:

  1. Act quickly — Don’t let stains set
  2. Spot-clean — Use soft cloth and mild detergent
  3. Gentle dab — Don’t scrub or rub hard
  4. Rinse thoroughly — Remove all detergent
  5. Air dry — Let dry completely
  6. Then machine wash — If needed, use normal washing method

Avoid: Aggressive scrubbing, bleach, or harsh chemicals.

Can I iron patched garments?

With caution:

  • Safe: Iron inside of garment only (patches facing away)
  • Safer: Use low-medium heat only
  • Safest: Use pressing cloth between iron and patch if needed
  • Never: Iron directly on patches with high heat

Better option: Avoid ironing patched items when possible. Air dry to prevent wrinkles.

How do I fix loose patch edges?

Options:

  1. Heat press resealing — Professional equipment at 350°F
  2. Household iron — Low-medium heat with pressing cloth
  3. Professional repair — For extensive damage

Best approach: Catch and fix minor lifting early before it becomes a major problem.

Can I wash patches by hand?

Yes. Hand washing is often the best method.

Benefits of hand washing:

  • Maximum control
  • Gentlest on patches
  • Lowest risk of damage
  • Best for delicate patch types
  • Longer patch lifespan

Process:

  • Use cool/lukewarm water
  • Add mild detergent
  • Gently wash with soft cloth
  • Rinse thoroughly
  • Air dry completely

Best for: Hats, delicate patches, high-value items, special uniforms.

How should I store patches long-term?

Best storage practices:

  • Temperature: Cool, dry location (65-75°F ideal)
  • Humidity: Low humidity (avoid moisture)
  • Light: Away from direct sunlight (prevents fading)
  • Positioning: Fold with patch side out or hang flat
  • Protection: Use tissue paper between layers if stacking
  • Ventilation: Good air circulation

Avoid:

  • Hot, humid environments
  • Direct sunlight
  • Extreme temperature changes
  • Damp basement storage

The Bottom Line: Keep Your Custom Patches Perfect

Your custom embroidered patches represent an investment in quality and professional appearance. Whether you’re a business owner providing branded merchandise or an individual protecting your favorite gear, proper patch care ensures they look fantastic for years.

The key principles:Turn inside out before every wash
Use cold or lukewarm water only
Choose mild detergent exclusively
Air dry for best results
Inspect regularly for early signs of wear
Address small issues immediately before they become problems
Store properly to maintain appearance
Hand wash special items for longest lifespan

With these simple care methods, your custom patches will maintain vibrant appearance and strong adhesion for 50-75+ wash cycles—possibly much longer with exceptional care.

Professional Custom Patches from Gem Punch

Your patches look amazing because they’re professionally made. Keep them looking amazing with professional care.

At Gem Punch, we’ve created 50,000+ custom patches since 2012. We know that patch quality depends not just on manufacturing, but on how customers care for them afterward.

Our custom patches are designed for durability:

  • Professional embroidery digitizing
  • Quality thread and fabric materials
  • Strong adhesive backing
  • Tested for 50+ wash cycles
  • Available in multiple styles (embroidered, PVC, woven, chenille, and more)

Need custom patches for your business, team, or project?

Get a Free Quote on Custom Patches →

Whether you need embroidered patches for uniforms, promotional patches for merchandise, or custom designs for a special project, Gem Punch creates patches built to last.

Related Resources: Patch Care & Embroidery Services

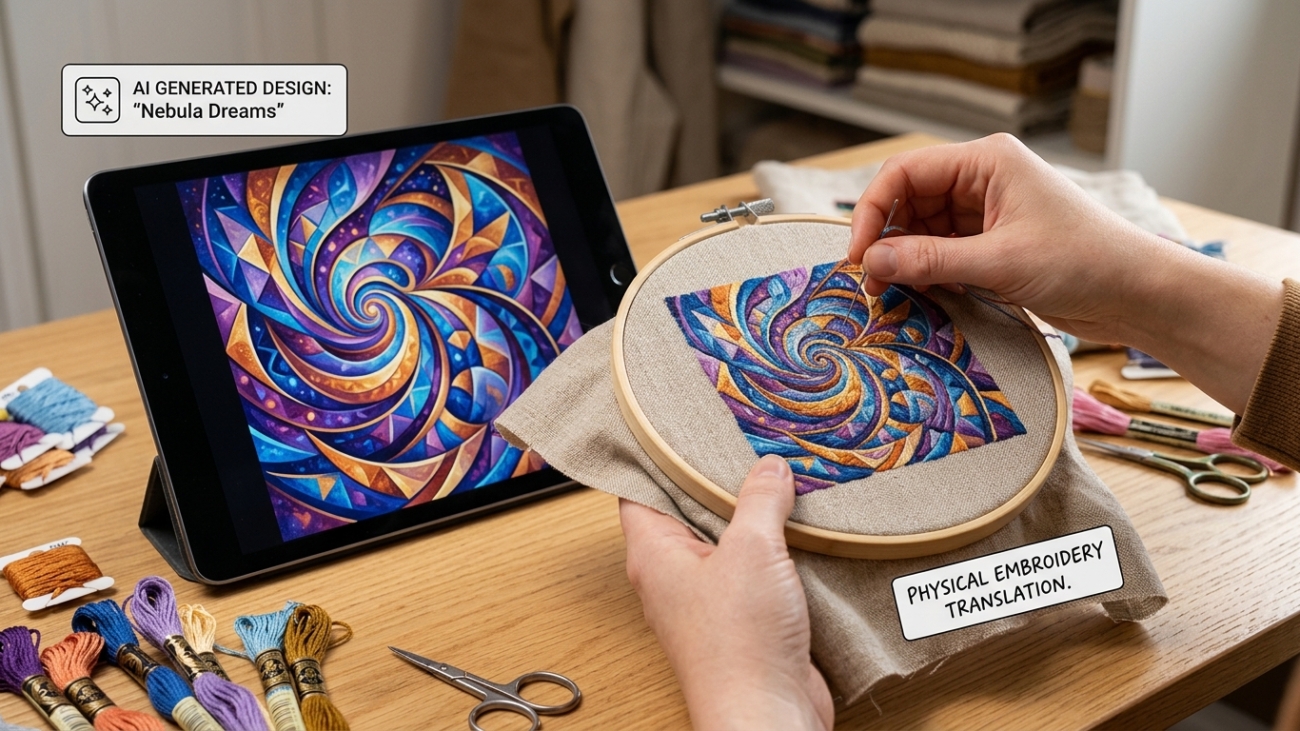
Can AI Artwork Be Used for Embroidery

Can AI Artwork Be Used for Embroidery? A Complete Guide

Artificial intelligence can generate stunning artwork in seconds. Detailed animals, complex logos, realistic textures, and intricate patch concepts are now easier to create than ever before.

Artwork that looks perfect on a screen is often not suitable for embroidery digitizing without significant modifications.

Embroidery is not a printing process. Every design must be recreated using physical thread, fabric, and machine stitches on your actual garment or patch. This introduces hard technical limitations that frequently require AI artwork to be simplified, modified, or completely redesigned before professional digitizing.

Understanding these limitations will help you create better AI-generated designs, reduce expensive revisions, avoid common digitizing mistakes, and achieve professional-quality embroidered results on the first try.

The AI Artwork Problem: Why Your Embroidery Design Looks Different

If you’ve ever submitted AI-generated artwork for embroidery digitizing, you’ve likely experienced this frustration:

✗ “Why doesn’t my embroidery file look exactly like the AI image?”
✗ “Why were some details removed or simplified?”
✗ “Why do the colors look completely different?”
✗ “Why can’t all the fine details fit on a hat or small patch?”
✗ “Why can’t I just use my AI artwork directly for embroidery?”

The answer is simple but important:

AI artwork is created for digital screens. Embroidery designs are created with physical thread on fabric.

These are fundamentally different mediums with completely different technical capabilities and limitations. What looks absolutely perfect on your computer screen may be impossible to reproduce accurately with thread stitches.

How Embroidery Digitizing Works (And Why AI Art Needs Modification)

From Pixels to Stitches: The Conversion Process

When you view AI-generated artwork on a screen, every pixel contains unlimited detail, smooth gradients, realistic shadows, complex textures, and countless color variations.

Embroidery machines don’t work that way.

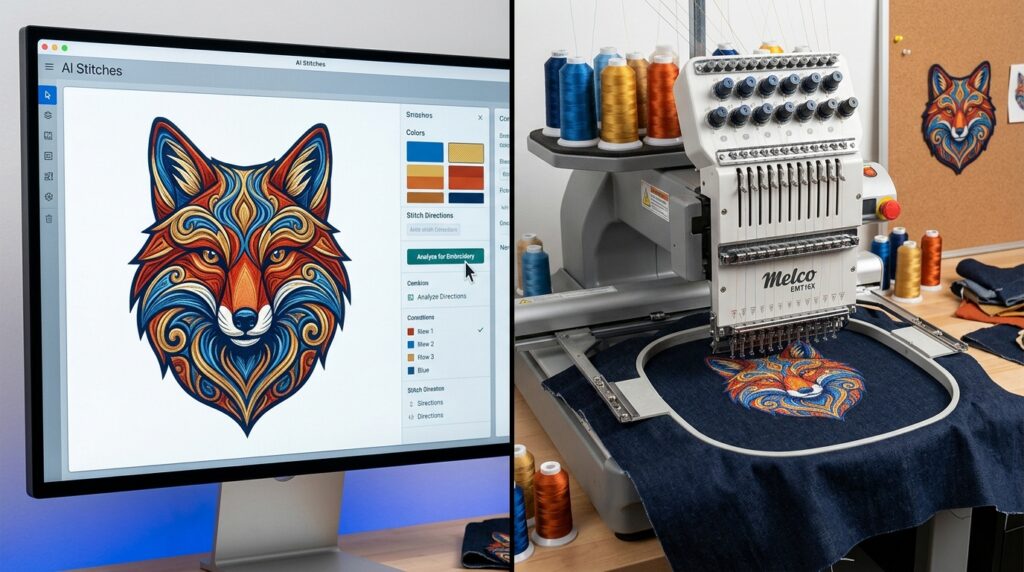
Before AI artwork can become an embroidered design, a professional digitizer must convert your image into thousands of individual stitch commands that tell the embroidery machine:

  • Where each stitch should be placed
  • Which direction each stitch should run
  • How dense the stitching should be (stitch density)
  • When thread colors should change
  • What stitch type to use (satin, fill, backstitch, etc.)
  • How to handle curves, angles, and transitions

Why You Can’t Just “Convert” AI Art to Embroidery

This is the critical misunderstanding that leads to failed embroidery projects:

You cannot simply convert an AI image into embroidery stitches the way you’d print an image to paper.

A printer can reproduce any pixel from your digital file. An embroidery machine cannot.

Every element of your AI design must be manually translated into thread by a skilled digitizer who understands:

  • Embroidery machine capabilities and limitations
  • Fabric types and how they affect stitching
  • Thread color matching and color theory
  • Stitch density optimization for different materials
  • How designs will look when worn on actual garments or patches

The goal of embroidery digitizing is NOT to recreate every pixel of your AI artwork. The goal is to create a design that:

  • Sews cleanly and professionally
  • Looks sharp and intentional on fabric
  • Performs well across different embroidery machines
  • Works at your intended size
  • Maintains the spirit and essence of your original design

When you understand this distinction, you understand why AI artwork almost always requires modification before professional digitizing.

The 5 Biggest Problems With AI Artwork for Embroidery

Problem #1: Too Much Detail (The Complexity Issue)

The issue: AI artwork often includes incredibly fine details—tiny textures, intricate backgrounds, delicate shadows, and elaborate patterns that look amazing on screen but become unreadable disasters when stitched.

Why it happens: AI is trained to maximize visual complexity and realism. When you ask for “detailed,” “photorealistic,” or “intricate” artwork, AI delivers. But embroidery doesn’t reward detail—it rewards clarity.

What happens when you try: Fine details become thick blobs of thread. Thin lines merge together. The finished embroidery looks muddy and unclear instead of sharp and professional.

The solution: Simplify your AI prompt. Request “bold shapes,” “clean outlines,” and “minimal fine detail” instead of photorealism.

Problem #2: Text That’s Too Small (The Readability Crisis)

The issue: Text below 1/4″ (0.25 inches) in height becomes unreadable when embroidered. Yet AI artwork commonly includes tiny lettering, small copyright marks, and decorative text that looks perfect on screen.

Why it happens: On a screen, text can be infinitely small and still be readable. Embroidery doesn’t scale that way—thread has physical thickness.

What happens when you try: Small text becomes an illegible blob of stitches. Letters merge together. The text disappears or becomes confusing.

The solution: Specify minimum text size in your AI prompt: “Large readable text, minimum 1/4 inch height, bold sans-serif font, no serifs.”

Problem #3: Thin Lines & Outlines (The Fragility Problem)

The issue: AI artwork frequently includes thin, delicate outlines and fine line work that looks elegant on screen but won’t embroider properly.

Why it happens: Digital art can have 1-pixel-thick lines. Thread can’t replicate that fineness—stitches have minimum thickness.

What happens when you try: Thin lines disappear entirely or become distorted. Delicate outlines become thick and clumsy. The design loses its intended elegance.

The solution: Request “bold outlines” and “strong contrast” in your AI prompt. Ensure all lines are thick enough to survive the embroidery conversion.

Problem #4: Unlimited Colors (The Thread Limitation)

The issue: AI artwork uses unlimited digital colors. Your computer can display millions of color variations in a single design. Embroidery machines cannot.

Why it happens: A sunset might contain 15+ subtle color variations. A realistic animal might have 10+ different shades of brown. Digital displays can show all of these simultaneously.

How embroidery machines work: A single-needle machine holds ONE thread color at a time. Multi-needle machines hold 6-15 colors (sometimes up to 20). Even with multiple needles, each color change takes time and adds complexity.

What happens when you try: Professional digitizers must reduce your 20+ color variations down to 6-12 thread colors. Colors look simplified, less photorealistic, and sometimes inaccurate.

Why it matters: Each extra color adds:

  • More production time
  • Higher costs for the customer
  • More thread changes (and potential errors)
  • Greater complexity for the embroidery machine

The solution: Generate AI artwork with a limited color palette from the start. Prompt: “Limited color palette, maximum 8 colors, use primary colors only, avoid gradients and subtle shading.”

Problem #5: Design Size Incompatibility (The Scaling Nightmare)

The issue: AI artwork created at large sizes doesn’t work when scaled down. A detailed design that looks great as a large back patch becomes an illegible mess when reduced to fit a 2″ cap or left chest logo.

Why it matters: Common embroidery placements have strict size limitations:

  • Cap/hat embroidery: 2-3 inches maximum
  • Left chest logo: 3-4 inches typical
  • Polo shirt front: 3-5 inches typical
  • Jacket front: 4-6 inches typical
  • Small patch: 2-3 inches common

What happens: When you shrink a detailed AI design to fit these spaces, fine lines become invisible, small text disappears, and color details merge into muddy blobs.

The solution: Design AI artwork with your final embroidery size in mind from the beginning. Smaller designs need simpler artwork.

What Is “Embroidery-Ready” AI Artwork?

Embroidery-ready artwork is AI-generated design that has been created specifically with embroidery digitizing in mind. It’s artwork prepared to be cleanly, professionally, and accurately recreated using thread stitches.

A design may look stunning as digital art, but that doesn’t automatically mean it will digitize beautifully or stitch cleanly on fabric. Embroidery-ready artwork removes, simplifies, or modifies the elements that would become messy, unreadable, or too delicate when converted to embroidery stitches.

Characteristics of Embroidery-Ready AI Artwork

Clean, bold outlines — Strong, visible edges (not thin or delicate)
Solid color areas — Flat colors, not gradients or realistic shading
Readable text — Large minimum 1/4″ height, bold sans-serif fonts
Simple shapes — Clear geometric forms, not overly complex
Adequate spacing — Room between design elements for thread
Thick enough lines — All lines visible and reproducible with stitches
Size-appropriate details — Details match your final embroidery size
Minimal special effects — No glowing edges, realistic shadows, tiny textures, or photo effects
Strong contrast — Clear visual separation between elements
Limited color palette — 6-12 colors maximum, not 20+

What Changes During Professional Embroidery Digitizing

When your AI artwork reaches a professional digitizer, several modifications typically occur:

  • Glowing edges → Removed or converted to clean outlines
  • Realistic shadows and gradients → Simplified to solid thread colors
  • Tiny textures and details → Removed or enlarged
  • Thin outlines → Thickened for embroidery reproduction
  • Unlimited colors → Reduced to 6-15 thread colors
  • Fine line work → Simplified to bold strokes
  • Delicate backgrounds → Removed or drastically simplified

This is not a failure of digitizing. This is the necessary translation between two different mediums.

The goal is to preserve the essence and spirit of your design while creating an embroidery file that looks professional, stitches cleanly, and performs well on actual fabric.

How to Create Embroidery-Friendly AI Artwork (Step-by-Step)

If you’re generating AI artwork specifically for embroidery digitizing, follow these guidelines:

Step 1: Use Embroidery-Specific AI Prompts

Instead of generic prompts, include embroidery-specific instructions:

Poor prompt: “Create a detailed logo with realistic shading and complex textures”

Better prompt: “Create a bold embroidery patch design with clean outlines, limited colors, readable text, and simple shapes. Make it suitable for embroidery digitizing.”

Best prompt: “Embroidery patch design: bold outlines, maximum 8 colors, clean shapes, large readable text minimum 1/4 inch, strong contrast, minimal detail, suitable for 3-inch patch size”

Step 2: Design for Your Intended Size

Consider where and how your embroidery will be used:

For small designs (2-3 inches): Request simple, bold, minimal-detail artwork
For medium designs (4-6 inches): Request moderate detail, bold outlines, clean shapes
For large designs (6+ inches): More detail is acceptable, but keep it clean

Step 3: Limit Your Color Palette

Request artwork with a specific number of colors:

“Limited color palette: Use only 6-8 colors maximum. Choose primary colors that contrast well. Avoid subtle gradients, shading, and blended colors.”

Step 4: Prioritize Readability

If your design includes text:

“Large, bold, readable text: Minimum 1/4 inch height. Use bold sans-serif fonts only. Ensure strong contrast between text and background. No script fonts or serifs.”

Step 5: Request Bold, Clean Elements

Emphasize simplicity and clarity:

“Bold shapes, clean outlines, strong contrast, minimal fine detail, no thin lines, no glowing effects, no realistic shading.”

Common AI-to-Embroidery Mistakes (And How to Avoid Them)

Mistake #1: Trusting That AI Artwork Will Digitize “As-Is”

Reality: Almost all AI artwork requires modification before professional digitizing. Plan for this.

Solution: Budget for digitizer consultation and potential design revisions. Ask your digitizer to recommend simplifications before starting work.

Mistake #2: Requesting Maximum Detail and Complexity

Reality: “Detailed” and “photorealistic” AI artwork almost never digitizes well.

Solution: Request simple, bold designs. Details can be added back manually if needed, but removing complex details is harder and more expensive.

Mistake #3: Using Unlimited Colors Without Thought

Reality: Each color in your AI design requires a thread change during embroidery. More colors = higher cost, longer production time, more complexity.

Solution: Limit colors from the start. Ask AI to generate artwork with 6-8 colors maximum.

Mistake #4: Scaling Large Designs Down Without Simplification

Reality: A detailed 10-inch design doesn’t work at 2 inches.

Solution: Design AI artwork at your actual embroidery size from the beginning.

Mistake #5: Ignoring Embroidery Limitations Entirely

Reality: Embroidery is not a printing process. It has real physical limitations.

Solution: Research embroidery design requirements before creating AI artwork. Understand what does and doesn’t work.

AI Artwork for Embroidery: A Practical Example

Let’s say you want a custom patch with an eagle design.

Your first AI prompt (not embroidery-friendly): “Create a photorealistic, detailed eagle with realistic feathers, complex shading, realistic eyes, and intricate background scenery. Maximum detail. 4K quality.”

Result: 15+ colors, countless fine details, thin lines, complex shadows. Requires extensive modification before digitizing. Expensive. Disappointing final result.

Your revised AI prompt (embroidery-friendly): “Create an embroidery patch design: Bold eagle design with clean outlines, simple shapes, strong contrast. Limited color palette: brown, tan, white, black only (4 colors maximum). Large readable wing details. Bold facial features. Clean background. Suitable for 3-inch embroidered patch. No realistic shading or fine textures.”

Result: Clean, simple design. Requires minimal modification. Professional digitizing. Happy customer. Lower cost.

The difference? The second design respects embroidery limitations from the start.

Frequently Asked Questions About AI Artwork and Embroidery Digitizing

Can I use any AI artwork for embroidery?

Technically yes, but most AI artwork will require significant modification before professional digitizing. AI artwork specifically created for embroidery works much better and requires fewer revisions.

Will my AI design look exactly like the original after embroidery digitizing?

Rarely. Professional digitizers must simplify, remove, or modify elements that can’t be cleanly reproduced with thread. The goal is to preserve the essence of the design while creating something that stitches beautifully.

How much will my AI artwork need to be changed?

It depends on the artwork. Simple, bold designs with limited colors require minimal changes. Detailed, photorealistic designs with complex colors and fine details require extensive modifications.

Can I provide my own AI artwork and have it digitized without changes?

Possibly, if your AI artwork was created with embroidery in mind. If it was created for general digital use, expect your digitizer to recommend modifications.

What’s the best way to generate AI artwork for embroidery?

Use prompts that request embroidery-specific characteristics: bold outlines, clean shapes, limited colors, readable text, minimal detail, and strong contrast.

Will detailed AI artwork cost more to digitize?

Yes. Complex artwork with many colors, fine details, and intricate elements requires more digitizer time and expertise. Simple artwork digitizes faster and costs less.

Should I simplify my AI artwork myself or let the digitizer do it?

Have a professional digitizer evaluate your artwork. They understand embroidery limitations and can recommend the best simplifications. But creating embroidery-friendly artwork from the start saves time and money.

Getting Professional Help: Gem Punch’s AI-to-Embroidery Solution

AI-generated artwork is a fantastic starting point for embroidery design. But it usually needs professional expertise to become a digitizing-ready file.

That’s where professional embroidery digitizing comes in.

At Gem Punch, our expert digitizers work with AI artwork every single day. We:

Evaluate your AI design for embroidery feasibility
Recommend simplifications that improve stitching results
Simplify and modify your artwork for professional embroidery
Convert to production-ready files that stitch beautifully
Provide digital proofs before you commit to production
Include unlimited revisions until you’re completely satisfied
Test on your actual fabric to ensure quality

Whether your AI artwork needs minor tweaks or major revision, our digitizers know exactly how to translate your design into professional-quality embroidery.

Get Professional Embroidery Digitizing for Your AI Artwork →

The Bottom Line: AI Artwork + Professional Digitizing = Success

Artificial intelligence is an amazing tool for creating patch and embroidery design concepts. AI artwork can inspire, guide, and accelerate your creative process.

But AI artwork is a starting point, not a finished embroidery file.

Between your AI design and your finished embroidered patches or apparel, you need professional digitizing expertise. This expertise:

  • Translates digital art to thread
  • Simplifies complexity appropriately
  • Optimizes for your specific fabric and size
  • Ensures professional quality
  • Prevents costly mistakes

The best embroidery designs are not always the most detailed. They’re the ones that look clear, balanced, and beautiful when stitched on actual fabric.

If you have AI-generated artwork and want to explore embroidery options, submit your design for a free professional digitizing consultation. Our team will review your artwork, recommend simplifications if needed, and provide accurate pricing for converting your AI art into professional-quality embroidery.

Related Resources & Blog Posts

Embroidery Digitizing Mistakes

Embroidery Digitizing Mistakes: 10 Common Errors & How to Avoid Them

You’ve spent months designing the perfect patch. The colors are vibrant, the details are sharp, and you can already imagine how it will look on your uniforms, jackets, or merchandise. Then you send the design to a digitizer, expecting magic. What comes back is… disappointing. The lines are thick and blurry. Text is illegible. Colors don’t match. The patch feels stiff and uncomfortable.

This scenario plays out thousands of times yearly because many people don’t understand embroidery digitizing—or they choose digitizers who cut corners.

Digitizing is the critical bridge between your artwork and the finished patch.

Bad digitizing means wasted money, damaged reputation, and unhappy customers. Good digitizing means professional results that exceed expectations.

This guide breaks down the 10 most common Embroidery Digitizing Mistakes and how to avoid them. Whether you’re ordering patches for corporate uniforms, sports teams, motorcycle clubs, or military units, understanding these errors will save you money, time, and frustration.

What is Digitizing? (And Why It Matters)

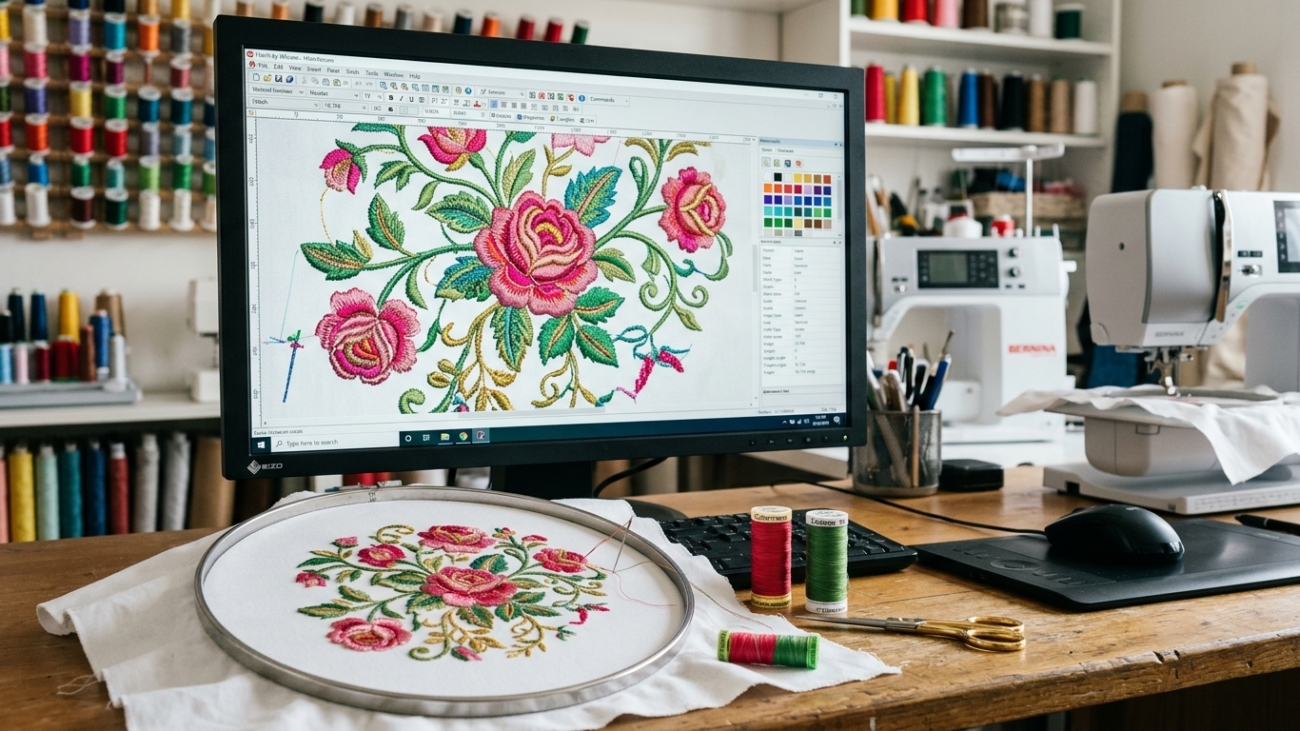
Embroidery digitizing is the process of converting artwork into a file that embroidery machines can understand. Think of it like translating a language—your artwork speaks design language, but embroidery machines speak stitch language. A digitizer is the translator.

The digitizer makes critical decisions:

  • Which stitches go where
  • How dense the stitching should be
  • How to handle curves and angles
  • How to incorporate multiple colors
  • How to simplify complex designs for embroidery

Bad digitizing = bad patches. Good digitizing = professional results.

MISTAKE #1: Wrong Stitch Density

What Happens:

  • Puckering: Fabric wrinkles under heavy stitching
  • Loose stitches: Embroidery falls apart after a few washes
  • Overly heavy feel: Stitches pull and stretch the fabric
  • Sagging: Patch droops or distorts
  • Uncomfortable wear: Stiff, scratchy patches that irritate skin

Why It Happens:

Stitch density is the number of stitches per inch (SPI). Different fabrics require different densities:

  • Jersey fabric (t-shirts): Requires LOW density (4-5 SPI) because the stretchy fabric distorts easily
  • Towel fabric: Requires MEDIUM density (6-8 SPI) because thick fabric can handle more
  • Denim: Requires MEDIUM-HIGH density (7-9 SPI) because tight weave supports heavier stitching
  • Twill: Requires MEDIUM density (6-8 SPI)

Many digitizers use generic templates with one-size-fits-all density, not adjusting for your specific fabric.

How to Fix:

  1. Tell your digitizer your exact fabric type. Don’t say “it’s for a shirt.” Say “it’s for 100% cotton jersey knit, medium weight, typical t-shirt material.”
  2. Request a sample or sew-out on YOUR actual fabric. Before ordering 1,000 patches, order 50-100 samples stitched on the exact fabric you’ll be using.
  3. Ask for density adjustments if needed. If samples pucker, request lower density. If stitches are loose, request higher density.
  4. Verify stitch count. Ask your digitizer: “What’s the total stitch count?” Typical ranges: 5,000-15,000 stitches for a 2-3″ patch. Anything significantly higher might indicate excess density.

MISTAKE #2: Too Much Detail

What Happens:

  • Fine lines become thick blobs: The 1-pixel line in your design becomes a thick mass of thread
  • Small text becomes illegible: You can’t read what the patch says
  • Details blur together: Intricate details merge into an unrecognizable mess
  • Looks nothing like original design: The finished patch is unrecognizable

Why It Happens:

Embroidery can’t recreate photorealistic artwork. A digital image can have millions of colors and pixel-perfect detail. Embroidery is limited to what thread can achieve—generally 20-30 colors maximum per patch, and details need to be bold to survive the stitching process.

Many customers and inexperienced digitizers try to force photorealistic designs directly into patches without simplification.

How to Fix:

  1. Simplify your design before sending to digitizer. Reduce colors (aim for 5-10 for patches). Eliminate fine details that won’t embroider well.
  2. Merge fine lines into bold strokes. A 1-pixel line becomes unusable. A 3-5 pixel line emborders beautifully.
  3. Remove intricate details. Ask yourself: “Will this be recognizable at 2 inches?” If no, simplify.
  4. Test on samples first. Order small sample batches (50 patches) before committing to 1,000. This shows if detail level is appropriate.
  5. Work with your digitizer. A good digitizer will advise: “This design is too detailed. Here’s how we can simplify it while keeping the core design.”

Real example: A customer wanted a photorealistic portrait embroidered on patches. It had hundreds of colors and intricate shading. We simplified it to 8 colors with bold strokes, removing unnecessary detail. Result: patches looked fantastic and cost 40% less.

MISTAKE #3: Minimum Text Size Ignored

What Happens:

  • Text smaller than 1/4″ becomes completely unreadable
  • Letters run together and become illegible
  • Final patch looks like a blurry smudge where text should be
  • Professional appearance destroyed by sloppy text

Why It Happens:

Your computer screen can display tiny, crisp text perfectly. Embroidery can’t. Text stitch density requires space. Text smaller than 1/4″ (0.25″) doesn’t have enough area for thread to form recognizable letters.

Inexperienced designers don’t know this limitation and include undersized text.

How to Fix:

  1. Text should be MINIMUM 1/4″ height (0.25 inches). Measure it. If you can’t clearly read it at that size on your monitor, it won’t embroider well.
  2. Larger fonts work better. Aim for 1/2″ (0.5″) or larger when possible. Easier to read, looks more professional.
  3. Use bold fonts. Bold sans-serif fonts (Arial, Helvetica, Verdana) embroider clearly. Thin or script fonts become illegible at small sizes.
  4. Avoid serifs. Serifs are thin strokes that don’t embroider well. Sans-serif fonts are industry standard for a reason.
  5. Use ALL CAPS. Lowercase letters have inconsistent heights and complex shapes. ALL CAPS is clearer and more professional in embroidery.

Real example: A customer wanted “Established 1974″ on a 2” patch. They used 10-point serif font. We increased to 14-point bold sans-serif ALL CAPS. Result: text became the focal point instead of an illegible smudge.

MISTAKE #4: Wrong File Format Provided

What Happens:

  • File can’t be digitized at all. Digitizer has to start from scratch.
  • Quality suffers. Digitizer has to recreate from low-quality source instead of working with proper artwork.
  • Delays and extra costs. Rework takes time and money.
  • Project timeline slips. What should be 24-hour digitizing becomes 72+ hours.

Why It Happens:

Digitizers need vector files (.AI, .EPS, .PDF with vectors) to work properly. Vector files are mathematical descriptions of your design—infinitely scalable, clean, and precise.

Raster files (JPG, PNG, BMP) are just pixels. They lose quality when enlarged and don’t contain the design information digitizers need.

Many people provide JPGs and expect perfect results, not understanding the difference.

How to Fix:

  1. Provide vector files (.AI, .EPS, .PDF, .SVG). These are the gold standard. Ask your designer to provide vector format.
  2. If vector unavailable, provide HIGH-RESOLUTION raster files. Minimum 300 DPI (dots per inch) at final size. A 2″ patch needs 600×600 pixels minimum. Anything less gets blurry.
  3. Ask your digitizer upfront what formats they accept. Don’t assume. Confirm before sending files.
  4. Test file before full project. Send one file and ask: “Can you digitize this?” Get confirmation before proceeding with order.
  5. Provide clean files. No extra layers, no extra colors, no embedded images. Just your clean design.

Real example: Customer sent a JPG from a website (72 DPI). We requested vector file. They couldn’t provide one. We re-created from the JPG (lower quality). Final patches weren’t bad, but would have been better with original vector file.

MISTAKE #5: Skipping Sample Testing

What Happens:

  • Order 1,000 patches confidently
  • First production run arrives wrong. Colors off, details blurry, sizing wrong.
  • $2,000-$5,000 wasted on unusable patches
  • Timeline destroyed. Now you need to reorder and delay delivery.
  • Customer angry. You promised patches weeks ago.
  • Reputation damaged. Your customer blames you (fairly).

Why It Happens:

Pressure to save money. Time pressure to meet deadlines. Overconfidence in digitizer (“They said it would be great, so it will be”).

People skip the safety step that costs $100-200 but saves thousands.

How to Fix:

  1. ALWAYS order samples first. Non-negotiable. 50-100 sample patches cost $100-300. Worth it to catch issues.
  2. Test on your actual fabric. Don’t test on different fabric. Test on exactly what you’ll be using for final production.
  3. Inspect samples carefully:
    • Are colors accurate?
    • Is text readable?
    • Are details clear?
    • Does sizing look right?
    • Is stitching quality good (no loose threads)?
    • Is patch comfortable to wear?
  4. Request revisions BEFORE full production. If samples aren’t perfect, request digitizer make adjustments and send revised samples.
  5. Get written approval from stakeholders. If this is for a company or organization, get sign-off from decision makers before you commit to 1,000 patches.

Real example: Fire department ordered 500 patches without samples. First production arrived with wrong colors (bright red instead of fire department’s official crimson). Cost: $1,500 wasted, deadline missed. Now they always order samples first.

MISTAKE #6: Poor Color Matching

What Happens:

  • Stitched patch doesn’t match your brand colors
  • Looks wrong compared to uniforms or branding
  • Customer complains the colors are “off”
  • Professional appearance compromised
  • Customer unhappy, reputation damaged

Why It Happens:

Thread colors don’t perfectly match every Pantone color. Threads are limited to manufacturer’s color palette (maybe 600-800 colors available). Your brand might need a specific Pantone that doesn’t have a perfect thread match.

Customers often communicate color poorly: “I need red” instead of “Pantone 200C” or “fire department crimson.”

Thread colors also look different on different fabrics. Red on white fabric looks different than red on black fabric.

How to Fix:

  1. Provide Pantone color codes, not color names. “Red” is too vague. “Pantone 200C” is precise. Get official Pantone codes from your brand guidelines.
  2. Provide thread color swatch references. Ask digitizer to show thread swatches from their supplier. Physical thread samples are better than digital previews.
  3. Request digital proof showing actual thread colors. Before production, get a mockup showing which threads will be used for each color.
  4. Test on your actual fabric. Color perception changes depending on fabric. Test on exact material you’ll use.
  5. Accept thread color matching limitations. Thread is thread. It won’t perfectly match every Pantone. Digitizer will find the closest match.

Real example: Customer specified brand blue as “Pantone 279C.” Digitizer found the closest match thread (Pantone 280C, slightly different). Digital proof showed the difference. Customer approved. Final patches matched expectations because expectations were set correctly.

MISTAKE #7: Ignoring Fabric Type

What Happens:

  • Stitches pucker on jersey fabric
  • Patch is too heavy for thin, delicate fabric
  • Looks wrong when worn on intended garment
  • Customer unhappy—”patch doesn’t look right”

Why It Happens:

Different fabrics require different digitizing:

  • Jersey (t-shirts): Stretchy, low density needed
  • Twill (workwear): Stable, medium-high density OK
  • Towel fabric: Thick, can handle higher density
  • Denim: Tight weave, higher density OK
  • Silk: Delicate, requires LOW density

Many digitizers don’t ask about fabric or use generic settings for all fabrics.

How to Fix:

  1. Tell digitizer exactly where patch will be sewn. “This will be embroidered on cotton jersey t-shirt material” is clear. “It’s for apparel” is vague.
  2. Provide sample of your fabric. Send digitizer a swatch of the actual fabric if possible. They can test on it.
  3. Request sample/sew-out on your exact fabric. Before full production, ensure stitching works on your fabric.
  4. Ask digitizer for recommendations. Good digitizers will say: “For jersey, we recommend lower density to prevent puckering. Here’s what we recommend…”
  5. Get professional guidance. If unsure, ask your digitizer: “What density/stitch settings do you recommend for [your fabric]?”

MISTAKE #8: Excessive Stitch Count

What Happens:

  • Patch is heavy, stiff, uncomfortable to wear
  • Stitches pull and bunch
  • Expensive to produce (more thread = higher cost)
  • Patch looks over-stitched, amateur
  • Takes longer to produce (more stitches = more machine time)

Why It Happens:

Inexperienced digitizers don’t optimize. They think “more stitches = better quality.” Wrong. Optimized digitizing uses the minimum necessary stitches to achieve quality.

Generic templates often have excessive stitches because they’re not customized to your specific design.

How to Fix:

  1. Ask digitizer: “What’s the total stitch count?” Before approving design, know the stitch count. Typical range for 2-3″ patch: 5,000-15,000 stitches.
  2. Request optimization for your budget. Tell digitizer your stitch count target. They can optimize to hit it.
  3. Understand the trade-off. Simple designs = fewer stitches = lower cost + lighter patch. Complex designs = more stitches = higher cost + heavier patch.
  4. Ask for alternatives. If stitch count is high, ask: “Can we simplify the design to reduce stitch count?” Often the answer is yes.
  5. Benchmark against quality makers. Get quotes from 2-3 digitizers. Compare stitch counts for same design. Wide variance indicates one digitizer isn’t optimizing.

MISTAKE #9: Bad File Preparation

What Happens:

  • Files have missing fonts (text converts wrong)
  • Artwork is sloppy (digitizer has poor source material)
  • Files are corrupted (won’t open)
  • Digitizing takes longer (digitizer has to fix your files)
  • Quality suffers (digitizer working with bad source)

Why It Happens:

Customers don’t understand how to prepare files for professional use. They send what they have without thinking about whether it’s suitable.

How to Fix:

  1. Convert all text to curves before sending. If your design has text, convert it to outlines/curves in your design software. Otherwise, digitizer might not have the font.
  2. Use clean, professional artwork. Remove all extra layers, hidden objects, and unnecessary elements. Send only what you want digitized.
  3. Save files in correct format. Vector files should be .AI, .EPS, or .PDF. Not .PSD or .TIF.
  4. Use appropriate file size. Files under 50MB are fine. Huge files get slow and might corrupt.
  5. Send test file first. Before sending entire project, send one file and ask: “Can you open this? Is this the right format?” Get confirmation.
  6. Include a mockup or reference. Send your artwork PLUS a visual reference (screenshot, PDF mockup) showing how it should look.

MISTAKE #10: Choosing Cheap Over Quality

What Happens:

  • Cheap digitizing = poor results
  • Bad-looking patches damage your reputation
  • Customer complaints about quality
  • Money wasted anyway (you need to reorder from quality digitizer)
  • Timeline destroyed (rework delays everything)
  • Reputation damage (customer blames you)

Why It Happens:

Budget constraints feel real. A $50 digitizing job seems better than $150. Until you get the results and realize you paid $50 for garbage.

The math is simple: $100 for quality digitizing saves you $3,000 in wasted patches.

How to Fix:

  1. Invest in quality digitizing. Good digitizers cost more because they’re better. That’s how quality works.
  2. Consider long-term ROI. Your reputation is worth more than $100. Cheap digitizing damages it.
  3. Get quotes from 2-3 digitizers. Compare not just price, but experience, portfolio, communication, guarantees.
  4. Choose based on quality, not price. Pick the digitizer who will deliver best results, not cheapest price.
  5. Ask for references. Quality digitizers have happy customers who’ll recommend them.

How to Choose a Digitizer: Your Evaluation Checklist

Portfolio Review

  • Look at projects similar to yours
  • Check quality and attention to detail
  • Are designs clear and professional?
  • Ask: “What challenges did you face with similar projects?”

Communication Test

  • How quickly do they respond to emails?
  • Can they explain their digitizing process?
  • Do they ask smart questions about YOUR project?
  • Do they seem interested or just transactional?

Sample Evaluation

  • Ask if they offer sample services
  • Order small sample (50-100 patches)
  • Test on your actual fabric
  • Inspect closely for quality and detail
  • Request unlimited revisions until happy

Red Flags—Avoid These:

  • “Overnight turnaround offered” (too fast = rushed work)
  • “Can’t explain their process” (lack of expertise)
  • “No sample option available” (hiding quality issues)
  • “Only use templates” (not custom work)
  • “No revision policy” (inflexible, difficult to work with)
  • “Cheapest price in the market” (usually reflects quality)

Gem Punch’s Digitizing Approach

We’ve been digitizing patches since 2012. Here’s how we do it differently:

Expert digitizers with 13+ years experience: Our team understands embroidery limitations and possibilities. We know what works and what doesn’t.

Every file customized to YOUR specs: No templates. No generic approach. We customize stitch density, color selection, and detail level for your specific fabric and design.

Digital proofs before production: You see exactly how your patch will look (thread colors and all) before we start embroidering.

Unlimited revisions included: Want adjustments? No problem. We revise until you’re completely happy. No surprise revision charges.

Sew-out testing on your actual fabric: Before production, we test-stitch on the exact fabric you’ll be using. Catches issues early.

24-48 hour digitizing turnaround: Fast without sacrificing quality.

Focus on YOUR project, not templates: We care about your success, not just completing work.

Frequently Asked Questions

How long does digitizing typically take? 24-48 hours for most projects. Rush services (12-24 hours) available.

Can I revise the digital file after receiving proof? Yes. Unlimited revisions are standard. We adjust until you’re completely happy.

Do you digitize simple designs? Yes, any complexity level. Simple designs often digitize faster and cost less.

What file formats can you work with? Vector files preferred (.AI, .EPS, .PDF). We also work with high-res raster files (300 DPI minimum).

How much does digitizing cost? Depends on complexity. Often included free with patch orders. Standalone digitizing typically $25-$150 per design.

Can you simplify my overly complex design? Yes. We’ll advise on what will and won’t work in embroidery, then recommend simplifications while keeping the core design.

What’s included with digitizing? Digital proof, unlimited revisions, sew-out testing on your fabric, final digitized file in multiple formats.

Conclusion

Embroidery digitizing is where your vision becomes reality. Good digitizing means professional patches that exceed expectations. Bad digitizing means wasted money and disappointed customers.

Avoid these 10 mistakes:

  1. Wrong stitch density (specify your fabric)
  2. Too much detail (simplify for embroidery)
  3. Undersized text (minimum 1/4″ height)
  4. Wrong file format (provide vectors)
  5. Skipping samples (test before full production)
  6. Poor color matching (use Pantone codes)
  7. Ignoring fabric type (specify where patch goes)
  8. Excessive stitch count (ask for optimization)
  9. Bad file prep (clean, professional files)
  10. Choosing cheap over quality (invest in good work)

Need expert digitizing for your patches?

Get Your Free Quote Today — Our expert digitizers will evaluate your design, advise on best approach, and deliver professional results.

Related Resources

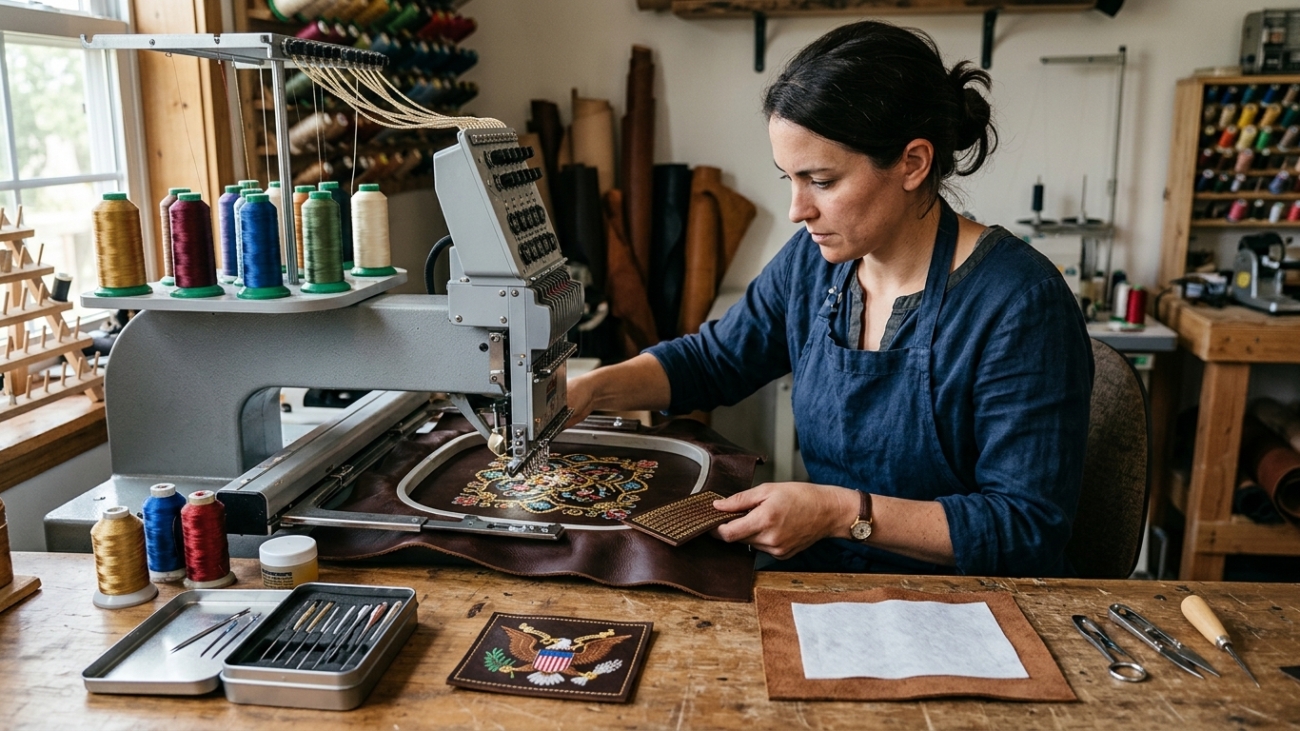
Close-up of embroidery machine stitching gold thread onto black leather motorcycle vest

Embroidery on Leather: Techniques, Challenges & Pro Tips for Flawless Results

Leather is one of the most luxurious and durable materials for custom embroidery—but it is also one of the most unforgiving. One wrong stitch, and you have a permanent hole in an expensive hide. Whether you are branding leather jackets, luxury bags, motorcycle vests, or corporate portfolios, understanding how embroidery on leather interacts with is the difference between a premium product and a costly mistake.

At Gem Punch, we digitize and produce leather embroidery daily for brands, motorcycle clubs, fashion labels, and corporate clients. This guide covers everything you need to know: the techniques that work, the challenges you will face, and the pro tips that separate amateur results from professional-grade leather embroidery.

Why Embroider on Leather?

Leather carries instant prestige. It signals durability, craftsmanship, and timeless style. Adding embroidery to leather elevates it further—transforming a plain jacket or bag into a personalized statement piece or branded asset.

Common Leather Embroidery Applications

ApplicationLeather TypeTypical Design
Motorcycle vestsCowhide, buffaloClub patches, name tapes, memorial panels
Luxury handbagsFull-grain, ItalianBrand logos, monograms, limited-edition art
Bomber jacketsLambskin, cowhideBack patches, sleeve details, unit insignias
Corporate portfoliosBonded, genuineCompany logos, initials, event branding
Wallets & beltsTop-grain, exoticSmall logos, decorative borders
FootwearSuede, nubuckBrand marks, custom designs
Furniture & auto interiorsAutomotive-gradeMonograms, logos, decorative panels

The commercial value is clear: leather embroidery commands higher prices than fabric embroidery, attracts premium clientele, and creates products that last decades.

The Core Challenge: Leather Does Not Forgive

Unlike cotton, polyester, or twill, leather has zero recovery. Once a needle pierces the surface, that hole is permanent. There is no fiber memory to close the gap. This fundamental property creates every challenge in leather embroidery.

Key Material Properties

PropertyFabric (Cotton/Twill)Leather
Fiber recoveryHigh—holes close partiallyNone—holes are permanent
Tensile strengthModerateVery high
FlexibilityHighLow to moderate
Thickness variationMinimalSignificant
Heat sensitivityModerateHigh—scorches easily
Needle penetrationEasyRequires force
Stitch density toleranceHighLow—causes tearing

Because leather does not stretch or recover, every stitch must be placed with precision. Over-stitching, poor digitizing, or incorrect machine settings will crack, tear, or distort the leather permanently.

Leather Types: What Works and What Does Not

Not all leather is suitable for embroidery. Here is the breakdown.

Best for Embroidery

Cowhide and Buffalo
The industry standard for motorcycle vests, jackets, and heavy bags. Thick, stable, and consistent enough to hold stitches without tearing. Full-grain and top-grain varieties perform best.

Lambskin
Soft and lightweight, ideal for fashion jackets and luxury goods. Requires lighter touch—smaller needles, reduced density, careful hooping.

Genuine Leather (Corrected Grain)
Processed to remove imperfections, creating a uniform surface. Good for corporate portfolios, belts, and promotional items where consistency matters more than character.

Bonded Leather
Leather fibers bonded with latex or polyurethane. Affordable and stable, though less durable long-term. Fine for low-wear applications like book covers or presentation folders.

Challenging but Possible

Suede and Nubuck
The brushed, fuzzy surface hides stitches well but is prone to distortion under tension. Requires specialized stabilizers and very careful hooping.

Exotic Leathers (Alligator, Ostrich, Python)
Beautiful but unpredictable. Scale patterns, natural armor, and uneven thickness make digitizing complex. Only attempt with experienced digitizers and test samples.

Avoid for Embroidery

Patent Leather
The glossy, plastic-coated surface cracks under needle penetration. Embroidery destroys the finish.

Thin or Faux Leather (Low-Grade PU)
Tears under stitch tension. The backing separates from the surface layer, creating bubbles and rips.

Very Soft, Unbacked Leather
Lacks structural integrity. Hooping distorts the shape, and stitches pull through.

Essential Techniques for Leather Embroidery

1. Needle Selection

Use sharp-point leather needles (also called wedge-point or cutting-point needles). These blades slice through the leather cleanly rather than pushing fibers apart. Standard ball-point needles, designed for knit fabrics, will struggle and cause ragged holes.

Leather ThicknessNeedle SizeType
Lightweight (under 1 oz)70/10 or 75/11Sharp point
Medium (1–2.5 oz)80/12Sharp point
Heavy (2.5–4 oz)90/14Sharp point
Extra heavy (4+ oz)100/16Sharp point or diamond point

Pro tip: Replace needles more frequently than with fabric. Leather dulls needles faster, and a dull needle causes ragged perforations and thread breaks.

2. Stabilizer Strategy

Stabilization is critical because leather has no natural give. The wrong stabilizer causes puckering, distortion, or hoop burn.

Recommended stabilizers:

  • Tear-away stabilizer (medium to heavy weight): The standard choice. Provides rigidity during stitching and tears away cleanly afterward without pulling stitches.
  • Cut-away stabilizer: For large or dense designs where tear-away might not provide enough support. Trim close to the stitch line with scissors.
  • Adhesive stabilizer (spray or peel-and-stick): Essential for small or irregular leather pieces that cannot be hooped conventionally. Prevents shifting without clamping pressure.
  • Water-soluble topping: Place on top of suede or nubuck to prevent stitches from sinking into the nap. Rinses away after embroidery.

Never use: Heat-away stabilizers on leather. The heat required to dissolve them will scorch or shrink the hide.

3. Hooping Without Damage

Hooping leather is the most delicate step. Excessive pressure creates permanent creases, hoop burn, or depressions.

Best practices:

  • Use magnetic hoops or clamp hoops instead of traditional screw-tightened hoops. They apply even pressure without crushing.
  • Hoop the stabilizer only, then adhere the leather to the stabilizer with temporary spray adhesive or double-sided tape. This eliminates hoop pressure on the leather itself.
  • If direct hooping is necessary, use the largest hoop possible to reduce tension on the leather area. Pad the inner hoop with soft tape to prevent sharp edges from cutting in.
  • Never stretch leather while hooping. Lay it flat and natural. Stretching creates tension that releases after unhooping, distorting the design.

4. Digitizing for Leather

This is where professional results are made or lost. Standard embroidery digitizing assumes fabric recovery. Leather digitizing assumes zero recovery.

Critical digitizing adjustments:

ParameterStandard FabricLeather
Stitch density0.4–0.5 mm0.5–0.6 mm (reduced by 15–20%)
Pull compensationModerateMinimal—leather does not stretch
UnderlayStandardLight or none—reduces perforation count
Stitch lengthStandardSlightly longer to reduce puncture density
Small text4–5 mm heightMinimum 6–7 mm—smaller sinks or tears
Satin stitch width1–12 mmAvoid very wide satins—they cut like a blade
Fill patternsAnyUse run stitch or light fill; avoid heavy zigzag

Pro tip: Reduce overall stitch count by 20–30% compared to fabric versions of the same design. Fewer stitches mean fewer holes, less stress, and cleaner results.

5. Thread and Tension

Thread choice:

  • Rayon: Standard for sheen and color vibrancy. Works on most leather types.
  • Polyester: More durable and colorfast. Better for outdoor gear, motorcycle leathers, and items exposed to sun and sweat.
  • Metallic: Stunning on black or brown leather but requires larger needles and slower speeds to prevent shredding.

Tension settings:

  • Top tension: Slightly looser than for fabric. Tight tension pulls stitches into the leather surface, creating dimples.
  • Bobbin tension: Standard or slightly tighter to balance the looser top tension.
  • Test on a leather scrap from the same hide before production. Every batch of leather behaves differently.

6. Machine Speed

Slow down. Leather embroidery should run at 60–70% of normal machine speed. High speeds generate heat through friction, which can scorch light-colored leather or melt synthetic finishes. Slower speeds also give the needle time to penetrate cleanly without deflecting.

Common Leather Embroidery Problems and Solutions

Problem 1: Tearing or Cracking Along Stitch Lines

Cause: Stitch density too high, underlay too aggressive, or leather too thin.

Solution: Reduce density by 20%, eliminate underlay for small designs, or upgrade to a heavier leather grade. For thin leather, consider a leather patch sewn on rather than direct embroidery.

Problem 2: Puckering or Distortion Around the Design

Cause: Improper hooping, insufficient stabilizer, or digitizing without pull compensation adjustment.

Solution: Use adhesive hooping on heavy tear-away stabilizer. Ensure the digitizer reduced pull compensation specifically for leather.

Problem 3: Thread Breaks Every Few Stitches

Cause: Dull needle, incorrect needle size, or tension too tight.

Solution: Replace needle, verify size matches leather thickness, loosen top tension incrementally until breaks stop.

Problem 4: Hoop Burn or Permanent Creases

Cause: Hoop pressure too high, hooping time too long, or sharp hoop edges.

Solution: Switch to magnetic or clamp hoops. Use adhesive hooping methods. If creases occur, gently warm the leather with a hair dryer and massage flat—results vary by leather type.

Problem 5: Stitches Sinking Into Suede or Nubuck

Cause: Nap of the leather swallows stitches, making them invisible.

Solution: Use water-soluble topping over the design area. The topping holds stitches above the surface and rinses away clean.

Problem 6: Color Bleeding or Finish Damage

Cause: Excessive machine heat, incompatible thread dye, or moisture from soluble topping.

Solution: Reduce machine speed, use polyester threads (more colorfast), and ensure leather is completely dry before and after any water-soluble topping application.

Advanced Techniques for Premium Results

3D Puff Embroidery on Leather

Puff embroidery adds dramatic raised dimension. On leather, it requires:

  • Specialized puff foam designed for leather applications (standard foam may react with leather finishes)
  • Reduced density on the puff areas to prevent foam collapse
  • Larger needle (90/14 or 100/16) to penetrate foam and leather cleanly
  • Slower speed to prevent foam tearing

Puff on leather is stunning for motorcycle club rockers, luxury brand logos, and statement jacket backs. It is unforgiving—master flat leather embroidery before attempting puff.

Applique on Leather

Instead of stitching directly onto expensive leather, sew a fabric or thinner leather patch onto the main leather surface. This technique:

  • Eliminates direct perforation of the primary hide
  • Allows for more complex designs on a separate, replaceable panel
  • Creates visual contrast between leather types (e.g., suede applique on smooth cowhide)

Laser Etching + Embroidery Hybrid

Some high-end producers combine laser etching (which burns a shallow design into the surface) with embroidered outlines or accents. The laser handles detail and shading; embroidery adds texture and color. This is advanced production requiring specialized equipment.

Debossed Embroidery

A technique where the design is first debossed (pressed into the leather without cutting) and then embroidered within the depressed area. The embroidery sits flush or slightly recessed, creating a subtle, sophisticated look popular in luxury automotive and leather goods.

Leather Patch vs. Direct Leather Embroidery

If direct embroidery feels too risky, consider leather patches—embroidered designs on a separate leather piece that is then sewn, riveted, or glued onto the main item.

MethodProsCons
Direct embroiderySeamless, integrated, no edgesPermanent, risky on thin/expensive leather
Leather patchReplaceable, less risk, more design freedomVisible edge, additional production step
Woven leather patchFine detail possibleLess texture than embroidery
Printed leather patchFull color, photo-realisticLess durable, no tactile quality

For one-off luxury items or experimental designs, patches are the safer choice. For production runs of branded goods, direct embroidery signals higher craftsmanship.

Industry-Specific Best Practices

Motorcycle Clubs and MC Patches

Motorcycle vests use heavy cowhide or buffalo leather. Embroidery is typically direct on the back panel for club patches, or on leather patches that are then sewn on for rockers and officer titles.

  • Use 100% polyester thread for UV and sweat resistance
  • Sew-on backing only—iron-on adhesive fails under road vibration and heat
  • Minimum 6 mm text height for readability at riding distances
  • Consider merrowed border on leather patches for clean, fray-proof edges

Fashion and Luxury Goods

High-fashion leather embroidery demands perfection. Every stitch is visible.

  • Use finest needles (70/10) on lambskin and delicate hides
  • Match thread sheen to leather finish—matte thread on matte leather, glossy on patent (though avoid patent for direct embroidery)
  • Test on identical leather scraps from the same tannery batch
  • Consider hand-guided embroidery for true luxury one-offs

Corporate and Promotional

Leather portfolios, padfolios, and gift items prioritize consistency and speed.

  • Bonded leather is acceptable for mid-tier corporate gifts
  • Small left-chest or corner placement works best
  • Metallic threads elevate perceived value for executive gifts
  • Always order pre-production samples for corporate color matching

Cost Expectations for Leather Embroidery

Leather embroidery costs more than fabric embroidery due to material risk, slower production, and specialized handling.

FactorCost Impact
Leather type (full-grain vs bonded)Premium hides increase material cost 50–200%
Design complexityIntricate designs require slower speeds and more needle changes
Stitch countHigher count = more time, more risk, higher cost
Sample approvalPre-production samples add 20–30% to first-unit cost
Rework rateLeather rework is often impossible—builds risk into pricing

At Gem Punch, we recommend approving a physical sample on identical leather before any production run over 10 units. The cost of one sample is negligible compared to ruining a full batch.

Frequently Asked Questions

Can any embroidery machine sew on leather?
Technically yes, but results vary dramatically. Commercial machines with adjustable presser foot pressure, sharp-point needle capability, and precise tension control produce professional results. Home machines often lack the power and precision for heavy leather.

What is the thinnest leather that can be embroidered?
Approximately 1 oz (0.4 mm) is the practical minimum for direct embroidery. Thinner materials require applique techniques or patches to avoid tearing.

Does embroidery weaken leather over time?
Yes, but minimally if done correctly. The perforation line creates a theoretical weak point, but properly spaced stitches on quality leather do not compromise structural integrity under normal use. Dense stitching on thin leather is where failure occurs.

Can you remove embroidery from leather?
No. Unlike fabric where stitches can be picked out and the weave recovers, leather embroidery is permanent. Removal leaves a perforated outline that cannot be hidden. This is why sampling is critical.

Is hand embroidery better than machine on leather?
For artistic, one-off pieces, hand embroidery offers control and character impossible to replicate by machine. For consistency, speed, and commercial production, machine embroidery is superior. The choice depends on your project goals.

What thread count should I use for leather?
40-weight thread is standard. 60-weight is available for very fine detail on delicate leather but is harder to work with. 30-weight is used for bold, visible stitches on heavy leather.

How do I prevent the needle from leaving marks around the design?
Marks are usually caused by presser foot pressure or hoop burn. Use a roller presser foot or Teflon foot to reduce friction. Hoop with adhesive methods rather than direct clamping.

Final Thoughts

Embroidery on leather is not a beginner’s technique—but it is one of the most rewarding when executed correctly. The combination of leather’s natural prestige and embroidery’s precision creates products that command attention, respect, and premium pricing.

Success requires three things: the right leather, digitizing adjusted for zero-recovery material, and production discipline (slow speeds, proper needles, careful hooping). Skip any of these, and you risk damaging expensive material. Master all three, and you produce heirloom-quality work.

At Gem Punch, we specialize in leather embroidery digitizing and production. Whether you need a single motorcycle vest back panel or a thousand corporate portfolios, our digitizers understand the unique demands of leather and program every file to protect your material while maximizing visual impact.

Ready to embroider on leather? Send us your artwork and leather specifications for a free digitizing assessment and production quote.

Chenille_vs_Embroidered_Patches_202606061254

Chenille Patches vs Embroidered Patches: Which Is Right for Your Brand?

Custom patches are one of the most versatile branding tools available today—but not all patches are created equal. If you are deciding between Chenille vs Embroidered Patches for your jackets, uniforms, merchandise, or streetwear line, the choice you make will directly impact your product’s texture, visual impact, durability, and price.

At Gem Punch, we digitize and produce both styles daily. This guide breaks down the real differences so you can choose the patch type that aligns with your brand identity, budget, and end-use goals.

What Are Chenille Patches?

Chenille patches are characterized by their soft, fuzzy, towel-like texture. The word “chenille” comes from the French word for “caterpillar,” which perfectly describes the plush, velvety surface these patches create.

How Chenille Patches Are Made

Chenille patches are constructed using a specialized looped yarn technique. Instead of flat stitches sitting on top of a fabric base, chenille uses a loop pile system where yarn is fed through the backing to create raised, textured loops. These loops are then sheared (cut) or left intact depending on the desired effect, producing that iconic fuzzy surface.

The process requires dedicated chenille embroidery machines or attachments that can handle the thicker, bulkier yarn. At Gem Punch, our digitizers program separate stitch files for chenille elements because the density, pull compensation, and underlay requirements differ significantly from standard embroidery.

Common Uses for Chenille Patches

Chenille patches are most commonly associated with:

  • Letterman jackets and varsity jackets — the classic athletic aesthetic
  • Sports team awards — championship patches, MVP badges, and commemorative emblems
  • Streetwear brands — oversized back patches, nostalgic 90s-inspired designs
  • Schools and universities — academic achievement patches, club insignias
  • Greek life organizations — fraternity and sorority jacket patches

The tactile, three-dimensional nature of chenille makes it ideal for designs that need to pop visually and physically. If you want someone to reach out and touch your patch, chenille is the answer.

What Are Embroidered Patches?

Embroidered patches are the industry standard. They use traditional flat stitching—typically rayon or polyester thread—to recreate a design on a twill or felt backing. The result is a clean, detailed, and versatile patch that works on nearly any garment or accessory.

How Embroidered Patches Are Made

Standard embroidered patches are created using computerized embroidery machines that read digitized stitch files (DST, PES, JEF, etc.). The digitizer maps every stitch: direction, density, type, and sequence. Common stitch types include:

  • Satin stitches — for borders and clean lines
  • Fill stitches — for large color areas
  • Running stitches — for fine details and outlines

Embroidered patches can be produced with 50% thread coverage (classic look with visible backing) or 100% thread coverage (completely covered, premium appearance). They can also incorporate 3D puff embroidery for raised elements, though the texture differs from chenille’s soft fuzz.

Common Uses for Embroidered Patches

Embroidered patches dominate across virtually every industry:

  • Corporate uniforms — left-chest logos, sleeve branding
  • Military and tactical gear — morale patches, unit insignias, name tapes
  • Motorcycle clubs — back patches, rocker panels, memorial patches
  • Fashion and accessories — denim jackets, backpacks, hats
  • Promotional merchandise — event giveaways, brand activations
  • Sports teams — cap logos, jersey patches, fan merchandise

If chenille is the specialist, embroidered patches are the universal workhorse.

Chenille vs. Embroidered: Side-by-Side Comparison

FeatureChenille PatchesEmbroidered Patches
TextureSoft, fuzzy, looped pileFlat, smooth, stitched surface
Visual ImpactBold, retro, highly tactileClean, precise, professional
Detail LevelBest for large letters, simple shapesExcellent for intricate logos, fine text
Color BlendingLimited; solid blocks work bestAdvanced gradients and color transitions
Typical SizeLarge (4″–12″) for maximum effectFlexible (1″–15″+)
BackingsSew-on, iron-on, velcroIron-on, sew-on, velcro, adhesive, magnetic
DurabilityVery durable; loops can snag on sharp objectsExtremely durable; minimal snag risk
CostHigher (specialized machines, bulkier materials)Lower to moderate (standard production)
TurnaroundSlightly longer (specialized setup)Faster (standard workflow)
Best ForVarsity jackets, streetwear, nostalgia brandsCorporate, tactical, detailed logos, bulk orders

When to Choose Chenille Patches

Chenille is not the right choice for every project—but when it fits, it dominates. Here are the scenarios where chenille patches outperform embroidered alternatives.

1. Varsity and Letterman Jackets

This is the classic use case. Letterman patches and varsity jacket patches are practically synonymous with chenille. The oversized, fuzzy letters spelling out team names, graduation years, or athletic achievements are instantly recognizable. If you are producing jackets for a school, sports team, or nostalgia-driven brand, chenille is non-negotiable.

2. Streetwear and Retro Fashion

In 2026, streetwear continues to mine 90s and Y2K aesthetics for inspiration. Chenille patches deliver that vintage, tactile look that flat embroidery simply cannot replicate. Brands like Supreme, Stüssy, and countless independent labels use chenille for oversized back patches that demand attention.

3. Awards and Commemorative Pieces

Because chenille feels premium and substantial, it is perfect for patches that celebrate milestones. Championship patches, hall-of-fame inductions, and anniversary badges all benefit from chenille’s weight and presence.

4. Designs with Large Typography

Chenille excels at rendering big, bold letters. If your design is primarily text-based—think “STATE CHAMPS,” “CLASS OF 2026,” or a brand name in block letters—chenille will look more impactful than embroidered text at the same scale.

5. Texture-First Branding

Some brands are built on sensory experiences. If your identity revolves around craftsmanship, heritage, or tactile luxury, the fuzzy surface of chenille reinforces that story every time someone touches it.

When to Choose Embroidered Patches

Embroidered patches are the safer, more flexible choice for the majority of projects. Here is where they shine.

1. Detailed Logos and Complex Artwork

If your design includes fine lines, small text, intricate borders, or multiple colors with gradients, embroidered patches are the only practical option. Chenille’s looped construction cannot reproduce details smaller than approximately 3–4 millimeters reliably. A detailed corporate logo with a tagline will look crisp in embroidery and muddy in chenille.

2. Small-Scale Applications

Need a 2-inch cap patch? A 1.5-inch uniform badge? Chenille does not scale down well—the loops become compressed and lose their signature texture. Embroidered patches work flawlessly at any size from one inch upward.

3. High-Volume, Budget-Conscious Orders

If you are ordering 500+ patches for a corporate event, employee uniform rollout, or promotional campaign, embroidered patches offer significantly better cost efficiency. The production process is standardized, thread costs are lower, and turnaround times are faster.

4. Tactical and Professional Gear

Military morale patches, law enforcement insignias, and corporate uniform badges prioritize readability and durability over texture. Embroidered patches withstand harsh washing, abrasion, and environmental exposure without snagging or matting.

5. Versatile Placement

Embroidered patches adhere cleanly to hats, backpacks, polos, dress shirts, and even delicate fabrics. Chenille’s bulk and weight limit it to heavier garments like wool jackets, denim, and canvas.

Cost Comparison: What to Expect

Pricing varies based on size, quantity, colors, and backing type, but here is a general framework based on Gem Punch’s 2026 pricing:

SizeChenille Patch (per unit, 50 qty)Embroidered Patch (per unit, 50 qty)
3″$8–$14$4–$7
5″$12–$20$6–$10
8″$18–$30$10–$16
12″$28–$45$16–$25

Why the difference? Chenille requires specialized machinery, thicker yarn, more material weight, and longer production time. The digitizing process is also more complex because the digitizer must account for loop height, pile direction, and compression factors that do not exist in flat embroidery.

For bulk orders of 250+ units, the per-unit cost gap narrows, but embroidered patches remain the more economical choice.

Design Limitations and Capabilities

Understanding what each patch type can and cannot do will save you from expensive redesigns.

Chenille Limitations

  • No fine detail: Text below 0.25″ height will be illegible. Thin lines and intricate borders are not achievable.
  • Limited color blending: Chenille works best with solid, contrasting color blocks. Gradients and shading are effectively impossible.
  • Size minimum: Chenille needs room to show its texture. Patches smaller than 3″ rarely look impressive.
  • Weight: Chenille patches are heavier and can pull down lightweight fabrics.

Embroidered Limitations

  • Flat appearance: Without 3D puff or special techniques, embroidered patches lack physical depth.
  • Thread sheen: Rayon thread has a distinctive shine that may not match matte brand guidelines.
  • Large solid areas: Filling a 6″ patch with satin stitches can look stiff and create tension issues on the garment.

Hybrid Designs: The Best of Both Worlds

Many of Gem Punch’s most successful projects combine both techniques. A varsity jacket might feature a large chenille team name across the back with embroidered sleeve patches for player numbers and sponsor logos. A streetwear brand might use chenille for the main graphic and embroidered satin borders for clean edges.

If your design has both bold typographic elements and detailed iconography, ask your digitizer about mixed-media patches. They cost more and require advanced production, but the result is unmatched.

Durability and Care

Both patch types are built to last, but their care requirements differ.

Chenille patches should be washed inside-out on gentle cycles. The loops can snag on zippers, Velcro, or sharp edges during machine washing. Avoid high-heat drying, which can flatten the pile over time. With proper care, a chenille patch will last 5–10 years before showing significant wear.

Embroidered patches are virtually indestructible under normal conditions. They withstand industrial washing, dry cleaning, and heavy abrasion. The primary failure point is the backing adhesive (for iron-on versions) rather than the stitching itself. Sew-on embroidered patches often outlast the garment they are attached to.

Trends: Where Chenille and Embroidery Are Heading

The custom patch industry is evolving rapidly. Here are the trends shaping how brands use chenille and embroidered patches this year:

1. Oversized Chenille in Streetwear
Brands are pushing chenille patches to 10″–14″ back-panel sizes for maximum visual impact. The bigger the patch, the more the texture reads as luxury.

2. Sustainable Materials
Both patch types are now available with organic cotton twill backings, recycled polyester threads, and PVC-free alternatives. Eco-conscious brands are requesting these options for 2026 collections.

3. Hybrid Puff + Chenille
A new technique combines 3D puff embroidery with chenille loops to create patches with multiple elevation levels. This is especially popular for limited-edition streetwear drops.

4. Nostalgia-Driven Varsity Revival
Letterman jackets are back in mainstream fashion—not just for athletes. Fashion brands are creating “faux varsity” lines with authentic chenille patches to sell the aesthetic without the athletic affiliation.

5. Minimalist Embroidery
On the embroidered side, brands are moving toward smaller, more subtle left-chest logos with 100% thread coverage for a premium, badge-like appearance.

How to Order: Tips for a Smooth Process

Whether you choose chenille or embroidered, follow these steps to avoid costly revisions:

  1. Start with vector art: Send AI, EPS, or SVG files. Chenille especially requires clean vector paths because the digitizer needs to define loop zones precisely.
  2. Specify the garment: A patch digitized for a wool varsity jacket will not sew the same way on a lightweight nylon windbreaker. Fabric weight matters.
  3. Request a physical sample: For orders over 100 units, always approve a production sample before full manufacturing. Chenille colors can look different under factory lighting than on screen.
  4. Choose the right backing: Sew-on is most durable for both types. Iron-on works for embroidered patches on stable fabrics. Velcro is ideal for tactical and removable applications.
  5. Trust your digitizer: Chenille digitizing is a specialized skill. If your provider does not ask about loop height, pile direction, and compression ratios, find one who does.

Frequently Asked Questions

Can you combine chenille and embroidery in one patch?
Yes. Mixed-media patches are increasingly popular, especially for varsity jackets and streetwear. The digitizer must plan the stitch sequence carefully so the chenille loops do not interfere with embroidered elements.

Are chenille patches only for jackets?
Primarily, yes. Chenille’s weight and bulk make it unsuitable for lightweight shirts, hats, or delicate fabrics. It works best on wool, denim, canvas, and heavy cotton.

Which patch type is more expensive?
Chenille is consistently 40–60% more expensive than embroidered patches at equivalent sizes and quantities due to specialized machinery, thicker materials, and longer production times.

How small can text be in a chenille patch?
Text should be no smaller than 0.25″ (6mm) in height for chenille. Anything smaller will be illegible because the loops merge together. Embroidered patches can handle text down to 0.125″ (3mm) with proper digitizing.

Can I get a single chenille patch as a sample?
Most manufacturers—including Gem Punch—require a minimum order for chenille due to the machine setup time. However, we offer sample programs for qualified bulk orders. Contact us for specifics.

Final Verdict

Choose chenille patches when you want bold, tactile, nostalgic impact—ideal for varsity jackets, streetwear back panels, and commemorative pieces where texture is the selling point.

Choose embroidered patches when you need detail, versatility, cost efficiency, and universal compatibility—ideal for corporate branding, tactical gear, detailed logos, and high-volume orders.

Still unsure? Send your artwork to Gem Punch and our digitizers will recommend the optimal patch type, size, and construction for your specific design and budget. We have produced thousands of both chenille and embroidered patches for brands, teams, and organizations worldwide—and we will make sure your patch tells your story exactly the way you envision it.

Ready to start your order? Get a free quote and digital mockup from Gem Punch today.

Custom Fire Department Patches: Design, Ordering & Pricing Guide

Custom Fire Department Patches: Design, Ordering & Pricing Guide

Why Your Fire Department Needs Custom Patches

Custom patches are more than fabric and thread — they’re a symbol of service, sacrifice, and brotherhood. For fire departments across the country, a well-designed custom patch represents the identity of every firefighter who wears it.

Whether you’re outfitting a new recruit class, commemorating a department milestone, or adding a finishing touch to dress uniforms, custom fire department patches deliver a professional, cohesive look that commands respect. At Gem Punch, we’ve partnered with fire departments of all sizes — from rural volunteer companies to major metropolitan fire services — to produce patches that stand up to the demands of the job and the pride of the profession.

This guide covers everything your department needs to know: design considerations, patch types, the ordering process, pricing breakdowns, and answers to the questions we hear most. By the end, you’ll know exactly how to order custom fire patches that represent your department with distinction.

Why Fire Departments Choose Custom Patches

The fire service has a long tradition of visual identity. Patches aren’t just decoration — they serve real operational and cultural functions.

Build Team Identity and Brotherhood Every firefighter knows the feeling of putting on a patch that represents their house. A custom patch creates a shared visual symbol that reinforces the bonds built in training and on scene. New recruits feel the weight of the tradition when they receive their first department patch.

Create Memorable Recognition and Training Materials Custom patches are widely used for recruit graduation ceremonies, promotional milestones, and special unit designations. A patch earned through training has lasting meaning that no certificate can replicate.

Celebrate Milestones and Anniversaries Department anniversaries, memorial patches for fallen firefighters, and commemorative designs for major events are among the most requested patch orders we receive. These pieces become department heirlooms.

Boost Department Morale Giving firefighters a patch designed specifically for their station, unit, or specialty — whether that’s hazmat, swift water rescue, or technical rescue — builds pride in their role and reinforces their identity within the larger department.

Show Pride in Service to the Community At public events, recruitment drives, and community outreach programs, custom patches create a professional, unified appearance that builds public trust and recognition.

Design Considerations for Fire Department Patches

Great fire patch design isn’t just about aesthetics — it’s about accuracy, durability, and compliance. Here’s what to consider before you submit your design.

Color Psychology and Fire Service Tradition

Red dominates fire service iconography for good reason: it signals authority, urgency, and action. Black backgrounds convey formality and command presence, while gold and yellow thread conveys prestige and years of service. When choosing your color palette, consider both the visual impact and how colors will hold up after repeated washing and heavy wear.

Symbols That Carry Meaning

The Maltese Cross is the most recognized symbol in the fire service, representing the protection firefighters offer to those in their care. Firefighter helmets, flames, axes, and ladders are all common design elements that communicate function and heritage at a glance. Many departments also incorporate their city seal, state outline, or founding year into their patch designs.

Work with symbols that have meaning to your department — not just generic clip art. Your patch should tell your story.

Compliance with Department Insignia Rules

Many fire departments operate under strict regulations regarding how official insignia, logos, and badge designs may be reproduced. Before submitting your design to Gem Punch, confirm with your department leadership or legal team that your proposed design complies with all internal policies and any applicable municipal guidelines. We can reproduce official insignia with proper authorization.

Font Choices for Legibility

Bold, high-contrast fonts are essential on embroidered patches. Thin serif fonts tend to fill in during the embroidery process and become illegible at small sizes. We recommend block lettering or clean sans-serif fonts for department names and text elements. If you’re including a motto, keep it short — six words or fewer reads cleanly at patch scale.

Placement and Size on Uniforms

Standard sleeve patches for fire uniforms typically run between 3″ and 5″ in diameter or width. Chest patches are usually smaller (2″–3″). Consider where the patch will be worn and design accordingly — a large circular patch works on a sleeve, while a more compact horizontal design suits a chest pocket.

Patch Types Best for Fire Departments

Not all patches are created equal. Here’s a breakdown of the most common options and when to choose each:

Patch TypeBest ForDurabilityDetail LevelPrice Range
EmbroideredUniforms, dress occasions5–10 yearsMedium-High$0.80–$3.50/ea
PVC/RubberTactical gear, outdoor use10+ yearsHigh$1.50–$4.50/ea
WovenComplex insignia, fine detail5–8 yearsVery High$1.20–$3.80/ea

Embroidered Patches — The Fire Service Standard

Embroidered patches are the most requested type for fire department orders and for good reason. They carry the traditional look associated with the fire service, hold up through repeated laundering, and accept complex designs including gradients, shading, and multi-color detail. Thread counts of 75%–100% coverage give patches a full, professional appearance. Expected lifespan: 5–10 years with normal use.

PVC Patches — Built for the Field

PVC (polyvinyl chloride) patches are fully waterproof, hold their shape in extreme temperatures, and won’t fray or unravel — making them ideal for tactical uniforms, gear bags, and any application involving outdoor or wet conditions. PVC patches also accept extremely fine detail, making them excellent for replicating complex department seals. Expected lifespan: 10+ years.

Woven Patches — Maximum Detail

Woven patches are produced on specialized looms rather than embroidery machines, which allows for much finer detail reproduction. If your department insignia includes fine lines, small text, or intricate imagery, a woven patch may be the best option. They’re slightly less textured than embroidered patches but offer superior detail at smaller sizes.

Step-by-Step Ordering Process at Gem Punch

We’ve refined our ordering process over 13 years of working with fire departments. Here’s exactly what to expect from first contact to final delivery.

Step 1: Free Consultation Call

Every fire department order starts with a consultation. We’ll discuss your design vision, intended use, patch size, attachment type (iron-on, sew-on, hook-and-loop), and quantity. This call takes about 15 minutes and ensures nothing gets lost in translation.

Step 2: Design Submission

Submit your existing logos, badge artwork, insignia, or reference images. High-resolution files (300 DPI or higher) produce the best results, but we work with whatever you have. If you’re starting from scratch, our in-house design team can develop your concept — at no additional charge on qualifying orders.

Step 3: Digital Proof and Digitizing

Our team creates a digital mockup of your patch and sends it for your review and approval. For embroidered patches, we also complete the digitizing process — converting your artwork into machine-readable stitch patterns. You’ll see exactly what your patch will look like before production begins. Revisions are included until you’re satisfied.

Step 4: Production

Once you approve the proof, production begins. Standard turnaround is 7–9 business days for embroidered patches. Rush production (24–48 hours) is available for time-sensitive orders such as graduation ceremonies or recruitment events — contact us to confirm availability.

Step 5: Quality Assurance

Every patch order is individually inspected before packaging. We check thread tension, color accuracy, edge finishing, and overall appearance against your approved proof. Batches that don’t meet our standards are rerun before shipping.

Step 6: Delivery

We ship to fire departments nationwide with tracking on all orders. Bulk orders are packaged to prevent damage in transit. For departments reordering the same design, your digitizing file is saved permanently — making future orders faster and ensuring perfect consistency.

Pricing for Fire Department Patches

Patch pricing depends on size, stitch count, complexity, patch type, and order quantity. Here’s what fire departments typically pay:

Embroidered Patch Pricing

QuantityEstimated Price Per Patch
50 patches$2.80–$3.50
100 patches$2.00–$2.60
250 patches$1.40–$1.80
500 patches$1.00–$1.30
1,000+ patches$0.80–$1.10

Prices based on a standard 4″ embroidered patch with 75%+ coverage. Complex designs or larger sizes may vary.

PVC Patch Pricing

QuantityEstimated Price Per Patch
50 patches$3.80–$4.50
100 patches$2.80–$3.40
250 patches$2.00–$2.50
500 patches$1.60–$2.00
1,000+ patches$1.30–$1.60

Sample Order Quotes

Volunteer Department — Recruit Graduation (50 patches) 4″ embroidered patch, two-color design, sew-on backing Estimated total: $140–$175

Mid-Size Department — Annual Uniform Reorder (500 patches) 3.5″ embroidered patch, department seal design, hook-and-loop backing Estimated total: $500–$650

Metropolitan Department — Commemorative Milestone Patch (1,000 patches) 5″ embroidered patch, multi-color complex design, mixed backing options Estimated total: $800–$1,100

Rush Service Pricing

24–48 hour rush production is available and typically adds 25%–40% to the per-patch price, plus expedited shipping. Rush availability varies — contact us as early as possible for time-sensitive orders.

Budget-Friendly Options

For departments working within tight budgets, we offer options to reduce cost without sacrificing appearance: reducing patch size slightly, simplifying the design to fewer thread colors, or choosing iron-on backing instead of hook-and-loop. Our team will help you identify cost savings that don’t affect the quality or impact of your patches.

Success Stories from Fire Departments We’ve Served

Volunteer Fire Company — Recruitment Drive Patches A rural volunteer fire company came to us needing 75 patches for an upcoming community recruitment event. They had a sketch of their department logo and a tight two-week window. Our team digitized the design, produced a proof within 48 hours, and delivered finished patches a full week before their event. The department reported that the patches generated significant interest at their booth and helped recruit several new members who wanted to “earn” the patch through training.

Municipal Fire Department — 100th Anniversary Commemorative Patch A city fire department celebrating its centennial needed a special commemorative patch to distribute to all active and retired members — approximately 800 patches. The design incorporated the original 1924 department badge alongside modern department insignia. We worked through four proof revisions to get the historical detail exactly right. The patches were presented at the department’s anniversary gala and are now displayed in the firehouse alongside original department photographs.

Regional Training Academy — Recruit Class Patches A multi-department regional training academy orders a custom patch for each recruit class that graduates. Each class patch features the same base design with the class year and number. Because we retained their digitizing file, reorders take a fraction of the time and cost of the original — and every class patch is perfectly consistent, year after year.

Frequently Asked Questions

Can you replicate official fire department insignia on patches?

Yes — with proper authorization. We work with departments to reproduce official badges, seals, and insignia accurately. We ask for documentation confirming you have permission to reproduce the insignia, particularly for official city or county seals.

Do you work specifically with fire departments?

Absolutely. Fire department patch orders represent a significant portion of our work. We understand the importance of accuracy, durability, and compliance in fire service patches, and our team is experienced with the specific requirements these orders carry.

What’s the fastest turnaround available?

In most cases, 24–48 hour rush production is available. Rush orders require design files to be ready at the time of order placement. Contact us immediately for time-critical orders — the earlier we hear from you, the better we can accommodate your timeline.

Can we reorder the same patch design in the future?

Yes. We permanently retain your digitizing files and design records. Future reorders of the same design are processed faster and at no additional setup cost. This is especially valuable for departments that reorder the same patch design for annual recruit classes or regular uniform updates.

What if we’re not satisfied with our patches?

Gem Punch backs every order with a 100% satisfaction guarantee. If your patches don’t match your approved proof or fall short of our quality standards, we’ll rerun the order at no charge. We don’t consider an order complete until you’re fully satisfied.

What attachment options are available?

We offer iron-on, sew-on, hook-and-loop (Velcro), and peel-and-stick backing. Hook-and-loop is popular for tactical and field applications; iron-on and sew-on are standard for dress uniforms.

What file formats do you accept?

We work with AI, EPS, PDF, PNG, and JPG files. Vector files (AI/EPS) produce the cleanest results, but our digitizing team can work from high-resolution raster files as well.

Outfit Your Department with Patches Built to Last

Custom fire department patches are a meaningful investment in your department’s identity, morale, and professional image. Whether you need 50 patches for a recruit graduation or 1,000 for a department-wide uniform update, Gem Punch delivers designs that honor the tradition and pride of the fire service.

With 13+ years of experience, in-house design and digitizing, individual quality inspection on every order, and a 100% satisfaction guarantee, your department is in experienced hands from first consultation to final delivery.

Ready to get started?

→ Request a Free Quote for Your Fire Department Patches

Or call us directly to speak with a patch specialist about your department’s specific needs. We’re here to help you create something your firefighters will wear with pride.

Gem Punch specializes in custom embroidered patches, PVC patches, and woven patches for fire departments, law enforcement, military units, and organizations nationwide. All designs are digitized in-house. Rush production available.

Vector Art Paches

The History of Biker Patches: Evolution, Significance & Modern Trends

A biker patch is a piece of embroidered fabric. That is all it is, technically. And yet few objects in American cultural history carry as much meaning, as much contested territory, or as much earned respect as the patches sewn onto the back of a motorcycle vest.

The history of biker patches is inseparable from the history of motorcycle club culture itself — a story that begins with returning World War II veterans, runs through the outlaw rebellions of the 1950s and 1960s, and continues today in a global culture of riders who use patches to communicate identity, loyalty, and belonging in ways that words alone cannot.

This is that story — told decade by decade, from the earliest riding clubs to the custom patch designs.

Biker patches are not a single uniform tradition. Different clubs, regions, and cultures have developed their own systems of patch meaning and etiquette. This guide covers the dominant traditions rooted in American motorcycle club culture, which form the foundation of global biker patch culture today.

The Origins: Military Insignia and the Birth of Motorcycle Clubs (1900s–1940s)

To understand where biker patches came from, you first need to understand where bikers came from. The earliest motorcycle clubs in America formed in the early 1900s, shortly after the invention of the motorcycle itself. The American Motorcyclist Association (AMA) was founded in 1924, bringing together riding enthusiasts under a single national organization.

From the beginning, these clubs borrowed heavily from military culture — and for good reason. Many early riders were veterans or active military personnel who were drawn to motorcycles for the same reasons they had been drawn to military service: the brotherhood, the discipline, the sense of shared mission. Military insignia had long served as a way to identify unit affiliation, rank, and achievement. Early motorcycle clubs adopted the same logic — patches and badges on jackets and vests that told other riders who you were, who you rode with, and what you had done.

These early patches were simple — often just a club name or logo stitched onto a jacket back. But they established the fundamental idea that would define biker culture for the next century: your patch is your identity on the road.

The Turning Point: Post-World War II and the Rise of Outlaw Culture (1945–1955)

The period immediately following World War II was the most consequential in the history of biker patches. Hundreds of thousands of veterans returned home from the war having experienced levels of camaraderie, danger, and freedom that civilian life simply could not match. Many found solace on motorcycles — the closest thing to the freedom and intensity of the war they had left behind.

Motorcycle clubs formed rapidly across the country. Most operated within the AMA’s framework, adhering to its codes of conduct and participating in sanctioned events. But a significant number did not. These riders — who would come to be called outlaw clubs — rejected the AMA’s authority and the mainstream values it represented.

The defining moment came in 1947 at the Hollister Rally in California, where a group of riders from the Pissed Off Bastards of Bloomington caused a significant disturbance. The event was sensationalized in the press and became a cultural flashpoint. In the aftermath, the AMA reportedly stated that 99% of motorcyclists were law-abiding citizens — implying that the remaining 1% were not. Outlaw clubs embraced this framing, and the 1% patch was born.

It was also during this period that the three-piece patch configuration emerged as the defining symbol of outlaw motorcycle club identity. Where AMA clubs wore simple one-piece patches, the outlaw clubs divided their back patch into three distinct elements — top rocker, center emblem, and bottom rocker — each carrying specific meaning about the club’s name, identity, and territory.

The three-piece patch was not just a design choice. It was a declaration of independence from mainstream motorcycle culture and the values it represented. Wearing colors meant you had earned a place in a brotherhood that operated by its own rules.

The 1950s and 1960s: Consolidation and the Golden Age of Club Culture

Through the 1950s and into the 1960s, the major outlaw motorcycle clubs that would define the culture solidified their identities and their patch systems. Clubs like the Hells Angels (founded in 1948), the Outlaws (founded in 1935 but fully patched in this era), the Pagans, and the Bandidos developed the patch traditions that most closely resemble what MC culture looks like today.

During this period, patches became increasingly complex and regulated. Each element — the top rocker, center patch, bottom rocker, and the growing number of smaller patches that accompanied them — was assigned specific meaning. Officer designations (President, Vice President, Sergeant-at-Arms) appeared as chest patches. Memorial patches for fallen members became standard. Achievement patches were awarded for specific acts of loyalty or service to the club.

The colors became something sacred. A member’s patches represented not just their affiliation but their standing, their history, and their commitment to the brotherhood. The rule that colors must be surrendered when a member leaves the club — rather than kept as personal property — dates to this era. Colors belonged to the club, not the individual.

1924American Motorcyclist Association (AMA) founded — first organized framework for US motorcycle clubs
1935The Outlaws MC formed in Illinois — one of the earliest outlaw clubs
1945–48Mass veteran return from WWII — motorcycle club formation accelerates rapidly across the US
1947Hollister Rally — the cultural flashpoint that defined outlaw motorcycle identity
1948Hells Angels MC founded in Fontana, California — three-piece patch system adopted
1950sThree-piece patch becomes the universal symbol of outlaw MC status
1960sMajor clubs expand nationally and internationally — patch systems become highly regulated
1970sBiker culture enters mainstream consciousness through film and media
1980s–90sCustom patch manufacturing industry grows — wider access to embroidery technology
2000sInternet era opens global access to patch culture — riding clubs proliferate worldwide
2010sPVC and woven patches become popular alternatives to embroidery
2020sCustom patch design reaches new levels of sophistication — digital tools transform production

The 1970s: Biker Culture Goes Mainstream

The 1970s brought motorcycle culture into the mainstream American consciousness in an unprecedented way. Films like Easy Rider (1969, but dominant in the 70s cultural conversation) and later The Wild One romanticized the biker lifestyle and brought the imagery of motorcycle patches to a mass audience that had previously only seen it from a distance.

This mainstream visibility had a double-edged effect on patch culture. On one hand, it brought new riders into the fold and expanded motorcycle club membership. On the other hand, it created a market for biker imagery that was completely divorced from the culture itself — patch designs, leather vests, and club-style insignia sold as fashion items to people who had no connection to actual motorcycle clubs.

This tension between authentic patch culture and its commercial imitations has defined the relationship between the biker community and mainstream culture ever since.

The 1980s and 1990s: Technology Changes Everything

The embroidery technology of the 1980s and 1990s transformed what was possible in patch design. Computer-aided embroidery systems — which allowed designs to be digitized and reproduced with machine precision — dramatically expanded the complexity, color range, and detail achievable in a custom patch.

Where earlier patches had been limited by the constraints of hand or simple machine embroidery, the new technology allowed for photorealistic portraits, complex multi-color designs, and fine detail work that would have been impossible to produce at scale a decade earlier. Custom patch manufacturers expanded rapidly, and the quality ceiling for what a club could put on its members’ vests rose significantly.

This era also saw the emergence of the custom patch industry as a distinct commercial sector — with specialist manufacturers offering production services to clubs, military units, law enforcement agencies, and eventually the broader public.

The 2000s: The Internet Era and the Global Spread of Patch Culture

The internet era fundamentally changed the landscape of biker patch culture in ways that are still playing out today. For the first time, riders in rural areas, outside the US, and without access to established club networks could connect with patch culture, order custom patches, and learn the traditions and rules that governed them.

The global spread of American motorcycle club culture accelerated dramatically. Chapters of major American clubs opened across Europe, Australia, South America, and Asia. Local clubs in countries with no prior MC tradition adopted the three-piece patch system and the associated etiquette, creating genuinely international networks of club culture.

The internet also created new challenges around patch authenticity and etiquette enforcement. With custom patches available to order online from anywhere in the world, the cultural gatekeeping that had previously been enforced through physical presence and local reputation became harder to maintain.

Modern Patch Types and Materials (2010s–2026)

Today, biker patches are produced in a wider range of materials and techniques than at any point in their history. While traditional embroidered patches remain the standard for most motorcycle clubs, several alternatives have become popular across the broader riding community:

Embroidered patches

Still the gold standard for MC colors and formal club patches. High stitch count embroidery produces rich, durable designs that maintain their appearance over years of riding. Modern embroidery digitizing allows for extraordinarily detailed designs at competitive prices.

PVC patches

Molded rubber patches that offer a tactile, three-dimensional quality not achievable with embroidery. Increasingly popular for morale patches, riding club designs, and patches that need to withstand extreme weather conditions. PVC patches are waterproof, UV-resistant, and highly durable.

Woven patches

Produced on a loom rather than embroidered, woven patches achieve finer detail at smaller sizes — making them ideal for small text, intricate linework, and designs with many colors. Woven patches have a flatter, more textile-like appearance than embroidered patches.

Leather patches

Laser-cut or stamped leather patches offer a rugged, traditional aesthetic that sits naturally on leather vests. Popular for name patches, chapter designations, and smaller accent patches. Leather patches have seen a significant resurgence in popularity since the early 2010s.

Patch TypeBest Used For
EmbroideredClub colors, back patches, formal designations
PVCMorale patches, weather-exposed applications, detailed 3D designs
WovenFine detail designs, small text, high color count designs
LeatherName patches, accent patches, traditional aesthetic applications
PrintedPhoto-realistic designs, temporary applications, event patches

The Cultural Significance of Biker Patches Today

In 2026, biker patches carry a cultural weight that goes far beyond the motorcycle community. They have influenced fashion, military culture, sports team identity, and the broader custom merchandise industry. The language of patches — the idea that a piece of embroidered fabric can carry earned meaning, represent loyalty, and communicate identity in an instant — has spread into nearly every corner of culture.

But for the riders who wear them in the original tradition, the meaning remains unchanged. A patch on the back of a vest represents something earned through time, loyalty, and commitment. It is a visual biography — a record of where you have been, who you ride with, and what you stand for.

The three-piece patch still carries the same weight it has carried since the 1950s. The rules around wearing colors, respecting territory, and earning rather than buying your patches remain as significant as they have ever been. Technology has changed how patches are made. It has not changed what they mean.

Current Trends in Biker Patch Design

  • Hyper-detailed embroidery — advances in digitizing allow stitch counts and detail levels previously impossible at commercial scales
  • Glow-in-the-dark thread — increasingly popular for night-ride patches and event commemoratives
  • Minimalist designs — a countercurrent to the maximalist tradition, featuring clean geometric designs and limited color palettes
  • Mixed-media patches — combining embroidery with PVC elements, metal hardware, or leather backing for dimensional effects
  • Memorial and tribute patches — growing demand for detailed portrait patches honoring fallen members
  • Sustainable materials — eco-conscious clubs seeking recycled or organic thread and backing options

Frequently Asked Questions

When did biker patches first appear?

The earliest motorcycle club patches appeared in the 1920s and 1930s alongside the formation of the first organized riding clubs. The patch traditions most recognizable today — particularly the three-piece system — developed in the late 1940s and 1950s following World War II.

What was the first motorcycle club to use three-piece patches?

The Hells Angels, founded in Fontana, California in 1948, are widely credited with establishing the three-piece patch as the defining symbol of outlaw motorcycle club identity. The configuration — top rocker, center emblem, bottom rocker — was adopted by other outlaw clubs throughout the 1950s.

Why do biker patches have such strict rules?

The rules around biker patches developed organically from the culture’s emphasis on earned identity, territorial respect, and brotherhood. Patches represent genuine membership and loyalty — allowing non-members to wear similar patches would undermine the entire system of meaning. The rules exist to protect the integrity of what the patches represent.

Has the meaning of biker patches changed over time?

The specific designs and configurations have evolved, but the core meaning of biker patches has remained remarkably consistent since the 1950s. Patches still primarily represent club affiliation, earned membership, territory, rank, and personal achievement. What has changed is the breadth of patch culture — it has expanded well beyond outlaw MC culture into riding clubs, independent riders, and the broader custom patch market.

What is the future of biker patches?

Embroidery technology continues to advance, enabling finer detail and more complex designs at lower costs. PVC and mixed-media patches are growing in popularity. But the fundamental tradition — earned patches representing real membership and real loyalty — shows no signs of changing. If anything, the proliferation of fashion patches has made authentic club patches more meaningful by contrast.

Final Thoughts

The history of biker patches is a history of identity. From the simple sewn badges of the first riding clubs to the tightly regulated colors of modern motorcycle clubs, patches have always served the same purpose — to tell the world who you are, who you ride with, and what you have earned the right to display.

That purpose is as relevant in 2026 as it was in 1948. The materials have changed. The designs have evolved. The technology has transformed what is possible. But the meaning at the heart of every patch — earned, not bought; worn, not displayed; respected, not imitated — remains exactly what it has always been.

Gem Punch has produced custom embroidered and PVC patches for motorcycle clubs worldwide for over 13 years. If your club needs new colors, memorial patches, officer designations, or chapter patches — we understand the culture and deliver production-quality results. Get a free quote at gempunch.xtremlogics.com/.

Motorcycle-Vest-Patches-1024x683

Biker Patches Rules & Etiquettes: Everything You Need to Know

Biker patches are not decorations. To the uninitiated they look like colorful embroidered fabric sewn onto a leather vest. To those inside motorcycle culture, they are a visual language — communicating club affiliation, rank, territory, achievements, and personal history in a way that every rider immediately understands.

Getting patch etiquette wrong is not just a fashion faux pas. In the wrong setting, wearing the wrong patch, or wearing a patch the wrong way can lead to serious conflict. This guide breaks down everything you need to know about biker patch rules — whether you are a new rider, an aspiring club member, or someone designing custom patches for a motorcycle club.

The History Behind Biker Patches

Biker patch culture traces its roots to post-World War II America. Veterans returning home formed motorcycle clubs as a way to maintain the brotherhood and freedom they had experienced during the war. The American Motorcyclist Association (AMA) was founded in 1924 and sanctioned many of these clubs.

In 1947, at the Hollister Rally in California, a smaller group of riders — later called outlaw clubs — broke from AMA norms and began establishing their own identity. The most significant visual marker of this split was the three-piece patch, which outlaw clubs adopted to differentiate themselves from AMA-sanctioned riding clubs. From that moment, biker patches became one of the most loaded and regulated symbols in any subculture in America.

Types of Biker Patches and What They Mean

One-Piece Patches

A single patch worn on the back of a vest, typically showing a club name, logo, or riding group emblem. One-piece patches are associated with riding clubs (RCs), independent riders, and hobbyist motorcycle groups. They carry the least amount of cultural weight and are generally safe for non-MC members to wear without issue.

Two-Piece Patches

Two-piece patches consist of a top rocker with the club name and a center emblem, without a bottom rocker showing territory. In MC culture, two-piece patches often indicate a club in a transitional or probationary state — working toward full recognition. Wearing a two-piece patch that mimics an existing club without membership is considered highly disrespectful and should be avoided.

Three-Piece Patches (Colors)

The three-piece patch — or colors — is the most significant and most regulated patch configuration in biker culture. It consists of:

  • Top rocker: the club name, curved along the top of the back
  • Center patch: the club’s main emblem or logo, the centerpiece of the colors
  • Bottom rocker: the territory or chapter location, curved along the bottom

Three-piece patches are associated with established motorcycle clubs, both AMA-sanctioned and outlaw. They represent full membership, earned loyalty, and territorial identity. Under no circumstances should a non-member wear a three-piece configuration that resembles an existing MC’s colors.

Patch TypeWho Wears ItRisk If Worn Without Affiliation
One-pieceRiding clubs, independents, hobbyistsLow — generally acceptable
Two-pieceClubs in transition, some MCsModerate — research the specific design
Three-piece (colors)Established MCs, outlaw clubsHigh — serious breach of etiquette

Patch Placement Rules on the Vest

Where patches are placed on a vest or cut is as meaningful as the patches themselves. Here is the standard placement map used across most MC culture:

Back of the vest

  • Top rocker: club name, spanning the upper back
  • Center patch: main club emblem, center of the back
  • Bottom rocker: territory or chapter, lower back
  • MC patch (if applicable): small patch below or beside the center emblem, indicating motorcycle club status

Front of the vest — left chest

  • Club name patch or officer title (President, VP, Sergeant-at-Arms, etc.)
  • Membership rank patches (Prospect, Hangaround, Full Member)
  • Chapter or region identifier

Front of the vest — right chest

  • Memorial patches for fallen members
  • Event patches from rallies or runs
  • Achievement patches earned through club activities

Other placements

  • Side panels: additional designations, awards, or specialized role patches
  • Sleeves: some clubs use sleeve patches for chapter numbers or run awards
  • Collar: rarely used — some clubs place small patches near the collar for specific designations

Never place a bottom rocker on your vest unless you are a full member of the club that owns that territory. A non-member wearing a bottom rocker in a club’s territory is considered one of the most serious breaches of biker etiquette.

The Core Rules of Biker Patch Etiquette

1. Never wear another club’s colors

This is the most fundamental rule. Wearing the colors of a motorcycle club you are not a member of — or colors that closely resemble them — is considered an act of disrespect that can have serious real-world consequences. Even an accidental resemblance should be avoided. If you are designing custom patches for a club, always research existing colors in the region before finalizing a design.

2. Respect territorial boundaries

Each motorcycle club has an established territory, and wearing colors within another club’s territory without permission or acknowledgment is a significant breach of etiquette. Visiting riders — particularly those wearing club colors — are expected to show respect when passing through another club’s territory, sometimes by checking in with the local club.

3. Never touch another rider’s patches without permission

A biker’s vest and patches are deeply personal. Touching, adjusting, or handling another rider’s patches without explicit permission is considered a major sign of disrespect. This applies to friends, family, and strangers alike. The patches are earned — they are not casual accessories to be handled freely.

4. Patches must be earned, not bought

In established motorcycle clubs, patches are awarded — not purchased. Each patch represents something earned through time, loyalty, effort, or achievement. Buying a club-style patch and wearing it without going through the proper channels undermines this entire system and marks the wearer as someone who does not understand or respect the culture.

5. Colors stay with the club

When a member leaves a club — whether voluntarily, involuntarily, or due to death — their colors are returned to the club. Colors belong to the club, not the individual. A former member wearing their old colors after leaving is considered a serious violation of club rules and can lead to confrontation.

6. Prospect and hangaround patches have their own rules

New riders working their way toward full membership wear prospect or hangaround patches. These are earned designations that cannot be self-assigned. The prospect period is a test of loyalty, conduct, and commitment — and the patch reflects that status. Wearing a prospect patch without going through the actual prospect process is not acceptable.

7. MC patches are not for riding clubs

The small “MC” patch worn by motorcycle clubs indicates formal MC status — a designation that carries significant cultural weight. Riding clubs (RCs), which are casual groups without the formal structure of an MC, do not wear MC patches. Wearing an MC patch without actual MC status causes confusion and disrespect.

Independent Riders: What You Can and Cannot Wear

If you ride independently and are not affiliated with any motorcycle club, you have significant freedom in what patches you wear — with a few important boundaries:

Safe to WearAvoid Wearing
Personal achievement patchesThree-piece patch configurations
Event and rally patchesBottom rockers claiming territory
Humor and novelty patchesColors resembling any established MC
Military service patchesThe ‘1%’ patch (MC-specific symbol)
One-piece riding club patchesAny patch with an existing club’s name or emblem
Memorial patchesMC designation patch

Tip for independent riders: If you want to wear a distinctive back patch, stick to a one-piece design with original artwork that does not use a rocker-style layout. This keeps you clearly outside MC territory while still expressing your identity.

The 1% Patch — What It Means

The 1% patch is one of the most recognized and most misunderstood symbols in biker culture. It originates from an AMA statement following the 1947 Hollister incident, in which the AMA reportedly claimed that 99% of motorcyclists were law-abiding citizens. Outlaw clubs adopted the remaining 1% as their badge of honor — a declaration that they operated outside mainstream society’s rules.

Wearing a 1% patch without belonging to an outlaw motorcycle club is not just a fashion mistake — it is a declaration of identity that carries real-world implications. Do not wear this patch unless you understand exactly what it communicates and are prepared to stand behind it.

Designing Custom Patches for a Motorcycle Club

If you are a club officer or member responsible for commissioning custom patches, here are the key considerations before placing an order:

  1. Research existing colors in your region — avoid any design that resembles an established club’s colors, even accidentally
  2. Establish your patch configuration — decide whether your club uses one-piece, two-piece, or three-piece before designing
  3. Keep colors distinctive — your center emblem, rocker colors, and border colors should be unique to your club
  4. Plan all membership ranks — design patches for full members, prospects, officers, and any specialized roles upfront
  5. Choose quality materials — embroidered patches for vests need to be durable, colorfast, and properly backed for sewing or iron-on application
  6. Work with a digitizing service — any embroidered patch starts with a digitized file. Quality digitizing ensures your emblem looks sharp and holds up over years of riding

At Gem Punch, we have produced custom patches for motorcycle clubs across the US and internationally. We understand the culture and the importance of getting the design right — both artistically and respectfully. Our team can help you design a distinctive set of colors that stands on its own.

How to Order Custom Biker Patches the Right Way

When ordering custom patches for a motorcycle club, the process matters as much as the design. Here is what to prepare before placing an order:

  • Final artwork or design concept — vector files preferred (AI, EPS, SVG)
  • Patch dimensions — back patches are typically 10–12 inches wide; front patches 3–4 inches
  • Thread color selections — choose colors that match your club’s established palette
  • Backing type — sew-on is standard for vest patches; iron-on is available but less durable for heavy use
  • Quantity — most custom patch manufacturers have minimum order quantities, typically 10–50 pieces
  • Border style — merrowed (overlocked) borders are standard for MC patches

Frequently Asked Questions

Can I wear biker patches if I am not in a motorcycle club?

Yes — independent riders can wear patches that do not mimic or reference established motorcycle club colors. Novelty patches, personal achievement patches, event patches, and one-piece riding club patches are all acceptable. Avoid any configuration that looks like a three-piece MC setup.

What happens if I wear another club’s colors by mistake?

Intent matters but is difficult to prove in the moment. If you find yourself in a situation where your patches are being questioned by club members, the right approach is to be respectful, honest, and non-confrontational. Remove the offending patch immediately if asked. Ignorance of the rules is not always accepted as an excuse in MC culture.

Can women wear biker patches?

Yes — women’s chapters of motorcycle clubs exist, and female riders wear patches according to the same rules as male members. Female riders who are affiliated with a club as partners or supporters of members sometimes wear a ‘Property of’ patch, though this is a personal choice and increasingly less common in modern clubs.

How much do custom biker patches cost?

Custom embroidered biker patches typically range from $3 to $15 per patch depending on size, complexity, and quantity ordered. Back patches with large embroidered designs cost more per piece at low quantities, but the per-piece price drops significantly for orders of 50 or more. Rush orders are available at an additional fee.

What is the difference between a motorcycle club and a riding club?

A motorcycle club (MC) is a formal organization with a structured hierarchy, membership process, colors, and territorial identity. A riding club (RC) is a more casual group focused on social riding without the formal structure of an MC. RCs use one-piece patches and do not use the MC designation.

Final Thoughts

Biker patches are one of the most meaningful symbol systems in any subculture. They represent years of loyalty, earned respect, and cultural identity that goes back over 75 years. Whether you are a new rider, a club officer commissioning a fresh set of colors, or simply someone interested in the culture — understanding and respecting these rules is essential.

The rules exist not to be restrictive, but to protect a culture built on brotherhood, trust, and earned respect. Approach them with that understanding and you will navigate the world of biker patches with confidence.

Need custom biker patches for your club or riding group? Gem Punch has produced patches for motorcycle clubs worldwide — embroidered, PVC, woven, and leather. We understand the culture and deliver production-quality patches that stand up to the road. Get a free quote at gempunch.xtremlogics.com/.

How to convert PNG to vector for embroidery — pixel to path to stitch diagram by Gem Punch

How to Convert a PNG to Vector for Embroidery and Printing?

You have a logo saved as a PNG file. You need it embroidered on shirts, printed on signage, or applied to merchandise. But the vendor keeps asking for a vector file — and you are not sure what that means or how to convert a PNG to a vector for Embroidery and Printing.

This guide explains exactly how to convert a PNG to Vector for Embroidery and Printing, why it matters for embroidery and printing, how the process works step by step, and when it makes sense to do it yourself versus hiring a professional.

Quick answer: A PNG is a pixel-based image that loses quality when scaled. A vector file is built from mathematical paths that stay sharp at any size. Converting PNG to vector is essential before embroidery digitizing or large-format printing.

How to convert PNG to vector for embroidery — pixel to path to stitch diagram by Gem Punch

What Is the Difference Between PNG and Vector?

PNG — Pixel-based (raster)

A PNG is made up of a grid of pixels. Zoom in far enough and you see individual colored squares. Enlarge the image beyond its original size and it becomes blurry and pixelated. PNG files are ideal for screen display — photos, web graphics, social media images — but they are not suitable for embroidery or large-format print production.

Vector — Path-based (scalable)

A vector file is built from mathematical equations that define paths, curves, and shapes. Because the image is defined mathematically rather than as a fixed grid of pixels, it can be scaled to any size — from a thumbnail to a billboard — without any loss of quality. Common vector formats include AI (Adobe Illustrator), EPS, SVG, and PDF with vector data.

 PNG (Raster)
Built fromPixels
ScalabilityFixed — blurs when enlarged
File sizeLarger for complex images
Best forPhotos, web graphics, social media
Used in embroidery?Not directly — needs conversion first
 Vector
Built fromMathematical paths and curves
ScalabilityInfinite — sharp at any size
File sizeSmaller for logos and graphics
Best forLogos, embroidery, print, signage
Used in embroidery?Yes — ideal source for digitizing

Why Do You Need a Vector File for Embroidery?

Embroidery digitizing — the process of converting artwork into a stitch file for an embroidery machine — produces far better results when the source file is a clean vector. Here is why:

  • Vector files have clearly defined edges and color boundaries, making it easy to map stitch paths accurately
  • There is no pixelation or compression artifacts for the digitizer to work around
  • Color areas are clean and separated, making thread color selection straightforward
  • The file can be scaled to any placement size without degrading the quality the digitizer works from

When a digitizer receives a low-resolution PNG, they have to interpret blurry edges and guess at fine details — which leads to more revisions, higher cost, and lower quality output. A clean vector file eliminates all of that.

Important: Converting to vector does not replace digitizing. Vector conversion prepares your artwork for digitizing — it is a separate upstream step. You still need the embroidery digitizing service to create the actual stitch file.

How to Convert PNG to Vector: Step by Step

Step 1 — Assess your source PNG

Before converting, evaluate what you are working with. The best candidates for PNG-to-vector conversion are:

  • Logos with clean, defined shapes and solid colors
  • Icons, badges, and graphic marks
  • Text-based designs with clear letterforms
  • Simple illustrations with limited color counts

Photographic images and designs with complex gradients, shadows, or realistic shading are much harder to vectorize cleanly. They can be done, but the result will be a simplified, stylized interpretation rather than a faithful reproduction.

Step 2 — Choose your conversion method

There are three main approaches to PNG-to-vector conversion, each with different trade-offs:

Option A — Automatic tracing software

Tools like Adobe Illustrator’s Image Trace, CorelDRAW’s PowerTRACE, and the free online tool Vector Magic can automatically trace a PNG and generate a vector file. This works well for simple, high-contrast designs with clean edges and solid colors.

The limitation is that automatic tracing rarely produces clean, production-ready results for complex logos. Paths are often jagged, colors merge incorrectly, and anchor points multiply unnecessarily. The output usually requires significant manual cleanup before it is usable.

Option B — Manual redraw in vector software

A designer uses vector software (Adobe Illustrator, CorelDRAW, or the free Inkscape) to manually trace over the PNG, rebuilding every shape and path by hand. This produces the cleanest possible result — smooth curves, correct colors, minimal anchor points — but requires design skill and takes significantly more time than auto-tracing.

This is the method professional vector conversion services use for complex or detailed logos.

Option C — Hire a professional vector conversion service

For business logos and designs that will be used commercially, the fastest and most reliable option is hiring a professional. A good vector conversion service will manually redraw your artwork, deliver a clean AI or EPS file, and typically turn it around within 24 hours for $15–$50 depending on complexity.

Step 3 — Clean up the vector file

Whether you use auto-tracing or manual redraw, the file should be reviewed and cleaned up before use:

  1. Remove unnecessary anchor points — too many points create jagged curves
  2. Simplify overlapping shapes — merge fills that should be continuous
  3. Separate colors onto individual layers for easy editing
  4. Check that all paths are closed — open paths cause issues in both printing and digitizing
  5. Convert text to outlines — this ensures the font is embedded and does not depend on the recipient having the same font installed

Step 4 — Save in the correct format

The right output format depends on what the vector file will be used for:

Use CaseRecommended Format
Embroidery digitizingAI or EPS (preferred), SVG accepted
Large-format print / signageAI, EPS, or PDF (vector)
Screen printingAI or EPS with separated colors
Web useSVG
General sharing / editingPDF with vector data

Can You Do It Yourself for Free?

Yes — several free tools can convert simple PNGs to vector:

  • Inkscape (free desktop software) — use Path → Trace Bitmap for auto-tracing
  • Vector Magic (online) — free trial available, produces cleaner auto-traces than most tools
  • Adobe Express (free tier) — basic auto-trace for simple designs
  • Vectorizer.io — free online auto-tracer for simple logos

For simple, clean logos with 2–4 solid colors, these tools can produce usable results. For anything more complex — detailed emblems, fine typography, multi-color badges — the output will typically need significant manual cleanup or professional intervention.

Rule of thumb: If your logo has more than 4 colors, fine detail, or thin lines under 1mm, auto-tracing tools will struggle. A professional conversion will save you time and produce a far cleaner result.

What Does Professional Vector Conversion Cost?

Professional vector conversion is priced based on design complexity:

Complexity LevelTypical Price Range
Simple logo (1–3 colors, clean shapes)$15 – $30
Medium complexity (4–6 colors, some detail)$30 – $60
Complex design (many colors, fine detail)$60 – $120
Full redraw of damaged/low-res artwork$80 – $150+

Like embroidery digitizing, vector conversion is a one-time cost. Once you have a clean vector file, you own it and can use it for every future project — embroidery, print, merchandise, signage — without paying again.

Common Mistakes to Avoid

  • Using a low-resolution PNG as the source — a 72 DPI web graphic produces poor conversion results. Use the highest resolution version available
  • Accepting auto-trace output without reviewing it — always open the file and check for jagged paths, color errors, and missing detail
  • Forgetting to convert text to outlines — missing fonts cause design files to display incorrectly when opened on another machine
  • Using a vector PDF as a source without checking it — some PDFs contain rasterized images, not actual vector data. Open in Illustrator and check
  • Skipping vector conversion and sending a PNG directly to the embroidery digitizer — always convert first for the best stitch output

PNG to Vector for Printing vs Embroidery — Is There a Difference?

The vector conversion process is the same regardless of the end use. However, the requirements downstream differ:

  • For embroidery: the vector file is handed to a digitizer who converts it into a stitch file. Color counts matter — embroidery uses thread colors, so designs with 15+ colors may need simplification
  • For screen printing: colors need to be separated onto individual layers, one per ink color. Spot colors (Pantone references) are preferred over CMYK
  • For large-format print: color mode should be CMYK for print output. RGB vector files need to be converted before sending to a print provider
  • For digital/web use: SVG format is ideal — it is resolution-independent and loads fast in browsers

Frequently Asked Questions

Can I convert a JPG to vector as well?

Yes — the process is identical. JPG and PNG are both raster formats and both require the same vector conversion workflow. JPGs are often lower quality due to compression artifacts, so provide the highest quality JPG available.

Will the vector file look exactly like my PNG?

For simple logos with clean shapes and solid colors, yes — a professional conversion will be virtually identical. For complex designs with gradients, shadows, or photographic elements, the vector version will be a stylized interpretation. Your conversion service should show you a preview before you approve the final file.

How long does vector conversion take?

Professional services typically deliver within 12–24 hours for standard complexity designs. Rush turnaround (4–8 hours) is usually available for an additional fee.

Do I need to convert to vector if I already have a high-resolution PNG?

For embroidery — yes, always. Even a 300 DPI PNG needs to be converted to vector before digitizing for best results. For large-format print over roughly A3 size, vector is also strongly recommended to avoid any quality loss at scale.

Final Thoughts

Converting a PNG to vector is a foundational step for anyone who needs their logo or artwork used in embroidery, large-format print, screen printing, or merchandise production. It is a one-time investment that makes every subsequent production job faster, cheaper, and higher quality.

For simple logos, free auto-tracing tools can get you there. For business-critical artwork, a professional conversion delivers clean, production-ready files that work flawlessly across every application.

Need your PNG or JPG converted to a clean vector file? Gem Punch offers professional vector conversion with 24-hour turnaround, delivered in AI, EPS, or SVG format. Get a free quote at gempunch.xtremlogics.com/.

Beyond Biker Jackets: Unconventional Ways to Use PVC Patches in Home Decor

Best Embroidery File Formats Explained: DST, PES, JEF, EMB & More

Sending the wrong file format to your embroiderer is one of the most common — and easily avoidable — mistakes in custom apparel. Here’s everything you need to know.


Beyond Biker Jackets: Unconventional Ways to Use PVC Patches in Home Decor

If you’ve ever ordered custom embroidery and been asked to send your “embroidery file,” you may have run into a wall. What exactly is an embroidery file? Why can’t they just use your logo PNG or PDF? And why are there so many different formats — DST, PES, JEF, EMB, EXP, VIP, VP3 — each seemingly more cryptic than the last?

This guide completely demystifies embroidery file formats. Whether you’re a business owner ordering custom patches, a brand manager coordinating uniform production, or a hobbyist digitizing your first design, you’ll leave here knowing exactly what format you need, why it matters, and how to get it right.


Why Embroidery Files Are Different From Regular Image Files

Before diving into specific formats, it helps to understand why embroidery requires its own file types at all.

A standard image file — JPEG, PNG, SVG, PDF — describes your design in terms of pixels or vectors. It tells a screen (or printer) what colors go where. Embroidery machines don’t read pixels. They read stitch instructions.

An embroidery file is essentially a choreography script for a needle. It tells the machine:

  • Where to move (X/Y coordinates)
  • When to stitch and when to jump
  • Which thread color to use (and when to cut and change)
  • What stitch type to use (satin, fill, running stitch, etc.)
  • The stitch density and direction

This process of converting artwork into stitch instructions is called digitizing, and it can be done manually by a skilled digitizer or semi-automatically by embroidery software. The output of that process is an embroidery file — and the format of that file depends on the machine that will read it.


The Main Embroidery File Formats Explained

DST — Tajima Data Stitch Tajima

Most widely accepted. The industry standard.

DST is the closest thing embroidery has to a universal format. Developed by Tajima, one of the world’s leading commercial embroidery machine manufacturers, DST files are accepted by virtually every professional embroidery service and most commercial machines.

If you’re ordering from a professional embroiderer and they haven’t specified a format, DST is almost always a safe choice. It stores stitch data efficiently — coordinates, jump stitches, and color stops — in a compact binary format.

Key facts:

  • Supported by nearly all commercial embroidery machines
  • Does not store thread color information (colors must be assigned manually by the operator)
  • No built-in image preview — the operator works from a separate reference image
  • Ideal for commercial and industrial production runs

When to use it: When ordering custom patches, uniforms, or any commercial embroidery and your provider hasn’t specified a format. If in doubt, ask for DST.


PES — Brother Embroidery Format

Best for Brother and Babylock machines. Common in retail and small-scale production.

PES is the native format for Brother embroidery machines — one of the most popular brands for both home embroidery and smaller commercial operations. Unlike DST, PES files do store thread color information and include a thumbnail preview of the design, making them more user-friendly for operators.

PES files are widely used in North America, particularly in smaller embroidery shops, monogramming services, and DIY embroidery setups. You’ll also find them commonly used for patches made on Brother PR and multi-needle machines.

Key facts:

  • Native to Brother and Babylock machines
  • Stores thread color data and a built-in design thumbnail
  • Multiple versions exist (PES Version 1 through 10+) — compatibility matters
  • Widely used for home embroidery and small-batch commercial work

When to use it: When working with a Brother machine operator or ordering smaller runs from a local embroidery shop. Ask which PES version they need — it matters more than many people realize.


JEF — Janome Embroidery Format

Native to Janome machines. Common in home and mid-tier commercial embroidery.

JEF is Janome’s proprietary format, used across the Janome and Elna machine families. Like PES, it stores color information and is well-suited for home and semi-professional embroidery work. While less universal than DST, JEF files are reliable and high quality within the Janome ecosystem.

Some embroidery software will export to JEF automatically when it detects Janome machine settings, making it straightforward to work with in the right environment.

Key facts:

  • Native to Janome and Elna machines
  • Includes thread color and stitch data
  • Less common in large commercial facilities but standard for Janome users
  • Compatible with many third-party embroidery software applications

When to use it: When your embroiderer is working on a Janome machine, or when specified by your digitizing service.


EMB — Wilcom Embroidery Format

The most feature-rich format. Used by professional digitizers.

EMB is the native project format for Wilcom, the industry-leading professional embroidery digitizing software used by most high-end commercial digitizers worldwide. EMB files are not machine-readable directly — they’re design files, not output files.

Think of EMB the way you’d think of a Photoshop PSD file: it’s the editable source file that a digitizer works in, containing all the layers, stitch types, color objects, and design properties in an editable state. When production is ready, the digitizer exports from EMB into a machine-readable format like DST or PES.

Key facts:

  • Not a machine format — it’s a design/project format
  • Editable: all stitch objects, colors, and properties can be modified
  • Only openable in Wilcom software (or compatible programs)
  • Extremely high fidelity — the gold standard for complex, detailed designs

When to use it: Ask for EMB files when you want to retain the ability to edit or resize your design in the future without re-digitizing from scratch. It’s the “source file” of your embroidery design — valuable to own.


EXP — Melco Expanded Format

Common in North American commercial shops. A Melco standard.

EXP is the native format for Melco embroidery machines, which are widely used in commercial embroidery operations across North America. Melco machines are popular in uniform programs, team apparel, and mid-to-large-scale production facilities.

EXP files are similar in structure to DST — they store stitch coordinates but don’t include color data. Thread colors are mapped separately by the machine operator.

Key facts:

  • Native to Melco machines
  • No embedded color data — colors assigned manually
  • Common in North American commercial embroidery facilities
  • Reliable for production-scale runs

When to use it: When your embroiderer runs Melco equipment, which is common in North American uniform shops.


VIP and VP3 — Pfaff / Husqvarna Viking Formats

Home and semi-commercial embroidery, popular in Europe.

VIP and its successor VP3 are the native formats for Pfaff and Husqvarna Viking machines — well-regarded brands in both home and semi-professional embroidery, particularly popular in Europe and among serious hobbyists.

VP3 is the more modern of the two, with improved stitch data handling and broader software support. Both formats include color data and are readable by a range of digitizing software packages.

Key facts:

  • VIP is the older format; VP3 is the current standard
  • Used by Pfaff, Husqvarna Viking, and Designer machines
  • Include thread color and design data
  • Common in European markets and home embroidery communities

When to use it: When working with Pfaff or Viking machine operators, or when specified by your digitizer for European production.


XXX — Singer / Compucon Format

Singer’s proprietary format, used with Singer embroidery machines and the Compucon software ecosystem. Less common in commercial production but relevant for Singer machine owners and some specialized digitizing services.

HUS — Husqvarna Format (Legacy)

The older Husqvarna format, largely superseded by VIP and VP3 but still referenced by some older machines and software versions.

SEW — Janome Legacy Format

An older Janome format preceding JEF, still supported by some machines and software but generally being phased out in favor of JEF.


Quick Reference: Embroidery File Format Comparison

FormatBrand/MachineColor DataEditableBest For
DSTTajima / UniversalNoNoCommercial production, universal submissions
PESBrother / BabylockYesNoSmall-batch, retail, home embroidery
JEFJanome / ElnaYesNoJanome machine operators
EMBWilcom (software)YesYesProfessional digitizers, editable source files
EXPMelcoNoNoNorth American commercial shops
VP3Pfaff / VikingYesNoEuropean and home embroidery
VIPHusqvarna VikingYesNoOlder Viking machines
XXXSinger / CompuconYesNoSinger machine operators

What Format Should You Send to Your Embroiderer?

The simplest answer: ask your embroiderer what they need. Every professional shop will have a preferred format based on the machines they run. Sending the wrong format doesn’t always mean a job gets rejected — most shops have digitizing software that can convert between formats — but it can introduce fees, delays, or subtle quality losses in translation.

That said, here’s a practical guide:

Ordering custom patches from a professional service → Ask for DST or send your artwork (AI, EPS, or high-res PNG/PDF) and let them digitize it. Most patch manufacturers handle digitizing in-house.

Working with a local embroiderer → Ask which machine they use. Brother operators need PES, Janome operators need JEF, Melco operators need EXP.

Hiring a freelance digitizer → Request the EMB source file along with your production format. This protects your investment — if you need to resize or change colors later, you won’t need to pay for re-digitizing from scratch.

Running your own embroidery machine at home → Your machine’s manual will specify which formats it reads. Brother home machines use PES; Janome home machines use JEF; Pfaff uses VP3.


What If You Only Have a Logo or Image File?

This is the most common situation for businesses ordering embroidery for the first time. You have a PNG, JPEG, PDF, or vector (AI/EPS/SVG) of your logo — and that’s it.

That’s perfectly fine. Here’s what happens:

  1. Your embroiderer or digitizing service takes your artwork
  2. A human digitizer (or digitizing software) recreates the design as stitch instructions
  3. The output is an embroidery file in the format your machine needs

The quality of that digitizing process determines how well your logo reproduces in thread. This is why vector files (AI, EPS, SVG) are always preferred over raster images — they’re infinitely scalable and give the digitizer clean, precise paths to work with. If you only have a raster image, a high-resolution version (at least 300 DPI at actual size) will produce better results than a low-res web image.


A Note on File Conversion

You’ll find plenty of online tools that promise to convert a JPEG or PNG directly into an embroidery file. Be cautious. Auto-conversion tools produce technically readable files, but they almost never produce good embroidery. Stitch types are wrong, density is off, small text becomes a mess of stitches, and outlines don’t hold.

Professional digitizing — done by a skilled human who understands how thread behaves — is worth the cost, especially for logos and brand marks where quality matters. A professionally digitized EMB or DST file will outlast dozens of jobs and pay for itself quickly.


Final Takeaway

Embroidery file formats aren’t as complicated as they first appear once you understand the logic behind them. The key points to remember:

  • DST is the universal commercial standard — when in doubt, it’s the safe choice
  • PES is for Brother machines, JEF for Janome, VP3 for Pfaff/Viking
  • EMB is the editable source format — always worth requesting alongside your production file
  • Always ask your embroiderer what format they need before submitting artwork
  • Send vector files (AI, EPS, SVG) whenever possible — they digitize far more cleanly than raster images

Ready to get your design into production? Browse our custom patch and embroidery services and our team will handle digitizing, format conversion, and production — start to finish.