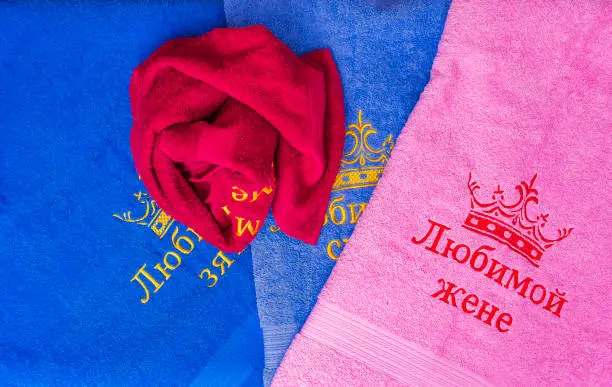
You want to add text to your embroidery design. Maybe it’s a name, date, or company name. But the text is small and you’re worried: “Will it be readable when embroidered?”
This is the right worry. Small text is the #1 problem in embroidery digitizing. Get it wrong and your embroidery looks unprofessional or unreadable.
This guide reveals exactly Digitizing Small Text for Embroidery: minimum sizes, best fonts, common mistakes, and solutions.
Minimum Embroidery Text Sizes
The Critical Rule
Minimum readable text height: 1/4 inch (6.4mm)
This is non-negotiable. Text smaller than this becomes illegible when embroidered.
Practical Text Sizes by Use
Size
Readability
Best Use
0.25″ (6mm)
Barely readable
Last resort only
0.35″ (9mm)
Acceptable
Small text, large fonts
0.5″ (12.7mm)
Good
Standard small text
0.75″ (19mm)
Excellent
Primary text
1″ (25mm)
Perfect
Large, bold text
Rule of thumb: If text is hard to read on your computer at 50% zoom, it will be unreadable when embroidered.
Best Fonts for Small Text Embroidery
Fonts That Work
Bold Sans-Serif (BEST):
Arial Black
Helvetica Bold
Trebuchet Bold
Impact
Characteristics: Thick strokes, clear letterforms, no serifs
Why: Thin details disappear in embroidery; bold weights stay visible
Fonts to Avoid
Don’t use for small text:
Serif fonts (Times, Garamond) — Serifs disappear
Script fonts — Letters connect, become illegible
Thin fonts — Strokes too thin to embroider
Decorative fonts — Too complex for small size
Common Small Text Mistakes
Mistake #1: Text Too Small
What happens: Text becomes illegible blob
How to fix: Increase minimum to 0.35″ or larger
Mistake #2: Wrong Font Choice
What happens: Serifs disappear, letters merge together
How to fix: Use bold sans-serif only for small sizes
Mistake #3: Too Many Letters
What happens: Letters run together, text unreadable
How to fix: Increase letter spacing or increase size
Mistake #4: Thin Font Weight
What happens: Strokes too thin, text disappears
How to fix: Use bold weight minimum
Solutions for Small Text Challenges
Solution 1: Increase Size
Simplest solution: Make text larger
Minimum readable: 0.25″
Comfortable readable: 0.5″+
If space limited, consider reducing content instead
Solution 2: Simplify Font
Use bold sans-serif only:
Arial Black
Helvetica Bold
Impact
Trebuchet Bold
Avoid: Serifs, script, thin weights
Solution 3: Adjust Letter Spacing
Increase spacing between letters:
Prevents letters from merging
Makes text more readable
Professional appearance
Solution 4: Reduce Content
Alternative: Use fewer words
“Est. 2024” instead of “Established 2024”
“NYC” instead of “New York City”
Abbreviate where possible
Solution 5: Split into Multiple Lines
Alternative: Use two lines instead of one
Line 1: Main text (larger)
Line 2: Secondary text (smaller, bold)
Improves readability significantly
Font Recommendations by Size
0.25″ – 0.35″ (Minimum Sizes)
ONLY bold sans-serif:
Arial Black
Helvetica Bold (must be bold)
Impact
Rules:
ALL CAPS only
Maximum 10-15 characters
Bold weight only
No lowercase
0.5″ – 0.75″ (Small Text)
Bold sans-serif recommended:
Arial Bold
Helvetica Bold
Trebuchet Bold
Can use:
Mix of upper and lowercase
Slightly thinner fonts
More flexibility
0.75″+ (Standard Text)
Any professional font:
Any sans-serif
Professional serif fonts
Script fonts (less problematic at size)
Decorative fonts can work
Testing Small Text Before Production
Step 1: Print at Actual Size
Print your design at actual embroidered size
Step 2: Assess Readability
Can you read it easily?
Is it clear?
Would it look good at arm’s length?
Step 3: Get Sew-Out Test
Before production run, request test stitch-out of small text
Cost: $15-30 (worth every penny)
Step 4: Adjust if Needed
If illegible in test:
Increase size
Change font
Add spacing
Simplify content
FAQ: Small Text in Embroidery
Why does small text disappear in embroidery?
Embroidery thread has thickness (about 0.3mm). Very small designs can’t accommodate thread properly, causing loss of fine detail. Bold, larger text stays visible.
What’s the smallest readable text size?
Minimum is technically 1/4″ (6.4mm), but 3/8″ (9.5mm) or larger is recommended for comfortable readability.
Can I use any font for small text?
No. Bold sans-serif fonts only for text under 0.5″. Serif and thin fonts lose readability at small sizes.
Should I request a sew-out test?
Yes, absolutely. For any text under 0.5″, a sew-out test is invaluable. Ensures text is readable before production.
Gem Punch specializes in small text embroidery: ✓ Expert font selection ✓ Optimal sizing consultation ✓ Test stitch-outs included ✓ Guaranteed readable results
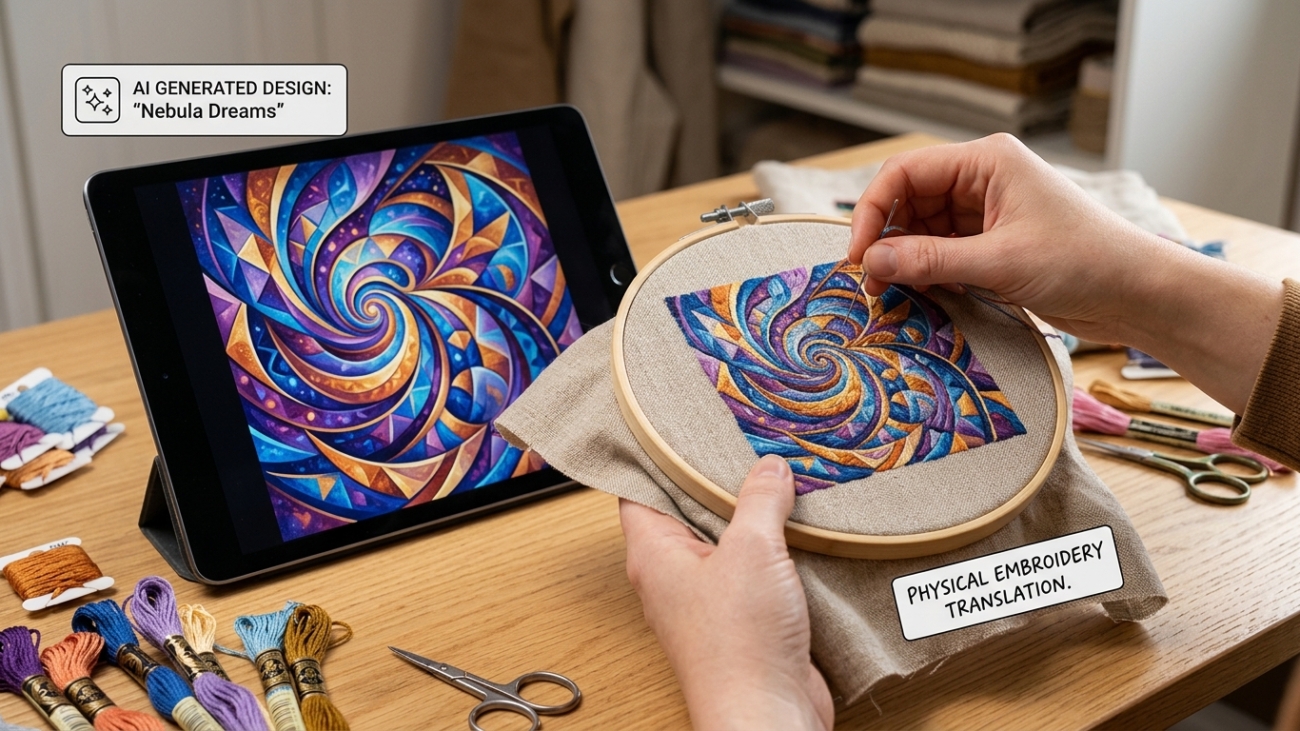
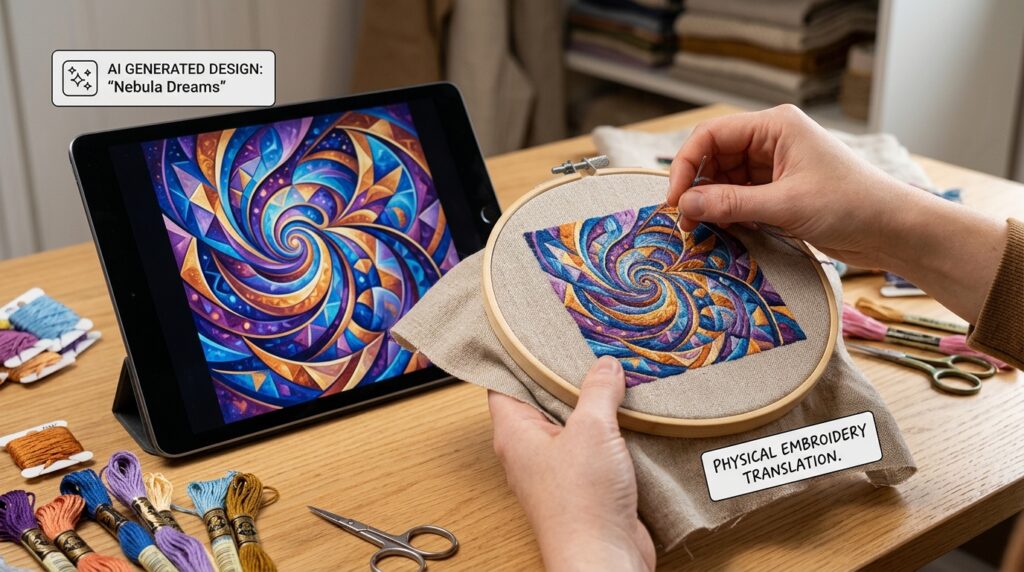
Artificial intelligence can generate stunning artwork in seconds. Detailed animals, complex logos, realistic textures, and intricate patch concepts are now easier to create than ever before.
Artwork that looks perfect on a screen is often not suitable for embroidery digitizing without significant modifications.
Embroidery is not a printing process. Every design must be recreated using physical thread, fabric, and machine stitches on your actual garment or patch. This introduces hard technical limitations that frequently require AI artwork to be simplified, modified, or completely redesigned before professional digitizing.
Understanding these limitations will help you create better AI-generated designs, reduce expensive revisions, avoid common digitizing mistakes, and achieve professional-quality embroidered results on the first try.
The AI Artwork Problem: Why Your Embroidery Design Looks Different
If you’ve ever submitted AI-generated artwork for embroidery digitizing, you’ve likely experienced this frustration:
✗ “Why doesn’t my embroidery file look exactly like the AI image?” ✗ “Why were some details removed or simplified?” ✗ “Why do the colors look completely different?” ✗ “Why can’t all the fine details fit on a hat or small patch?” ✗ “Why can’t I just use my AI artwork directly for embroidery?”
The answer is simple but important:
AI artwork is created for digital screens. Embroidery designs are created with physical thread on fabric.
These are fundamentally different mediums with completely different technical capabilities and limitations. What looks absolutely perfect on your computer screen may be impossible to reproduce accurately with thread stitches.
How Embroidery Digitizing Works (And Why AI Art Needs Modification)
From Pixels to Stitches: The Conversion Process
When you view AI-generated artwork on a screen, every pixel contains unlimited detail, smooth gradients, realistic shadows, complex textures, and countless color variations.
Embroidery machines don’t work that way.
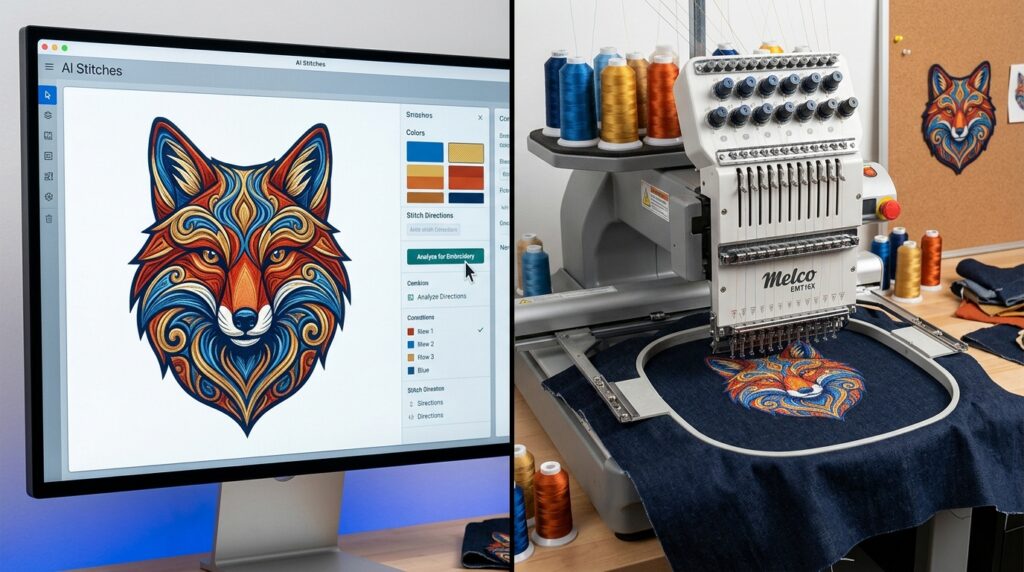
Before AI artwork can become an embroidered design, a professional digitizer must convert your image into thousands of individual stitch commands that tell the embroidery machine:
Where each stitch should be placed
Which direction each stitch should run
How dense the stitching should be (stitch density)
When thread colors should change
What stitch type to use (satin, fill, backstitch, etc.)
How to handle curves, angles, and transitions
Why You Can’t Just “Convert” AI Art to Embroidery
This is the critical misunderstanding that leads to failed embroidery projects:
You cannot simply convert an AI image into embroidery stitches the way you’d print an image to paper.
A printer can reproduce any pixel from your digital file. An embroidery machine cannot.
Every element of your AI design must be manually translated into thread by a skilled digitizer who understands:
Embroidery machine capabilities and limitations
Fabric types and how they affect stitching
Thread color matching and color theory
Stitch density optimization for different materials
How designs will look when worn on actual garments or patches
The goal of embroidery digitizing is NOT to recreate every pixel of your AI artwork. The goal is to create a design that:
Sews cleanly and professionally
Looks sharp and intentional on fabric
Performs well across different embroidery machines
Works at your intended size
Maintains the spirit and essence of your original design
When you understand this distinction, you understand why AI artwork almost always requires modification before professional digitizing.
The 5 Biggest Problems With AI Artwork for Embroidery
Problem #1: Too Much Detail (The Complexity Issue)
The issue: AI artwork often includes incredibly fine details—tiny textures, intricate backgrounds, delicate shadows, and elaborate patterns that look amazing on screen but become unreadable disasters when stitched.
Why it happens: AI is trained to maximize visual complexity and realism. When you ask for “detailed,” “photorealistic,” or “intricate” artwork, AI delivers. But embroidery doesn’t reward detail—it rewards clarity.
What happens when you try: Fine details become thick blobs of thread. Thin lines merge together. The finished embroidery looks muddy and unclear instead of sharp and professional.
The solution: Simplify your AI prompt. Request “bold shapes,” “clean outlines,” and “minimal fine detail” instead of photorealism.
Problem #2: Text That’s Too Small (The Readability Crisis)
The issue: Text below 1/4″ (0.25 inches) in height becomes unreadable when embroidered. Yet AI artwork commonly includes tiny lettering, small copyright marks, and decorative text that looks perfect on screen.
Why it happens: On a screen, text can be infinitely small and still be readable. Embroidery doesn’t scale that way—thread has physical thickness.
What happens when you try: Small text becomes an illegible blob of stitches. Letters merge together. The text disappears or becomes confusing.
The solution: Specify minimum text size in your AI prompt: “Large readable text, minimum 1/4 inch height, bold sans-serif font, no serifs.”
Problem #3: Thin Lines & Outlines (The Fragility Problem)
The issue: AI artwork frequently includes thin, delicate outlines and fine line work that looks elegant on screen but won’t embroider properly.
Why it happens: Digital art can have 1-pixel-thick lines. Thread can’t replicate that fineness—stitches have minimum thickness.
What happens when you try: Thin lines disappear entirely or become distorted. Delicate outlines become thick and clumsy. The design loses its intended elegance.
The solution: Request “bold outlines” and “strong contrast” in your AI prompt. Ensure all lines are thick enough to survive the embroidery conversion.
Problem #4: Unlimited Colors (The Thread Limitation)
The issue: AI artwork uses unlimited digital colors. Your computer can display millions of color variations in a single design. Embroidery machines cannot.
Why it happens: A sunset might contain 15+ subtle color variations. A realistic animal might have 10+ different shades of brown. Digital displays can show all of these simultaneously.
How embroidery machines work: A single-needle machine holds ONE thread color at a time. Multi-needle machines hold 6-15 colors (sometimes up to 20). Even with multiple needles, each color change takes time and adds complexity.
What happens when you try: Professional digitizers must reduce your 20+ color variations down to 6-12 thread colors. Colors look simplified, less photorealistic, and sometimes inaccurate.
Why it matters: Each extra color adds:
More production time
Higher costs for the customer
More thread changes (and potential errors)
Greater complexity for the embroidery machine
The solution: Generate AI artwork with a limited color palette from the start. Prompt: “Limited color palette, maximum 8 colors, use primary colors only, avoid gradients and subtle shading.”
Problem #5: Design Size Incompatibility (The Scaling Nightmare)
The issue: AI artwork created at large sizes doesn’t work when scaled down. A detailed design that looks great as a large back patch becomes an illegible mess when reduced to fit a 2″ cap or left chest logo.
Why it matters: Common embroidery placements have strict size limitations:
Cap/hat embroidery: 2-3 inches maximum
Left chest logo: 3-4 inches typical
Polo shirt front: 3-5 inches typical
Jacket front: 4-6 inches typical
Small patch: 2-3 inches common
What happens: When you shrink a detailed AI design to fit these spaces, fine lines become invisible, small text disappears, and color details merge into muddy blobs.
The solution: Design AI artwork with your final embroidery size in mind from the beginning. Smaller designs need simpler artwork.
What Is “Embroidery-Ready” AI Artwork?
Embroidery-ready artwork is AI-generated design that has been created specifically with embroidery digitizing in mind. It’s artwork prepared to be cleanly, professionally, and accurately recreated using thread stitches.
A design may look stunning as digital art, but that doesn’t automatically mean it will digitize beautifully or stitch cleanly on fabric. Embroidery-ready artwork removes, simplifies, or modifies the elements that would become messy, unreadable, or too delicate when converted to embroidery stitches.
Characteristics of Embroidery-Ready AI Artwork
✓ Clean, bold outlines — Strong, visible edges (not thin or delicate) ✓ Solid color areas — Flat colors, not gradients or realistic shading ✓ Readable text — Large minimum 1/4″ height, bold sans-serif fonts ✓ Simple shapes — Clear geometric forms, not overly complex ✓ Adequate spacing — Room between design elements for thread ✓ Thick enough lines — All lines visible and reproducible with stitches ✓ Size-appropriate details — Details match your final embroidery size ✓ Minimal special effects — No glowing edges, realistic shadows, tiny textures, or photo effects ✓ Strong contrast — Clear visual separation between elements ✓ Limited color palette — 6-12 colors maximum, not 20+
What Changes During Professional Embroidery Digitizing
When your AI artwork reaches a professional digitizer, several modifications typically occur:
Glowing edges → Removed or converted to clean outlines
Realistic shadows and gradients → Simplified to solid thread colors
Tiny textures and details → Removed or enlarged
Thin outlines → Thickened for embroidery reproduction
Unlimited colors → Reduced to 6-15 thread colors
Fine line work → Simplified to bold strokes
Delicate backgrounds → Removed or drastically simplified
This is not a failure of digitizing. This is the necessary translation between two different mediums.
The goal is to preserve the essence and spirit of your design while creating an embroidery file that looks professional, stitches cleanly, and performs well on actual fabric.
How to Create Embroidery-Friendly AI Artwork (Step-by-Step)
If you’re generating AI artwork specifically for embroidery digitizing, follow these guidelines:
Step 1: Use Embroidery-Specific AI Prompts
Instead of generic prompts, include embroidery-specific instructions:
Poor prompt: “Create a detailed logo with realistic shading and complex textures”
Better prompt: “Create a bold embroidery patch design with clean outlines, limited colors, readable text, and simple shapes. Make it suitable for embroidery digitizing.”
Best prompt: “Embroidery patch design: bold outlines, maximum 8 colors, clean shapes, large readable text minimum 1/4 inch, strong contrast, minimal detail, suitable for 3-inch patch size”
Step 2: Design for Your Intended Size
Consider where and how your embroidery will be used:
For small designs (2-3 inches): Request simple, bold, minimal-detail artwork For medium designs (4-6 inches): Request moderate detail, bold outlines, clean shapes For large designs (6+ inches): More detail is acceptable, but keep it clean
Step 3: Limit Your Color Palette
Request artwork with a specific number of colors:
“Limited color palette: Use only 6-8 colors maximum. Choose primary colors that contrast well. Avoid subtle gradients, shading, and blended colors.”
Step 4: Prioritize Readability
If your design includes text:
“Large, bold, readable text: Minimum 1/4 inch height. Use bold sans-serif fonts only. Ensure strong contrast between text and background. No script fonts or serifs.”
Step 5: Request Bold, Clean Elements
Emphasize simplicity and clarity:
“Bold shapes, clean outlines, strong contrast, minimal fine detail, no thin lines, no glowing effects, no realistic shading.”
Common AI-to-Embroidery Mistakes (And How to Avoid Them)
Mistake #1: Trusting That AI Artwork Will Digitize “As-Is”
Reality: Almost all AI artwork requires modification before professional digitizing. Plan for this.
Solution: Budget for digitizer consultation and potential design revisions. Ask your digitizer to recommend simplifications before starting work.
Mistake #2: Requesting Maximum Detail and Complexity
Reality: “Detailed” and “photorealistic” AI artwork almost never digitizes well.
Solution: Request simple, bold designs. Details can be added back manually if needed, but removing complex details is harder and more expensive.
Mistake #3: Using Unlimited Colors Without Thought
Reality: Each color in your AI design requires a thread change during embroidery. More colors = higher cost, longer production time, more complexity.
Solution: Limit colors from the start. Ask AI to generate artwork with 6-8 colors maximum.
Mistake #4: Scaling Large Designs Down Without Simplification
Reality: A detailed 10-inch design doesn’t work at 2 inches.
Solution: Design AI artwork at your actual embroidery size from the beginning.
Reality: Embroidery is not a printing process. It has real physical limitations.
Solution: Research embroidery design requirements before creating AI artwork. Understand what does and doesn’t work.
AI Artwork for Embroidery: A Practical Example
Let’s say you want a custom patch with an eagle design.
Your first AI prompt (not embroidery-friendly): “Create a photorealistic, detailed eagle with realistic feathers, complex shading, realistic eyes, and intricate background scenery. Maximum detail. 4K quality.”
Result: 15+ colors, countless fine details, thin lines, complex shadows. Requires extensive modification before digitizing. Expensive. Disappointing final result.
Your revised AI prompt (embroidery-friendly): “Create an embroidery patch design: Bold eagle design with clean outlines, simple shapes, strong contrast. Limited color palette: brown, tan, white, black only (4 colors maximum). Large readable wing details. Bold facial features. Clean background. Suitable for 3-inch embroidered patch. No realistic shading or fine textures.”
The difference? The second design respects embroidery limitations from the start.
Frequently Asked Questions About AI Artwork and Embroidery Digitizing
Can I use any AI artwork for embroidery?
Technically yes, but most AI artwork will require significant modification before professional digitizing. AI artwork specifically created for embroidery works much better and requires fewer revisions.
Will my AI design look exactly like the original after embroidery digitizing?
Rarely. Professional digitizers must simplify, remove, or modify elements that can’t be cleanly reproduced with thread. The goal is to preserve the essence of the design while creating something that stitches beautifully.
How much will my AI artwork need to be changed?
It depends on the artwork. Simple, bold designs with limited colors require minimal changes. Detailed, photorealistic designs with complex colors and fine details require extensive modifications.
Can I provide my own AI artwork and have it digitized without changes?
Possibly, if your AI artwork was created with embroidery in mind. If it was created for general digital use, expect your digitizer to recommend modifications.
What’s the best way to generate AI artwork for embroidery?
Use prompts that request embroidery-specific characteristics: bold outlines, clean shapes, limited colors, readable text, minimal detail, and strong contrast.
Will detailed AI artwork cost more to digitize?
Yes. Complex artwork with many colors, fine details, and intricate elements requires more digitizer time and expertise. Simple artwork digitizes faster and costs less.
Should I simplify my AI artwork myself or let the digitizer do it?
Have a professional digitizer evaluate your artwork. They understand embroidery limitations and can recommend the best simplifications. But creating embroidery-friendly artwork from the start saves time and money.
Getting Professional Help: Gem Punch’s AI-to-Embroidery Solution
AI-generated artwork is a fantastic starting point for embroidery design. But it usually needs professional expertise to become a digitizing-ready file.
That’s where professional embroidery digitizing comes in.
At Gem Punch, our expert digitizers work with AI artwork every single day. We:
✓ Evaluate your AI design for embroidery feasibility ✓ Recommend simplifications that improve stitching results ✓ Simplify and modify your artwork for professional embroidery ✓ Convert to production-ready files that stitch beautifully ✓ Provide digital proofs before you commit to production ✓ Include unlimited revisions until you’re completely satisfied ✓ Test on your actual fabric to ensure quality
Whether your AI artwork needs minor tweaks or major revision, our digitizers know exactly how to translate your design into professional-quality embroidery.
The Bottom Line: AI Artwork + Professional Digitizing = Success
Artificial intelligence is an amazing tool for creating patch and embroidery design concepts. AI artwork can inspire, guide, and accelerate your creative process.
But AI artwork is a starting point, not a finished embroidery file.
Between your AI design and your finished embroidered patches or apparel, you need professional digitizing expertise. This expertise:
Translates digital art to thread
Simplifies complexity appropriately
Optimizes for your specific fabric and size
Ensures professional quality
Prevents costly mistakes
The best embroidery designs are not always the most detailed. They’re the ones that look clear, balanced, and beautiful when stitched on actual fabric.
If you have AI-generated artwork and want to explore embroidery options, submit your design for a free professional digitizing consultation. Our team will review your artwork, recommend simplifications if needed, and provide accurate pricing for converting your AI art into professional-quality embroidery.
You’ve spent months designing the perfect patch. The colors are vibrant, the details are sharp, and you can already imagine how it will look on your uniforms, jackets, or merchandise. Then you send the design to a digitizer, expecting magic. What comes back is… disappointing. The lines are thick and blurry. Text is illegible. Colors don’t match. The patch feels stiff and uncomfortable.
This scenario plays out thousands of times yearly because many people don’t understand embroidery digitizing—or they choose digitizers who cut corners.
Digitizing is the critical bridge between your artwork and the finished patch.
Bad digitizing means wasted money, damaged reputation, and unhappy customers. Good digitizing means professional results that exceed expectations.
This guide breaks down the 10 most common Embroidery Digitizing Mistakes and how to avoid them. Whether you’re ordering patches for corporate uniforms, sports teams, motorcycle clubs, or military units, understanding these errors will save you money, time, and frustration.
What is Digitizing? (And Why It Matters)
Embroidery digitizing is the process of converting artwork into a file that embroidery machines can understand. Think of it like translating a language—your artwork speaks design language, but embroidery machines speak stitch language. A digitizer is the translator.
The digitizer makes critical decisions:
Which stitches go where
How dense the stitching should be
How to handle curves and angles
How to incorporate multiple colors
How to simplify complex designs for embroidery
Bad digitizing = bad patches. Good digitizing = professional results.
MISTAKE #1: Wrong Stitch Density
What Happens:
Puckering: Fabric wrinkles under heavy stitching
Loose stitches: Embroidery falls apart after a few washes
Overly heavy feel: Stitches pull and stretch the fabric
Sagging: Patch droops or distorts
Uncomfortable wear: Stiff, scratchy patches that irritate skin
Why It Happens:
Stitch density is the number of stitches per inch (SPI). Different fabrics require different densities:
Jersey fabric (t-shirts): Requires LOW density (4-5 SPI) because the stretchy fabric distorts easily
Towel fabric: Requires MEDIUM density (6-8 SPI) because thick fabric can handle more
Denim: Requires MEDIUM-HIGH density (7-9 SPI) because tight weave supports heavier stitching
Twill: Requires MEDIUM density (6-8 SPI)
Many digitizers use generic templates with one-size-fits-all density, not adjusting for your specific fabric.
How to Fix:
Tell your digitizer your exact fabric type. Don’t say “it’s for a shirt.” Say “it’s for 100% cotton jersey knit, medium weight, typical t-shirt material.”
Request a sample or sew-out on YOUR actual fabric. Before ordering 1,000 patches, order 50-100 samples stitched on the exact fabric you’ll be using.
Ask for density adjustments if needed. If samples pucker, request lower density. If stitches are loose, request higher density.
Verify stitch count. Ask your digitizer: “What’s the total stitch count?” Typical ranges: 5,000-15,000 stitches for a 2-3″ patch. Anything significantly higher might indicate excess density.
MISTAKE #2: Too Much Detail
What Happens:
Fine lines become thick blobs: The 1-pixel line in your design becomes a thick mass of thread
Small text becomes illegible: You can’t read what the patch says
Details blur together: Intricate details merge into an unrecognizable mess
Looks nothing like original design: The finished patch is unrecognizable
Why It Happens:
Embroidery can’t recreate photorealistic artwork. A digital image can have millions of colors and pixel-perfect detail. Embroidery is limited to what thread can achieve—generally 20-30 colors maximum per patch, and details need to be bold to survive the stitching process.
Many customers and inexperienced digitizers try to force photorealistic designs directly into patches without simplification.
How to Fix:
Simplify your design before sending to digitizer. Reduce colors (aim for 5-10 for patches). Eliminate fine details that won’t embroider well.
Merge fine lines into bold strokes. A 1-pixel line becomes unusable. A 3-5 pixel line emborders beautifully.
Remove intricate details. Ask yourself: “Will this be recognizable at 2 inches?” If no, simplify.
Test on samples first. Order small sample batches (50 patches) before committing to 1,000. This shows if detail level is appropriate.
Work with your digitizer. A good digitizer will advise: “This design is too detailed. Here’s how we can simplify it while keeping the core design.”
Real example: A customer wanted a photorealistic portrait embroidered on patches. It had hundreds of colors and intricate shading. We simplified it to 8 colors with bold strokes, removing unnecessary detail. Result: patches looked fantastic and cost 40% less.
MISTAKE #3: Minimum Text Size Ignored
What Happens:
Text smaller than 1/4″ becomes completely unreadable
Letters run together and become illegible
Final patch looks like a blurry smudge where text should be
Professional appearance destroyed by sloppy text
Why It Happens:
Your computer screen can display tiny, crisp text perfectly. Embroidery can’t. Text stitch density requires space. Text smaller than 1/4″ (0.25″) doesn’t have enough area for thread to form recognizable letters.
Inexperienced designers don’t know this limitation and include undersized text.
How to Fix:
Text should be MINIMUM 1/4″ height (0.25 inches). Measure it. If you can’t clearly read it at that size on your monitor, it won’t embroider well.
Larger fonts work better. Aim for 1/2″ (0.5″) or larger when possible. Easier to read, looks more professional.
Use bold fonts. Bold sans-serif fonts (Arial, Helvetica, Verdana) embroider clearly. Thin or script fonts become illegible at small sizes.
Avoid serifs. Serifs are thin strokes that don’t embroider well. Sans-serif fonts are industry standard for a reason.
Use ALL CAPS. Lowercase letters have inconsistent heights and complex shapes. ALL CAPS is clearer and more professional in embroidery.
Real example: A customer wanted “Established 1974″ on a 2” patch. They used 10-point serif font. We increased to 14-point bold sans-serif ALL CAPS. Result: text became the focal point instead of an illegible smudge.
MISTAKE #4: Wrong File Format Provided
What Happens:
File can’t be digitized at all. Digitizer has to start from scratch.
Quality suffers. Digitizer has to recreate from low-quality source instead of working with proper artwork.
Delays and extra costs. Rework takes time and money.
Project timeline slips. What should be 24-hour digitizing becomes 72+ hours.
Why It Happens:
Digitizers need vector files (.AI, .EPS, .PDF with vectors) to work properly. Vector files are mathematical descriptions of your design—infinitely scalable, clean, and precise.
Raster files (JPG, PNG, BMP) are just pixels. They lose quality when enlarged and don’t contain the design information digitizers need.
Many people provide JPGs and expect perfect results, not understanding the difference.
How to Fix:
Provide vector files (.AI, .EPS, .PDF, .SVG). These are the gold standard. Ask your designer to provide vector format.
If vector unavailable, provide HIGH-RESOLUTION raster files. Minimum 300 DPI (dots per inch) at final size. A 2″ patch needs 600×600 pixels minimum. Anything less gets blurry.
Ask your digitizer upfront what formats they accept. Don’t assume. Confirm before sending files.
Test file before full project. Send one file and ask: “Can you digitize this?” Get confirmation before proceeding with order.
Provide clean files. No extra layers, no extra colors, no embedded images. Just your clean design.
Real example: Customer sent a JPG from a website (72 DPI). We requested vector file. They couldn’t provide one. We re-created from the JPG (lower quality). Final patches weren’t bad, but would have been better with original vector file.
MISTAKE #5: Skipping Sample Testing
What Happens:
Order 1,000 patches confidently
First production run arrives wrong. Colors off, details blurry, sizing wrong.
$2,000-$5,000 wasted on unusable patches
Timeline destroyed. Now you need to reorder and delay delivery.
Customer angry. You promised patches weeks ago.
Reputation damaged. Your customer blames you (fairly).
Why It Happens:
Pressure to save money. Time pressure to meet deadlines. Overconfidence in digitizer (“They said it would be great, so it will be”).
People skip the safety step that costs $100-200 but saves thousands.
How to Fix:
ALWAYS order samples first. Non-negotiable. 50-100 sample patches cost $100-300. Worth it to catch issues.
Test on your actual fabric. Don’t test on different fabric. Test on exactly what you’ll be using for final production.
Inspect samples carefully:
Are colors accurate?
Is text readable?
Are details clear?
Does sizing look right?
Is stitching quality good (no loose threads)?
Is patch comfortable to wear?
Request revisions BEFORE full production. If samples aren’t perfect, request digitizer make adjustments and send revised samples.
Get written approval from stakeholders. If this is for a company or organization, get sign-off from decision makers before you commit to 1,000 patches.
Real example: Fire department ordered 500 patches without samples. First production arrived with wrong colors (bright red instead of fire department’s official crimson). Cost: $1,500 wasted, deadline missed. Now they always order samples first.
MISTAKE #6: Poor Color Matching
What Happens:
Stitched patch doesn’t match your brand colors
Looks wrong compared to uniforms or branding
Customer complains the colors are “off”
Professional appearance compromised
Customer unhappy, reputation damaged
Why It Happens:
Thread colors don’t perfectly match every Pantone color. Threads are limited to manufacturer’s color palette (maybe 600-800 colors available). Your brand might need a specific Pantone that doesn’t have a perfect thread match.
Customers often communicate color poorly: “I need red” instead of “Pantone 200C” or “fire department crimson.”
Thread colors also look different on different fabrics. Red on white fabric looks different than red on black fabric.
How to Fix:
Provide Pantone color codes, not color names. “Red” is too vague. “Pantone 200C” is precise. Get official Pantone codes from your brand guidelines.
Provide thread color swatch references. Ask digitizer to show thread swatches from their supplier. Physical thread samples are better than digital previews.
Request digital proof showing actual thread colors. Before production, get a mockup showing which threads will be used for each color.
Test on your actual fabric. Color perception changes depending on fabric. Test on exact material you’ll use.
Accept thread color matching limitations. Thread is thread. It won’t perfectly match every Pantone. Digitizer will find the closest match.
Real example: Customer specified brand blue as “Pantone 279C.” Digitizer found the closest match thread (Pantone 280C, slightly different). Digital proof showed the difference. Customer approved. Final patches matched expectations because expectations were set correctly.
MISTAKE #7: Ignoring Fabric Type
What Happens:
Stitches pucker on jersey fabric
Patch is too heavy for thin, delicate fabric
Looks wrong when worn on intended garment
Customer unhappy—”patch doesn’t look right”
Why It Happens:
Different fabrics require different digitizing:
Jersey (t-shirts): Stretchy, low density needed
Twill (workwear): Stable, medium-high density OK
Towel fabric: Thick, can handle higher density
Denim: Tight weave, higher density OK
Silk: Delicate, requires LOW density
Many digitizers don’t ask about fabric or use generic settings for all fabrics.
How to Fix:
Tell digitizer exactly where patch will be sewn. “This will be embroidered on cotton jersey t-shirt material” is clear. “It’s for apparel” is vague.
Provide sample of your fabric. Send digitizer a swatch of the actual fabric if possible. They can test on it.
Request sample/sew-out on your exact fabric. Before full production, ensure stitching works on your fabric.
Ask digitizer for recommendations. Good digitizers will say: “For jersey, we recommend lower density to prevent puckering. Here’s what we recommend…”
Get professional guidance. If unsure, ask your digitizer: “What density/stitch settings do you recommend for [your fabric]?”
MISTAKE #8: Excessive Stitch Count
What Happens:
Patch is heavy, stiff, uncomfortable to wear
Stitches pull and bunch
Expensive to produce (more thread = higher cost)
Patch looks over-stitched, amateur
Takes longer to produce (more stitches = more machine time)
Why It Happens:
Inexperienced digitizers don’t optimize. They think “more stitches = better quality.” Wrong. Optimized digitizing uses the minimum necessary stitches to achieve quality.
Generic templates often have excessive stitches because they’re not customized to your specific design.
How to Fix:
Ask digitizer: “What’s the total stitch count?” Before approving design, know the stitch count. Typical range for 2-3″ patch: 5,000-15,000 stitches.
Request optimization for your budget. Tell digitizer your stitch count target. They can optimize to hit it.
Ask for alternatives. If stitch count is high, ask: “Can we simplify the design to reduce stitch count?” Often the answer is yes.
Benchmark against quality makers. Get quotes from 2-3 digitizers. Compare stitch counts for same design. Wide variance indicates one digitizer isn’t optimizing.
MISTAKE #9: Bad File Preparation
What Happens:
Files have missing fonts (text converts wrong)
Artwork is sloppy (digitizer has poor source material)
Files are corrupted (won’t open)
Digitizing takes longer (digitizer has to fix your files)
Quality suffers (digitizer working with bad source)
Why It Happens:
Customers don’t understand how to prepare files for professional use. They send what they have without thinking about whether it’s suitable.
How to Fix:
Convert all text to curves before sending. If your design has text, convert it to outlines/curves in your design software. Otherwise, digitizer might not have the font.
Use clean, professional artwork. Remove all extra layers, hidden objects, and unnecessary elements. Send only what you want digitized.
Save files in correct format. Vector files should be .AI, .EPS, or .PDF. Not .PSD or .TIF.
Use appropriate file size. Files under 50MB are fine. Huge files get slow and might corrupt.
Send test file first. Before sending entire project, send one file and ask: “Can you open this? Is this the right format?” Get confirmation.
Include a mockup or reference. Send your artwork PLUS a visual reference (screenshot, PDF mockup) showing how it should look.
MISTAKE #10: Choosing Cheap Over Quality
What Happens:
Cheap digitizing = poor results
Bad-looking patches damage your reputation
Customer complaints about quality
Money wasted anyway (you need to reorder from quality digitizer)
Timeline destroyed (rework delays everything)
Reputation damage (customer blames you)
Why It Happens:
Budget constraints feel real. A $50 digitizing job seems better than $150. Until you get the results and realize you paid $50 for garbage.
The math is simple: $100 for quality digitizing saves you $3,000 in wasted patches.
How to Fix:
Invest in quality digitizing. Good digitizers cost more because they’re better. That’s how quality works.
Consider long-term ROI. Your reputation is worth more than $100. Cheap digitizing damages it.
Get quotes from 2-3 digitizers. Compare not just price, but experience, portfolio, communication, guarantees.
Choose based on quality, not price. Pick the digitizer who will deliver best results, not cheapest price.
Ask for references. Quality digitizers have happy customers who’ll recommend them.
How to Choose a Digitizer: Your Evaluation Checklist
Portfolio Review
Look at projects similar to yours
Check quality and attention to detail
Are designs clear and professional?
Ask: “What challenges did you face with similar projects?”
Communication Test
How quickly do they respond to emails?
Can they explain their digitizing process?
Do they ask smart questions about YOUR project?
Do they seem interested or just transactional?
Sample Evaluation
Ask if they offer sample services
Order small sample (50-100 patches)
Test on your actual fabric
Inspect closely for quality and detail
Request unlimited revisions until happy
Red Flags—Avoid These:
“Overnight turnaround offered” (too fast = rushed work)
“No revision policy” (inflexible, difficult to work with)
“Cheapest price in the market” (usually reflects quality)
Gem Punch’s Digitizing Approach
We’ve been digitizing patches since 2012. Here’s how we do it differently:
Expert digitizers with 13+ years experience: Our team understands embroidery limitations and possibilities. We know what works and what doesn’t.
Every file customized to YOUR specs: No templates. No generic approach. We customize stitch density, color selection, and detail level for your specific fabric and design.
Digital proofs before production: You see exactly how your patch will look (thread colors and all) before we start embroidering.
Unlimited revisions included: Want adjustments? No problem. We revise until you’re completely happy. No surprise revision charges.
Sew-out testing on your actual fabric: Before production, we test-stitch on the exact fabric you’ll be using. Catches issues early.
24-48 hour digitizing turnaround: Fast without sacrificing quality.
Focus on YOUR project, not templates: We care about your success, not just completing work.
Frequently Asked Questions
How long does digitizing typically take? 24-48 hours for most projects. Rush services (12-24 hours) available.
Can I revise the digital file after receiving proof? Yes. Unlimited revisions are standard. We adjust until you’re completely happy.
Do you digitize simple designs? Yes, any complexity level. Simple designs often digitize faster and cost less.
What file formats can you work with? Vector files preferred (.AI, .EPS, .PDF). We also work with high-res raster files (300 DPI minimum).
How much does digitizing cost? Depends on complexity. Often included free with patch orders. Standalone digitizing typically $25-$150 per design.
Can you simplify my overly complex design? Yes. We’ll advise on what will and won’t work in embroidery, then recommend simplifications while keeping the core design.
What’s included with digitizing? Digital proof, unlimited revisions, sew-out testing on your fabric, final digitized file in multiple formats.
Conclusion
Embroidery digitizing is where your vision becomes reality. Good digitizing means professional patches that exceed expectations. Bad digitizing means wasted money and disappointed customers.
Avoid these 10 mistakes:
Wrong stitch density (specify your fabric)
Too much detail (simplify for embroidery)
Undersized text (minimum 1/4″ height)
Wrong file format (provide vectors)
Skipping samples (test before full production)
Poor color matching (use Pantone codes)
Ignoring fabric type (specify where patch goes)
Excessive stitch count (ask for optimization)
Bad file prep (clean, professional files)
Choosing cheap over quality (invest in good work)
Need expert digitizing for your patches?
Get Your Free Quote Today — Our expert digitizers will evaluate your design, advise on best approach, and deliver professional results.
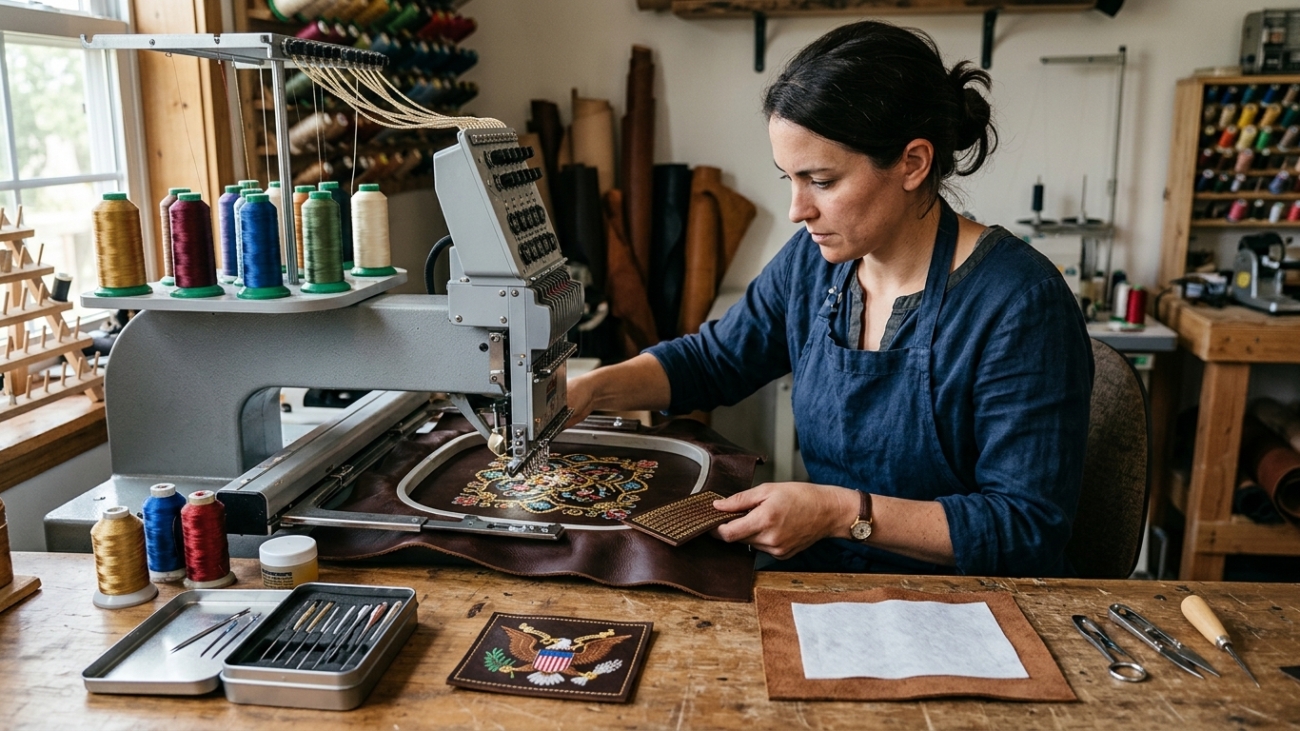
Leather is one of the most luxurious and durable materials for custom embroidery—but it is also one of the most unforgiving. One wrong stitch, and you have a permanent hole in an expensive hide. Whether you are branding leather jackets, luxury bags, motorcycle vests, or corporate portfolios, understanding how embroidery on leather interacts with is the difference between a premium product and a costly mistake.
At Gem Punch, we digitize and produce leather embroidery daily for brands, motorcycle clubs, fashion labels, and corporate clients. This guide covers everything you need to know: the techniques that work, the challenges you will face, and the pro tips that separate amateur results from professional-grade leather embroidery.
Why Embroider on Leather?
Leather carries instant prestige. It signals durability, craftsmanship, and timeless style. Adding embroidery to leather elevates it further—transforming a plain jacket or bag into a personalized statement piece or branded asset.
Common Leather Embroidery Applications
Application
Leather Type
Typical Design
Motorcycle vests
Cowhide, buffalo
Club patches, name tapes, memorial panels
Luxury handbags
Full-grain, Italian
Brand logos, monograms, limited-edition art
Bomber jackets
Lambskin, cowhide
Back patches, sleeve details, unit insignias
Corporate portfolios
Bonded, genuine
Company logos, initials, event branding
Wallets & belts
Top-grain, exotic
Small logos, decorative borders
Footwear
Suede, nubuck
Brand marks, custom designs
Furniture & auto interiors
Automotive-grade
Monograms, logos, decorative panels
The commercial value is clear: leather embroidery commands higher prices than fabric embroidery, attracts premium clientele, and creates products that last decades.
The Core Challenge: Leather Does Not Forgive
Unlike cotton, polyester, or twill, leather has zero recovery. Once a needle pierces the surface, that hole is permanent. There is no fiber memory to close the gap. This fundamental property creates every challenge in leather embroidery.
Key Material Properties
Property
Fabric (Cotton/Twill)
Leather
Fiber recovery
High—holes close partially
None—holes are permanent
Tensile strength
Moderate
Very high
Flexibility
High
Low to moderate
Thickness variation
Minimal
Significant
Heat sensitivity
Moderate
High—scorches easily
Needle penetration
Easy
Requires force
Stitch density tolerance
High
Low—causes tearing
Because leather does not stretch or recover, every stitch must be placed with precision. Over-stitching, poor digitizing, or incorrect machine settings will crack, tear, or distort the leather permanently.
Leather Types: What Works and What Does Not
Not all leather is suitable for embroidery. Here is the breakdown.
Best for Embroidery
Cowhide and Buffalo The industry standard for motorcycle vests, jackets, and heavy bags. Thick, stable, and consistent enough to hold stitches without tearing. Full-grain and top-grain varieties perform best.
Lambskin Soft and lightweight, ideal for fashion jackets and luxury goods. Requires lighter touch—smaller needles, reduced density, careful hooping.
Genuine Leather (Corrected Grain) Processed to remove imperfections, creating a uniform surface. Good for corporate portfolios, belts, and promotional items where consistency matters more than character.
Bonded Leather Leather fibers bonded with latex or polyurethane. Affordable and stable, though less durable long-term. Fine for low-wear applications like book covers or presentation folders.
Challenging but Possible
Suede and Nubuck The brushed, fuzzy surface hides stitches well but is prone to distortion under tension. Requires specialized stabilizers and very careful hooping.
Exotic Leathers (Alligator, Ostrich, Python) Beautiful but unpredictable. Scale patterns, natural armor, and uneven thickness make digitizing complex. Only attempt with experienced digitizers and test samples.
Avoid for Embroidery
Patent Leather The glossy, plastic-coated surface cracks under needle penetration. Embroidery destroys the finish.
Thin or Faux Leather (Low-Grade PU) Tears under stitch tension. The backing separates from the surface layer, creating bubbles and rips.
Very Soft, Unbacked Leather Lacks structural integrity. Hooping distorts the shape, and stitches pull through.
Essential Techniques for Leather Embroidery
1. Needle Selection
Use sharp-point leather needles (also called wedge-point or cutting-point needles). These blades slice through the leather cleanly rather than pushing fibers apart. Standard ball-point needles, designed for knit fabrics, will struggle and cause ragged holes.
Leather Thickness
Needle Size
Type
Lightweight (under 1 oz)
70/10 or 75/11
Sharp point
Medium (1–2.5 oz)
80/12
Sharp point
Heavy (2.5–4 oz)
90/14
Sharp point
Extra heavy (4+ oz)
100/16
Sharp point or diamond point
Pro tip: Replace needles more frequently than with fabric. Leather dulls needles faster, and a dull needle causes ragged perforations and thread breaks.
2. Stabilizer Strategy
Stabilization is critical because leather has no natural give. The wrong stabilizer causes puckering, distortion, or hoop burn.
Recommended stabilizers:
Tear-away stabilizer (medium to heavy weight): The standard choice. Provides rigidity during stitching and tears away cleanly afterward without pulling stitches.
Cut-away stabilizer: For large or dense designs where tear-away might not provide enough support. Trim close to the stitch line with scissors.
Adhesive stabilizer (spray or peel-and-stick): Essential for small or irregular leather pieces that cannot be hooped conventionally. Prevents shifting without clamping pressure.
Water-soluble topping: Place on top of suede or nubuck to prevent stitches from sinking into the nap. Rinses away after embroidery.
Never use: Heat-away stabilizers on leather. The heat required to dissolve them will scorch or shrink the hide.
3. Hooping Without Damage
Hooping leather is the most delicate step. Excessive pressure creates permanent creases, hoop burn, or depressions.
Best practices:
Use magnetic hoops or clamp hoops instead of traditional screw-tightened hoops. They apply even pressure without crushing.
Hoop the stabilizer only, then adhere the leather to the stabilizer with temporary spray adhesive or double-sided tape. This eliminates hoop pressure on the leather itself.
If direct hooping is necessary, use the largest hoop possible to reduce tension on the leather area. Pad the inner hoop with soft tape to prevent sharp edges from cutting in.
Never stretch leather while hooping. Lay it flat and natural. Stretching creates tension that releases after unhooping, distorting the design.
4. Digitizing for Leather
This is where professional results are made or lost. Standard embroidery digitizing assumes fabric recovery. Leather digitizing assumes zero recovery.
Critical digitizing adjustments:
Parameter
Standard Fabric
Leather
Stitch density
0.4–0.5 mm
0.5–0.6 mm (reduced by 15–20%)
Pull compensation
Moderate
Minimal—leather does not stretch
Underlay
Standard
Light or none—reduces perforation count
Stitch length
Standard
Slightly longer to reduce puncture density
Small text
4–5 mm height
Minimum 6–7 mm—smaller sinks or tears
Satin stitch width
1–12 mm
Avoid very wide satins—they cut like a blade
Fill patterns
Any
Use run stitch or light fill; avoid heavy zigzag
Pro tip: Reduce overall stitch count by 20–30% compared to fabric versions of the same design. Fewer stitches mean fewer holes, less stress, and cleaner results.
5. Thread and Tension
Thread choice:
Rayon: Standard for sheen and color vibrancy. Works on most leather types.
Polyester: More durable and colorfast. Better for outdoor gear, motorcycle leathers, and items exposed to sun and sweat.
Metallic: Stunning on black or brown leather but requires larger needles and slower speeds to prevent shredding.
Tension settings:
Top tension: Slightly looser than for fabric. Tight tension pulls stitches into the leather surface, creating dimples.
Bobbin tension: Standard or slightly tighter to balance the looser top tension.
Test on a leather scrap from the same hide before production. Every batch of leather behaves differently.
6. Machine Speed
Slow down. Leather embroidery should run at 60–70% of normal machine speed. High speeds generate heat through friction, which can scorch light-colored leather or melt synthetic finishes. Slower speeds also give the needle time to penetrate cleanly without deflecting.
Common Leather Embroidery Problems and Solutions
Problem 1: Tearing or Cracking Along Stitch Lines
Cause: Stitch density too high, underlay too aggressive, or leather too thin.
Solution: Reduce density by 20%, eliminate underlay for small designs, or upgrade to a heavier leather grade. For thin leather, consider a leather patch sewn on rather than direct embroidery.
Problem 2: Puckering or Distortion Around the Design
Cause: Improper hooping, insufficient stabilizer, or digitizing without pull compensation adjustment.
Solution: Use adhesive hooping on heavy tear-away stabilizer. Ensure the digitizer reduced pull compensation specifically for leather.
Problem 3: Thread Breaks Every Few Stitches
Cause: Dull needle, incorrect needle size, or tension too tight.
Solution: Replace needle, verify size matches leather thickness, loosen top tension incrementally until breaks stop.
Problem 4: Hoop Burn or Permanent Creases
Cause: Hoop pressure too high, hooping time too long, or sharp hoop edges.
Solution: Switch to magnetic or clamp hoops. Use adhesive hooping methods. If creases occur, gently warm the leather with a hair dryer and massage flat—results vary by leather type.
Problem 5: Stitches Sinking Into Suede or Nubuck
Cause: Nap of the leather swallows stitches, making them invisible.
Solution: Use water-soluble topping over the design area. The topping holds stitches above the surface and rinses away clean.
Problem 6: Color Bleeding or Finish Damage
Cause: Excessive machine heat, incompatible thread dye, or moisture from soluble topping.
Solution: Reduce machine speed, use polyester threads (more colorfast), and ensure leather is completely dry before and after any water-soluble topping application.
Advanced Techniques for Premium Results
3D Puff Embroidery on Leather
Puff embroidery adds dramatic raised dimension. On leather, it requires:
Specialized puff foam designed for leather applications (standard foam may react with leather finishes)
Reduced density on the puff areas to prevent foam collapse
Larger needle (90/14 or 100/16) to penetrate foam and leather cleanly
Slower speed to prevent foam tearing
Puff on leather is stunning for motorcycle club rockers, luxury brand logos, and statement jacket backs. It is unforgiving—master flat leather embroidery before attempting puff.
Applique on Leather
Instead of stitching directly onto expensive leather, sew a fabric or thinner leather patch onto the main leather surface. This technique:
Eliminates direct perforation of the primary hide
Allows for more complex designs on a separate, replaceable panel
Creates visual contrast between leather types (e.g., suede applique on smooth cowhide)
Laser Etching + Embroidery Hybrid
Some high-end producers combine laser etching (which burns a shallow design into the surface) with embroidered outlines or accents. The laser handles detail and shading; embroidery adds texture and color. This is advanced production requiring specialized equipment.
Debossed Embroidery
A technique where the design is first debossed (pressed into the leather without cutting) and then embroidered within the depressed area. The embroidery sits flush or slightly recessed, creating a subtle, sophisticated look popular in luxury automotive and leather goods.
Leather Patch vs. Direct Leather Embroidery
If direct embroidery feels too risky, consider leather patches—embroidered designs on a separate leather piece that is then sewn, riveted, or glued onto the main item.
Method
Pros
Cons
Direct embroidery
Seamless, integrated, no edges
Permanent, risky on thin/expensive leather
Leather patch
Replaceable, less risk, more design freedom
Visible edge, additional production step
Woven leather patch
Fine detail possible
Less texture than embroidery
Printed leather patch
Full color, photo-realistic
Less durable, no tactile quality
For one-off luxury items or experimental designs, patches are the safer choice. For production runs of branded goods, direct embroidery signals higher craftsmanship.
Industry-Specific Best Practices
Motorcycle Clubs and MC Patches
Motorcycle vests use heavy cowhide or buffalo leather. Embroidery is typically direct on the back panel for club patches, or on leather patches that are then sewn on for rockers and officer titles.
Use 100% polyester thread for UV and sweat resistance
Sew-on backing only—iron-on adhesive fails under road vibration and heat
Minimum 6 mm text height for readability at riding distances
Consider merrowed border on leather patches for clean, fray-proof edges
Fashion and Luxury Goods
High-fashion leather embroidery demands perfection. Every stitch is visible.
Use finest needles (70/10) on lambskin and delicate hides
Match thread sheen to leather finish—matte thread on matte leather, glossy on patent (though avoid patent for direct embroidery)
Test on identical leather scraps from the same tannery batch
Consider hand-guided embroidery for true luxury one-offs
Corporate and Promotional
Leather portfolios, padfolios, and gift items prioritize consistency and speed.
Bonded leather is acceptable for mid-tier corporate gifts
Small left-chest or corner placement works best
Metallic threads elevate perceived value for executive gifts
Always order pre-production samples for corporate color matching
Cost Expectations for Leather Embroidery
Leather embroidery costs more than fabric embroidery due to material risk, slower production, and specialized handling.
Factor
Cost Impact
Leather type (full-grain vs bonded)
Premium hides increase material cost 50–200%
Design complexity
Intricate designs require slower speeds and more needle changes
Stitch count
Higher count = more time, more risk, higher cost
Sample approval
Pre-production samples add 20–30% to first-unit cost
Rework rate
Leather rework is often impossible—builds risk into pricing
At Gem Punch, we recommend approving a physical sample on identical leather before any production run over 10 units. The cost of one sample is negligible compared to ruining a full batch.
Frequently Asked Questions
Can any embroidery machine sew on leather? Technically yes, but results vary dramatically. Commercial machines with adjustable presser foot pressure, sharp-point needle capability, and precise tension control produce professional results. Home machines often lack the power and precision for heavy leather.
What is the thinnest leather that can be embroidered? Approximately 1 oz (0.4 mm) is the practical minimum for direct embroidery. Thinner materials require applique techniques or patches to avoid tearing.
Does embroidery weaken leather over time? Yes, but minimally if done correctly. The perforation line creates a theoretical weak point, but properly spaced stitches on quality leather do not compromise structural integrity under normal use. Dense stitching on thin leather is where failure occurs.
Can you remove embroidery from leather? No. Unlike fabric where stitches can be picked out and the weave recovers, leather embroidery is permanent. Removal leaves a perforated outline that cannot be hidden. This is why sampling is critical.
Is hand embroidery better than machine on leather? For artistic, one-off pieces, hand embroidery offers control and character impossible to replicate by machine. For consistency, speed, and commercial production, machine embroidery is superior. The choice depends on your project goals.
What thread count should I use for leather? 40-weight thread is standard. 60-weight is available for very fine detail on delicate leather but is harder to work with. 30-weight is used for bold, visible stitches on heavy leather.
How do I prevent the needle from leaving marks around the design? Marks are usually caused by presser foot pressure or hoop burn. Use a roller presser foot or Teflon foot to reduce friction. Hoop with adhesive methods rather than direct clamping.
Final Thoughts
Embroidery on leather is not a beginner’s technique—but it is one of the most rewarding when executed correctly. The combination of leather’s natural prestige and embroidery’s precision creates products that command attention, respect, and premium pricing.
Success requires three things: the right leather, digitizing adjusted for zero-recovery material, and production discipline (slow speeds, proper needles, careful hooping). Skip any of these, and you risk damaging expensive material. Master all three, and you produce heirloom-quality work.
At Gem Punch, we specialize in leather embroidery digitizing and production. Whether you need a single motorcycle vest back panel or a thousand corporate portfolios, our digitizers understand the unique demands of leather and program every file to protect your material while maximizing visual impact.
Ready to embroider on leather? Send us your artwork and leather specifications for a free digitizing assessment and production quote.
You have a great logo. Now you want it embroidered on uniforms, hats, or custom merchandise. But before a single thread is sewn, your logo needs to be digitized — converted from a flat image into a stitch file that an embroidery machine can actually read and execute.
In this guide, we walk you through exactly how logo digitizing works, what the process looks like step by step, the difference between doing it yourself and hiring a professional, and how to make sure your embroidered logo comes out looking exactly as it should.
Key takeaway: Logo digitizing is not just resizing or tracing an image. It is a technical craft that maps out every individual stitch — direction, density, type, and sequence — to produce a clean, durable result on fabric.
What Does It Mean to Digitize a Logo?
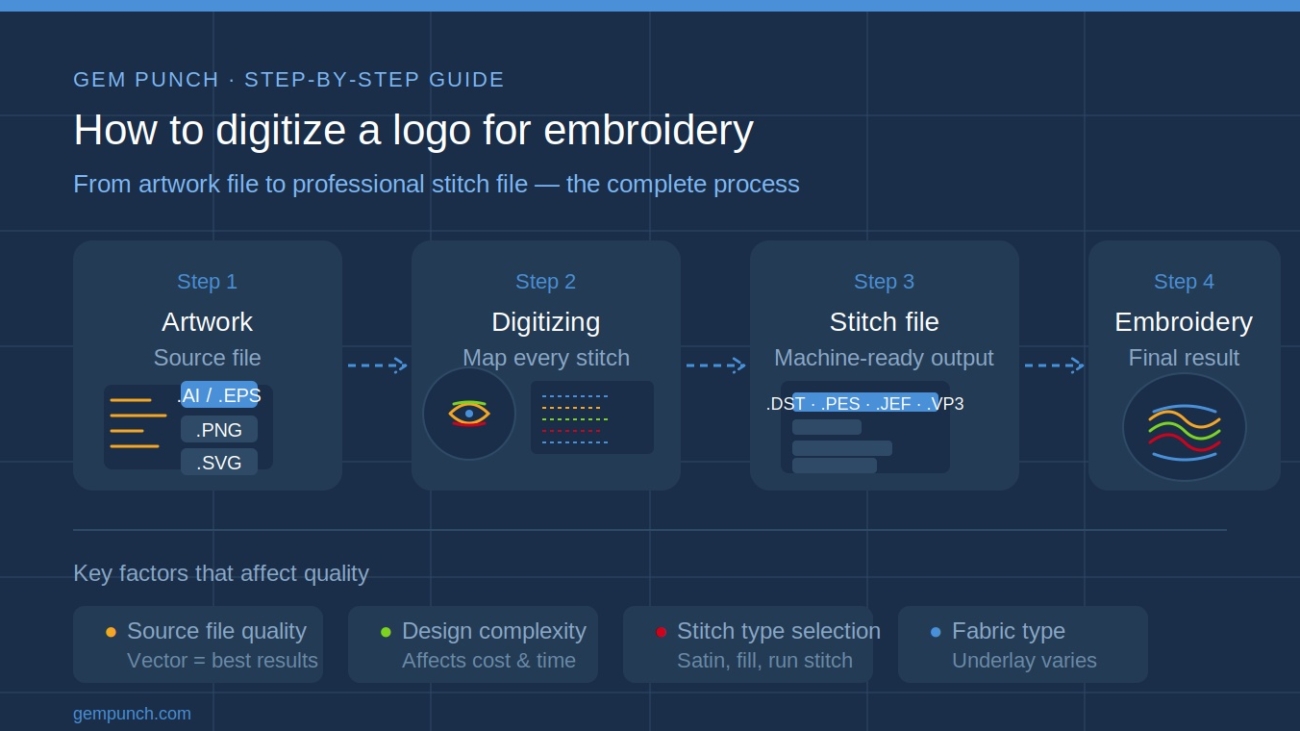
Embroidery machines do not read JPEG, PNG, or PDF files. They read stitch files — proprietary formats that contain precise instructions for every movement the needle makes. Digitizing is the process of creating those instructions from your logo artwork.
A skilled digitizer uses specialist software to manually map out stitch paths, select stitch types (satin, fill, run), set densities, and plan the sequence in which each element is sewn. Done well, the result looks sharp and professional. Done poorly, it results in thread gaps, puckering, misaligned colors, and wasted garments.
Common output formats include DST (Tajima), PES (Brother), JEF (Janome), VP3 (Husqvarna), and EMB (Wilcom). Your embroiderer will tell you which format their machine requires.
Step-by-Step: How Logo Digitizing Works
Step 1 — Prepare Your Artwork
The quality of your source file directly affects the quality of your digitized output. Always provide the clearest, highest-resolution version of your logo possible. A vector file (AI, EPS, or SVG) is ideal because it scales without losing quality and has clearly defined edges and colors.
If you only have a raster image (PNG, JPG), make sure it is at least 300 DPI and not blurry, pixelated, or compressed. The digitizer needs to clearly see every element of the design — fine lines, small text, and color boundaries all matter.
Step 2 — Assess the Design for Embroidery
Not every element of a logo translates perfectly to embroidery. A good digitizer reviews the artwork before starting and flags any elements that may need to be simplified or adapted:
Very thin lines (under 1mm) may need to be thickened to stitch cleanly
Small text (under 4mm tall) often needs adjustment to remain legible
Photographic gradients must be interpreted using fill patterns or stitch angles
Extremely fine detail may need to be simplified to avoid thread buildup
This assessment stage is what separates a professional digitizer from an automated tool. It requires knowledge of how thread behaves on different fabrics and at different scales.
Step 3 — Set Up the Digitizing File
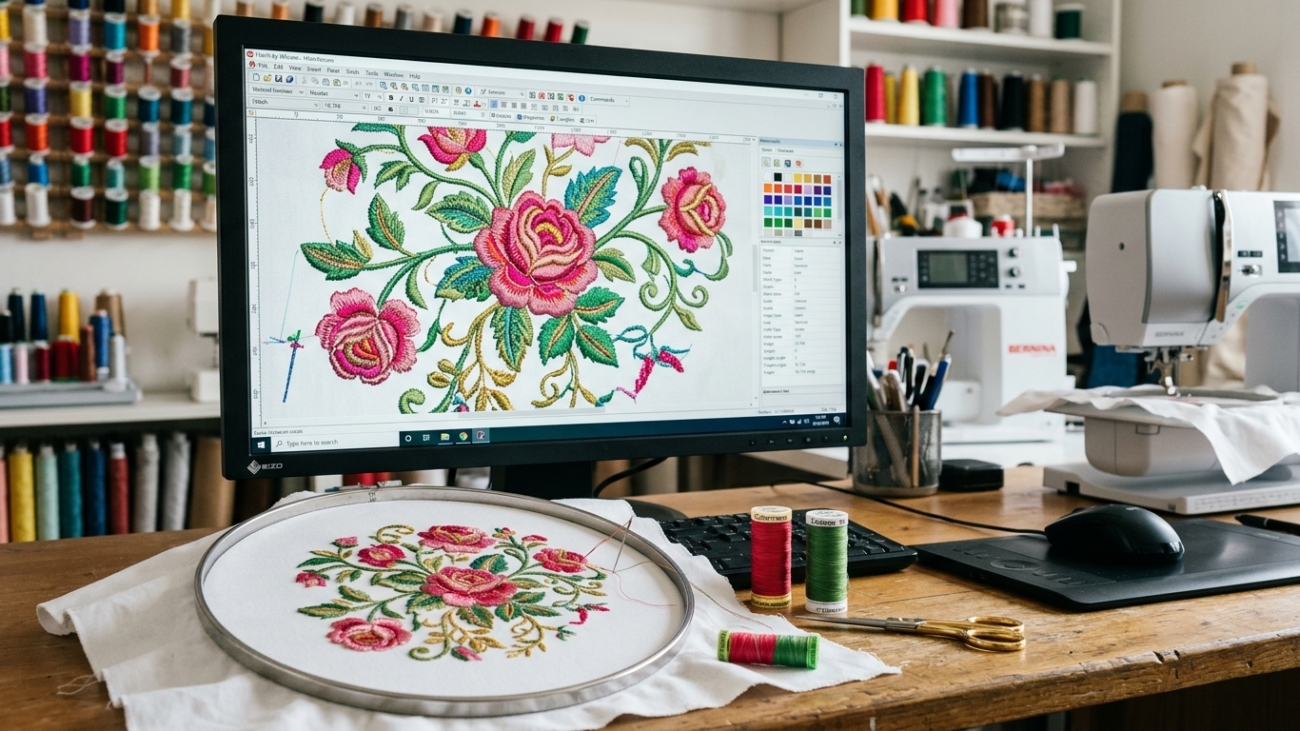
The digitizer opens the artwork in specialist software (Wilcom, Hatch, Pulse, or similar) and begins mapping the design. They set the canvas to the correct output size — because a logo digitized for a left chest placement is set up very differently from the same logo intended for a jacket back.
Step 4 — Map Stitch Types to Each Element
Each part of the logo gets assigned a stitch type based on what it represents:
Design Element
Stitch Type Used
Borders and outlines
Run stitch
Lettering and thin fills
Satin stitch
Large filled areas
Fill / Tatami stitch
Raised 3D elements
Puff / foam underlay
Fine detail lines
Bean / triple run stitch
Step 5 — Set Stitch Direction and Density
Stitch angle dramatically affects how the finished embroidery catches light and appears to the eye. Density determines how tightly packed the stitches are — too dense and the fabric puckers; too sparse and the base fabric shows through. This is one of the most technically demanding parts of digitizing and where expertise matters most.
Step 6 — Plan the Stitch Sequence
The order in which elements are stitched matters. A good stitch sequence minimizes thread trims, reduces jump stitches (which need to be cut and can look untidy), and ensures underlying elements do not show through overlapping ones. Color changes also need to be sequenced logically to reduce machine stops.
Step 7 — Add Underlay
Underlay stitches are laid down beneath the main stitching to stabilize the fabric, provide a foundation for the top stitches, and improve the overall appearance of the embroidery. Different underlay types are used for different fabric types — a knit polo requires different underlay to a structured cap.
Step 8 — Export and Test
Once the file is complete, it is exported in the required machine format and ideally test-stitched on a similar fabric before production. A stitch-out reveals any issues with density, registration, or sequence that need to be corrected before the full order runs.
DIY Digitizing vs Hiring a Professional
You have two options when it comes to digitizing your logo: do it yourself using software, or hire a professional digitizing service. Here is an honest comparison:
DIY Digitizing
Cost
Free to ~$50/month (software subscription)
Time to learn
Weeks to months for quality results
Output quality
Variable — steep learning curve
Best for
Hobbyists and very simple designs
Software options
Ink/Stitch (free), Hatch, Wilcom
Professional Digitizing
Cost
$10–$100 per design (one-time fee)
Turnaround
12–24 hours standard
Output quality
Consistent, production-ready
Best for
Business logos, commercial use, complex designs
File ownership
You keep the file for unlimited reorders
For business logos and branded embroidery, professional digitizing costs almost always deliver better results at a lower total cost when you factor in the time and learning curve of DIY. The digitizing fee is a one-time expense — the file is yours forever and works for every reorder.
Rule of thumb: If you are embroidering for personal use or learning the craft, DIY digitizing is a great skill to develop. If you are embroidering for customers, uniforms, or merchandise, hire a professional.
What File Should You Send for Digitizing?
The format you provide has a big impact on digitizing quality and speed. Here is what to send, in order of preference:
Vector file (AI, EPS, SVG, PDF with vector data) — always the best option
High-resolution PNG or TIFF at 300 DPI minimum with transparent background
High-resolution JPEG at 300 DPI — acceptable but not ideal
Low-resolution or compressed images — avoid if at all possible
If your logo only exists as a low-resolution image, ask your digitizing service about vector conversion first. Converting to vector before digitizing produces significantly better stitch output.
Common Digitizing Mistakes to Avoid
Providing a blurry or low-resolution source file — digitizers cannot add detail that is not there
Assuming automatic digitizing software produces the same quality as manual digitizing — it does not
Not specifying the intended placement size — a logo digitized for a 4-inch width will not work at 1.5 inches
Forgetting to confirm the output file format before ordering — check with your embroiderer first
Skipping the test stitch-out on a bulk order — one test run prevents thousands of dollars in wasted garments
Using a service that retains file ownership — always confirm you receive the stitch file
How Long Does Digitizing Take?
Turnaround time varies by provider and complexity. For a professional digitizing service:
Standard turnaround: 12–24 hours for most designs
Same-day service: 4–12 hours, typically with a rush surcharge of 25–35%
Rush service: Under 4 hours, with surcharges of 40–75%
For most orders, standard turnaround is sufficient and saves you meaningfully on cost. Plan your digitizing at least 24–48 hours before your embroidery production deadline.
Frequently Asked Questions
Can I use a PNG file for embroidery digitizing?
Yes, but a high-resolution PNG (300 DPI or above) is needed for good results. A vector file is always preferable if available. Low-resolution PNGs result in lower quality digitizing output.
How much does it cost to digitize a logo?
Most professional digitizing services charge between $10 and $50 for standard logos. Complex designs with high stitch counts, fine detail, or many colors can cost $50–$100+. See our full embroidery digitizing cost guide for a detailed breakdown.
Can I reuse a digitized file for multiple orders?
Yes — this is one of the biggest advantages of professional digitizing. Once the file is created, you own it and can use it for unlimited reorders at no additional digitizing cost.
What is the minimum text size for embroidery?
As a general rule, uppercase letters should be at least 4mm tall and lowercase at least 3mm. Below these sizes, individual letter forms become difficult for machines to reproduce cleanly. Your digitizer may adjust letterforms slightly to ensure legibility.
Do I need to digitize my logo differently for different products?
Sometimes. A logo digitized for a flat woven polo shirt may need adjustment for a structured cap, a thick fleece, or a terry towel. Different fabrics require different underlay strategies and stitch densities. Always tell your digitizer what product the design will be applied to.
Final Thoughts
Digitizing a logo for embroidery is a technical process that sits between your artwork and the final embroidered product. Get it right — with clean source files, professional execution, and a proper test stitch-out — and your embroidery will look sharp and professional on every garment, badge, or patch you produce.
Get it wrong and you will spend more fixing problems than you saved by cutting corners on digitizing. For commercial and business use, professional digitizing is almost always the right call.
Ready to digitize your logo? Gem Punch offers professional embroidery digitizing with 24-hour turnaround, free revisions, and full file ownership from $10. Get a free quote at gempunch.xtremlogics.com/.
If you’ve ever tried to get a logo embroidered on a hat, jacket, or uniform, you’ve likely run into the term embroidery digitizing — and wondered what it’s going to cost you. The short answer: anywhere from $5 to $100+ depending on a handful of key factors.
In this guide, we break down exactly what affects embroidery digitizing pricing, what’s included in the price, what’s not, and how to make sure you’re getting fair value for your money — whether you’re ordering for the first time or managing high-volume commercial orders.
Quick Answer: Most standard embroidery digitizing jobs cost between $10 and $35 for simple to medium-complexity designs. Complex logos with fine detail, gradients, or high stitch counts can run $50–$100+.
Table of Contents
What Is Embroidery Digitizing?
What Factors Affect the Cost?
Embroidery Digitizing Pricing Breakdown
One-Time Fee vs Per-Piece Pricing
Rush Orders: What Do They Cost Extra?
What’s Included in the Price?
How to Get the Best Value
Common Mistakes That Drive Up Your Cost
FAQs
What Is Embroidery Digitizing?
Embroidery digitizing is the process of converting a flat artwork file — like a JPEG, PNG, or PDF — into a stitch file that an embroidery machine can read and execute. A digitizer maps out every individual stitch: the direction, density, type, and sequence, all of which affects how the final embroidery looks on fabric.
Without a digitized file, an embroidery machine simply cannot work. Even if you have a perfect logo in high resolution, it still needs to be professionally digitized before a single thread is sewn.
Common output file formats include: DST, PES, JEF, EXP, VP3, and EMB — your embroiderer will tell you which format their machine requires.
What Factors Affect Embroidery Digitizing Cost?
Digitizing pricing isn’t one-size-fits-all. Here are the main variables that determine what you’ll pay:
1. Stitch Count
This is the biggest pricing factor. The more stitches in a design, the longer it takes to digitize — and the more it costs. A simple left-chest logo might have 5,000–8,000 stitches while a large jacket back design can exceed 50,000 stitches.
2. Design Complexity
A bold, clean logo with solid colors is far easier to digitize than one with gradients, tiny text, photographic detail, or intricate linework. Complex designs require more technical skill, more time, and more revisions — all of which add to the cost.
3. Design Size
Larger designs generally have higher stitch counts, which means higher prices. However, size alone doesn’t determine cost — a large but simple design may be cheaper than a small but highly detailed one.
4. Number of Colors
Each color in an embroidery design requires a thread change and careful planning to avoid misalignment. Designs with 8+ colors take significantly longer to digitize than single or dual-color designs.
5. Turnaround Time
Standard turnaround is typically 12–24 hours for professional digitizing services. Rush orders — anything needed in under 4 hours — typically carry a 25–50% premium on top of the standard price.
6. Provider Type
Pricing varies significantly between freelancers, offshore services, and professional digitizing companies. Each has trade-offs in quality, communication, and reliability.
Embroidery Digitizing Pricing Breakdown
Here’s what you can expect to pay at a professional digitizing service:
Service Type
Basic Price
Complex Price
Rush Fee
Small Logo (under 5,000 stitches)
$10 – $20
$20 – $35
+$5 – $10
Medium Logo (5,000–15,000 stitches)
$20 – $40
$35 – $60
+$10 – $20
Large Design (15,000–30,000 stitches)
$40 – $65
$60 – $90
+$15 – $30
Jacket Back / Full Design (30,000+ stitches)
$65 – $100
$90 – $150+
+$20 – $50
3D Puff Digitizing
$25 – $50
$50 – $80
+$10 – $25
Hat / Cap Digitizing
$15 – $35
$30 – $55
+$10 – $20
Patch Digitizing
$15 – $40
$35 – $70
+$10 – $20
Towel / Terry Digitizing
$20 – $45
$40 – $75
+$10 – $25
Note: Prices are indicative for professional services. Freelancer marketplaces may be cheaper but quality varies widely.
One-Time Fee vs Per-Piece Pricing — What’s the Difference?
This is one of the most common points of confusion for first-time buyers. Here’s how it works:
Digitizing Fee (One-Time)
You pay for digitizing once — when the file is created. After that, the digitized file is yours. Every time you reorder, you use the same file without paying again. This is standard practice with reputable digitizing companies.
Per-Piece Embroidery Cost (Ongoing)
This is what the embroiderer charges to actually stitch the design onto garments. This is separate from digitizing and is charged per item, typically ranging from $3–$15 per piece depending on stitch count, garment type, and quantity.
Always ask: “Do I own the digitized file?” Reputable companies provide the file to you. Some low-cost providers retain ownership and charge you again for every reorder — avoid these.
Rush Orders: What Do They Cost Extra?
Most professional digitizing services offer tiered turnaround options:
Standard (12–24 hours): Base price
Same Day (4–12 hours): +25% to +35%
Rush (under 4 hours): +40% to +75%
Super Rush (under 2 hours): +75% to +100%
If your deadline allows, always go with standard turnaround — the quality is the same and you save significantly on cost.
What’s Included in the Price?
A good digitizing service should include the following at no extra charge:
The digitized stitch file in your required format (DST, PES, etc.)
A preview image of the digitized design before production
One round of free revisions if the output doesn’t match your artwork
Customer support to answer questions about the file
Watch out for providers who charge extra for the preview, additional formats, or basic revisions. These add-ons are standard inclusions at professional services.
How to Get the Best Value from Embroidery Digitizing
Follow these tips to keep your costs down without sacrificing quality:
Provide High-Quality Source Files
Send a vector file (AI, EPS, or SVG) whenever possible. Digitizing from a vector is faster and produces better results than working from a low-resolution JPEG. Poor artwork quality can add revision cycles that drive up cost and delay delivery.
Simplify Your Design Where Possible
If your logo has photographic gradients or extremely fine detail, ask your digitizer what can be simplified for embroidery without losing the essence of the brand. Fewer stitches means lower cost and often better-looking embroidery.
Batch Your Orders
If you need multiple designs digitized, send them together. Many providers offer discounts for batch orders of 3 or more designs.
Don’t Chase the Cheapest Option
$2 digitizing services exist. They also produce files that look terrible on fabric, require expensive re-digitizing, and waste the cost of your garments. Quality digitizing is a one-time investment that pays for itself across every reorder.
Common Mistakes That Drive Up Your Digitizing Cost
Sending a blurry or low-resolution image as source artwork
Asking for last-minute rush orders that could have been planned ahead
Requesting unnecessary colors that add complexity without adding visual value
Choosing a provider that doesn’t let you own the file — forcing you to pay again for every reorder
Not specifying the garment type — digitizing for a hat is different from digitizing for a jacket
Skipping the proof review and going straight to production, then needing re-digitizing
Frequently Asked Questions
How much does it cost to digitize a simple logo?
A simple logo with clean lines, 1–3 colors, and under 5,000 stitches typically costs $10–$20 at a professional digitizing service.
Do I have to pay for digitizing every time I order?
No — if you use a reputable service that gives you ownership of the digitized file, you pay once and reuse the file for every future order. Always confirm file ownership before paying.
How long does embroidery digitizing take?
Standard turnaround is 12–24 hours. Rush services can deliver in 2–4 hours, typically at an additional cost of 40–75%.
Can I digitize my own logo for free?
Free and low-cost digitizing software exists (like Ink/Stitch), but producing professional-quality results requires significant technical skill and practice. For business or commercial use, professional digitizing is almost always worth the investment.
What file format do I need for embroidery digitizing?
The most common formats are DST (Tajima), PES (Brother), JEF (Janome), and VP3 (Husqvarna/Viking). Ask your embroiderer which format their machine uses before ordering — most professional digitizers provide multiple formats at no extra charge.
Is embroidery digitizing a one-time cost?
Yes, for reputable providers. Once digitized, the file is yours to use indefinitely across unlimited reorders. The only ongoing cost is the per-piece embroidery fee charged by your embroiderer.
Final Thoughts
Embroidery digitizing is a one-time investment that unlocks unlimited production of your embroidered design. For most standard logos and designs, you’re looking at $10–$50 — a small cost relative to the value of professional-looking embroidery on uniforms, merchandise, or branded apparel.
The key is choosing a provider that delivers quality work, gives you file ownership, and offers responsive support. Cut corners here and you’ll pay for it in wasted garments, re-digitizing fees, and delays.
Need your logo digitized? Gem Punch offers professional embroidery digitizing with 24-hour turnaround, free revisions, and full file ownership. Get a free quote at gempunch.xtremlogics.com/.
Embroidery digitizing is the technical art of converting artwork into a stitch file that embroidery machines can read and execute. It’s the bridge between creative vision and physical production — a small error in digitization can result in costly rework, damaged fabrics, failed threads, and frustrated clients.
At Gem Punch, our digitizing team has worked with thousands of designs over 13+ years of production experience. We’ve digitized everything from simple 2-color logos to photorealistic images with 50+ thread colors. We’ve troubleshot every problem imaginable: puckering on jersey fabric, thread breakage on denim, color bleeding, and stitch-outs that don’t match the original design.
This comprehensive guide consolidates a decade of expertise into a definitive reference for anyone who needs to understand, create, or order digitized files.
Table of Contents
What Is Embroidery Digitizing?
Why Digitizing Matters
Digitizing Software & Tools
The Digitizing Process Step-by-Step
File Preparation & Artwork Requirements
Stitch Types, Density & Fabric Matching
Advanced Techniques
Common Mistakes & Solutions
Outsourcing vs. In-House Digitizing
Quality Assurance & Testing
Real-World Case Studies
FAQ: 15 Common Questions
What Is Embroidery Digitizing?
Embroidery digitizing is the process of converting a 2D design (logo, artwork, or image) into a 3D stitch file that embroidery machines can read and execute.
The Problem It Solves
Embroidery machines are mechanical devices that follow precise instructions. They’re incredibly sophisticated, but they can’t “understand” a logo the way humans do. A professional digitizer must:
Analyze the design — Understand what works in embroidery vs. what doesn’t
Choose stitch types — Running stitch for outlines, satin stitch for fills, backstitch for detail
Set stitch density — Too loose = sloppy; too dense = puckering and fabric damage
Plan color sequence — Order thread changes for production efficiency
Encode data — Convert all this into machine-readable files (.pes, .exp, .jef, etc.)
What Professional Digitizers Actually Do
Beyond the technical work, professional digitizers simplify artwork intelligently, adapt designs from print to embroidery (different colors, different detail levels), plan thread changes to minimize production time, test designs before full production runs, and optimize files for different machine brands. Each of these steps directly impacts the quality and cost of your final embroidered product.
Puckering fabric: Too many stitches in one area cause fabric to bunch → garment is unusable.
Fuzzy edges: Insufficient stitch density means outline stitches are too far apart → blurry, unprofessional appearance.
Color bleed: Thread shows through to underside of fabric → customer returns.
Stitch-out doesn’t match design: Machine follows a bad digitized file exactly — but it’s wrong → wasted material and wasted labor.
Cost impact: A 500-unit order with bad digitizing can cost $500–$2,000 in rework or scrapped goods. Professional digitizing is not an optional luxury — it’s essential cost control.
The Value of Great Digitizing
Clean, professional stitching. Accurate color reproduction. Durable embroidery that lasts 5–10 years. Fast production with no rework, no thread breaks, no delays. And ultimately, happy customers who place repeat orders and leave positive reviews.
Digitizing Software & Tools
Professional Digitizing Software
Wilcom (Industry Standard) — Price: $3,000–$8,000+. Sophisticated stitch control, automated tracing, AI-assisted density. Steep learning curve, requires formal training. ~40% of professional digitizers use Wilcom.
Janome Digitizer — Price: $300–$2,000. Good balance of power and usability. Moderate learning curve. Best for small to medium businesses and serious hobbyists.
Embird / Hatch — Price: $150–$500. Beginner-friendly with good automation. Low to moderate learning curve. Best for startups, freelancers, and learning digitizers.
Modern AI-Assisted Tools
Auto-digitizing algorithms can convert artwork with minimal manual adjustment, achieving 70–80% accuracy on simple designs. Cloud-based digitizing services offer lower cost at the expense of some control over quality. The honest reality: AI tools are improving but still can’t match expert human digitizers on complex designs. For simple logos (1–4 colors, bold shapes), AI is 80–90% of the way there. For complex artwork, human expertise remains essential.
Critical Digitizing Parameters
Stitch Density — Stitches per square inch. Tight density (4–6 stitches/inch) risks puckering on delicate fabrics. Medium density (2–4 stitches/inch) is standard and versatile. Loose density (1–2 stitches/inch) is for outline work and understitching.
Stitch Length — Distance between individual stitches. Short (1–2mm) for fills and detail. Medium (2–4mm) for standard borders. Long (4–6mm) for backstitching and outlines.
Underlay — Hidden stitches underneath the top layer that stabilize the design, preventing puckering and shifting. Adds stitches (increasing cost and time) but prevents defects. Always worth including.
You provide the design, desired final size, fabric type, color preferences, and any reference examples. The more specific your brief, the better your result. Key information: fabric type (jersey, towel, denim, twill), stitch budget if relevant, and attachment method (sew-on, iron-on, etc.).
The digitizer analyzes design suitability, removes fine details that won’t translate to stitching, simplifies curves, consolidates colors (fewer colors = faster, cheaper production), and converts raster images to vector if needed. Example: A photorealistic sunset gets simplified to 3 bold colors (orange, pink, purple) — a design embroidery can execute cleanly.
Using software, the digitizer traces outlines and fills with appropriate stitch types, sets stitch density customized for the target fabric, plans thread color order for production efficiency, adds underlay stabilization to prevent puckering, optimizes stitch paths to reduce jump stitches, and tests the design in simulation software. Quality digitizers run 100+ iterations before finalizing.
Step 4: Sampling & Testing (2–5 days)
Before full production, the digitizer runs the design on a sample using the actual production fabric, checks for puckering and thread breakage, measures stitch-out size, and compares to the original design intent. This step is non-negotiable. Cost of sample: $20–50. Cost of rework on 500 units: $500–2,000.
Step 5: Production
Once approved, the design is loaded into production machines and produced at scale. The digitized file becomes the master record for all future orders.
File Preparation & Artwork Requirements
What Makes Good Artwork for Digitizing
Ideal artwork is: Vector format (.ai, .eps, .pdf with vector data), minimum 300 DPI if raster, limited to 2–6 colors, using bold shapes with no lines thinner than 1mm, clear contrast, no gradients (convert to 2–3 flat colors), and not photorealistic raw files.
Avoid: Thin lines (under 1mm, they disappear when stitched), complex gradients, raw photographs without simplification, and text smaller than ¼ inch height.
The Critical Rule: Minimum Text Size
Minimum text size for embroidery readability: ¼ inch height. Below this, letters blend together and become illegible. This is a hard production rule. A logo with “est. 2024” in small text might look sharp at ¼ inch and look like a smudge at ⅛ inch. Always ask: will this be readable when stitched?
File Format Checklist
Before submitting artwork, verify: Is it a vector file (.ai, .eps, or .pdf with vector data)? If raster, is it 300 DPI at final size? Are all fonts converted to outlines? Is the color count 2–6 maximum? Are text sizes minimum ¼ inch? Are line weights minimum 1mm?
Puff creates raised, dimensional stitching by stitching on top of special foam or filling material. Result: an eye-catching 3D effect that pops off the garment. Best for hoodies, caps, and streetwear applications. Cost: 30–50% premium over standard digitizing. One streetwear brand that added puff to their hoodies saw sales increase 23% — the 3D effect was that distinctive.
Converts photographs into embroidery using layered colors and precise stitch angles. The digitizer analyzes a photo’s color gradations and recreates them using multiple thread colors and stitch angle changes. Results can be stunning. Cost: Very high ($500–$5,000+ per design) — this is expert territory. Sports memorabilia companies use this for embroidered player portraits, retailing at $150–$400 per item.
Appliqué Digitizing
Combines fabric pieces with embroidery — large shapes are created as fabric appliqué, with details embroidered on top. Reduces stitch count by 40–60% vs. full embroidery, making it faster and significantly cheaper for large logos or cost-sensitive bulk orders.
Color Blending with Stitch Direction
By changing stitch angles, digitizers can create subtle color transitions without multiple thread colors — an optical illusion that makes 2 thread colors look like 4–5. A powerful technique for creating rich-looking designs at a lower cost.
Common Mistakes & Solutions
Mistake #1: Too Much Detail in Design
Problem: Client submits logo with fine lines and small text. Result: Details blur, text becomes unreadable, fabric puckers. Solution: Simplify before digitizing. Remove fine lines, use minimum ¼ inch text, reduce to 2–6 colors.
Mistake #2: Incorrect Stitch Density for Fabric
Problem: Using towel density on jersey (or vice versa). Result: Either puckering and thread breaks, or weak sloppy-looking stitches. Solution: Always tell your digitizer the production fabric. Customize density per fabric type.
Mistake #3: Poor Thread Color Order
Problem: Planning color changes randomly without optimization. Result: Excessive thread trimming, production delays, higher labor costs. Solution: Organize colors logically — similar colors together, minimize transitions.
Mistake #4: No Sample Testing
Problem: Producing 1,000 patches without testing the digitized file first. Result: Discover a defect too late — all 1,000 are flawed. Solution: Always run a sample before full production. Cost: $20–50. Rework cost: $500–2,000. The math is obvious.
Mistake #5: Using Raster Files (JPEG/PNG)
Problem: Client provides logo as a low-res JPEG. Digitizer uses auto-trace. Result: Pixelated, blurry stitches that don’t match the original. Solution: Vector files only. Have JPEG vectorized first ($50–300) before digitizing.
Mistake #6: Ignoring Fabric Characteristics
Problem: Using uniform density regardless of fabric type. Result: Neither looks professional. One puckers, one looks weak. Solution: Customize digitizing by fabric. Never use a one-size-fits-all approach.
Pros: Complete control over quality and timeline, no vendor dependency, ability to iterate quickly, designs stay proprietary.
Cons: Software costs $1,000–$8,000+ plus formal training costs ($500–$2,000). Each complex design takes 4–8 hours of your time. Mistakes are entirely your cost. Steep learning curve. Machine compatibility headaches.
Best for: High-volume producers (100+ designs/year), embroidery shops with existing expertise, large corporations with internal teams.
When to Outsource Digitizing
Pros: Access to expert digitizers with years of experience. Fast 24–48 hour turnaround. Zero software investment. Risk transfer — the vendor is accountable for quality. Supports multiple machine formats (.pes, .exp, .jef, etc.).
Cons: Less direct control, communication delays, vendor dependency.
Best for: Agencies, startups, businesses with fewer than 20 designs/year, teams without design expertise.
Industry reality: 65% of US apparel brands now outsource digitizing to specialized studios. It’s the norm — not the exception.
Before releasing a file, professional digitizers verify: appropriate stitch count for design size and fabric, thread tension compatibility (no breaks), optimized color sequence, adequate underlay coverage, correct file format for the intended machine, pull compensation for fabric stretch, solid edge density (no gaps), and secure tie-down anchors.
Pre-Production Checklist
Before committing to 500–1,000 unit production, run through these checks on a physical sample: stitching is clean with no thread breaks, fabric lies flat with no puckering, thread colors match design intent, finished size matches desired dimensions, file format works on your machine, thread tension is correct, edges are crisp and solid, and the design holds up after a wash test.
Real-World Case Studies
Case Study #1: Retail Chain — Digitizing Disaster Averted
Client: Retail chain, 200 employees, 5 locations Challenge: Submitted a 72 DPI JPEG logo for embroidery on uniforms. Wanted 500 patches immediately. Problem Identified: Auto-digitizing from the JPEG would produce blurry, pixelated stitches.
Solution: Gem Punch recommended vectorizing the JPEG first ($150), then digitizing. Added 3 days but prevented a production disaster.
Results: Vectorized logo produced clean, crisp lines. Digitized file was professional quality. Sample tested perfectly. All 500 patches produced with zero defects. Cost savings: $150 vectorization vs. $2,000+ rework on bad patches.
Lesson: Don’t skip vectorization if your source file is raster. The upfront cost is always worth it.
Case Study #2: Streetwear Brand — 3D Puff Innovation
Client: Emerging streetwear brand, 5,000 social followers Challenge: Needed a “wow factor” for a limited-edition hoodie drop. Standard embroidery felt generic. Solution: Commissioned 3D puff digitizing of brand logo. Cost: $500 (premium for 3D).
Results: Hoodies sold out in 2 weeks (normally takes 4–6). Customer feedback: overwhelmingly positive about the 3D effect. Social posts about the hoodies got 5x typical engagement. Profit margin increased 18% due to premium pricing — the puff justified a higher retail price.
Lesson: Premium digitizing techniques can justify premium pricing and create real market differentiation.
Case Study #3: Corporate — Thread Break Crisis Solved
Client: Corporate uniform supplier, 10,000 unit annual order Problem: Production machine breaking thread on every 50th patch. The digitized file had density set too high for the jersey fabric — a file that had been in use for 4 years without re-testing. Solution: Re-digitized with proper density for jersey and modern machine specs.
Results: Zero thread breaks with the new file. Production efficiency increased 30%. Labor savings: $3,000+ immediately. Ongoing annual savings: $1,500–$2,000.
Lesson: Even “working” digitized files can be outdated. Regular re-testing catches expensive problems before they compound.
FAQ: 15 Common Questions About Embroidery Digitizing
Q1: How long does digitizing take? Simple logo (1–4 colors): 1–2 days. Complex design (5–10 colors): 3–5 days. Photorealistic: 1–2 weeks.
Q2: What file formats do you accept? Vector (.ai, .eps, .pdf with vector data) is ideal. If raster, minimum 300 DPI at final size. Low-res JPEG/PNG needs vectorization first ($50–300).
Q3: Can I use an old digitized file from 5 years ago? Maybe, but files should be re-tested regularly. Machine specs and fabric types change. Re-testing via sampling is cheap insurance.
Q4: What’s the ideal stitch count for patches? Depends on size: 2″ patch = 2,000–4,000 stitches; 4″ patch = 5,000–10,000 stitches. More stitches = higher cost and longer production.
Q5: Can I use the same digitized file on different fabrics? Not recommended. Density needs adjustment per fabric type. Always customize by fabric — the same file on jersey vs. towel will produce very different results.
Q6: What does “underlay” do? Underlay stitches stabilize the design, prevent puckering, and prevent shifting during production. They add stitches but prevent defects. Always worth including.
Q7: How much does digitizing cost? Simple: $50–100. Complex: $200–500. Photorealistic: $500–$5,000. Get quotes from 2–3 vendors before committing.
Q8: Can I make changes after digitizing is done? Minor changes (colors, slight adjustments): $20–50. Major changes (redesign): might as well re-digitize ($100–300).
Q9: Should I always get a sample before production? YES. Non-negotiable. Sample cost: $20–50. Rework cost on 500 units: $500–2,000. The ROI is obvious.
Q10: What if the digitized file doesn’t match my original design? Common and expected. Digitizing simplifies designs. Expected changes include fewer colors, less detail, and adjusted proportions. If the result is drastically different from what was agreed, request a revision.
Q11: Can digitized files be used on different machines? Each machine brand needs its own format (.pes for Brother, .exp for Melco, .jef for Janome, etc.). Good digitizers provide multiple formats automatically.
Q12: How do I know if a digitizer is good? Ask for a portfolio of samples they’ve actually produced. Read reviews. Check how they handle revisions. Good digitizers respond quickly and stand behind their work.
Q13: What’s the difference between auto-digitizing and manual? Auto-digitizing: Software traces design automatically (70–80% quality, faster, cheaper). Manual: Digitizer hand-traces and optimizes (95%+ quality, more expensive). Manual is always better for complex or professional work.
Q14: Can I digitize photographs? Yes, but they require photorealistic digitizing — expensive and complex. A simpler approach: have the photo simplified to 3–4 flat colors first, then digitize.
Q15: How often should I re-digitize old files? Every 3–5 years if actively used. Technology improves, machines are upgraded, better techniques become available. Annual re-testing (sampling) catches problems early.
Conclusion
Embroidery digitizing is both art and science. The best digitizers understand design principles, machine mechanics, fabric properties, and production realities. They think beyond the stitch file — they think about the final embroidered product and the customer who will wear it.
Key Takeaways:
Quality digitizing is the foundation of professional embroidery — don’t cut corners here
Artwork simplification is critical — complex designs produce poor results
Stitch density must be matched to fabric type (non-negotiable)
Always test samples before full production
Outsourcing digitizing is now standard industry practice (65% of brands do it)
Professional digitizers save time, money, and headaches
The embroidery digitizing landscape is undergoing a seismic shift. In 2025, 60% of US apparel brands, uniform suppliers, and promotional companies now outsourcing digitizing needs—a 25% increase from 2020. This isn’t just about cost-cutting; it’s a strategic move to harness specialized expertise, accelerate production, and tap into emerging trends. Here’s why outsourcing embroidery digitizing has become non-negotiable for competitive brands.
The Cost and Efficiency Advantage
The Reality: Maintaining in-house digitizing teams requires $80K–$120K annually in salaries, software licenses, and training. Outsourcing slashes this by 60–70% while providing scalable resources.
Actionable Insights:
Bulk Discounts: Studios like Digitize Are Us offer volume-based pricing, with per-design costs dropping to $5–$15 for orders exceeding 50 designs.
No Hidden Costs: Eliminate overheads like software updates ($2K/year) or equipment maintenance.
Access to Niche Expertise
Not all digitizing is equal. Custom patches, 3D puff effects, and performance fabrics demand specialized skills most brands lack internally.
Why Specialized Studios Excel:
Expertise Area
In-House Challenge
Outsourced Solution
Complex Techniques
Limited 3D puff experience
Mastery in dimensional embroidery
Fabric-Specific Optimization
Trial-and-error waste
Pre-tested settings for towels, denim, performance wear
Trend Alignment
Lag in adopting new trends
Glow-in-the-dark threads, AI-generated textures
Quality That Builds Brand Authority
Poor digitizing causes thread breaks, misaligned logos, and fabric damage—costing brands in returns and reputation. Specialized studios mitigate this through:
Stitch-Perfect Precision: Tight satin stitches for durability, micro-stitching for intricate details.
Fabric-Smart Settings: Optimized density for towels (4,000–6,000 SPI) vs. uniforms (7,000–10,000 SPI).
3-Step Quality Checks: Digital proofs → material tests → unlimited revisions.
Speed-to-Market in the TikTok Era
Fast fashion cycles and viral trends demand agility. Specialized studios deliver:
24–48 Hour Turnaround: Critical for event merch or trend-responsive drops.
Rush Services: 4–12 hour options for urgent campaigns (e.g., concert patches after a Taylor Swift tour announcement).
Bulk Scalability: Produce 10,000+ uniform patches without quality drift.
The Custom Patch Revolution: Why Digitizing Matters
Custom patches are 2025’s #1 branding tool—projected to grow 15% year-over-year. But their impact hinges on expert digitizing:
Durability: PVC patches for outdoor gear require waterproof stitch patterns.
Trend Integration: Chenille patches for vintage vibes or metallic threads for “quiet luxury”.
Storytelling: Micro-stitching captures intricate HBCU crests or national park details.
Brands Winning with Outsourced Patches:
Patagonia: Uses eco-digitized recycled thread patches to reinforce sustainability messaging.
Streetwear Startups: Leverage 3D puff digitizing for limited-edition drops selling out in minutes.
2025 Trends Driving Outsourcing Demand
AI-Optimized Files: Studios use AI to auto-reduce stitch counts by 20% without quality loss.
Eco-Digitizing: Demand for PFAS-free stabilizers and organic fabric-compatible settings surged 200% since 2024.
Multi-Sensory Designs: Glow-in-the-dark threads for nightlife patches; textured stitches for tactile branding.
How to Choose a Digitizing Studio: 4 Actionable Tips
Audit Their Niche Expertise: Ask for case studies in your sector (e.g., military badges vs. fashion patches).
Test Communication: Ensure 24/7 US-based support to avoid language barrier delays.
Request a Trial File: Validate quality with a complex design (e.g., tiny text or gradients).
Verify Turnaround Times: Confirm rush service SLAs in writing.
Conclusion: Outsourcing as Competitive Strategy
Outsourcing digitizing isn’t a compromise—it’s an operational upgrade. Brands gain:
✅ 50% faster production cycles
✅ Zero defects with specialized file optimization
✅ Trend agility through studios’ R&D investments
In 2025, embroidery isn’t just decoration; it’s wearable storytelling. Partnering with experts ensures your patches, uniforms, and merch tell that story flawlessly.
FAQs: Outsourcing Digitizing for US Brands
How do I ensure quality control with overseas studios?
Choose studios with US-based project managers (e.g., Digitize Are Us) and mandatory test sew-outs.
Can I reuse digitized files for different products?
Not without adjustments! A cap file differs from a towel design. Studios optimize files per application.
What’s the cost range for outsourcing?
$8–$30/design based on complexity. Bulk orders (50+) drop costs to $5–$15
How do studios handle confidential logos?
Reputable providers sign NDAs and use encrypted portals for file transfers.
What if I need revisions?
Top studios offer 1–2 free revisions within 7–14 days.
Embroidery thread breaks can turn a creative project into a frustrating ordeal. Whether you’re a hobbyist or a professional, few things are as disruptive as snapped threads, uneven stitches, or tangled messes. At the heart of this issue lie two critical factors: machine tension settings and embroidery file quality. Understanding how to address these problems not only saves time and materials but also ensures flawless results.
In this comprehensive guide, we’ll explore why embroidery thread breaks happen, how to adjust tension like a pro, and the file fixes that prevent costly errors. Plus, we’ll answer your top FAQs to keep your machine running smoothly.
Why Embroidery Thread Breaks: Top Causes
Before diving into solutions, let’s diagnose the root causes:
Incorrect Tension Settings (too tight or too loose).
Jump Stitches Over 10mm: Long jumps increase thread friction.
Too Many Color Changes: Frequent trimming weakens the thread.
Incorrect Pull Compensation: Shapes distort, forcing thread to snap.
Section 3: Thread and Needle Troubleshooting
3.1 Choosing the Right Thread
Polyester: Durable and affordable for most projects.
Rayon: High sheen but prone to breaks if tension is off.
Metallic: Use a larger needle (size 90/14) and slower speed.
Avoid: Old or cheap thread—it frays and snaps easily.
3.2 Needle Know-How
Size: Match the needle to the thread (e.g., 75/11 for 40-weight thread).
Type: Use embroidery needles with a larger eye to reduce friction.
Replacement: Change needles every 8–10 hours of stitching.
Section 4: Maintenance to Prevent Breaks
Clean Regularly: Remove lint from the bobbin area, tension discs, and feed dogs.
Oil Moving Parts: Follow your machine manual’s guidelines.
Check for Burrs: Inspect the needle plate and hooks for rough spots.
Key Takeaways
✅ Balance Tension: Test and adjust incrementally.
✅ Optimize Files: Simplify designs and add underlay.
✅ Use Quality Supplies: Thread, needles, and regular maintenance matter.
✅ When in Doubt, Redigitize: Flawless files prevent 80% of thread breaks.
Need Professional Help?
At Gem Punch, we specialize in ‘error-free embroidery digitizing’ and troubleshooting. Get a Free File Audit today—we’ll identify tension traps and optimize your designs for smooth stitching!
FAQs: Solving Embroidery Thread Breaks
What’s the ideal tension setting for embroidery machines?
There’s no universal setting, but start with a top tension of 4–5 and adjust based on thread and fabric. Always test on scrap material first.
Can a poorly digitized file damage my machine?
Yes! Overly dense files strain motors and needles, leading to breaks and wear. Always optimize files before stitching.
Does thread quality really matter?
Absolutely. Cheap thread has inconsistent thickness and weak fibers, increasing break risks. Invest in reputable brands like Madeira or Sulky.
Why does my thread keep breaking even after adjusting tension?
Check for hidden issues:
– Burred needles or throat plates.
– Incorrect bobbin threading.
– Thread guides not properly engaged.
How can I prevent breaks in high-speed machines?
– Slow down the machine speed.
– Use industrial-grade needles (e.g., Schmetz).
– Ensure files are optimized for high-speed stitching.
In the world of embroidery digitizing, not all fabrics are created equal. A design that looks flawless on a uniform might turn into a tangled mess on a towel—and vice versa. At Gem Punch, we’ve learned that stitch density and thread choice are the unsung heroes of perfect embroidery. Towel vs. Uniform Digitizing: Key Differences in Stitch Density and Thread Choice. Whether you’re creating branded towels for a spa or custom uniforms for a restaurant, understanding these differences is crucial.
In this guide, we’ll break down the key distinctions between towel and uniform digitizing, share actionable tips, and reveal how custom patches can bridge the gap between these two embroidery worlds.
Why Stitch Density and Thread Choice Matter
Embroidery digitizing is a science. The wrong stitch density can cause fabric puckering or thread breaks, while poor thread choices lead to fading or fraying. Here’s why it’s critical to tailor your approach:
Towels: Plush, looped fabrics require gentler stitching to avoid snagging.
Uniforms: Dense, woven materials demand durability to withstand daily wear.
Towel Digitizing: Mastering Delicate Fabrics
Ideal Stitch Density for Towels
Towels have a thick, textured surface with loops that can trap threads. To prevent damage:
Use lower stitch density (4,000–6,000 stitches per square inch).
Opt for shorter stitch lengths (2.5–3.5mm) to avoid pulling loops.
Pro Tip: Add a lightweight stabilizer to minimize fabric movement.
Best Threads for Towels
Polyester Thread: Flexible and fade-resistant, perfect for frequent washing.
Avoid Metallic Threads: They snag easily on towel loops.
Common Towel Digitizing Mistakes
Overcrowding stitches (causes fabric distortion).
Ignoring underlay stitches (leads to uneven designs).
Uniform Digitizing: Prioritizing Durability
Optimal Stitch Density for Uniforms
Uniforms are built to last, so embroidery must be tough:
Higher stitch density (7,000–10,000 stitches per square inch).
Longer stitch lengths (3.5–4.5mm) for smoother coverage.
Thread Choices for Uniforms
Rayon Thread: High-sheen finish for polished logos (ideal for corporate uniforms).
Cotton Thread: Matte look for casual or vintage styles.
Uniform-Specific Challenges
Stretchy Fabrics (e.g., polo shirts): Use cutaway stabilizers to prevent puckering.
Dark Fabrics: Add a topping stabilizer to reduce thread shine-through.
Towel vs. Uniform Digitizing: Side-by-Side Comparison
Factor
Towels
Uniforms
Stitch Density
Low (4,000–6,000 SPI)
High (7,000–10,000 SPI)
Thread Type
Polyester
Rayon or Cotton
Stabilizer
Lightweight tear-away
Heavy-duty cutaway
Common Uses
Spa logos, hotel linens
Corporate logos, team apparel
Trends in Towel and Uniform Digitizing
Eco-Friendly Threads: Recycled polyester and organic cotton gain traction.
Hybrid Designs: Combine flat embroidery with 3D puff elements on uniforms.
Tactile Towels: Raised stitching for luxury spa branding.
Smart Digitizing Software: AI tools auto-adjust density based on fabric scans.
How Custom Patches Bridge the Gap
Custom patches offer versatility for both towels and uniforms:
Towels: Iron-on patches add branding without damaging loops.
Uniforms: Embroidered patches reinforce logos on high-wear areas (e.g., sleeves).
Why Choose Gem Punch Patches?
Durability: UV-resistant threads and tight stitching.
Custom Backing: Choose iron-on, sew-on, or Velcro® for any application.
FAQs: Towel and Uniform Digitizing
Can I use the same embroidery file for towels and uniforms?
No. Towels need lower-density files to prevent snagging, while uniforms require denser stitching. Always redigitize for each fabric.
How do I prevent thread breaks on thick towels?
Use a larger needle (size 75/11) and polyester thread, which is more flexible than rayon.
What’s the best stitch type for uniform logos?
Satin stitches for borders and fill stitches for large areas (e.g., company crests).
Can I embroider on microfiber towels?
Yes, but use a water-soluble stabilizer and reduce stitch density by 20%.
Do you offer bulk discounts for uniform digitizing?
Yes! Contact us for custom pricing on orders of 50+ pieces.
Ready to Perfect Your Embroidery Projects?
At Gem Punch, we specialize in fabric-specific digitizing that ensures crisp, long-lasting designs—whether you’re stitching towels, uniforms, or custom patches. Get a Free Quote today and let our experts optimize your next project!