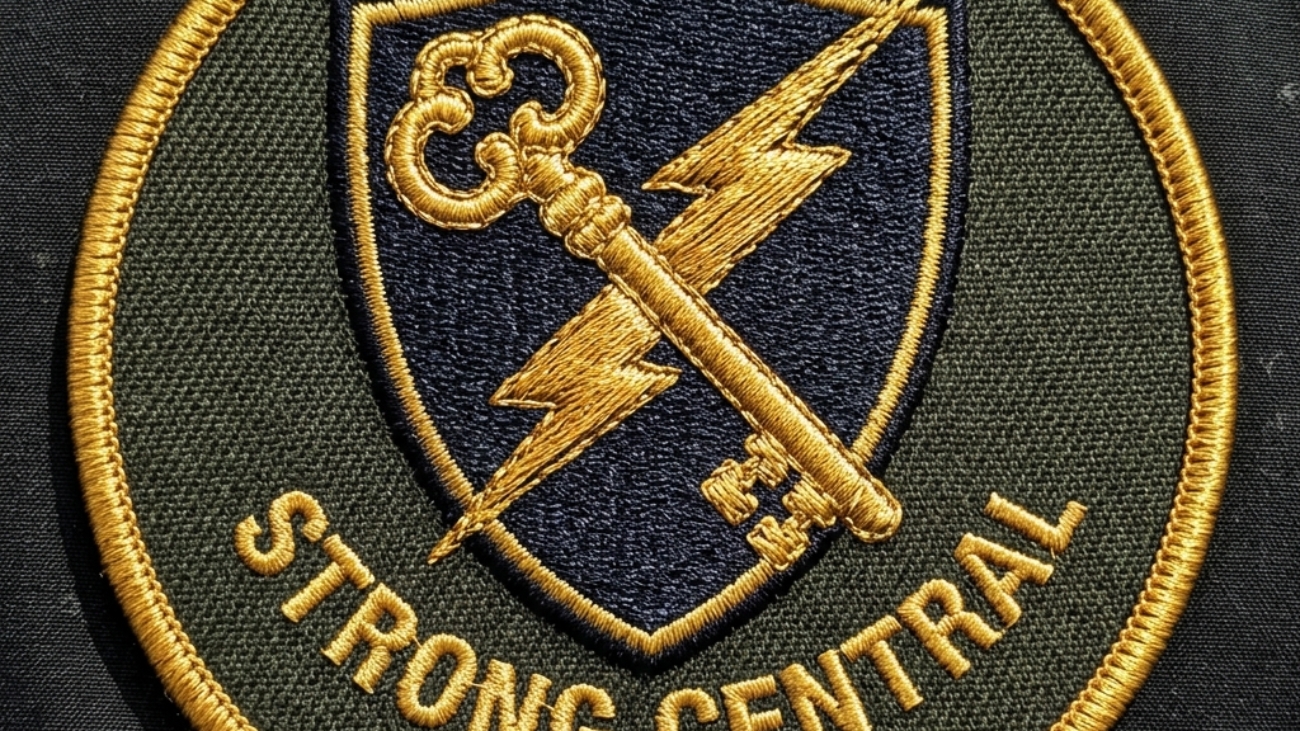
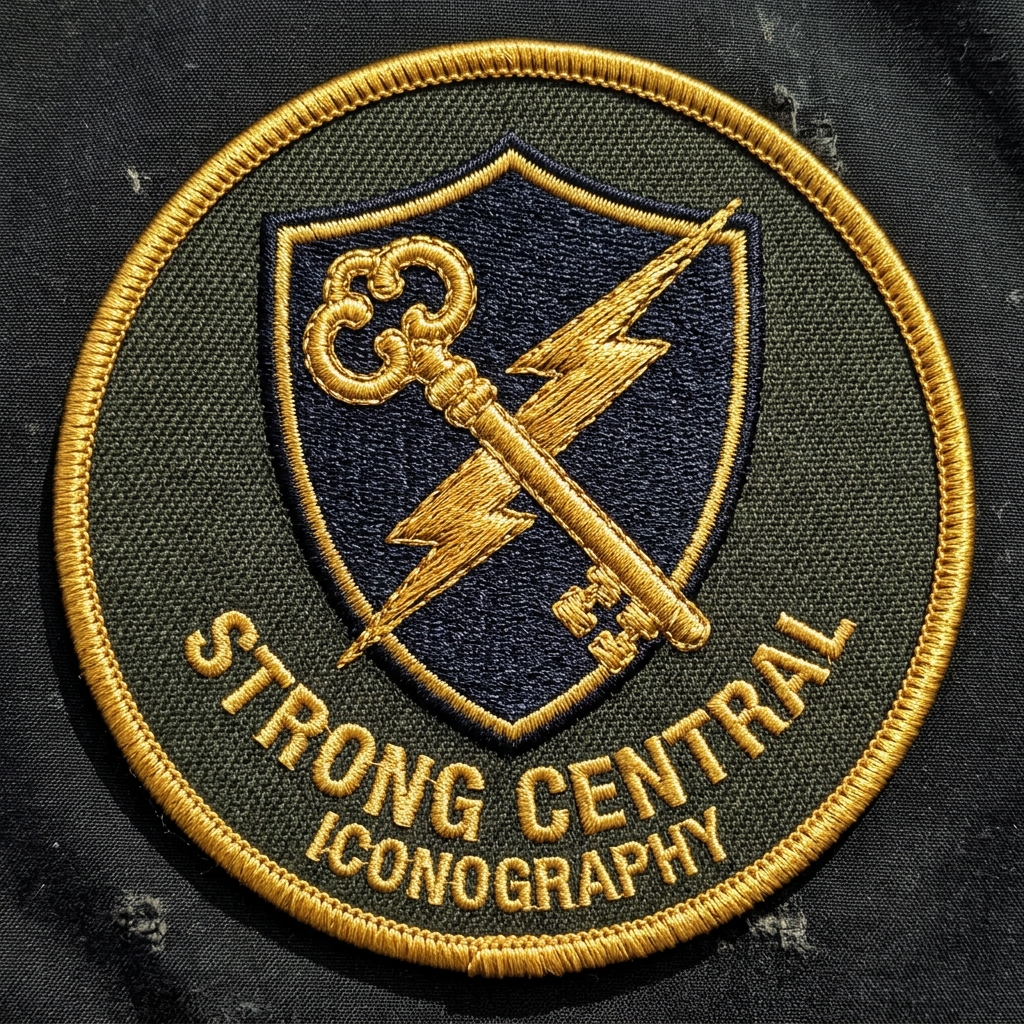
Embroidered_patch_key_and_lightning_202608131354

Patch Design Principles: Master Color, Contrast & Composition for Professional Patches

You’re sitting in front of your computer, trying to design a patch.

You have an idea. You’ve got colors in mind. You know generally what you want it to look like.

But you don’t know patch design principles, when you mock it up, something feels off. It doesn’t look as professional as you imagined. The text is hard to read. The colors don’t pop. The overall composition feels amateur.

Here’s the thing: great patch design isn’t magic. It’s not talent that some people have and others don’t.

It’s understanding specific design principles that work for patches. Because patch design has unique constraints—your design will be viewed at arm’s length, created with embroidery thread, and needs to communicate instantly.

This guide walks you through the fundamental design principles that separate professional patches from amateur ones. Apply these principles and your designs will look significantly better.
The Core Problem With Patch Design (Why Most Fail)

Before we talk about what works, let’s talk about what doesn’t.

I’ve reviewed hundreds of patch designs. The amateurs all make the same mistakes:

Too many colors. 7-8 colors looks cool on your computer. When embroidered, it’s muddy and complex.

Too much detail. Fine lines and intricate shapes disappear when stitched. Small details become visual noise.

Low contrast. Your colors look good together to you, but when viewed from 5 feet away, they blend together and become unreadable.

Unclear hierarchy. Everything is equally important, so nothing stands out. No focal point.

Text too small. Looks fine on screen. Illegible when embroidered on a 3-inch patch.

Fonts that don’t work. Script fonts, thin fonts, ornate fonts—all look terrible when stitched into thread.

Composition that’s cluttered. Every inch of space filled. No breathing room. Looks amateur.

The good news? Understanding these problems is halfway to fixing them.

Design Principle #1: Color Theory — Choose Colors That Work

Understanding Color Psychology

Color isn’t random. Colors communicate.

Red says: energy, urgency, passion, danger, stop
Blue says: trust, professional, calm, stability, corporate
Green says: growth, nature, fresh, eco-friendly, healthy
Yellow says: optimism, energy, caution, warmth, happiness
Orange says: creativity, enthusiasm, warning, activity, fun
Purple says: luxury, creativity, wisdom, mystery, premium
Black says: professional, power, sophisticated, elegance, formal
White says: clean, simple, modern, fresh, space
Gold says: premium, luxury, achievement, success, high-end
Silver says: modern, sophisticated, tech, sleek, contemporary

When designing a patch, ask yourself: What do I want this patch to communicate? Choose colors that reinforce that message.

Example: Security company patch should use blue (trust, professional) not orange (fun, casual).

The Color Harmony Approach

Not all colors work together. Some combinations are beautiful. Others clash.

Complementary colors — Opposite on color wheel

  • High contrast, vibrant, eye-catching
  • Example: Blue + Orange
  • Use when: You want maximum visual impact
  • Watch out: Can be overwhelming if not balanced

Analogous colors — Adjacent on color wheel

  • Harmonious, subtle, cohesive
  • Example: Blue + Purple + Green
  • Use when: You want sophisticated, professional look
  • Watch out: Can look bland if not enough contrast

Triadic colors — Equally spaced on color wheel

  • Balanced, dynamic, vibrant but not chaotic
  • Example: Blue + Red + Yellow
  • Use when: You want both balance and energy
  • Watch out: Requires skill to not overdo

Monochromatic — Variations of single color

  • Cohesive, professional, sophisticated
  • Example: Light blue + medium blue + dark blue
  • Use when: You want clean, professional, minimalist look
  • Watch out: Can look boring without proper contrast

For patches specifically: Complementary colors work best. High contrast = readable from distance.

The Color Limitation Reality

Here’s a constraint unique to patch design: embroidery has thread color limitations.

You can’t create every color that exists. You’re limited to thread colors a manufacturer has in stock.

Practical limit: 3-5 colors maximum per patch

Why?

  • 1-2 colors: Looks basic, no visual interest
  • 3-5 colors: Sweet spot (professional, interesting, cost-effective)
  • 6-10 colors: Expensive, complex, harder to read
  • 10+ colors: Impractical (poor quality, extremely expensive)

Real cost impact:

  • 3-color patch: $1.50/patch
  • 5-color patch: $2.00/patch
  • 8-color patch: $3.50/patch

More colors = significantly more expensive. Smart designers stay in the 3-5 color range.

Choosing Your Palette Strategically

Step 1: Decide on primary color

  • This is your main brand color
  • Should reflect your brand identity
  • Examples: Navy blue, forest green, burgundy

Step 2: Choose 1-2 accent colors

  • Support the primary color
  • Create contrast and interest
  • Examples: Gold accent on navy, white on dark colors

Step 3: Test contrast

  • Print your color palette
  • View from 10 feet away
  • Can you see each color clearly?
  • If not, increase contrast

Step 4: Verify thread availability

  • Confirm your manufacturer has thread in those colors
  • Some Pantone colors don’t exist in thread
  • Check before finalizing design

Design Principle #2: Contrast — Make It Readable From Distance

Why Contrast Matters More Than You Think

Patches are viewed at arm’s length. Sometimes from across the room.

Low contrast designs become visual mush. You can’t read text. Graphics blend together. The patch looks amateurish.

High contrast designs communicate instantly. Clear, professional, readable.

Test: Squint at your design. If you can’t see the elements when you squint, contrast is too low.

Types of Contrast

Color contrast — Dark vs. light (most critical for embroidery)

  • Example: White logo on dark blue background
  • Example: Black text on yellow background
  • This is what matters most for patches

Value contrast — Light vs. dark regardless of hue

  • Example: Light gray vs. dark gray (even without color difference)
  • Matters when color alone isn’t enough

Saturation contrast — Bright vs. muted

  • Example: Bright red next to muted brown
  • Adds interest beyond just light/dark

Size contrast — Large vs. small elements

  • Example: Large logo, small text
  • Creates visual hierarchy

For patches: Focus on color contrast (light vs. dark).

High Contrast vs. Low Contrast Examples

HIGH CONTRAST (Professional):

  • White logo on dark blue background ✓
  • Dark logo on light yellow background ✓
  • Bright color on black background ✓

LOW CONTRAST (Amateurish):

  • Light gray logo on white background ✗
  • Dark blue logo on dark purple background ✗
  • Muted color on similar muted color ✗

Quick test: View your design at 50% brightness on your screen. If you still see it clearly, contrast is good.

Checking Contrast (The Professional Way)

Use online tools:

  1. Google “color contrast checker”
  2. Enter your two colors (foreground/background)
  3. Check if it passes WCAG AA standard (recommended for design work)
  4. Aim for contrast ratio of 7:1 or higher (very easy to read)

Alternative test:

  1. Print design in black and white
  2. Can you see all elements clearly?
  3. If yes, color contrast is adequate

Design Principle #3: Composition — Organize Elements Professionally

Visual Hierarchy: Guide the Eye

When someone looks at your patch, what should they notice first?

That’s your primary element. Your visual hierarchy.

Hierarchy levels:

  1. Primary element (most important) — Logo, main graphic
  2. Secondary elements (supporting) — Text, smaller graphics
  3. Tertiary/background (least important) — Background color

Why it matters: If everything is equally important, nothing stands out. Confusion results.

How to create hierarchy:

  • Size: Make primary element larger
  • Color: Make primary element brighter/more vibrant
  • Placement: Center or emphasize primary element
  • Simplicity: Primary element should be simpler/bolder

Example: Company logo (primary) should be larger and more prominent than company name (secondary).

Composition Rules That Work

Rule of Thirds: Divide your space into thirds (both horizontal and vertical). Place important elements at intersection points.

  • More visually interesting than pure center
  • Used in professional design constantly
  • Creates natural, balanced composition

Balance: Visual weight distributed evenly

  • Symmetrical: Mirror image (formal, professional, stable)
  • Asymmetrical: Unequal but visually balanced (dynamic, interesting, modern)

Emphasis: Your focal point stands out

  • Can’t be ambiguous
  • Needs to be immediately clear

White space (Negative space): Breathing room around elements

  • Prevents cluttered appearance
  • Makes design feel professional
  • Critical for legibility

Alignment: All elements align to invisible grid

  • Everything intentional, nothing random
  • Creates organized, professional appearance

Composition Examples

Good patch composition:

  • Logo center or center-left (primary)
  • Company name below logo (secondary)
  • Background color unifies (tertiary)
  • Clear focal point (logo)
  • Breathing room around elements
  • Professional appearance

Poor patch composition:

  • 5 different graphics competing
  • Text and logo same size (unclear what’s important)
  • No clear focal point
  • Cluttered, every inch used
  • Random placement
  • Amateur appearance

Design Principle #4: Typography — Font Selection for Embroidery

Fonts That Work for Embroidery

Not all fonts work when embroidered. Some fonts look great on screen but terrible when stitched.

Best fonts for embroidery:

Sans-serif fonts (no decorative lines)

  • Arial, Helvetica, Futura, Gotham
  • Clean, modern, legible
  • Work great when embroidered
  • Recommended for patches

Bold weight fonts (thicker strokes)

  • Regular or bold weight best
  • Thin fonts disappear when stitched
  • Font weight matters more than you think

Simple letterforms (no unnecessary complexity)

  • Geometric, clear shapes
  • No intricate details
  • Everything readable

Fonts to AVOID for embroidery:

Script/handwriting fonts

  • Too ornate, details disappear
  • Illegible when stitched
  • Looks unprofessional on patches

Thin fonts

  • Disappear when embroidered
  • Too delicate for thread
  • Not suitable for patches

Serif fonts with small serifs

  • Serifs disappear entirely
  • Looks wrong when stitched
  • Choose sans-serif instead

Overly decorative fonts

  • Complexity is lost
  • Details become visual noise
  • Unprofessional appearance

Text Sizing for Readability

Minimum text height: 3/8 inch (readable but tight)
Comfortable: 1/2 inch (easy to read)
Large/bold: 3/4 inch (very readable)

Rule: Larger text = better readability when embroidered. Minimum should be 1/2 inch for any important text.

Example: “Est. 2024” at 3/8 inch is readable but small. At 1/2 inch, it’s comfortable.

Text Placement Best Practices

Best placement: Bottom of patch (natural reading direction)

Acceptable: Along curved edges (if large enough to read)

Avoid: Diagonal text (hard to read), vertical text (unnatural), too small (illegible)

Design Principle #5: Simplicity — When Less Is More

The Simplicity Principle

Here’s something that surprises many first-time patch designers:

Complex designs look cheap. Simple designs look professional.

Why? Because patches are viewed from distance (5-10 feet away). Complex detail disappears. You’re left with visual confusion.

Simple design is clear. Professional. Memorable.

Why Complexity Fails

Problem #1: Fine detail disappears

  • Small lines become thick blobs
  • Intricate shapes become unreadable
  • Intent is lost

Problem #2: Too many colors become muddy

  • Individual colors blend together
  • Overall impression: confused, amateur

Problem #3: Visual noise

  • Too many elements competing
  • No clear message
  • Hard to remember

Simplification Strategies

Strategy #1: Reduce element count

  • Fewer shapes = clearer message
  • One focal point = strong design
  • Remove anything that doesn’t serve purpose

Strategy #2: Reduce color count

  • Stick to 3-5 colors (not 8-10)
  • Eliminate unnecessary hues
  • Better contrast results from limitation

Strategy #3: Increase size of key elements

  • Make logo bigger
  • Make text bigger
  • Reduces need for fine detail

Strategy #4: Remove unnecessary detail

  • Eliminate small lines
  • Simplify complex shapes
  • Round corners instead of complex angles
  • If detail disappears at distance, remove it

Rule of thumb: If you can’t describe your design in one sentence, it’s too complex.

The Patch Design Checklist: Before You Finalize

Use this checklist to verify your design is ready:

Color & Contrast

  • ☐ Using 3-5 colors maximum?
  • ☐ High contrast between colors?
  • ☐ Colors match brand identity?
  • ☐ Test from distance: Still readable?

Typography

  • ☐ Using sans-serif font?
  • ☐ Font weight is bold or regular (not thin)?
  • ☐ Text minimum 1/2″ height?
  • ☐ Text placement is professional?

Composition

  • ☐ Clear primary element (focal point)?
  • ☐ Clear visual hierarchy?
  • ☐ Balanced composition?
  • ☐ Adequate white space?

Simplicity

  • ☐ No unnecessary detail?
  • ☐ Can describe in one sentence?
  • ☐ Elements work at arm’s length?
  • ☐ No complexity that disappears?

Professional Quality

  • ☐ Looks professional overall?
  • ☐ Would represent brand well?
  • ☐ Would stand out on uniform?
  • ☐ Worth creating in embroidery?

If you checked all boxes: Design is ready for digitizing.

Real-World Example: Good Design vs. Poor Design

Example #1: Security Company Patch

GOOD DESIGN:

  • Shield logo (professional symbol)
  • Company name below
  • Dark blue background (trust, professional)
  • White text (high contrast)
  • 3 colors total
  • Legible at distance
  • Professional appearance

POOR DESIGN:

  • Shield with added decorative elements
  • 7 colors (muddy when embroidered)
  • Small company name (illegible)
  • Thin font (disappears)
  • Lots of shading/texture
  • Looks amateurish when embroidered

Example #2: Sports Team Patch

GOOD DESIGN:

  • Team name bold and large (primary)
  • Mascot/symbol as supporting graphic
  • Two accent colors (team colors)
  • Year in small text
  • Clean composition
  • High contrast

POOR DESIGN:

  • Multiple graphics competing
  • Text and mascot same size (unclear priority)
  • 5-6 colors (chaotic)
  • Overly complex mascot design
  • Small text (unreadable)
  • Cluttered appearance

Common Design Mistakes (And How to Avoid Them)

Mistake #1: Using Logo as-Is Without Modification

Problem: Logo designed for web/print, not embroidery
Result: Fine details disappear, colors too many, text too small
Solution: Simplify logo for embroidery—remove detail, reduce colors, enlarge text

Mistake #2: Trying Too Many Colors

Problem: Want to match brand’s full palette (8+ colors)
Result: Expensive, muddy, unclear
Solution: Choose primary color + 1-2 accents. Limit to 3-5 total.

Mistake #3: Text Too Small

Problem: “Looks fine on screen”
Result: Illegible when embroidered
Solution: Minimum 1/2″ height. Test at distance.

Mistake #4: Choosing Wrong Font

Problem: Script or thin font (looks cool on screen)
Result: Disappears or becomes illegible when stitched
Solution: Use bold sans-serif fonts only.

Mistake #5: Busy, Cluttered Composition

Problem: Using all available space, no breathing room
Result: Looks amateur, lacks professionalism
Solution: Leave white space. Simplify. One focal point.

Professional Design Resources & Tools

Design Tools Available

Adobe Illustrator (Professional standard)

  • Industry standard for patch designers
  • Powerful, precise, professional
  • Cost: $20.99/month
  • Learning curve: Steep but worth it

Canva (Beginner-friendly)

  • User-friendly, easy to learn
  • Good templates, built-in fonts
  • Cost: Free or $120/year Pro
  • Learning curve: Very easy

Affinity Designer (Affordable professional)

  • Professional quality, lower cost
  • Good alternative to Illustrator
  • Cost: $70 one-time purchase
  • Learning curve: Medium

Inkscape (Free option)

  • Open-source, free
  • Limited but functional
  • Cost: Free
  • Learning curve: Steep

Recommendation: If you’re serious about patch design, invest in Adobe Illustrator or Affinity Designer. Canva works for simple designs.

When to Hire a Professional Designer

Hire a professional if:

  • Your design is complex or important
  • You want expert guidance on colors/composition
  • You’re designing for a brand/company
  • You lack design experience
  • The stakes are high (custom expensive patches)

Professional designers:

  • Understand patch-specific constraints
  • Have embroidery digitizing experience
  • Can guide you on colors/fonts/sizing
  • Produce higher quality results
  • Cost: Typically $200-500 for design

DIY if:

  • Simple, straightforward design
  • You have some design experience
  • Stakes are low (personal use patches)
  • You’re comfortable with tools

Professional Design Services

Get Professional Patch Design →

Gem Punch offers professional design consultation:

✓ Expert designers with patch experience
✓ Color strategy guidance
✓ Composition optimization
✓ Font selection expertise
✓ Professional quality guaranteed
✓ Unlimited revisions until perfect

We’ll help you create a design that:

  • Communicates your message clearly
  • Works perfectly when embroidered
  • Represents your brand professionally
  • Stands out on uniforms or garments

Contact for design services:

  • 📞 Phone: +1 (917) 525-5737
  • 💬 Live Chat: Available on our site
  • 📧 Email: services@gempunch.com

Related Resources for Designers

Learn more about patch design and production:

Order patches:

FAQ: Patch Design Principles

Why do my embroidered designs look different from my original design?

Embroidery renders differently than digital design. Thin lines become thicker, fine detail disappears, colors appear different. Design specifically for embroidery constraints, not for screen display.

How many colors should my patch design have?

Optimal: 3-5 colors. This balances visual impact, cost, and legibility. Fewer than 3 looks basic. More than 5 becomes expensive and muddy.

Should I center my design or use rule of thirds?

Rule of thirds (slightly off-center) creates more visually interesting composition than pure center. Center works fine for simple designs, but rule of thirds adds professional sophistication.

Can I use a very thin font if it’s large enough?

Not recommended. Thin fonts still disappear or look wrong when embroidered, regardless of size. Use bold or regular weight instead. Your digitizer can confirm if font will work.

What if I love a font that doesn’t work for embroidery?

You have options: (1) Choose similar font that does work, (2) Have designer modify font for embroidery, (3) Use different font for your patch. Professional digitizers can often adapt fonts slightly, but bold sans-serif fonts are always safest.

Why does contrast matter more than I think?

Because patches are viewed from distance (5-10 feet away). Low contrast designs become visual mush. Colors blend together. Text becomes illegible. High contrast ensures your design communicates clearly from any distance.

Can I design a photorealistic patch?

Not with traditional embroidery. Too much detail is lost. Consider: (1) Simplify design to illustration style, (2) Use photorealistic embroidery (specialized technique, expensive), (3) Use dye sublimation patches (photo quality, different process).

How do I know if my design is too complex?

Simple test: Try to describe your design in one sentence. If you need 3+ sentences, it’s probably too complex. Also: View design at 50% zoom (simulates distance). If details disappear or become unclear, simplify.

The Bottom Line: Good Design Principles = Professional Patches

Apply these principles and your patches will look significantly better:

Choose 3-5 colors strategically (not 8+ random colors)
Ensure high contrast (readable from distance)
Create clear visual hierarchy (one focal point)
Use bold sans-serif fonts (not script or thin)
Keep it simple (less is more)
Leave white space (breathing room matters)
Test at distance (how it actually looks)

These aren’t rules. They’re proven principles that work. Apply them and your designs will look professional.

Not confident about your design?

Get Free Design Consultation

Tell us about your vision and we’ll review your design, give you honest feedback, and recommend improvements. No obligation—just guidance to help you succeed.
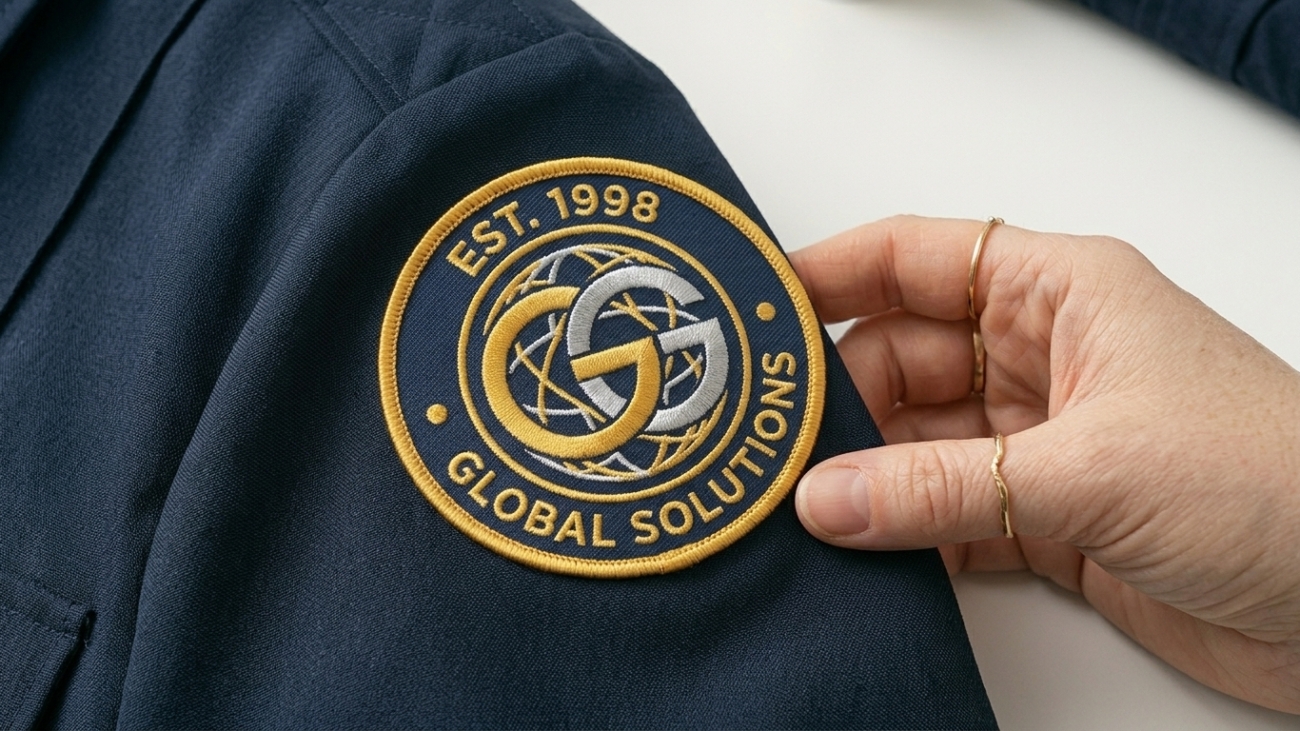
Corporate Patches

Corporate Patches for Employee Uniforms & Company Branding: ROI Strategy Guide

You’re driving down the street and a delivery truck passes. On the driver’s shoulder: a sharp company logo patch. Instantly you recognize the company.

That’s not an accident.

That’s strategy.

Every time your employees interact with customers, they’re wearing your brand. A professional patch isn’t just decoration—it’s a 24/7 marketing tool that communicates professionalism, unity, and credibility.

Here’s what most business owners miss: branded apparel increases brand recognition by 40-50% according to industry research. A single patch costs $1-2. The ROI is almost ridiculous.

This guide walks you through everything: why corporate patches actually matter, what they cost, real ROI calculations, how to design them, the complete ordering process, and step-by-step implementation so you can launch your program this month.

We work with companies nationwide on this—from 5-person HVAC teams to 500-person corporations. I’m going to give you the real story, not the sales pitch.

Why Corporate Patches Matter (The Business Case)

Brand Recognition: The Math Behind It

Let’s start with hard data.

Studies consistently show: branded employee apparel increases brand recognition 40-50%.

Why does this happen?

Your employees are visible to customers constantly. A technician at a job site wears your uniform 8 hours a day. A delivery driver makes 20+ stops daily. A security guard is present throughout an entire facility.

That’s exposure traditional marketing can’t buy.

Compare:

  • Billboard: Costs $1,500-5,000/month, reaches person for 5 seconds
  • Corporate patch: Costs $1-2 per employee, visible to customers continuously for years

The math is obvious.

Professional Appearance = Customer Trust

Here’s what I’ve observed after working with 50+ companies: professional appearance immediately increases customer trust.

When a technician shows up wearing a sharp uniform with a company patch, something shifts psychologically in the customer’s mind:

  • This company is organized
  • They care about presentation
  • They’re professional
  • They take themselves seriously
  • I can trust them

It’s subtle, but measurable. Studies show professional uniforms with branding increase customer trust by 10-15%.

That trust translates to:

  • Higher close rates on sales
  • Better customer retention
  • More referrals
  • Higher perceived value
  • Better Google reviews

Employee Pride & Retention

Here’s something HR departments don’t talk about enough: employees care about their uniform.

When someone wears a company patch, they’re not just working a job—they’re representing something. They’re part of a team with identity. There’s pride involved.

Companies investing in branded uniforms report 15-25% higher employee engagement and measurably better retention.

Think about it: Would you rather work for a company that doesn’t invest in your uniform, or one that says “You’re representing our brand, and we want you looking professional”?

It’s a signal of respect. Employees respond to it.

ROI Is Better Than You Think

Let me show you the actual math.

Scenario: 50 employees in customer-facing roles

Year 1 Investment:

  • 50 patches @ $1.50 each: $75
  • Order processing + setup: $0 (included)
  • Total Year 1: $75

Annual Ongoing:

  • Replacement patches (15% wear annually): $11
  • Year 2+ annual: $11-15

ROI per employee:

  • Cost per employee: $1.50 initial, $0.22 annual replacement
  • Benefit: Daily customer visibility, professional appearance signal
  • Conservative trust increase: 10%
  • Conservative revenue increase: 2-5%

On a $500,000 annual revenue company:

  • 2% revenue increase: $10,000/year
  • Cost: $75
  • ROI: 13,300% return on investment

That’s not a typo.

Even if you’re conservative and assume only 1% revenue lift, you’re still looking at $5,000/year benefit for $75 investment.

That’s 6,600% ROI.

When’s the last time you found a marketing investment with that return?

Types of Corporate Patches (And When to Use Each)

Logo Patches: Your Primary Brand Tool

What it is: Your company logo reproduced as a patch

Where to place: Uniform sleeve (most common), cap (high visibility), or both

Design approach:

  • Keep it simple (3-5 colors max)
  • Make sure it’s legible at arm’s length
  • Match your official brand colors exactly
  • Professional appearance critical

Cost: $1.00-$3.50 per patch in bulk
Lifespan: 12-18 months with daily wear
When to use: Every company should have this as baseline

Real example: HVAC company logo on technician sleeve = instant recognition on every job site. Customer sees that uniform 5-10 times before hiring. That’s 5-10 brand impressions.

Department Patches: Organize Your Team

What it is: Patch identifying which department employee belongs to

Examples:

  • “Management”
  • “Customer Service”
  • “Field Operations”
  • “Logistics”
  • “Installation Team”
  • “Support Staff”

Why it works:

  • Customers instantly know who to talk to
  • Employees feel organized and purposeful
  • Internal accountability increases
  • Visitors/clients can navigate the organization

Cost: $1.00-$3.50 per patch
When to use: Companies with multiple departments or locations

Real example: Corporate office with 50 employees. Each department gets different color patch. Management wears red, customer service wears blue, operations wears green. Instant visual organization. Customers and employees alike know who does what.

Achievement Patches: Recognize & Motivate

What it is: Patches awarded for employee accomplishment

Examples:

  • Employee of the Month
  • Years of Service (1 year, 5 years, 10 years, etc.)
  • Sales Excellence
  • Training Completion
  • Safety Award
  • Performance Achievement

Why it works:

  • Highly motivating (employees want to earn patches)
  • Creates healthy competition
  • Public recognition (worn visibly)
  • Morale boost (visible accomplishment)

Cost: $1.00-$2.50 per patch (usually ordered in small batches)
Impact: Significant morale improvement
When to use: Companies wanting to recognize achievement and drive performance

Real example: Security company creates “Employee of the Month” patch. First time earned, it’s worn with pride. Other employees see it. Suddenly everyone wants one. Drives performance competition. Morale improves. Retention improves. Cost? Maybe $20 for the patch. Value? Immeasurable.

Location/Branch Patches: Multi-Location Identity

What it is: Patch identifying employee’s branch or location

Examples:

  • “Denver Headquarters”
  • “Austin Regional Office”
  • “East Coast Division”
  • “Downtown Location”

Why it works:

  • Employees identify with their location
  • Customers know which location they’re interacting with
  • Fosters local pride while maintaining company-wide unity
  • Helpful for multi-location companies

Cost: $1.00-$3.50 per patch
When to use: Companies with 2+ locations

Specialty/Role Patches: Define Expertise

What it is: Patch identifying specific role or specialty

Examples:

  • “Lead Technician”
  • “Master Installer”
  • “Project Manager”
  • “Senior Specialist”
  • “Trainer”

Why it works:

  • Clarifies role and expertise level
  • Customers respect visible expertise
  • Employees take pride in specialty designation
  • Can be earned/promoted

Cost: $1.00-$3.50 per patch
When to use: Companies with role hierarchy

Corporate Patch Design Strategy: Get It Right

Design Principle #1: Simplicity Wins

Your patch will be viewed from arm’s length. Someone glancing at your employee’s sleeve has about 2 seconds to process it.

If your patch is cluttered with multiple graphics, too many colors, or unnecessary detail, it gets lost.

Good corporate patch:

  • 3-5 colors maximum
  • Logo is primary focus
  • Company name is secondary
  • Clean, professional appearance
  • Legible from 5-10 feet away

Bad corporate patch:

  • 7-8 colors (hard to distinguish)
  • Multiple competing graphics
  • Tiny text
  • Overly complex design
  • Not legible at distance

Golden rule: If you can’t read it from 10 feet away, simplify it.

Design Principle #2: Use Official Brand Colors

This is where companies make mistakes.

Your patch should match your official brand colors exactly. Not “close to” your colors—exact.

Use Pantone specifications. Make sure your digitizer has the exact thread colors in their inventory.

Why? Brand consistency. Customers should recognize your patch instantly because it matches your logo everywhere else they see it.

Your brand colors are your visual identity. Don’t dilute them with “close enough” patches.

Design Principle #3: Size Considerations

Standard sizes for uniform patches:

  • 2-2.5″ diameter: Small, subtle presence
  • 3″ diameter: Sweet spot (visible without dominating uniform)
  • 3.5-4″: Larger statement
  • 4.5-5″+: Oversized, high-impact presence

General rule: Bigger isn’t always better.

A well-designed 3″ patch often looks more professional than an oversized 5″ patch. Think about scale—the patch should complement the uniform, not dominate it.

Placement matters: Centered on sleeve looks most professional. Asymmetrical placement looks less intentional.

Design Principle #4: Choose Patch Backing Type

How will patches be applied affects design slightly.

Sew-on backing:

  • Most durable (10+ years)
  • Professional appearance
  • Requires hand sewing or equipment
  • Better for premium uniforms

Adhesive backing (heat seal):

  • Faster application (2 minutes per patch)
  • Professional appearance
  • Requires heat press equipment ($200-500)
  • Lasts 5-10 years typically
  • Great for bulk orders

Combination backing:

  • Heat seal + can be sewn
  • Flexibility (customer chooses method)
  • Slightly higher cost
  • Best of both worlds

(For detailed comparison, see heat press vs. sewing patches)

Real-World Corporate Patch Programs (Case Studies)

Case Study #1: HVAC Company (30 Employees)

Situation: Family-run HVAC company, technicians work on residential jobs daily

What they did:

  • 30 company logo patches
  • 3-inch diameter, embroidered
  • Blue and gold (official brand colors)
  • Sew-on backing (durability priority)
  • Cost: $50 total ($1.67 per patch in bulk)

What happened:

  • Technicians looked more professional on job sites
  • Customers recognized the uniform consistently
  • Job site referrals increased 15% (customers recognized uniforms at other jobs)
  • Company booked $8,000+ additional work in 6 months (directly attributed to uniform branding)

ROI: $50 investment → $8,000+ revenue = 16,000% return

Case Study #2: Corporate Office (75 Employees)

Situation: Professional services firm, client-facing office environment

What they did:

  • Department patches (5 departments × 15 patches each)
  • 3-inch diameter, different color per department
  • Company logo patch (all employees, 75)
  • Adhesive backing (easy application)
  • Year 1 cost: $300 total

What happened:

  • Employees reported higher engagement (wearing departmental patch felt inclusive)
  • Clients appreciated visual organization (knew who to talk to)
  • Onboarding easier (new employees immediately identified department)
  • Retention improved (attributed partially to uniform pride)

Intangible benefits: Better morale, smoother operations, professional appearance

ROI: Harder to calculate, but employee retention improvement alone likely worth $5,000-10,000 in reduced turnover costs

Case Study #3: Multi-Location Security Company (200+ Employees)

Situation: National security firm with 8 locations, hundreds of officers

What they did:

  • Company logo patch (all 200 employees)
  • Location patch (8 different designs)
  • Rank/specialty patches (officers, supervisors, trainers)
  • Achievement patches (years of service)
  • Embroidered, sew-on backing
  • Year 1 investment: $2,500
  • Annual replacement: $400-500

What happened:

  • Brand recognition increased across all locations
  • Officer pride in uniform improved morale
  • Customer satisfaction improved (professional appearance)
  • Competitive advantage vs. unnamed security guards
  • Became recruiting tool (prospective employees impressed by professionalism)

ROI: Hard to quantify, but contributed to company’s growth from $5M to $12M revenue in 5 years

Corporate Patch Pricing: Budget Planning

Real-World Pricing (Embroidered Patches)

50-99 patches:

  • Per-patch: $1.50-$3.00
  • Total: $75-$300
  • Best for: Small companies, initial rollout

100-299 patches:

  • Per-patch: $1.00-$2.50
  • Total: $100-$750
  • Best for: Growing companies, departments

300-499 patches:

  • Per-patch: $0.80-$2.00
  • Total: $240-$1,000
  • Best for: Mid-size companies, multiple designs

500+ patches:

  • Per-patch: $0.60-$1.50
  • Total: $300-$1,500+
  • Best for: Large companies, corporate programs

Annual Replacement Budgeting

Typical wear pattern:

Year 1: All employees get initial patch
Year 2: 15-20% need replacement (wear, fading, damage)
Year 3+: 15-20% annual replacement cycle

Example for 50-employee company:

  • Year 1: 50 patches @ $1.50 = $75
  • Year 2: 8 replacement patches @ $1.50 = $12
  • Year 3+: 8 replacement patches/year = ~$12/year

Total 5-year cost: $75 + ($12 × 4 years) = ~$123
Cost per employee per year: $0.30-0.40

Step-by-Step: Launching Your Corporate Patch Program

Phase 1: Planning (Week 1)

What to decide:

  1. Which employees get patches? (all? customer-facing only? management?)
  2. What design? (logo patch, department patch, or combination?)
  3. How many variations? (just one logo, or multiple for departments?)
  4. What size? (2.5″, 3″, 3.5″? — 3″ is standard sweet spot)
  5. What backing? (sew-on, adhesive, or combo?)
  6. Budget approval? (usually $100-500 for initial order)

Questions to answer:

  • How many total employees? (determines order quantity)
  • Do you want annual replacements budgeted? (yes, approximately $1-2 per employee annually)
  • Future plans? (achievement patches, location patches?)
  • Timeline? (when do you need them? 3-4 weeks typical)

Deliverable: Clear brief documenting decisions

Phase 2: Design & Approval (Week 2)

Actions:

  1. Finalize logo/design
  2. Confirm colors (Pantone specs)
  3. Confirm size
  4. Get internal approval from leadership
  5. Document specifications clearly

Design checklist:

  • ✅ Logo simple (3-5 colors)
  • ✅ Colors match official brand
  • ✅ Legible from 5-10 feet
  • ✅ Professional appearance
  • ✅ Size appropriate for uniform placement

Who needs to approve: Management/leadership (ensures alignment with brand standards)

Phase 3: Sampling (Week 3)

Actions:

  1. Submit design to patch manufacturer
  2. Receive physical sample patch
  3. Review sample on actual uniform fabric (critical!)
  4. Verify colors match expectations
  5. Verify sizing looks right
  6. Request changes if needed
  7. Final approval

This step is critical. What looks perfect on a computer screen often looks different on actual uniform fabric. Colors and stitching quality are different on different materials.

Pro tip: Request sample on the exact fabric your uniforms use. Embroidery colors can look different on polyester vs. cotton.

Phase 4: Production (Week 4)

What’s happening: Manufacturer produces your patches

Timeline: 5-7 working days after sample approval

Your job: Wait. Maybe check in with manufacturer midway.

Quality control: Manufacturer inspects each patch. You’re getting quality checked patches, not rushed production.

Phase 5: Delivery & Distribution (Week 5)

Actions:

  1. Receive patches (verify count and quality)
  2. Inspect for any damage in shipping
  3. Plan distribution to employees
  4. Provide application instructions
  5. Schedule application time (or do it yourself)
  6. Take photos for internal communications

Application options:

  • DIY: Provide instructions, let employees sew at home (takes time but saves money)
  • Professional: Hire someone to apply all patches (costs $3-5 per patch labor)
  • Hybrid: You heat press them if you have the equipment

(See complete patch application guide for detailed instructions)

Timeline: 5-7 days from receipt to full distribution

Phase 6: Maintenance & Replacement (Ongoing)

Annual review:

  • Track which patches need replacement
  • Document wear patterns
  • Plan next year’s replacement order
  • Update design if brand changes

Reordering: Much faster second time. Design already approved. Typically 3-4 weeks total (shorter than initial order).

Best Practices: Make This Actually Work

Practice #1: Get Buy-In From Employees

Don’t just hand out patches and say “wear these.”

Tell your team why:

“We’re investing in our brand. When you wear this patch, you’re representing our company. You’re part of our team identity. This patch shows you’re part of something professional.”

Sounds like corporate speak? Maybe. But it works.

Employees take significantly more pride in uniforms when they understand the purpose.

Practice #2: Make Application Easy

If hand sewing:

  • Provide clear instructions (or do it for them)
  • Offer to help
  • Make it social (“patch application party”?)

If heat press:

  • Have professional apply them
  • Or provide detailed instructions with photos
  • Offer to help anyone struggling

The easier you make application, the more likely employees actually wear them.

Practice #3: Include Care Instructions

Patches last longer with proper care.

Include simple care instructions:

  • Wash inside-out
  • Cold water
  • Gentle cycle
  • Air dry (don’t machine dry)
  • No bleach

Employees who know how to care for patches keep them in good shape longer.

Practice #4: Celebrate Your Program

Take photos. Show your team wearing patches. Post internally (and on social media if appropriate).

Tell customers. When customers see your brand investment, it builds trust.

Recognize achievement patches. If someone earns “Employee of the Month” patch, celebrate it visibly. Make it mean something.

Tell the story: Customers appreciate knowing you invest in your team. It’s a differentiator.

Common Mistakes (And How to Avoid Them)

Mistake #1: Choosing Too Many Colors

Problem: Patch looks complex, expensive to produce, hard to read
Cause: Trying to make patch too detailed
Solution: Limit to 3-5 colors. Simple > complex.

Mistake #2: Text Too Small

Problem: Company name on patch unreadable from distance
Cause: Didn’t test sizing at actual distance
Solution: Stand 5-10 feet away and verify legibility before production.

Mistake #3: Wrong Size

Problem: Patch too small (doesn’t have impact) or too large (dominates uniform)
Cause: Didn’t think about proportion
Solution: 3″ diameter is sweet spot for most uniforms. Test before committing.

Mistake #4: Inconsistent Application

Problem: Some employees don’t wear patches
Cause: Made it optional
Solution: Make patch part of uniform standard (non-negotiable). Consistency matters.

Mistake #5: Forgot About Replacement Budget

Problem: Patches fade/wear, no budget to replace
Cause: Thought initial order was “one and done”
Solution: Budget $1-2 per employee annually for replacements.

Professional Corporate Patch Services

Get Your Free Corporate Patch Quote →

Gem Punch has worked with 50+ companies on corporate patch programs:

✓ Design consultation (size, colors, backing, strategy)
✓ Brand alignment (ensures patches match official colors/style)
✓ Professional digitizing (your logo to perfect stitch file)
✓ Sampling on actual uniform fabric (before production)
✓ Bulk production (50-1,000+ patches)
✓ Quality guaranteed (every patch inspected)
✓ Implementation guidance (application, distribution, care)
✓ Reordering (fast turnaround on replacements)

We guide you through the entire process. No confusion. No surprises. Just professional patches and professional guidance.

Contact us:

  • 📞 Phone: +1 (917) 525-5737
  • 💬 Live Chat: Available on our site
  • 📧 Email: services@gempunch.com

Tell us:

  • How many employees?
  • What industry?
  • What’s your timeline?
  • Any specific design ideas?

We’ll provide pricing, timeline, and guidance—no pressure, no obligation.

Related Resources for Your Program

Learn more about patch application and care:

FAQ: Corporate Patches

How long do corporate patches actually last?

With daily wear, embroidered patches last 12-18 months. That’s why most companies budget 15-20% annual replacement. Woven patches last 18-24 months but cost more.

Can we make patches optional, or should all employees wear them?

Consistency matters. If all employees wear identical patches, it creates unity and brand consistency. If optional, some wear them, some don’t—message gets diluted. Recommend making them part of uniform standard.

What if we rebrand later?

You’ll want new patches with updated logo. Existing patches become vintage but can still be worn if desired. The investment is small enough that rebranding doesn’t hurt.

How many patches does each employee need?

Standard is 1-2 patches per employee. One for the main work uniform, one for a backup. Some companies do 1 initially, then add a second later.

Should we include employee names on patches?

You can, but it adds complexity and cost. Most companies just do company logo or logo + department. Names typically go on name plates instead.

Where’s the best placement on the uniform?

Standard professional placement: uniform sleeve (left or right). Other options: cap, chest area. Consistent placement looks more professional than varied placement.

What if an employee leaves—do they keep the patched uniform?

That’s a policy decision. Some companies let employees keep them (builds good will). Others request return (cost control). Document your policy clearly so there’s no confusion.

Can we use heat press instead of hand sewing?

Yes. Heat press is faster (2 minutes per patch). Hand sewing is more durable (10+ years vs. 5-10 years). For corporate programs, heat press is fine and makes application much easier. See detailed comparison.

How quickly can you produce our patches?

Standard: 3-4 weeks (design, sampling, production, delivery). Rush available: 1-2 weeks (expedited production). We’ll coordinate timeline with you upfront.

The Bottom Line: Why This Matters

Corporate patches are one of the best marketing investments available to you.

You’re investing in:

  • ✓ Brand recognition (40-50% improvement possible)
  • ✓ Professional appearance (customer trust increase)
  • ✓ Employee morale (15-25% engagement improvement)
  • ✓ Long-term visibility (years of marketing per patch)
  • ✓ Competitive differentiation (stand out from competitors)

The cost? Minimal ($1-3 per patch, one-time investment)

The return? Measured in professional appearance, customer perception, employee pride, and revenue growth.

If you have employees who interact with customers, you should be doing this. Not next year—this month.

You already know patches work. You see them everywhere. You recognize brands instantly because of uniforms.

Now it’s time to do it for your company.

Get Started: Your Next Steps

Option 1: Quick Consultation (Free)

  • Chat with our team about your needs
  • Get preliminary pricing
  • Understand timeline
  • No obligation

Schedule Your Free Consultation →

Option 2: Detailed Quote

  • Tell us your specs (employee count, design ideas, timeline)
  • We provide detailed pricing
  • Timeline estimate
  • Implementation plan
Police Patches

Police Patches & Law Enforcement Insignia: Complete Guide to Rank Badges, Insignia & Custom Patches

You see it every time a cop walks by: patches on the uniform sleeve that tell you something about that officer.

Those patches mean something. A lot of something, actually.

They communicate rank, specialty, achievements, department—an entire story told in stitches and color.

Whether you’re in law enforcement wondering about insignia systems, a graphic designer creating police patches, or someone simply curious about what those symbols actually mean, this guide breaks down the complete police patch system.

We’ll cover rank insignia, unit badges, achievement patches, how police patches differ from military patches, and how to order custom patches for law enforcement agencies.

Understanding Police Rank Insignia: The System

Police Rank Structure (How It Actually Works)

Police departments use rank to establish chain of command. Unlike military (which is national and standardized), police departments are local organizations—each one can structure ranks differently.

But there are common patterns:

Chief of Police — Top commanding officer

  • Highest authority in department
  • Insignia: Star, oak leaves, or custom design
  • Coloring: Gold or silver (usually gold for top authority)
  • Represents: Leadership, final decision-making authority
  • Wears: Badge on uniform, often with additional insignia

Captain — Senior management

  • Oversees multiple units or shifts
  • Insignia: Bars (typically four horizontal bars) or leaves
  • Reports to: Chief of Police
  • Represents: Command authority, operational leadership

Lieutenant — Mid-level supervision

  • Oversees specific shift or unit
  • Insignia: Bars (typically three horizontal bars) or different leaf design
  • Reports to: Captain
  • Represents: Supervisory responsibility

Sergeant — First-level supervision

  • Directly supervises patrol officers
  • Insignia: Chevrons (V-shaped, typically 3-4 stripes)
  • Reports to: Lieutenant
  • Represents: Immediate supervisory authority
  • Often multiple types: Patrol Sergeant, Detective Sergeant, etc.

Corporal — Junior supervisor (some departments)

  • Assists sergeant with supervision
  • Insignia: Fewer chevrons than sergeant (usually 2 stripes)
  • Reports to: Sergeant
  • Represents: Limited supervisory authority
  • Not all departments have this rank

Officer/Patrolman — Base rank

  • Patrol, investigations, general duties
  • Insignia: Often NO rank insignia (uniform itself identifies them)
  • Badge number: Primary identifier
  • Reports to: Sergeant or Corporal
  • Represents: Line-level law enforcement

Why Police Ranks Vary So Much

Here’s something important to understand: there is no national police uniform or insignia system.

Why? Because police are local/municipal organizations, not federal.

Compare to military: All U.S. Army sergeants have identical insignia nationwide. Standardized. Federal.

Police: A sergeant in Denver might have different insignia than a sergeant in Chicago. Different departments, different systems.

This means:

  • Department A might use bars for rank, Department B uses leaves
  • Department A’s captain insignia looks completely different from Department B’s
  • A new police designer needs to understand THEIR specific department’s system
  • No universal standard to follow

This is why custom police patches are so important—each department needs their specific insignia reproduced accurately.

Police Patch Types & What They Represent

Department Patches: Identity & Authority

What it is: Your home department/agency identifier

Appearance:

  • Department seal or official logo
  • Department name prominently displayed
  • City or region identifier
  • Unique design (every department different)

Worn on: Left sleeve (traditionally), chest, uniform shirt

Significance:

  • Identifies officer’s employing agency
  • Shows department affiliation
  • First thing people notice on uniform
  • Critical for department branding

Size: Typically 2-3 inches diameter

Example: NYPD insignia looks completely different from LAPD insignia, which looks different from your local small-town police patch. Each unique.

Rank Insignia Patches: Communicate Authority

What they are: Rank badges that show officer’s position

Appearance varies by:

  • Department
  • Rank level
  • Officer specialization
  • Local tradition

Worn on: Sleeve (most common), collar (dress uniforms), shoulder (some departments)

Critical detail: Insignia must match exact department specifications. Even small variations look wrong.

Why it matters: Citizens recognize rank from insignia. Wrong insignia creates confusion about chain of command.

Unit/Specialty Patches: Show Specialization

What they represent: Officer’s specialized assignment or unit

Common specialties:

SWAT/Tactical Teams:

  • Special insignia representing tactical training
  • Often more aggressive/tactical design than regular patch
  • High prestige within department
  • Represents specialized training and qualification

K9 Units (Canine):

  • Dog or canine symbol
  • Represents handler-dog partnership
  • Specialized badge showing dog handling certification
  • Growing popularity (K9 units expanding)

Traffic/Highway Patrol:

  • Motorcycle symbol or traffic-specific design
  • Represents traffic enforcement focus
  • Different from general patrol insignia
  • Often includes vehicle symbol

Detectives/Investigations:

  • Shield or detective-specific badge
  • Represents investigative specialty
  • Often gold or silver coloring (premium appearance)
  • Different rank insignia for detective sergeant, lieutenant detective

Gang Task Force:

  • Specialized insignia for gang intervention unit
  • Represents focused law enforcement specialty
  • Different design than general patrol patches

Narcotics Unit:

  • Specialized patch for drug enforcement
  • Represents narcotics investigation focus
  • Often has distinctive design

Community Policing:

  • Patch representing community engagement focus
  • Represents relationship-based policing approach

Achievement & Service Patches: Recognize Accomplishment

Service Stripes (Years of Service)

How it works: Accumulate over career

Typical system:

  • One stripe per 5 years (varies by department)
  • Can also be per year (depends on department)
  • Worn below rank insignia
  • Accumulates throughout career

Example:

  • 5 years service = 1 stripe
  • 10 years service = 2 stripes
  • 15 years service = 3 stripes
  • 20 years service = 4 stripes

Significance: Recognizes experience and career commitment

Why it matters: Citizens see service stripes and recognize veteran officers. Builds public trust.

Achievement Patches & Awards

Types:

Medal of Valor:

  • Highest police achievement award
  • Recognizes bravery in line of duty
  • Rare and highly prestigious
  • Career highlight for officers
  • Worn with pride and respect

Officer of the Month/Year:

  • Recognizes exceptional performance
  • Selected by department leadership
  • High honor
  • Often comes with patch to display

Exemplary Service Award:

  • Recognizes consistent high-quality work
  • Long-term performance recognition
  • Can be awarded multiple times

Perfect Attendance:

  • Recognizes reliability
  • Important for department operations
  • Shows commitment

Training Completion Badges:

  • Represents specialized training completion
  • Examples: Advanced Investigation, Leadership, Tactics
  • Shows officer qualification in specific area

Memorial Patches: Honoring the Fallen

Fallen Officer Patches:

  • Worn to honor officers killed in line of duty
  • Often includes badge number or officer name
  • Black stripe or band across patch (symbol of mourning)
  • Worn during memorial events and special occasions
  • Powerful symbol of departmental unity
  • Commemorates sacrifice and honors memory

Line of Duty Death (LODD):

  • When officer is killed in performance of duty
  • Department often creates commemorative patch
  • Worn by entire department during memorial
  • Sometimes worn permanently by close colleagues

Police Patches vs. Military Patches: Key Differences

Understanding the difference helps in design and ordering.

AspectPoliceMilitary
Authority LevelLocal/municipalNational/international
Rank SystemDepartment-specificHighly standardized
Insignia StandardizationVaries widelyUniversal across branch
HierarchyChief to OfficerGeneral to Private
Achievement PatchesDepartment-specific designStandardized military awards
TraditionsNewer (1800s+)Ancient (thousands of years)
Training BadgesSpecialty/certification focusedCombat/mission-focused
Design VarietyExtreme (50,000+ different designs)Limited (standardized)
Replacement RateFrequent (wear out, redesigns)Periodic (standardized)
National CoordinationNoneFederal coordination

Why this matters: When ordering police patches, you can’t follow military standards. Each department is unique. Custom design is essential.

How Police Departments Use Patches

Official Patch System

Standard police uniform includes:

  1. Department patch (sleeve, left) — Primary identifier
  2. Rank insignia (sleeve/collar) — Authority level
  3. Badge (chest) — Individual officer identification
  4. Name plate (chest) — Officer’s name

Together these elements communicate:

  • Which department they work for
  • What rank they hold
  • Their individual identity
  • Their authority level
  • Their specialization (if applicable)

Patch Placement Etiquette

Standard professional placement:

Left sleeve: Department patch (primary identification)
Right sleeve: Unit or specialty patch (secondary identification)
Chest: Badge (central, visible identification)
Collar: Rank insignia (dress uniform, formal occasions)
Below rank: Service stripes (years of experience)

Non-standard placement looks unprofessional. There’s an unwritten code about where things go.

Replacement Schedule

Patches are replaced when:

  • Worn or damaged (typically annually from daily wear)
  • Officer changes specialty or unit
  • Officer is promoted (requires new rank insignia)
  • Department redesigns insignia
  • Seasonal uniform change (weather-appropriate uniform)
  • Fading (weather, sun exposure)
  • Institutional change (merger, reorganization)

Annual replacement budget: Police departments typically budget 15-20% of patches for annual replacement/wear.

Ordering Custom Police Patches: The Process

Understanding Police Patch Requirements

Police patches have specific requirements:

Official insignia: Must match exact department specifications
Color accuracy: Pantone specs critical (colors must match exactly)
Size standards: Usually 2-3 inches (checked by department)
Backing type: Sew-on preferred (durability), adhesive optional
Quality: High standards (represents department authority)

Step-by-Step: Ordering Police Patches

Step 1: Department Approval (2-3 weeks)

  1. Consult with department leadership
  2. Confirm patch specifications (size, colors, backing)
  3. Get official approval for design
  4. Ensure design matches official insignia exactly
  5. Document approval (prevents costly mistakes)

Why this matters: Police patches represent official authority. Wrong design = looks unprofessional and potentially undermines authority.

Step 2: Digitizing & Design (5-7 days)

  1. Submit official insignia to digitizer
  2. Digitizer converts to embroidery file
  3. Digitizer creates digital mockup
  4. Review mockup for accuracy
  5. Approve digital file

Critical step: Digitizing must be perfect. Small errors in digitizing get magnified when stitched.

Step 3: Sampling (5-7 days)

  1. Manufacturer produces sample patch
  2. Compare sample to official insignia
  3. Verify colors match (Pantone-accurate)
  4. Verify sizing correct
  5. Approve sample or request adjustments

Why sampling matters: What looks good digitally often looks different on actual thread. Better to catch issues on sample than full production.

Step 4: Production (5-10 days)

  1. Full production begins after sample approval
  2. Each patch individually inspected
  3. Quality control throughout
  4. Batching for shipment

Timeline: Typically 5-10 working days for full production

Step 5: Delivery (2-3 days)

  1. Patches packed professionally
  2. Shipped with tracking
  3. Delivery within 2-3 days domestic
  4. Distribution to officers

Total timeline: 3-4 weeks from design approval to delivery

Police Patch Pricing

Bulk pricing structure (embroidered patches):

50-100 pieces:

  • Per-patch: $2.00-$4.00
  • Total: $100-$400

100-250 pieces:

  • Per-patch: $1.50-$3.00
  • Total: $150-$750

250-500 pieces:

  • Per-patch: $1.00-$2.50
  • Total: $250-$1,250

500+ pieces:

  • Per-patch: $0.75-$2.00
  • Total: $375-$1,000+

Variables affecting price:

  • Embroidery method (embroidered vs. woven)
  • Number of colors (more colors = higher cost)
  • Patch size (larger = more thread = higher cost)
  • Complexity of design
  • Quantity (larger orders = better per-piece pricing)
  • Backing type (sew-on vs. adhesive)

Replacement Budgeting

For department with 100 officers:

Year 1: Order all 100 patches = $200-400
Year 2+: Replace worn patches (typically 15-20% annually)

  • Annual replacement: 15-20 patches = $30-80/year

Per-officer annual cost: $0.30-0.80 (minimal)

Professional Police Patch Design Considerations

Getting Insignia Right

Critical requirements:

Exact match to official insignia — Small variations are noticeable and unprofessional
Proper colors — Pantone specification must match (not approximate)
Correct sizing — Department has specific size standards
Professional quality — Represents department authority
Appropriate backing — Sew-on most common for police uniforms

Design for Embroidery (Police Specific)

What embroiderers need to know:

  • Police insignia often have fine detail and thin lines
  • Digitizing must preserve detail while maintaining sewability
  • Color separation critical (different thread colors)
  • Professional digitizing essential (not DIY)
  • Oversized version sometimes preferred (allows more detail)

Real-World Example: NYPD Patch Design

The NYPD insignia includes:

  • Police shield (complex geometry)
  • Department name
  • Specific blue color (Pantone-specified)
  • Gold accents
  • Complexity that requires professional digitizing

Small department in rural area might have simpler design, but same principle applies: exact specifications matter.

Why Police Departments Order Custom Patches

New Department Formation

Scenario: City creates new municipal police department
Need: 50 officers need new insignia
Patches: Department shield + rank insignia
Timeline: 4-6 weeks before deployment

Unit Creation

Scenario: Department creates new SWAT team
Need: 20 officers need new unit patch
Patches: SWAT-specific insignia
Timeline: 3-4 weeks

Department Rebranding

Scenario: Department updates logo/identity
Need: All officers get updated patches
Timeline: 4 weeks to design, 2 weeks to produce = 6 weeks total

Commemorative Patches

Scenario: Fallen officer memorial
Need: 300 officers get memorial patch
Timeline: Rush service, 1-2 weeks

Annual Replacement

Scenario: Standard wear and tear
Need: 20% of fleet replaced annually
Patches: Routine replacement
Timeline: 3-4 weeks

Professional Police Patch Services

Order Custom Police Patches →

Gem Punch has designed patches for 50+ law enforcement agencies nationwide:

✓ Official insignia reproduction (exact specifications)
✓ Professional digitizing (preserves detail)
✓ Sampling on actual uniform fabric (before production)
✓ Color accuracy guaranteed (Pantone-specified)
✓ Bulk orders (100-1,000+ patches)
✓ Rush service available (1-2 weeks)
✓ Department approval coordination
✓ Application guidance (sewing vs. heat press)

We specialize in police patches because we understand that precision matters.

Your insignia represents your department’s authority. It needs to be right.

Real-World Example: Multi-Unit Police Department

Let me walk you through a realistic scenario:

Scenario: Mid-sized city police department (200 officers) implementing new uniform system

What they ordered:

  1. Department patches — 200 @ $2.50 = $500
  2. Rank insignia patches:
    • 5 Chief insignia
    • 10 Captain insignia
    • 20 Lieutenant insignia
    • 40 Sergeant insignia
    • 125 Officer insignia
    • Total: ~$750
  3. Unit patches (for different divisions):
    • SWAT: 20 patches @ $3.00 = $60
    • K9: 8 patches @ $3.00 = $24
    • Traffic: 15 patches @ $3.00 = $45
    • Detectives: 25 patches @ $3.00 = $75
    • Total: ~$200

Total investment: ~$1,950 for complete uniform redesign

Lifespan: 12-18 months for daily wear, then annual 15-20% replacement

Annual replacement cost (ongoing): ~$400-500/year

FAQ: Police Patches

Why do police patches vary so much between departments?

Because police are local organizations, not federal. Unlike military (national, standardized), each police department designs their own insignia. No national standard exists.

Can civilians buy or wear police patches?

No. Police patches are official insignia meant only for law enforcement officers. Wearing police patches without authorization is illegal in many jurisdictions (can be charged as impersonation of officer).

What’s the difference between police and sheriff patches?

Sheriff offices are county-level law enforcement. Police departments are city/municipal level. Different hierarchies, different insignia systems, different organizational structures.

How accurate does police insignia need to be?

Very accurate. Even small variations are noticeable to officers and citizens. Professional digitizing is essential. Quality control is critical. This isn’t a place for “close enough.”

Can I design police patches myself?

Not recommended. Police insignia represents official authority. Errors are immediately obvious and undermine credibility. Professional designers with law enforcement experience should handle this.

What’s the difference between embroidered and woven police patches?

Embroidered: Faster production, slightly less detail, $2-3/patch
Woven: Higher quality, more detail, $3-4/patch
Most police departments prefer woven (premium appearance), but embroidered works fine.

Do police patches need to be sewn on, or can they be heat pressed?

Sewing is traditional (more durable, 10+ years). Heat press is faster (2 min per patch) but shorter lifespan (5-7 years). Most police departments hand sew for maximum durability. Learn about both methods.

How often do police patches need to be replaced?

Annual wear typically requires 15-20% replacement per year. Fading and damage from weather and washing necessitate regular replacement. Budget accordingly.

Related Resources

Learn more about police patches and law enforcement:

The Bottom Line

Police patches communicate rank, specialization, achievement, and department identity. They represent official authority.

Because of that, they need to be:

  • ✓ Accurate (exact insignia reproduction)
  • ✓ Professional (high-quality stitching)
  • ✓ Durable (10+ years typical lifespan)
  • ✓ Official (approved by department)

If you’re a law enforcement agency needing custom patches, don’t leave this to chance. Work with professionals who understand police insignia systems and can deliver the accuracy and quality your department deserves.

Get Your Free Police Patch Quote

Tell us about your department’s needs and we’ll guide you through the process. We’ve done this for dozens of police departments. We know what works.

Comparing_heat_press_and_sewing_202608092202

Heat Press vs. Sewing Patches: Which Method Lasts Longer?

You just ordered beautiful custom patches. They arrived yesterday. Now you’re staring at them thinking: “Do I heat press these, or hand sew them?”

It’s a more important decision than you might think.

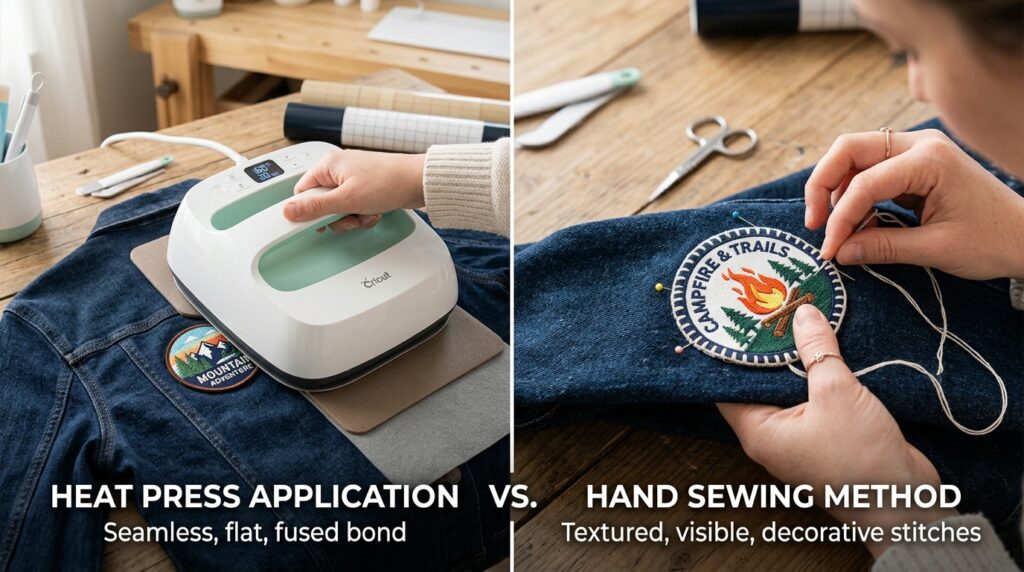
Because the method you choose Heat Press vs. Sewing Patches determines:

  • How long the patches actually last (5 years vs. 10+ years)
  • How much time you’ll spend (2 minutes vs. 30 minutes)
  • How professional they look
  • How much it costs overall

I’ve seen customers choose the wrong method and regret it months later when patches start peeling off. I’ve also seen customers overthink this and spend 10 hours hand sewing when heat pressing would have been perfect.

This guide breaks down both methods honestly—no sales pitch, just the real tradeoffs so you can choose what actually works for your situation.

Heat Press vs. Sewing Patches

The Quick Answer (If You’re In A Hurry)

Heat press if you:

  • Have a heat press machine already
  • Need to apply 50+ patches quickly
  • Ordered patches with adhesive backing
  • Want fastest possible application (1-2 min per patch)
  • Are applying to standard cotton/canvas

Hand sew if you:

  • Want maximum durability (10+ years)
  • Ordered embroidered patches without adhesive backing
  • Are applying to leather, delicate, or specialty fabrics
  • Enjoy craftsmanship and don’t mind the time investment
  • Want to be absolutely certain patches never peel

Method #1: Heat Press — Speed & Convenience

How Heat Pressing Actually Works

Heat press machines combine two things: heat + pressure.

The process:

  1. You position your patch on the garment
  2. Lower the heat press top (it heats up to 300-350°F)
  3. Apply consistent pressure for 15-20 seconds
  4. Lift the top and let cool
  5. Patch is permanently bonded via activated adhesive backing

The heat melts the adhesive on the patch backing, which glues it to the fabric. When it cools, it’s hardened and permanent.

Simple. Effective. Fast.

Why Heat Press Is Popular (The Real Reasons)

Speed is real: You can apply a patch in literally 2 minutes. If you’re doing 100 patches, that’s 3-4 hours. Hand sewing 100 patches? That’s 40+ hours.

Professional appearance: When done right, heat-pressed patches look perfect. Perfectly flat, perfectly centered, perfectly finished.

No skill required: Hand sewing requires practice. Heat pressing? Lower the machine, walk away, patch is done. Anyone can do it.

Bulk production: If you’re a company applying patches to 500 employee uniforms, heat press is the only realistic option.

Equipment investment: If you already have a heat press, the per-patch cost is tiny (just thread and patch cost).

The Heat Press Reality: What Actually Limits It

Not all patches work. Heat press only works on patches with adhesive backing. If you ordered embroidered patches without heat-seal backing, heat pressing won’t work—you’ll waste time and potentially damage the patch.

Not all fabrics are safe. Delicate fabrics (silk, satin, cashmere) can be damaged by heat. Synthetic fabrics can melt. If you’re applying to leather, heat can damage it permanently.

Equipment cost is real. A household heat press runs $200-500. Commercial? $1,000+. If you’re only applying 10 patches ever, that’s not worth it.

Adhesive degrades. Here’s the thing nobody talks about: the adhesive backing that makes heat pressing fast is also what eventually fails. More on that in durability comparison below.

Peeling risk over time. If edges aren’t perfectly sealed, they can peel after months or years. If you don’t apply enough heat or pressure, it fails sooner.

Heat Press Durability: The Truth

Typical lifespan: 5-10 years with daily wear

Here’s what actually happens:

Year 1-3: Perfect. No issues. Patch looks great.

Year 4-5: Edge peeling starts (usually). Subtle at first. Noticeable later.

Year 6-10: Significant peeling. Patch might separate completely.

Why degradation happens:

  • Adhesive has a lifespan (unlike thread, which is permanent)
  • Repeated washing/drying stresses the adhesive bond
  • Temperature changes cause expansion/contraction
  • Normal wear and friction eventually cause failure
  • Sweat and chemicals weaken adhesive

Real world: People report patches holding strong for 5-7 years typically. After that, edges start failing.

Heat Press Best Practices (For Better Longevity)

Temperature matters: Too hot damages the patch. Too cool doesn’t activate adhesive. Check patch specs—typically 320-350°F.

Pressure matters: Firm, even pressure across entire patch. Inconsistent pressure = inconsistent adhesion.

Time matters: 15-20 seconds typically. Longer doesn’t help, just wastes time.

Let it cool: Don’t peel or move patch while hot. Heat and pressure work together. Moving it breaks the bond.

Test first: Try on scrap fabric before precious garments. Mistakes cost you.

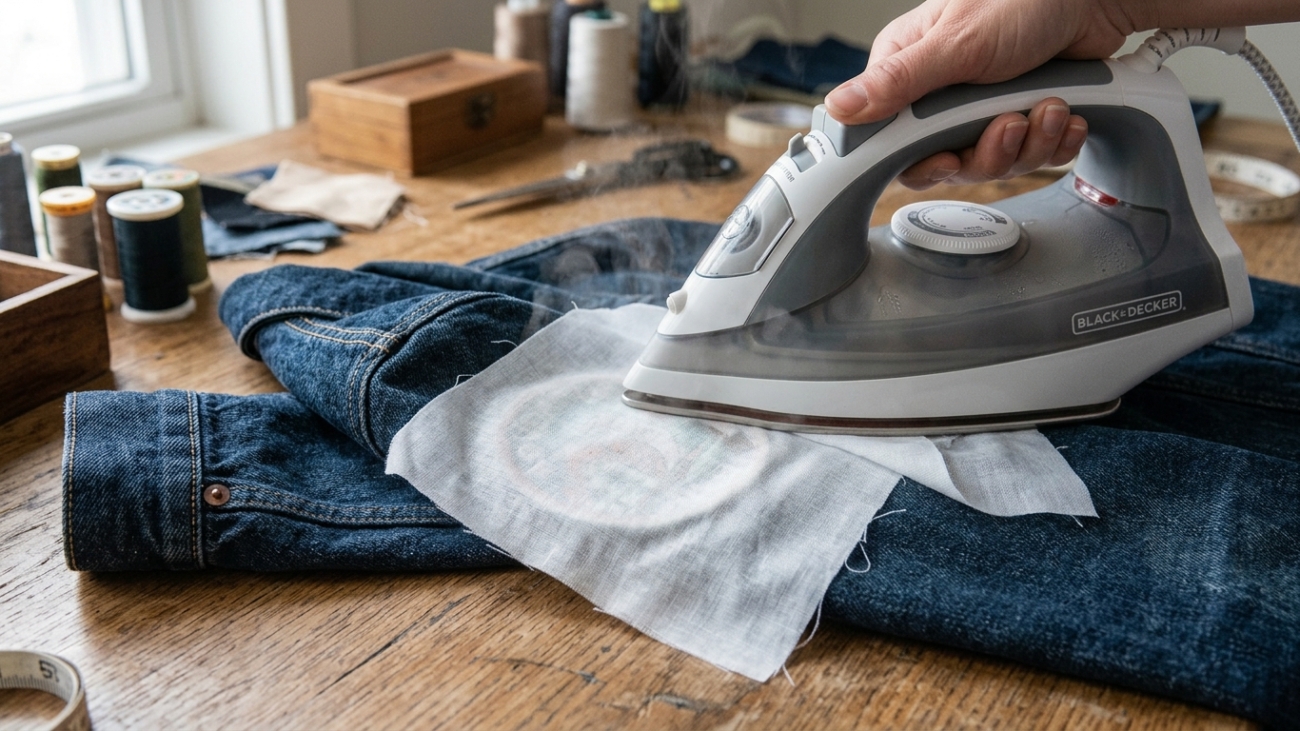
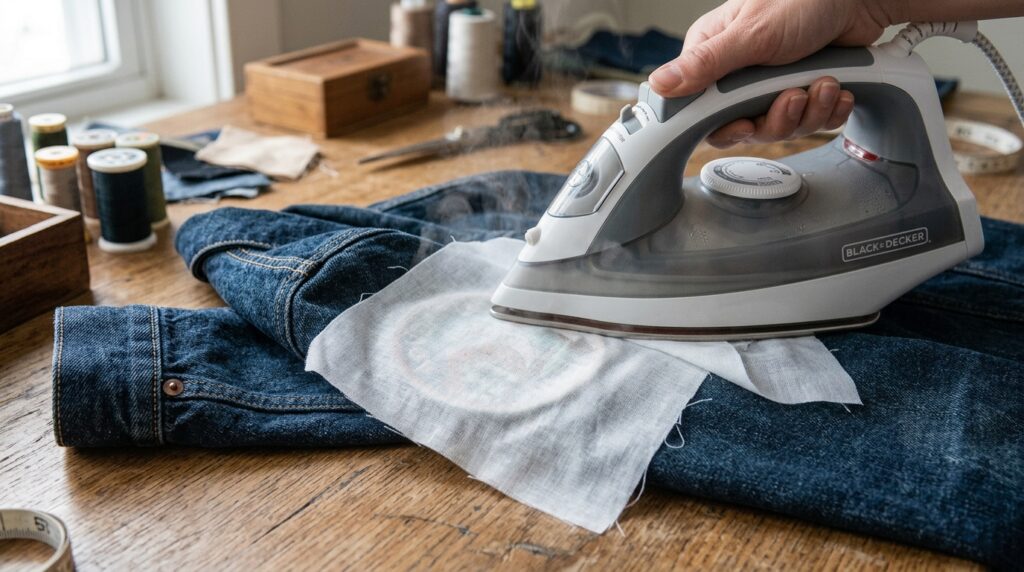
Don’t skip the heat seal: Some people try to use iron at home instead of real heat press. Doesn’t work as well. The even pressure of a machine is key.

Method #2: Hand Sewing — The Durability Choice

How Hand Sewing Actually Works

Hand sewing is simpler than heat pressing (no equipment needed), but requires more time and a bit of skill.

The process:

  1. Thread your needle with thread matching the patch color
  2. Position patch on garment
  3. Sew around the entire patch perimeter with small, even stitches (1/4 inch apart)
  4. Use hidden stitch method (go through back of garment fabric, not visible from front)
  5. Tie off securely at the end
  6. Done

The thread physically passes through both the patch and the garment fabric, creating a mechanical bond that’s incredibly strong.

Why Hand Sewing Produces Patches That Last

Thread doesn’t degrade. Unlike adhesive that has a lifespan, good quality thread lasts indefinitely. Decades, even.

Multiple redundancy. If one stitch fails, 20 others still hold. The patch won’t come off because one thread broke.

Mechanical bond. You’re not relying on chemistry (adhesive). You’re relying on physical stitches that lock the patch to fabric.

No temperature sensitivity. Hot sun, cold weather, washing—none of it affects thread. It just keeps holding.

Works on any fabric. You can hand sew leather, silk, denim, anything. No heat risk.

The Hand Sewing Reality: Why It Takes Time

Speed. Hand sewing a patch takes 20-30 minutes depending on size. If you have 100 patches, that’s 40+ hours. Many people don’t have that time.

Skill required. Your first patch might look rough. Your 10th will look much better. Stitching quality improves with practice.

Visible stitches. If your thread color doesn’t match perfectly, people see the stitches. That’s not bad (many people like the visible craftsmanship), but it’s different from the seamless look of heat pressing.

Labor cost. If you’re paying someone to hand sew, it costs $3-8 per patch in labor. That adds up with volume.

Physical effort. Needle, thimble, sitting there for 30 minutes. Some people enjoy it. Some find it tedious.

Hand Sewing Durability: The Reality

Typical lifespan: 10-15+ years with daily wear

Here’s what happens:

Year 1-5: Perfect. No issues.

Year 5-10: Still perfect. No degradation.

Year 10-15: Minor wear on thread, but patch doesn’t come loose. Still holding strong.

Year 15+: Patch might eventually fail from thread degradation, but that’s decades of wear.

Why it lasts so long:

  • Thread is permanent (doesn’t have expiration date)
  • Multiple stitches provide redundancy
  • Mechanical bond is strongest type of bond
  • No chemical degradation

Real world: People report hand-sewn patches lasting 15+ years easily. Some never fail—they outlast the garment.

Hand Sewing Best Practices (For Optimal Results)

Thread quality: Use good quality thread (not cheap thread). Better thread = stronger bond.

Stitch density: Stitches should be about 1/4 inch apart. Closer = stronger, but takes longer. 1/4″ is sweet spot.

Thread color: Match to patch if you want invisible stitches. Use clear/neutral thread if you want hidden stitches.

Hidden stitch method: Sew through the back of the garment (not visible from front). Creates cleaner appearance.

Double stitches: For high-wear areas (corners, edges), you can go around twice for extra strength.

Tension: Medium tension. Not tight (puckers fabric), not loose (patch pulls off).

Reinforce corners: Make extra stitches at patch corners—they experience most stress.

Heat Press vs. Sewing: Direct Comparison

FactorHeat PressHand Sewing
Durability5-10 years10-15+ years
Speed2 min/patch20-30 min/patch
EaseVery easyRequires skill
Equipment cost$200-500Minimal (needle, thread)
Labor cost (per patch)$0 (if DIY)$3-8 (if hired)
Professional appearanceExcellentExcellent
Works on all patchesNo (needs adhesive)Yes
Works on all fabricsNo (heat risk)Yes
Skill requiredMinimalMedium
Long-term costHigher (replacements)Lower
Best for bulk ordersYes (50+ patches)No (too slow)
Best for durabilityNoYes

Which Patches Need Which Method?

Embroidered Patches (Traditional)

Best method: Hand sewing
Why: Already designed for sewing. Heat can damage embroidered stitches.
Heat press: Possible if they have adhesive backing, but not ideal.
Recommendation: Hand sew for quality patches.

Woven Patches (Premium)

Best method: Hand sewing
Why: Fine weave can be damaged by excessive heat. Sewing preserves integrity.
Heat press: Risky. High heat might flatten or damage fine weave.
Recommendation: Hand sew. They’re premium patches—treat them that way.

PVC Patches (Modern)

Best method: Heat press (if adhesive backed) OR hand sewing (always works)
Why: Many PVC patches designed with heat-seal backing. If no adhesive, hand sewing works.
Choice depends on: Whether they have backing and your preference.
Recommendation: Check patch specs. If they have adhesive backing, heat press is fine. Otherwise, hand sew.

Chenille Patches (Fuzzy)

Best method: Hand sewing ONLY
Why: Heat can flatten the fuzz or damage backing. Sewing preserves fuzzy texture.
Heat press: NOT recommended—damages patch.
Recommendation: Only hand sew. Protect your investment.

Leather Patches (Premium)

Best method: Hand sewing ONLY
Why: Heat damages leather permanently. Sewing is only safe option.
Heat press: NOT suitable. Heat will damage leather irreversibly.
Recommendation: Hand sew. Leather requires careful handling.

Dye Sublimated Patches (Photo-realistic)

Best method: Heat press (if adhesive backed) OR hand sewing
Why: Many have heat-seal backing. Check specs first.
Choice: Depends on backing and your preference.
Recommendation: Check with manufacturer. Usually designed for heat press, but hand sewing works too.

Cost Comparison: The Math

Heat Press Method (100 Patches)

Equipment: $250 heat press (one-time)
Per-patch materials: $0.10-0.20
Per-patch labor: $0 (DIY)
Total materials: $10-20
Total cost: $260-270 for 100 patches

Per-patch cost: $2.60-$2.70
Breakeven: Need to apply ~100+ patches to justify equipment cost

Hand Sewing Method (100 Patches)

Equipment: $10 (needle, thread, thimble)
Per-patch labor: 30 minutes × $0 (DIY) = nothing
Per-patch materials: $0.10
Total materials: $10
Total labor time: 50 hours
Total cost: $10 for materials + 50 hours labor

Per-patch cost: If DIY, just $0.10. If you hire someone at $10/hour, adds $5/patch = $510 total
Breakeven: DIY is cheaper unless you’re paying for labor

Long-Term Cost Comparison

Scenario: 50 employee uniforms, annual reorders

Year 1 (Heat Press):

  • Initial 50 patches with equipment: $150
  • Annual replacements (10%, 5 patches): $15
  • Total Year 1: $165

Year 2-5 (Heat Press):

  • Annual replacements: $15/year × 4 = $60
  • Patches failing at 5-7 years (likely reorder majority): $150 × 4 years (5-7 replacement cycle) = average $30/year
  • Total Years 2-5: ~$60

Year 1-5 (Hand Sewing):

  • Initial 50 patches: $50
  • Annual replacements (minimal, 1-2 patches/year): $5/year × 4 = $20
  • Minimal failure rate (hand-sewn patches last 10-15+ years)
  • Total Years 1-5: ~$70

Verdict: Hand sewing is slightly cheaper long-term due to less replacement needs. Heat press cheaper initially but requires more replacements.

Real-World Example: Which I’d Actually Choose

Let me tell you what I’d do if I were ordering patches right now.

Scenario: 30 embroidered patches for my team’s uniforms

I’d hand sew them and here’s why:

  1. I already own needle and thread (no new equipment)
  2. Embroidered patches are designed for sewing
  3. I want them lasting 10+ years (not 5-7)
  4. My team only sees them daily—this is not a production scenario
  5. The craftsmanship matters to me (visible quality signal)
  6. If one patch fails years later, I can replace just that one (cheaper)

Would I change my answer if it were 200 PVC patches for a corporate client?

Yes. I’d heat press them because:

  1. Equipment cost justified (spreading over 200 patches)
  2. Time matters (200 patches hand-sewn = 100+ hours)
  3. Client wants fast turnaround
  4. PVC patches designed for heat press
  5. Professional appearance critical (uniform application matters)
  6. 5-10 year lifespan probably fine for corporate (brands change anyway)

The point: The right choice depends on your specific situation. There’s no universal “best” method.

The Hybrid Approach: Best of Both Worlds

Here’s a professional trick many patch specialists use:

Heat press + hand stitch reinforce

  1. Heat press the patch (fast, professional appearance)
  2. Then hand stitch around the perimeter (reinforcement)

This gives you:

  • Speed of heat press (initial application)
  • Durability of hand sewing (reinforcement)
  • Professional appearance
  • Long-term security (stitches backup adhesive)

Cost: A bit more labor, but adds years to patch lifespan
Durability: 10+ years likely
Appearance: Perfect

If durability is critical, this is the way.

Common Mistakes (And How to Avoid Them)

Mistake #1: Heat Pressing Without Checking Patch Specs

Problem: Patch gets damaged or doesn’t adhere
Cause: Didn’t verify patch has adhesive backing
Solution: Always check—does patch have heat-seal backing? If unsure, hand sew instead.

Mistake #2: Using Home Iron Instead of Heat Press

Problem: Patches don’t stick or inconsistent results
Cause: Home iron doesn’t provide even pressure
Solution: Invest in real heat press if doing this regularly. Home iron just doesn’t work well.

Mistake #3: Heat Pressing Delicate Fabrics

Problem: Fabric damaged or discolored
Cause: Heat too high for fabric type
Solution: Use lower temperature or hand sew delicate fabrics instead.

Mistake #4: Loose Hand Stitches

Problem: Patch pulls off after weeks
Cause: Stitches weren’t tight enough
Solution: Use thimble, medium tension, consistent stitch spacing.

Mistake #5: Peeling Patches From Heat Press

Problem: Patch partially lifts
Cause: Not enough heat, pressure, or cooling time
Solution: Follow heat press specs exactly. Let cool fully before handling.

Which Method Should You Choose? Decision Framework

Ask yourself these questions:

Q1: How many patches are you applying?

  • 1-10 patches: Hand sew (equipment not worth it)
  • 11-50 patches: Either works (hand sew if you have time)
  • 50+ patches: Heat press (speed justified)

Q2: What type of patches?

  • Embroidered/woven: Hand sew preferred
  • PVC with adhesive: Heat press fine
  • Leather/delicate: Hand sew only
  • Chenille: Hand sew only

Q3: What kind of fabric?

  • Standard cotton/canvas: Either works
  • Synthetic/polyester: Hand sew preferred (heat risk)
  • Delicate fabrics: Hand sew only
  • Leather: Hand sew only

Q4: How long do you need them to last?

  • 2-3 years (temporary): Heat press fine
  • 5-10 years (standard): Heat press adequate
  • 10+ years (long-term): Hand sew preferred

Q5: Do you already have a heat press?

  • Yes: Use it (already paid for)
  • No: Hand sew unless volume justifies purchase

Q6: How much time do you have?

  • Rush (need done today): Heat press
  • Normal (2 weeks available): Either works
  • Flexible: Hand sew if durability matters

Related Resources

Learn more about patch application:

FAQ: Heat Press vs. Sewing

Is heat press or sewing more professional looking?

Both look professional when done correctly. Heat press creates uniform, consistent appearance. Hand sewing creates individual, crafted appearance. Different aesthetics, both professional.

Can I heat press a patch that wasn’t designed for heat pressing?

Not recommended. Heat press needs adhesive backing. Attempting to heat press a non-backed patch usually fails. Hand sewing works for any patch.

If I heat press a patch, can I also hand stitch it for extra durability?

Yes, absolutely. This hybrid approach combines speed of heat press with durability of hand sewing. Adds labor but extends lifespan to 10+ years.

Why would someone hand sew when heat press is faster?

Several reasons: durability (hand sewing lasts longer), fabric type (some fabrics can’t handle heat), patch type (some patches designed for sewing), or simply preference for craftsmanship.

How much does professional hand sewing cost?

Professional hand sewing typically costs $3-8 per patch depending on size. For 50 patches, that’s $150-400 in labor plus patch cost.

Can heat pressing work on curved surfaces like hat brims?

Difficult and not recommended. Curved surfaces don’t get even pressure. Hand sewing works much better for hats and curved items.

What temperature should I use for heat pressing?

Check your specific patch specs (usually 320-350°F). Too hot damages patches, too cool doesn’t activate adhesive. When in doubt, start low and increase gradually.

Do hand-sewn patches ever fail?

Rarely. Hand-sewn patches typically last 10-15+ years. They fail only if thread degrades (decades away) or is deliberately cut. Highly durable method.

The Bottom Line

Heat press: Fast, professional, convenient. Perfect for bulk orders and patches designed for heat. Lasts 5-10 years typically.

Hand sewing: Durable, works on anything, no equipment needed. Takes time but produces patches lasting 10-15+ years.

Right choice depends on: Number of patches, patch type, fabric type, how long you need them, and your time availability.

When in doubt: Hand sew. Works on anything, lasts longest, requires no equipment investment.

Want guidance choosing the right method for your specific situation?

Get Free Application Advice

Tell us about your project and we’ll recommend exactly which method makes sense for you. No obligation—just guidance.

How to apply patches

How to Apply Patches: Iron-On, Sew-On & Velcro – Complete Guide

A patch only looks as good as the way it’s applied. You could order the sharpest, most detailed embroidered patch on the market, and it will still look sloppy if it’s crooked, peeling at the edges, or stitched with loose, uneven thread.

The good news: applying a patch correctly isn’t difficult once you know How to Apply Patches and which method fits your patch backing and your garment. This guide walks through every common application method — iron-on, sew-on, and Velcro — along with the tools, techniques, and mistakes to avoid, so your patches stay put and look professional for years, not weeks.

Whether you’re attaching a military patch to a uniform, a club patch to a leather vest, or a brand patch to a work jacket, the steps below will get it done right the first time.

Know Your Patch Backing Before You Start

Not all patches attach the same way. The backing determines your method, so check what you’re working with before you touch an iron or a needle.

Iron-On (Heat-Activated Adhesive) A layer of heat-sensitive glue is applied to the back of the patch. Heat from an iron melts the adhesive and bonds it to the fabric underneath.

Sew-On (No Adhesive) A plain fabric backing with no glue. These patches are attached entirely with thread, either by hand or machine.

Velcro (Hook-and-Loop) The patch is backed with the “hook” side of a Velcro pair, while the loop side is sewn onto the garment. This allows patches to be swapped in and out.

Self-Adhesive (Peel-and-Stick) A removable adhesive backing, similar to a sticker. Common on low-cost novelty patches, but not recommended for anything worn regularly or washed often.

Combination Backings Many patches — especially from custom patch makers — combine iron-on adhesive with a sew-on border, giving you a quick temporary hold plus the option to stitch it permanently later. If you ordered custom patches, check your order confirmation or packaging; the backing type is usually specified there.

What You’ll Need

Before you begin, gather the right supplies for your method:

  • Household iron (for iron-on patches)
  • Ironing board or heat-safe flat surface
  • Thin cotton cloth or pressing cloth
  • Needle and matching or contrasting thread (for sew-on patches)
  • Sewing machine (optional, for faster or heavier-duty stitching)
  • Straight pins or fabric clips
  • Fabric marker or tailor’s chalk
  • Scissors
  • Ruler or measuring tape

How to Iron On a Patch (Step-by-Step)

Iron-on application is the fastest method and works well on most cotton, denim, and polyester-blend garments. It is not recommended for leather, nylon, waterproof shells, or delicate fabrics that can’t handle direct heat.

Step 1: Set the Iron Temperature

Set your iron to the cotton or wool setting, with steam turned off. Heat, not steam, is what activates the adhesive.

Step 2: Preheat the Application Area

Iron the spot on the garment where the patch will go for about 10–15 seconds. This removes moisture and warms the fabric so the adhesive bonds evenly.

Step 3: Position the Patch

Place the patch adhesive-side down exactly where you want it. Use a fabric marker to lightly outline the corners on the garment first if you want to guarantee straight placement — this matters most on jacket backs and chest panels, where even a slight tilt is noticeable.

Step 4: Cover with a Pressing Cloth

Lay a thin cotton cloth over the patch. This protects both the patch design and your iron from direct heat contact and prevents scorching.

Step 5: Apply Firm, Even Heat

Press the iron down firmly — don’t slide it back and forth like normal ironing. Hold it in place for 20–30 seconds, then lift, reposition slightly if the patch is large, and press again until the entire surface has been heated evenly. For larger back patches, work in overlapping sections.

Step 6: Check the Bond

Let the patch cool completely before touching it. Once cool, gently try to lift a corner. If it resists, the bond is solid. If any edge lifts easily, repeat the heat application on that section.

Step 7: Reinforce with Stitching (Recommended)

Iron-on adhesive alone will loosen over time, especially with regular washing or wear. For anything beyond occasional use — jackets, bags, uniforms — stitch around the patch edge even if it’s already ironed on. This is the difference between a patch that lasts a season and one that lasts for years.

How to Sew On a Patch (Step-by-Step)

Sewing is the most durable application method and the standard for military, police, and motorcycle club patches, which are handled roughly and need to hold up to years of wear.

Step 1: Position and Pin

Place the patch where you want it and secure it with straight pins or fabric clips at each corner, or every couple of inches around a curved patch like a top or bottom rocker.

Step 2: Thread Your Needle

Use a strong polyester or nylon thread that matches (or intentionally contrasts with) the patch border. Double the thread through the needle and knot the ends for extra strength.

Step 3: Start From the Back

Push the needle through the garment from the inside, coming up right at the patch’s edge. Starting from the back hides your knot.

Step 4: Stitch Around the Perimeter

Use a whipstitch or blanket stitch, sewing through the patch border and the garment fabric in small, even stitches — about 1/8 inch apart. Keep tension consistent so the patch lies flat without puckering.

By hand: Expect 20–40 minutes for a standard 3–4 inch patch, depending on stitch density.

By machine: A zigzag stitch around the patch border is faster and holds tighter. Go slowly around curves and corners, and backstitch at the start and end to lock the thread.

Step 5: Knot and Trim

Once you’ve stitched all the way around, tie off the thread on the inside of the garment and trim any excess.

Step 6: Press Flat

Iron the finished patch (low heat, no steam) from the inside of the garment to smooth out any puckering from the stitching.

How to Apply a Velcro-Backed Patch

Velcro backing is the go-to choice when patches need to be interchangeable — tactical gear, uniforms with rotating unit designations, or seasonal patch displays.

Step 1: Sew the Loop Side to the Garment

The soft “loop” side of the Velcro pair gets sewn onto the garment first, using a straight or zigzag stitch around all four edges. This piece stays permanently attached.

Step 2: Attach the Hook Side to the Patch

If your patch didn’t come pre-attached to hook-and-loop backing, sew or iron the rough “hook” side directly onto the back of the patch, matching its dimensions.

Step 3: Press the Patch On

Once both pieces are in place, simply press the patch onto the garment. It should hold firmly but allow you to remove and swap it whenever needed.

Tip: Always match hook-to-loop, not hook-to-hook. If your patch already has hook backing (most do), make sure you’re sewing the loop side — not another hook piece — onto the garment.

Common Patch Application Mistakes to Avoid

Skipping the preheat step. Ironing a cold, slightly damp garment leads to a weak, uneven bond that peels within a few wears.

Using steam on iron-on patches. Steam interferes with adhesive activation. Always turn steam off.

Sliding the iron instead of pressing. Iron-on adhesive needs sustained, direct pressure — sliding the iron spreads heat too thin to activate the glue fully.

Ironing directly on delicate or synthetic fabrics. Nylon, leather, and some polyester blends can scorch or melt. Test on a hidden corner first, or switch to sew-on application.

Not reinforcing iron-on patches with stitching. Adhesive-only patches loosen with washing. A quick stitch around the border more than doubles the lifespan.

Mismatched thread tension when sewing. Stitches that are too tight will pucker the fabric; too loose and the patch will sag. Aim for even, moderate tension throughout.

Placing the patch without measuring first. Especially on jackets and vests with multiple patches (top rocker, center patch, bottom rocker), even small misalignments are highly visible. Measure and mark before you commit.

Patch Placement Guide by Garment

Jackets and Vests: Left chest for name or rank patches, full back for large club or brand patches, sleeves for smaller achievement or unit patches.

Uniforms: Standard placement is dictated by department or organizational guidelines — always check official regulations before applying, since incorrect placement on a military or police uniform can violate dress code.

Hats and Caps: Centered on the front panel, sized to leave a small margin from the seams.

Bags and Backpacks: Flat, low-flex areas hold patches best; avoid zippered pockets that flex constantly, since repeated movement stresses the stitching or adhesive.

How Long Should a Properly Applied Patch Last?

With correct application and reasonable care, patches typically hold up as follows:

  • Sewn patches: 10+ years, even with regular washing and heavy wear
  • Iron-on with stitched reinforcement: 5–10 years
  • Iron-on only: 1–3 years, shorter with frequent washing
  • Velcro: 10+ years for the loop side; hook-side wear depends on how often the patch is swapped

If you’re investing in a custom embroidered or woven patch, sewing it on — or at minimum reinforcing an iron-on patch with stitching — protects that investment for the long run.

Frequently Asked Questions

Can I iron on a patch without a pressing cloth?

It’s not recommended. Direct iron contact can scorch the patch design or melt synthetic threads. A thin cotton cloth protects both the patch and your iron with no downside.

Do I need a sewing machine to sew on a patch?

No. Hand-sewing works fine for most patches and is often preferred for curved pieces like rocker patches, where machine stitching around tight curves is harder to control.

Can iron-on patches be removed and reapplied elsewhere?

Generally no. The adhesive is designed for a permanent bond, and removing an iron-on patch usually damages the patch backing and leaves adhesive residue on the garment. Velcro backing is the right choice if you need repositionable patches.

What’s the strongest way to attach a patch?

Sewing is the most durable method for garments that see regular wear and washing. For maximum hold, many people iron a patch on first to keep it in place, then sew around the border for a permanent, reinforced bond.

Can I apply a patch to leather?

Leather can’t be ironed, since heat damages the material. Sewing is the standard method for leather vests and jackets — this is also why most motorcycle club and biker patches are sew-on rather than iron-on.

Get Your Custom Patches Made Right

At Gem Punch, every custom patch we produce — embroidered, woven, PVC, or Velcro-backed — is built for whichever application method you plan to use, with backing options specified clearly at order time.

Order Your Custom Patches →

Whether you need military patches, police patches, biker patches, or custom brand patches for your team, our team handles the digitizing and production — you handle the application, using the steps above.

Related Resources

Motorcycle_Club_Patches_202607071518

Motorcycle Club Patch Design: 1% Rules, Placement & Meaning – Complete Guide

INTRODUCTION

The image is instantly recognizable: a rider in a leather vest covered in patches, each one telling a story. A large center patch on the back. Curved rocker patches above and below. Smaller patches scattered across the vest. Each patch means something. Each one was earned.

Motorcycle club patches aren’t just decoration. They’re a complex, highly meaningful system with deep tradition, strict rules, and serious consequences for violations.

If you’re in a motorcycle club, thinking about starting one, or designing patches for a club, you need to understand the rules—and respect them.

This comprehensive guide reveals the complete MC patch system: what makes an authentic motorcycle club patch, the meaning behind the structure, the unwritten rules about placement and display, how to design MC patches correctly, and why respecting patch tradition matters more than you might think.

Whether you’re an officer looking to order new patches, a designer creating MC artwork, or someone curious about motorcycle club culture, this guide covers everything you need to know about the patches that represent MC life.

Motorcycle Club Patch Design

Understanding Motorcycle Club Patch Culture: Why It Matters

The Significance of Motorcycle Club Patches

In motorcycle club culture, patches represent far more than decoration or branding. They represent:

Identity — Your club, your chapter, your rank Achievement — Earned through time, commitment, and often specific deeds Brotherhood — Connection to club members and the broader MC community Reputation — How you’re known and respected in the motorcycle world Status — Your position within the club hierarchy

A member’s patch collection tells their history. How long they’ve been in the club. What chapters they’ve belonged to. What positions they’ve held. What battles they’ve fought (metaphorical and otherwise).

Patches are taken so seriously that:

  • Wearing another club’s patches without membership is considered extremely disrespectful
  • Stealing patches is virtually guaranteed to result in serious consequences
  • Losing a patch vest can be as significant as losing a personal identification document
  • Patches are sometimes buried with deceased members

This is the culture you’re entering when you work with motorcycle club patches.

The 1% Club Patch: Explained

What Does “1%” Mean?

The “1%” designation originated from the American Motorcycle Association’s (AMA) claim that 99% of motorcyclists are law-abiding citizens, and 1% are not.

Motorcycle clubs embraced this designation. Being a “1% club” means:

Definition: A club that doesn’t follow mainstream society rules. The club operates by its own code.

Not literally: It doesn’t mean the club is automatically illegal (though some are). It means the club operates independently, outside mainstream expectations.

The patch: The “1%” diamond patch, typically worn on the vest front, officially designates a club as a 1% motorcycle club.

1% Patch Appearance

Size: Typically 2-3 inches, diamond-shaped Design: “1%” inside a diamond shape Placement: Front of vest, left side (or right, depending on club preference) Material: Embroidered, woven, or PVC (professional clubs often use woven) Color: Usually red/white or black/white (varies by club)

Clubs That Wear the 1% Patch

The “Big Four” (dominant 1% clubs in the US):

  • Hells Angels
  • Outlaws
  • Bandidos
  • Mongols

But hundreds of other 1% clubs exist across the world, each with their own patches and traditions.

The Anatomy of a Motorcycle Club Patch: Understanding the Structure

Authentic motorcycle club patch design follows a very specific structure. Understanding this structure is critical if you’re designing patches for a club.

THE THREE MAIN COMPONENTS

Most MC patches consist of three distinct pieces:

1. TOP ROCKER (Curved patch above main design)

  • Contains the state name or chapter name
  • Curved to fit over rider’s back/shoulder
  • Typically 3-5 inches wide
  • Text in bold, easily readable font

2. CENTER PATCH (Main design)

  • Club name/logo
  • Club symbol or emblem
  • Typically 4-6 inches tall
  • Most distinctive piece
  • Requires custom digitizing

3. BOTTOM ROCKER (Curved patch below main design)

  • Typically contains “MC” (Motorcycle Club)
  • Some clubs use year founded or chapter number
  • Curved to match top rocker
  • Same width as top rocker

Why Three Pieces?

The three-piece design serves practical and cultural purposes:

Practical: Each piece can be produced separately, making replacement easier if damaged Cultural: The structure is traditional and expected in MC culture Visual: The arrangement creates a professional, recognized appearance Versatility: Different chapters can use same center patch with different rockers

Example: Hells Angels Patch Structure

  • Top rocker: State name (“CALIFORNIA,” “TEXAS,” etc.)
  • Center patch: Death’s head (Hells Angels logo)
  • Bottom rocker: “HELLS ANGELS” + “M.C.”
  • 1% patch: Worn separately on front left

This three-piece structure is instantly recognizable and has remained consistent for decades.

Motorcycle Club Patch Components: Detailed Breakdown

TOP ROCKER PATCHES

Purpose: Identify chapter location or affiliation

Typical content:

  • State name (most common)
  • City name (smaller clubs)
  • Chapter name or number
  • Region designation

Design considerations:

  • Text must be large and readable (1/2″ minimum height)
  • Curved shape to fit over shoulders
  • White/light text on dark background (or vice versa)
  • Bold sans-serif font for clarity
  • Usually 3-5 inches wide

Common mistake: Text too small or hard to read Correct approach: Prioritize readability above all

CENTER PATCHES (Main Design)

Purpose: Club identity, logo, symbol

Critical considerations:

Design complexity:

  • Can range from simple to highly detailed
  • Most clubs use recognizable symbol or emblem
  • Should be distinctive and memorable
  • Must work at various sizes (t-shirts, patches, etc.)

Common MC center patch themes:

  • Animal (eagle, skull, ram, etc.)
  • Mythical figure (demon, angel, etc.)
  • Symbol (skull and bones, shield, etc.)
  • Custom design specific to club

Size: Typically 4-6 inches tall (patches), can be smaller on t-shirts

Color palette:

  • 2-5 colors is typical
  • More colors = higher cost but more detail
  • Color choice can have cultural meaning
  • Most common: red, black, white, gold

BOTTOM ROCKER PATCHES

Purpose: Formally identify as motorcycle club

Typical content:

  • “M.C.” (Motorcycle Club) – universal designation
  • Club name (sometimes)
  • Year founded (sometimes)
  • Chapter number (sometimes)

Design considerations:

  • Usually matches top rocker in size and style
  • Text clarity is critical
  • Curved to match top rocker shape
  • Creates balanced visual with top rocker

1% DIAMOND PATCH

Purpose: Officially designate as 1% club

Design:

  • Diamond shape (roughly 2-3 inches)
  • “1%” inside diamond
  • Bold, clear lettering
  • High contrast (dark background, light text or vice versa)

Placement: Usually front left of vest

Significance: Only worn by clubs that officially claim 1% status

MC Patch Placement: Rules & Traditions

Motorcycle club patch placement follows strict, unwritten rules. Violating these rules is considered extremely disrespectful.

VEST/JACKET PLACEMENT GUIDE

Back of Vest:

  • Center position: Center patch (largest, most prominent)
  • Top: Top rocker patch
  • Bottom: Bottom rocker patch
  • Arrangement: Top rocker > center patch > bottom rocker

Front Left Side:

  • 1% diamond: If applicable
  • Other significant patches: Club officer designation, MC-wide patches

Front Right Side:

  • Secondary patches: Support patches, affiliations
  • Smaller designs: Event patches

Sleeves:

  • Arm patches: Chapter designation, achievement patches
  • Limited placement: Not overcrowded

Rules:

  • Center patch placement is sacred (never moved)
  • All three main patches must be worn together
  • No gaps between rocker patches and center patch
  • Proper spacing between all elements
  • Patches must be straight and aligned

The Vest as Identity

Think of a motorcycle club vest as a resume of the wearer:

  • Center patch = Club membership
  • Top rocker = Chapter/location
  • Bottom rocker = MC status
  • 1% patch = Club classification
  • Additional patches = Officer rank, achievements, affiliations
  • Worn-out/faded patches = Proof of time in club

A club member might have the same vest for 10-20+ years, with the same patches. The patches wear with the vest, becoming part of the member’s identity.

MC Patch Colors: Meaning & Significance

Color choices in MC patches aren’t random. Colors often have cultural meanings and associations.

Common MC Patch Colors & Meanings

Red:

  • Hells Angels signature color
  • Represents aggression, dominance, fire
  • Strong association with old-school clubs
  • Commands respect

Black:

  • Universal MC color
  • Represents strength, power, seriousness
  • Used by clubs worldwide
  • Can be combined with any other color

White:

  • Contrast color
  • Used for text/detail visibility
  • Represents purity (rare in MC culture—usually combined with other colors)
  • Creates clean, professional appearance

Gold:

  • Luxury, prestige
  • Often used for club names or details
  • Creates premium appearance

Blue:

  • Less common in 1% culture
  • Some regional clubs use blue
  • Can represent loyalty, calm
  • Sometimes associated with smaller/newer clubs

Green/Purple:

  • Rare in traditional 1% culture
  • Sometimes used by younger clubs or outlaw regions
  • Less traditional appearance

Color Combinations

Red + Black + White:

  • Classic, aggressive, traditional
  • High contrast, professional appearance
  • Hells Angels-influenced aesthetic

Black + Gold:

  • Professional, prestigious
  • Less aggressive than red/black
  • Growing in newer clubs

Black + White:

  • Clean, stark, powerful
  • Maximum contrast
  • High readability

Critical Rule:

Never wear another club’s signature colors without permission. Color combinations are claimed by established clubs. Using their colors can be interpreted as trying to claim their identity.

Example: Wearing red and white (Hells Angels colors) without being a member is extremely disrespectful and can result in serious consequences.

Designing Motorcycle Club Patches: Best Practices

If you’re designing patches for your motorcycle club, understand these critical design principles.

DESIGN PRINCIPLES FOR AUTHENTIC MC PATCHES

1. Simplicity with Impact

The best MC patches are simple enough to recognize instantly, but distinctive enough to stand out.

  • 3-5 elements maximum in center patch
  • Bold shapes, clear lines
  • Avoid overly complicated details
  • Logo should work at both large (jacket) and small (cap) sizes

2. Embroidery Readability

Remember: Your design will be embroidered, not printed. This changes what’s possible.

  • Text needs minimum 1/4″ (6mm) height
  • Fine details disappear (avoid thin lines)
  • Solid shapes work better than gradients
  • Bold outlines are critical

3. Timelessness

MC patches should look good for 10+ years, not just this season.

  • Avoid trendy design elements
  • Classic style ages better than modern style
  • Proven design themes (skulls, animals, shields) work well
  • Original artwork beats following current trends

4. Recognition & Pride

The patch should make members proud to wear it.

  • Distinctive enough to be remembered
  • Professional appearance (no amateur look)
  • Represents club values and identity
  • Looks good on vest and other merchandise

5. Scalability

Design must work at multiple sizes.

  • Looks good at 2″ (hat patches)
  • Looks good at 5-6″ (back patches)
  • Readable at all sizes
  • Details don’t disappear when scaled down

COMMON MC DESIGN MISTAKES

Mistake #1: Too Many Colors

More colors = higher cost + more complexity + longer production time

Better: 3-4 colors maximum for center patch

  • Uses bold color contrast
  • Costs less than 6+ colors
  • Embroidery quality remains high

Mistake #2: Text Too Small

Small text becomes illegible when embroidered

Better: Text minimum 1/4″ (6mm) height

  • Easily readable from arm’s length
  • Professional appearance
  • No customer complaints about legibility

Mistake #3: Overly Complex Design

Tiny details that disappear when stitched

Better: Simplified shapes and bold outlines

  • All details remain visible
  • Professional, clean appearance
  • Works at all sizes

Mistake #4: Poor Font Choice

Thin, decorative fonts don’t work in embroidery

Better: Bold sans-serif fonts

  • Maximum readability
  • Professional appearance
  • Works at all sizes

Mistake #5: Ignoring Embroidery Constraints

Designing as if it will be printed, not embroidered

Better: Understand embroidery limitations

  • Work with experienced digitizer
  • Test samples before full production
  • Adjust design for embroidery reality

MC Patch Materials: Embroidered vs. PVC vs. Woven

Different patch materials communicate different things about your club.

EMBROIDERED PATCHES (Traditional)

Appearance: Thread stitched on fabric Cost: $$ (most affordable) Durability: 5-10 years typical Feel: Soft, flexible, traditional

Best for:

  • Clubs on budget
  • Traditional aesthetic
  • Working clubs (more comfort)

Disadvantages:

  • Less detailed than woven
  • May fray at edges
  • Requires backing

WOVEN PATCHES (Premium Professional)

Appearance: Interlaced thread creating flat, detailed surface Cost: $$$ (most expensive) Durability: 10+ years Feel: Smooth, flat, professional

Best for:

  • Clubs wanting premium appearance
  • High-visibility clubs
  • Clubs with detailed designs
  • Maximum detail and sharpness

Advantages:

  • Captures finest detail
  • Extremely professional appearance
  • Excellent durability
  • Looks sharp for years

Why many established clubs use woven: Represents longevity and quality

PVC PATCHES (Modern Alternative)

Appearance: Molded rubber with embossed or 2D design Cost: $$ – $$$ Durability: 10+ years (excellent) Feel: Hard/semi-rigid, modern

Best for:

  • Clubs wanting modern appearance
  • 3D/embossed effects
  • Extreme durability needs
  • Weather-resistant requirement

Advantages:

  • Extremely durable
  • Waterproof
  • Modern appearance
  • Can create 3D effects

Disadvantages:

  • Doesn’t look traditional
  • More expensive than embroidered
  • Feels different than fabric patches

The MC Patch Order: What You Need to Know

TYPICAL MC PATCH ORDER BREAKDOWN

When a motorcycle club orders patches, they typically order:

For center patch:

  • 50-500 pieces (depends on chapter size and distribution)
  • Cost: $2-3 per piece (embroidered) to $5-7 per piece (woven)
  • Timeline: 5-7 days standard, 2-3 days rush

For top rocker:

  • Same quantity as center patch
  • Cost: $1.50-2.50 per piece (embroidered)
  • Timeline: Same as center patch

For bottom rocker:

  • Same quantity as center patch
  • Cost: $1.50-2.50 per piece (embroidered)
  • Timeline: Same as center patch

For 1% diamond patch:

  • Smaller quantity (might be worn by fewer members)
  • Cost: $0.75-1.50 per piece (embroidered)
  • Timeline: Same as other patches

Total order example: 100 members, full patch set

  • 100 center patches: $200-300
  • 100 top rockers: $150-250
  • 100 bottom rockers: $150-250
  • 100 1% diamonds: $75-150
  • Total: $575-950
  • Per member: $5.75-9.50 complete set

REORDER CYCLES

Most motorcycle clubs reorder patches on these cycles:

New chapter: Initial full order of all four patch types Annual refresh: Top rocker (location) and center patch refresh Member additions: New members get full patch set Special events: Special event patches (anniversary, rally, etc.)

Real Examples: Iconic MC Patch Designs

HELLS ANGELS

Center patch: Death’s head (skull with wings) Colors: Red, white, black Top rocker: State name Bottom rocker: HELLS ANGELS / M.C. 1% patch: Yes (diamond with “1%”)

Why it works:

  • Instantly recognizable worldwide
  • Simple but powerful (skull with wings)
  • Bold colors command respect
  • Consistent across decades

OUTLAWS MC

Center patch: Skull with crossed pistons Colors: Black and white (primarily) Top rocker: State name Bottom rocker: OUTLAWS / M.C. 1% patch: Yes

Why it works:

  • Motorcycle-specific symbol (pistons)
  • High contrast black and white
  • Clear, powerful imagery
  • Strong brand recognition

BANDIDOS

Center patch: Red and gold Mexican bandit face Colors: Red, gold, black Top rocker: State/country name Bottom rocker: BANDIDOS / M.C. 1% patch: Yes

Why it works:

  • Cultural symbol (bandit)
  • Distinctive color palette
  • Recognizable even at distance
  • Proud heritage representation

MONGOLS

Center patch: Mongolian warrior face Colors: Black and white primarily Top rocker: State name Bottom rocker: MONGOLS / M.C. 1% patch: Yes

Why it works:

  • Strong warrior imagery
  • Bold, simple face design
  • Easy to embroider and recognize
  • Cultural heritage

MC Patch Digitizing: What You Need to Know

Professional digitizing is essential for quality MC patches. This isn’t an area for amateur work.

WHY PROFESSIONAL DIGITIZING MATTERS

MC patches are highly visible, often worn for decades, and represent club identity. Poor digitizing results in:

  • Text that’s hard to read
  • Details that disappear
  • Design that looks cheap
  • Finished patches that look unprofessional
  • Member dissatisfaction

DIGITIZING REQUIREMENTS FOR MC PATCHES

Text precision:

  • Text must be perfectly readable
  • Proper stitch direction for each letter
  • Minimum 1/4″ height for all text
  • Clean, professional letterforms

Complex imagery:

  • Skulls, animals, faces need expertise
  • Shading and dimension require skill
  • Fine details must be simplified for embroidery
  • Professional results, not amateur work

Color accuracy:

  • Each color change must be planned
  • Proper color sequencing for efficiency
  • Stitch density calibrated for each color
  • No color bleeding or overlap issues

Rocker curve:

  • Top and bottom rockers have curved text
  • Text must follow curve properly
  • Curve radius must be correct for garment fit
  • Professional digitizing is essential

FINDING A PROFESSIONAL DIGITIZER

Work with a digitizer who:

  • ✓ Has experience with MC patches
  • ✓ Understands embroidery machines
  • ✓ Can handle complex imagery (skulls, faces, etc.)
  • ✓ Provides test stitch-outs before production
  • ✓ Communicates clearly about limitations
  • ✓ Has portfolio of professional work

Red flags:

  • ✗ Won’t provide test stitch-outs
  • ✗ Promises results that aren’t embroidery-realistic
  • ✗ No portfolio or examples
  • ✗ Can’t explain digitizing constraints
  • ✗ Rush work without testing
Motorcycle Club Patches

FAQ: Motorcycle Club Patches

Can I wear another club’s patch if I respect them?

No. This is one of the most serious violations in MC culture. Wearing another club’s patches without membership can result in severe consequences, including violence.

Exception: Some clubs offer “support” patches that allies can wear. This is explicit permission only.

What does it mean if someone’s patches are worn/faded?

Respect. It means they’ve been wearing those patches for years, literally wearing them in through hard riding and hard living. The more worn, the more “street credible” in some circles.

Some members deliberately wear their vests to give them that broken-in look.

Why is losing a patch vest so serious?

Because the vest is the physical embodiment of club membership. The patches represent earned status, chapter affiliation, and personal history. Losing them is like losing your membership card, your history, and your identity in the club all at once.

Some clubs will require you to earn your membership status all over again if you lose your vest.

Can I design an MC patch if I’m not in a club?

Yes, but understand that the design has cultural weight. Design respectfully. Understand the culture. Don’t trivialize the tradition.

If you’re designing for a club, work closely with club leadership to ensure the design aligns with their vision and values.

What’s the difference between a 1% club and a regular motorcycle club?

Regular motorcycle clubs: Follow laws, exist more for camaraderie 1% clubs: Operate by their own rules/code, don’t necessarily follow mainstream law

The 1% patch officially designates this distinction.

How much does an MC patch order cost?

Typical breakdown (embroidered):

  • Center patch: $2-4/piece
  • Top rocker: $1.50-2.50/piece
  • Bottom rocker: $1.50-2.50/piece
  • 1% diamond: $0.75-1.50/piece

For 100 members: $575-950 total ($5.75-9.50/member for full set)

Woven patches cost 25-50% more. PVC patches vary widely.

How long do MC patches last?

Embroidered: 5-10 years typical (worn out like the vest) Woven: 10-15 years (more durable) PVC: 10+ years (extremely durable)

Most members replace patches when replacing their vest or as needed for wear/damage.

Can patches be customized for specific chapters?

Absolutely. This is standard:

  • Top rocker: Customized for chapter location
  • Center patch: Usually club-wide standard
  • Bottom rocker: Customized for chapter or MC designation
  • Additional patches: Chapter-specific patches very common

Should we get embroidered or woven patches?

Embroidered:

  • Most affordable
  • Traditional look
  • Good quality
  • Best for smaller budgets

Woven:

  • Premium appearance
  • More durable
  • Captures detail better
  • Best for clubs wanting top quality

Recommendation: If you’re established and want to look professional, woven is worth the investment.

Professional MC Patch Design & Production

At Gem Punch, we understand motorcycle club patch culture and the importance of getting it right.

Order Your MC Patches →

We specialize in:

  • ✓ Authentic MC patch design
  • ✓ Professional digitizing for complex imagery
  • ✓ Rocker patch expertise (curved text, proper sizing)
  • ✓ Quality embroidered and woven patches
  • ✓ Test stitch-outs before production
  • ✓ Understanding MC patch culture and traditions
  • ✓ Fast turnaround (5-7 days standard, 2-3 days rush)
  • ✓ Experienced with 1% clubs and traditional designs

Related Resources: Custom Patches & Motorcycle Culture

Custom_embroidered_patches_on_denim_202607042352

How Much Do Custom Embroidered Patches Cost? Complete Pricing Guide

INTRODUCTION

You’ve decided to invest in custom patches. You have an amazing design. You know exactly how you want them to look.

But then the question hits: How much is this actually going to cost?

Custom patch pricing seems mysteriously opaque. You find one price online, another company quotes something completely different. You’re not sure if you’re looking at a fair price or getting overcharged. Bulk pricing, rush fees, different patch types—it all feels confusing.

Here’s the reality: Custom patch pricing is actually very straightforward once you understand the factors that affect cost.

This comprehensive guide breaks down exactly how custom patches are priced in 2026. You’ll learn the factors that influence cost, pricing by patch type, how bulk discounts work, what rush delivery costs, real-world pricing examples, and—most importantly—how to get the best value for your budget.

By the time you finish reading, you’ll be able to confidently estimate costs, compare quotes, and make informed decisions about your custom patch investment.

How Much Do Custom Embroidered Patches Cost

Why Custom Patch Prices Vary So Much

The Core Pricing Factors

Custom patch pricing isn’t random. It’s determined by several specific, measurable factors:

1. Patch Type (Embroidered vs. PVC vs. Woven)

  • Different materials have different costs
  • Manufacturing processes vary significantly
  • Material sourcing affects pricing

2. Patch Size (2″ vs. 4″ vs. 6″)

  • Larger patches require more thread and time
  • Hoop size and machine time increases
  • Stitch count increases with size

3. Color Count (Single color vs. Full color)

  • Each color = additional thread changes
  • More production time
  • More complex file handling

4. Quantity Ordered (50 vs. 500 vs. 5,000)

  • Volume dramatically affects per-unit cost
  • Setup costs spread across more pieces
  • Bulk discounts are substantial (20-40% savings)

5. Complexity (Simple logo vs. Photorealistic design)

  • Complex designs require more digitizing time
  • More stitch detail = more stitches
  • Specialty techniques cost more

6. Rush Delivery (Standard vs. 48-hour vs. 24-hour)

  • Rush services cost 25-50% more
  • Expedited production requires priority scheduling
  • Faster timeline = premium pricing

7. Backing/Finishing (Standard felt vs. Merrow border vs. Velcro)

  • Different backing options have different costs
  • Merrow borders add premium finishing
  • Velcro backing adds material cost

8. Digitizing (Included vs. Additional cost)

  • Many providers include free digitizing
  • Custom digitizing from scratch costs extra
  • Logo conversion/simplification may add cost

Understanding these factors means you can intelligently control costs and get the best value.

CUSTOM PATCH PRICING BREAKDOWN BY TYPE

EMBROIDERED PATCHES (Most Common)

Embroidered patches are the industry standard—thread stitched onto fabric backing.

Cost structure:

Complexity50 Pieces250 Pieces500 Pieces1,000 Pieces5,000 Pieces
Simple (1-2 color)$3.50-5$2-3$1.50-2$1-1.50$0.80-1.20
Standard (3-5 color)$4.50-6.50$2.50-3.50$2-2.50$1.50-2$1.20-1.50
Complex (6+ color)$6-8$3.50-4.50$2.50-3.50$2-3$1.50-2

Embroidered patch example pricing:

  • 2″ x 2″ simple logo patch, 250 pieces: $500-750 ($2-3 per piece)
  • 3″ x 3″ standard patch, 500 pieces: $1,000-1,250 ($2-2.50 per piece)
  • 4″ x 4″ complex patch, 1,000 pieces: $2,000-3,000 ($2-3 per piece)

Why embroidered patches:

  • Professional appearance (industry standard)
  • Works on any fabric
  • Durable (5-10 year lifespan typical)
  • Flexible design options
  • Wide price range (accessible for small orders)

PVC RUBBER PATCHES (Modern Alternative)

Molded rubber with colored layers. Available in 2D (flat) and 3D (embossed).

Cost structure:

Style50 Pieces250 Pieces500 Pieces1,000 Pieces
2D PVC (Flat)$4-6$2.50-3.50$2-2.50$1.50-2
3D PVC (Embossed)$6-8$3.50-4.50$3-3.50$2-2.50

PVC patch example pricing:

  • 2″ x 2″ flat PVC, 250 pieces: $625-875 ($2.50-3.50 per piece)
  • 3″ x 3″ embossed PVC, 500 pieces: $1,500-1,750 ($3-3.50 per piece)
  • 4″ x 4″ 3D PVC, 1,000 pieces: $2,000-2,500 ($2-2.50 per piece)

Why PVC patches:

  • Modern, sleek appearance
  • Extremely durable (10+ years)
  • Waterproof and weather-resistant
  • Great for tactical/outdoor gear
  • 3D options create eye-catching effects

Premium for 3D: +30-50% cost compared to 2D

WOVEN PATCHES (Premium Detail)

Thread interlaced on looms, flat surface with exceptional detail. Typically includes Merrow border (curved edge).

Cost structure:

Complexity50 Pieces250 Pieces500 Pieces1,000 Pieces
Standard Woven$5-7$3-4$2.50-3$2-2.50
Premium Woven$7-10$4-5$3-3.50$2.50-3

Woven patch example pricing:

  • 2″ x 2″ standard woven, 250 pieces: $750-1,000 ($3-4 per piece)
  • 3″ x 3″ premium woven, 500 pieces: $1,500-1,750 ($3-3.50 per piece)
  • 4″ x 4″ woven with Merrow, 1,000 pieces: $2,500-3,500 ($2.50-3.50 per piece)

Why woven patches:

  • Captures finest details beautifully
  • Extremely professional appearance
  • Sleek, flat finish
  • Lightweight and flexible
  • Premium quality positioning

CHENILLE PATCHES (Varsity Style)

Plush fabric with fuzzy texture, often with Merrow border. Popular for varsity jackets and letterman wear.

Cost structure:

Type50 Pieces250 Pieces500 Pieces1,000 Pieces
Standard Chenille$4-6$2.50-3.50$2-2.50$1.50-2
Premium Chenille$6-8$3.50-4.50$2.50-3.50$2-2.50

Chenille patch example pricing:

  • 3″ x 2″ standard chenille, 250 pieces: $625-875 ($2.50-3.50 per piece)
  • 4″ x 3″ premium chenille with Merrow, 500 pieces: $1,250-1,750 ($2.50-3.50 per piece)

Why chenille patches:

  • Vintage, nostalgic appeal
  • Ideal for letterman jackets
  • Premium feel and appearance
  • Plush texture adds dimension

LEATHER PATCHES (Premium/Specialty)

Genuine or faux leather, typically embossed or stamped.

Cost structure:

Material50 Pieces100 Pieces250 Pieces500 Pieces
Faux Leather$4-6$3-4$2-3$1.50-2.50
Genuine Leather$8-12$6-8$4-6$3-5

Leather patch example pricing:

  • 2″ x 2″ faux leather, 100 pieces: $300-400 ($3-4 per piece)
  • 3″ x 3″ genuine leather, 250 pieces: $1,000-1,500 ($4-6 per piece)

Why leather patches:

  • Premium, upscale appearance
  • Durable (10+ years)
  • Professional/sophisticated look
  • Great for high-end merchandise

Note: Genuine leather significantly more expensive than faux

PRICING BY SIZE

Size has a major impact on cost. Larger patches require more thread, more stitching time, and more production effort.

Embroidered patch pricing by size (500 pieces, standard complexity):

SizePer Piece CostTotal for 500
1.5″ x 1.5″$1.50$750
2″ x 2″$1.80$900
3″ x 3″$2.20$1,100
4″ x 4″$2.80$1,400
5″ x 5″$3.50$1,750
6″ x 6″$4.50$2,250

Key insight: Doubling patch size roughly increases cost by 40-60%, not 100%. Larger patches are more cost-efficient at scale.

PRICING BY COLOR COUNT

Each color in your design requires a thread change during production, which affects cost.

Embroidered patch pricing by color (3″ x 3″, 500 pieces):

ColorsPer Piece CostTotal for 500
1 color$1.50$750
2 colors$1.80$900
3-4 colors$2.20$1,100
5-6 colors$2.50$1,250
7-8 colors$3$1,500
10+ colors$3.50+$1,750+

Key insight: Colors add cost, but not dramatically. The jump from 1 to 3 colors is about $0.50/piece. Colors 4-8 add less than $0.10/piece each.

VOLUME PRICING & BULK DISCOUNTS

Bulk discounts are substantial. Ordering more patches significantly reduces per-unit cost.

Embroidered patch bulk discount structure (single color, 2″ x 2″):

QuantityPer Piece CostTotal Cost
50 pieces$4$200
100 pieces$3.25$325
250 pieces$2.50$625
500 pieces$1.80$900
1,000 pieces$1.20$1,200
2,500 pieces$0.95$2,375
5,000 pieces$0.75$3,750

Discount breakdown:

  • 50 vs. 250: 37.5% discount
  • 250 vs. 500: 28% discount
  • 500 vs. 1,000: 33% discount
  • 1,000 vs. 5,000: 37.5% discount

Key insight: Sweet spot for best value is typically 500-1,000 pieces. Jumping to 5,000+ gets only modest additional discounts (another 20-25%).

RUSH DELIVERY PRICING

Standard turnaround is typically 7-9 business days. Rush options cost extra.

Rush pricing premiums:

TurnaroundPremiumExample: 500 patches
Standard (7-9 days)0%$900
5-7 days+15-20%$1,035-1,080
3-4 days+30-40%$1,170-1,260
24-48 hours+50-75%$1,350-1,575
Overnight+75-100%$1,575-1,800

Real example: 500 piece rush order

  • Standard (7-9 days): $900
  • 3-4 day rush: $1,170 (+$270 premium)
  • 48-hour rush: $1,350 (+$450 premium)

Key insight: Rush pricing escalates quickly. 48-hour service costs roughly 50% more than standard.

REAL-WORLD PRICING EXAMPLES

SCENARIO 1: Small Business Startup (250 pieces)

Design: 2.5″ x 2.5″ company logo, 3 colors, embroidered

Breakdown:

  • Patch cost: 250 × $2.50 = $625
  • Digitizing (if not included): $0 (included with order)
  • Felt backing: Included
  • Shipping: ~$25-40
  • Total: $650-665
  • Per piece: $2.60-2.66

SCENARIO 2: Corporate Uniform Order (1,000 pieces)

Design: 3″ x 3″ embroidered company crest, 5 colors, left chest placement

Breakdown:

  • Patch cost: 1,000 × $1.80 = $1,800
  • Digitizing: $0 (included)
  • Twill backing: Included
  • Shipping: $50-75
  • Total: $1,850-1,875
  • Per piece: $1.85-1.88

SCENARIO 3: Event/Commemorative (500 pieces, Rush)

Design: 4″ x 4″ complex event patch, 7 colors, embroidered, 48-hour delivery

Breakdown:

  • Base patch cost: 500 × $2.50 = $1,250
  • Rush premium (50%): $625
  • Digitizing: $0 (included)
  • Felt backing: Included
  • Expedited shipping: $40
  • Total: $1,915
  • Per piece: $3.83

SCENARIO 4: Large Bulk Order (5,000 pieces)

Design: 2″ x 2″ simple logo, 2 colors, embroidered, standard delivery

Breakdown:

  • Patch cost: 5,000 × $0.75 = $3,750
  • Digitizing: $0 (included)
  • Felt backing: Included
  • Standard shipping: $75-100
  • Total: $3,825-3,850
  • Per piece: $0.765-0.77

ADDITIONAL COSTS & FEE BREAKDOWN

Digitizing Costs (If Not Included)

Most custom patch makers include digitizing with orders, but standalone digitizing costs:

ComplexityCost
Simple design$25-40
Standard design$40-75
Complex design$75-150
Custom design creation$100-300+

Gem Punch includes digitizing with all orders (no extra charge)

Backing Options (Upcharge if Different)

Standard felt backing is included. Upgrades cost extra:

Backing TypeAdditional Cost
Standard feltIncluded
Twill backing+$0.10-0.25 per piece
Merrow border (embroidered edge)+$0.25-0.50 per piece
Velcro loop backing+$0.15-0.35 per piece
Velcro hook backing+$0.15-0.35 per piece

Setup Fees (Sometimes Charged)

Some producers charge setup fees:

ItemCost
Digitizing setup$0-50 (usually included)
Production setup$25-100 per order
Art approval fee$0-25
Sample fee$0-50 (sometimes refunded)

Gem Punch charges no setup fees (included in pricing)

Shipping Costs

Shipping depends on weight and destination:

QuantityWeightStandard ShippingRush Shipping
250 pieces~2 lbs$15-25$40-60
500 pieces~4 lbs$25-35$60-90
1,000 pieces~8 lbs$35-50$90-150
5,000 pieces~40 lbs$75-125$200-350

COST FACTORS: WHAT DRIVES PRICING UP

Complexity Multiplier

Design complexity dramatically affects cost:

  • Simple design (1-2 colors, basic shapes): Baseline price
  • Standard design (3-5 colors, moderate detail): +20-30%
  • Complex design (6+ colors, fine detail): +50-100%
  • Photorealistic design: +100-200%

Size Multiplier

Patch size affects production time and material:

  • 1″ x 1″: Baseline
  • 2″ x 2″: +50-75%
  • 3″ x 3″: +100-150%
  • 4″ x 4″: +150-250%
  • 6″ x 6″: +300-400%

Specialty Techniques (Premium Pricing)

Certain effects cost extra:

TechniqueCost Increase
Chain stitch+20-40%
Puff embroidery+25-50%
Photorealistic+50-100%
3D embossed (PVC)+30-50%
Metallic thread+10-20%
Sequins/rhinestones+25-100%+
Custom Embroidered Patches Cost

COST COMPARISON: PATCH TYPES

For identical 3″ x 3″ design, 500 pieces:

TypePer PieceTotal
Embroidered$2.20$1,100
Woven$3$1,500
PVC 2D$2.50$1,250
PVC 3D$3.25$1,625
Chenille$2.50$1,250
Faux Leather$2.75$1,375

Cost ranking (cheapest to most expensive):

  1. Embroidered (baseline)
  2. PVC 2D
  3. Chenille / Faux Leather
  4. Woven
  5. PVC 3D
  6. Genuine Leather

BUDGET-FRIENDLY PRICING STRATEGIES

Strategy #1: Reduce Complexity

Impact: 30-50% cost savings

How:

  • Simplify design from 6 colors to 3 colors
  • Remove fine details
  • Simplify text (larger, bolder)
  • Use solid shapes instead of gradients

Example: 500 pieces, 3″ patch

  • Complex design (7 colors): $2.50/piece
  • Simple design (3 colors): $1.80/piece
  • Savings: $0.70/piece = $350 total

Strategy #2: Increase Quantity

Impact: 20-40% cost savings per piece

How:

  • Order 1,000 instead of 250 (cost per piece drops 25%)
  • Order 5,000 instead of 1,000 (cost per piece drops another 35%)

Example: 3″ patch, single color

  • 250 pieces: $2.50/piece
  • 1,000 pieces: $1.80/piece (28% savings)
  • 5,000 pieces: $0.75/piece (60% savings)

Strategy #3: Reduce Size

Impact: 20-35% cost savings

How:

  • Order 2″ patches instead of 3″
  • Order 3″ instead of 4″
  • Smaller patches are significantly cheaper

Example: 500 pieces, embroidered

  • 4″ x 4″: $2.80/piece = $1,400
  • 3″ x 3″: $2.20/piece = $1,100 (21% savings)
  • 2″ x 2″: $1.80/piece = $900 (36% savings)

Strategy #4: Choose Standard Patch Type

Impact: 15-30% cost savings

How:

  • Embroidered patches are most affordable
  • Avoid specialty types (genuine leather, woven)
  • Skip premium finishes (Merrow border, fancy backing)

Example: 500 pieces, 3″ patch

  • Embroidered: $2.20/piece
  • PVC 3D: $3.25/piece (48% more expensive)
  • Choose embroidered to save $525 on this order

Strategy #5: Accept Standard Turnaround

Impact: 0% cost, max efficiency

How:

  • Standard 7-9 day turnaround is free
  • Rush services cost 50-100% premium
  • Plan ahead to avoid rush fees

Example: 500 pieces, 3″ patch

  • Standard (7-9 days): $1,100
  • 48-hour rush: $1,650 (50% premium)
  • By planning ahead, save $550

Frequently Asked Questions: Patch Pricing

Why do prices vary so much between providers?

Factors affecting pricing:

  • Quality standards (cheap vs. premium)
  • Material sourcing
  • Labor costs
  • Overhead
  • Production efficiency
  • Minimum order requirements
  • Service level (included digitizing, revisions, etc.)

Comparing prices is important, but also consider:

  • What’s included?
  • Quality standards?
  • Revision policy?
  • Customer support?

What’s the cheapest way to get patches?

Budget strategies (in order of impact):

  1. Order larger quantity (5,000 vs. 500 = 50-60% savings)
  2. Accept longer turnaround (save on rush fees)
  3. Simplify design (fewer colors, less detail)
  4. Reduce size (smaller patches cost significantly less)
  5. Choose embroidered type (cheapest patch type)

Budget example: 5,000 simple 2″ embroidered patches, standard delivery

  • Cost per piece: ~$0.75-0.95
  • Total: $3,750-4,750

Do I have to order in bulk to get good pricing?

No, but bulk helps:

  • 50 pieces: ~$3-4/piece
  • 250 pieces: ~$2-2.50/piece (25-35% discount)
  • 500 pieces: ~$1.50-2/piece (50% discount from small orders)
  • 1,000+: ~$1-1.50/piece (70% discount)

Bottom line: Even 250 pieces gets meaningful discounts. You don’t need 5,000+ to get reasonable pricing.

What’s included in the quoted price?

Standard inclusions with Gem Punch: ✓ Digitizing (free) ✓ Digital proofs (free, unlimited) ✓ Revisions (unlimited) ✓ Felt backing (standard) ✓ All file formats (EMB, PES, JEF, DST, etc.) ✓ Sew-out testing on your fabric (included)

What’s NOT included (additional cost):

  • Shipping
  • Rush delivery premium
  • Specialty backings (Merrow, velcro, twill)
  • Specialty techniques (puff, chain stitch, sequins)

How accurate are online price estimates?

Online estimates: Usually accurate within 10-15%

Final pricing depends on:

  • Exact design specifications
  • Precise color count
  • Exact sizing
  • Final file complexity after digitizing
  • Customer-specific requests

Best practice: Request formal quote after submitting design for most accurate pricing.

Can prices change if I modify my design?

Yes. Design changes affect cost:

  • Adding colors: +$0.10-0.25 per piece
  • Increasing size: +$0.50-1 per piece
  • Adding detail: +$0.25-0.50 per piece
  • Changing complexity: Can change price significantly

Always request updated quote when making design changes.

Is there a minimum order?

Gem Punch minimum: 50 pieces

  • Some providers require 100+
  • Very small orders (under 50) are possible but expensive
  • Quantity discounts start at 100+

Getting the Best Pricing

Ready to order patches? Here’s how to get accurate pricing:

Step 1: Define your needs

  • Design/logo
  • Patch size and placement
  • Quantity needed
  • Timeline (rush vs. standard)
  • Patch type preference

Step 2: Submit design

  • Provide artwork in vector format if possible
  • Include specifications (size, placement, quantity)
  • Mention any special requirements

Step 3: Request quote

  • Get pricing breakdown
  • Verify what’s included
  • Ask about bulk discounts
  • Clarify rush delivery costs

Step 4: Compare options

  • Consider total cost vs. quality
  • Factor in production timeline
  • Evaluate customer support
  • Verify satisfaction guarantee

Step 5: Approve and order

  • Review final specifications
  • Confirm pricing
  • Place order with deposit
  • Proceed to production

Getting Your Custom Patch Quote

At Gem Punch, we provide transparent, competitive pricing on all custom patches.

Get Your Free Patch Quote →

Submit your design and specifications. We’ll provide:

  • Accurate pricing breakdown
  • Bulk discount options
  • Timeline estimates
  • Quality guarantees
  • No hidden fees

Related Resources: Patch Pricing & Ordering

Embroidered_wolf_head_patch_202607031314

Patch Sizing Guide: How Big Should Your Custom Patches Be? Complete Size Chart

INTRODUCTION

You’ve designed an amazing custom patch. The art looks sharp. The colors are perfect. The design concept is exactly what you envisioned.

Then you hit a wall: How big should the patch actually be?

This question stops thousands of people every year. They know what they want their patch to look like, but sizing decisions feel like guesswork. Too small and the patch becomes a tiny detail nobody notices. Too large and it overwhelms the garment. Wrong size for the placement and the patch looks awkward or off-balance.

The truth: Patch sizing isn’t guesswork. There are proven principles, technical limitations, and best practices that ensure your patches look professional every single time.

This comprehensive guide reveals exactly how to size custom patches based on where they’ll be worn, what they need to communicate, and the technical constraints of embroidery machines. By the time you finish reading, you’ll know the ideal size for any application—from tiny hat patches to oversized back designs.

Custom Patch

Why Patch Sizing Matters More Than You Think

The Real Cost of Getting Size Wrong

Too small:

  • Design details become invisible
  • Text becomes unreadable
  • Patch looks cheap or incomplete
  • Customer doesn’t get the impact you intended
  • Wasted design effort and digitizing costs

Too large:

  • Overwhelms the garment
  • Creates visual imbalance
  • Difficult or impossible to apply
  • Looks tacky or unprofessional
  • Placement options become limited

Wrong size for placement:

  • Patch looks awkward on the garment
  • Clashes with garment proportions
  • Visibility issues (hidden folds, placement conflicts)
  • Professional appearance compromised
  • Customer dissatisfaction

The impact: A poorly sized patch can completely undermine an otherwise great design. Conversely, perfect sizing makes an average design look professional.

The Technical Reality: Embroidery Machine Limitations

Embroidery machines have physical constraints that affect sizing:

Hoop sizes: Standard embroidery hoops range from 4×4 inches to 26×10 inches (commercial machines go larger) Stitch count limits: Typical patches have 5,000-15,000 stitches Digitizing resolution: Minimum details are limited by thread thickness Embroidery speed: Larger patches take longer to stitch (impacts cost and production time)

These technical limitations inform sizing recommendations. A patch that’s theoretically possible might not be practical or cost-effective.

The Patch Sizing Chart: Standard Sizes by Application

REFERENCE CHART: Ideal Patch Sizes by Placement

PlacementIdeal SizeRangeVisibilityBest For
Baseball Cap2.5″ x 2.5″2-3″HighLogo, name, simple designs
Hat Back4″ x 4″3.5-5″HighDetailed designs, graphics
Left Chest3″ x 3″2.5-4″Very HighPrimary logo, branding
Right Chest3″ x 3″2.5-4″Very HighSecondary logo, emblem
Jacket Back5-6″4-8″Very HighLarge graphics, main design
Sleeve2-3″1.5-3.5″MediumSecondary details, accents
Polo Shirt Front2.5-3″2-3.5″HighLogo, branding
T-Shirt Front3-4″2.5-5″HighFeatured design
T-Shirt Back4-6″3.5-7″Very HighLarge statement designs
Small Patch2″ x 2″1.5-2.5″MediumCollectible, morale patches
Medium Patch3″ x 3″2.5-3.5″HighStandard emblem size
Large Patch4-6″3.5-7″Very HighImpact designs, focal points
Extra Large Patch6-8″5.5-9″MaximumBack patches, statement pieces
Vest3-4″2.5-5″Medium-HighDepending on vest size
Hat Embroidery (visor)2-3″1.5-3.5″MediumLimited space on visor

Sizing by Garment Type: Detailed Recommendations

BASEBALL CAPS & HAD EMBROIDERY

Why it’s different: Caps have limited embroidery space and curved surfaces

Front cap embroidery: 2-3 inches maximum

  • This is the primary visible area
  • Text must be extremely clear and bold
  • Keep designs simple and bold
  • Details become invisible at smaller sizes

Cap back: 3-4 inches

  • More space available
  • Still limited by hat curve
  • Can handle slightly more detail

Hat visor: 1.5-2.5 inches maximum

  • Extremely limited space
  • Text sizing is critical (must be 1/4″ minimum height)
  • Simple, bold designs only

Pro tip: Cap sizing is constrained by the small embroidery field. Design specifically for the limited space, not generic sizing.

CORPORATE APPAREL (Polos, Dress Shirts, Jackets)

Left chest logo: 2.5-3.5 inches (standard corporate size)

  • This is the “power position” for corporate branding
  • Professional standard across industries
  • Large enough for detail, small enough for balance
  • Text remains readable

Jacket back: 4-6 inches

  • Much more space available
  • Can accommodate more detailed designs
  • Standard size for corporate jacket designs
  • Creates strong visual impact

Sleeve embroidery: 2-2.5 inches

  • Space is limited by sleeve width
  • Avoid complex designs
  • Must be clearly visible from arm’s length
  • Typically secondary branding

Vest embroidery: 3-4 inches

  • Depends on vest front panel size
  • Primary branding on back
  • Secondary elements on sides or pockets

T-SHIRT EMBROIDERY

Front chest: 3-4 inches (standard)

  • Sweet spot for visibility and balance
  • Design clearly visible but not overwhelming
  • Works well for logos and medium-complexity designs

Front center: 4-6 inches (featured design)

  • Primary focal point
  • Larger designs work well here
  • Can accommodate significant detail

Back design: 4-8 inches

  • Maximum space and flexibility
  • Can use much larger patches
  • Statement pieces work well here
  • Common for music, lifestyle, branding

Sleeve: 2-3 inches

  • Limited space on sleeve
  • Secondary branding position
  • Keep designs simple

Rule of thumb: T-shirt patches should be 15-25% of chest width for proper proportion.

JACKETS & OUTERWEAR

Front left chest: 3-3.5 inches

  • Primary branding position
  • Visible when jacket is zipped
  • Standard corporate placement

Front right chest: 3-3.5 inches

  • Secondary branding or emblem
  • Balanced with left chest

Back design: 5-8 inches

  • Maximum space and impact
  • Can be very large
  • Great for detailed graphics or oversized designs

Sleeve: 2.5-3.5 inches

  • Visible when arms are down
  • Secondary details or accents
  • Keep designs bold

Pocket areas: 1.5-2.5 inches

  • Very limited space
  • Small logos or icons only
  • Must be extremely clear

HATS & CAPS: DETAILED PLACEMENT GUIDE

Front cap embroidery:

  • Ideal size: 2.5-3 inches
  • Challenge: Curved surface on cap crown
  • Text limits: Absolute minimum 4mm (1/6″) height
  • Design limit: 2-3 elements maximum
  • Best for: Logo only, no additional text

Cap back/back panel:

  • Ideal size: 3.5-4.5 inches
  • Advantage: Flat surface for better embroidery
  • Challenge: Less visibility than front
  • Best for: Larger, detailed designs
  • Text: Can be slightly smaller than front

Visor/bill embroidery:

  • Ideal size: 1.5-2 inches (extremely limited)
  • Challenge: Very small space, curved surface
  • Design: Only simplest icons or text
  • Visibility: Only seen from certain angles
  • Best for: Name, initials, small logo only

Side panel: 2-2.5 inches

  • Visible when wearing cap
  • Medium visibility
  • Good for secondary branding

SPECIALTY PLACEMENTS: PATCHES ON UNUSUAL ITEMS

Bags & Backpacks: 2.5-4 inches

  • Depends on bag size
  • Visible from multiple angles
  • Can be slightly larger than apparel

Vests & Motorcycle Gear: 3-5 inches

  • Depends on vest size and construction
  • Can accommodate larger patches
  • Multiple patches can be worn together

Hats (not baseball): 2-3 inches

  • Limited space on smaller hats
  • Consider hat proportions
  • Visibility must be considered

Patches for jackets (Jean, Leather): 3.5-5 inches

  • Larger can look good on denim/leather
  • More durable fabrics support larger patches
  • Visual impact is important

Sizing by Design Complexity: Matching Size to Detail

SIMPLE DESIGNS (1-2 colors, minimal detail)

Minimum viable size: 1.5-2 inches

  • Text must be clear and readable
  • Simple geometric shapes work
  • Great for small format patches

Recommended size: 2.5-3 inches

  • Provides safety margin
  • Text is comfortably readable
  • Small details remain visible
  • More forgiving for embroidery

Maximum size: 4-6 inches

  • Simple designs look cheap if too large
  • Better to keep proportional to detail level

MODERATE COMPLEXITY (3-5 colors, some detail)

Minimum viable size: 2-2.5 inches

  • Requires bold design elements
  • Text needs to be large
  • Details must be simplified

Recommended size: 3-4 inches

  • Ideal for moderate complexity
  • Text easily readable
  • Details are visible without being overwhelming
  • Professional appearance

Maximum size: 5-7 inches

  • Still looks proportional
  • Good for maximum impact
  • Can include more detail

COMPLEX DESIGNS (6+ colors, significant detail)

Minimum viable size: 2.5-3 inches

  • Requires strategic simplification
  • Fine details will be lost
  • Text must be 1/4″+ tall

Recommended size: 4-6 inches

  • Sweet spot for complex designs
  • Details remain visible and clear
  • Text is readable
  • Professional quality

Ideal size: 6-8 inches

  • Maximum detail can be appreciated
  • All design elements visible
  • Text highly readable
  • Impressive visual impact

Rule: Complex designs need more space. Don’t try to cram intricate designs into tiny patches.

Text Sizing: The Critical Factor in Patch Sizing

Minimum Readable Text Size in Embroidery

Critical rule: Text must be minimum 1/4″ (6.4mm) height for readability

This is non-negotiable. Text smaller than this becomes illegible when embroidered.

Text-to-Patch-Size Ratio

Patch SizeText HeightText StyleReadability
1.5-2″0.25-0.35″Large, bold, ALL CAPSGood
2-3″0.35-0.5″Bold sans-serifExcellent
3-4″0.5-0.75″Normal weightExcellent
4-6″0.75-1″Any weightExcellent
6-8″1-1.5″Any weightExcellent

Text Best Practices

For small patches (under 3 inches):

  • Use ONLY bold sans-serif fonts
  • Minimum text size: 0.25″ height
  • Avoid serifs and thin strokes
  • Use ALL CAPS for clarity
  • Limit to 1-2 words maximum

For medium patches (3-5 inches):

  • Text can be slightly smaller (0.35″ minimum)
  • Bold fonts still recommended
  • Mix of upper and lowercase acceptable
  • Can handle 2-3 words

For large patches (5+ inches):

  • Text can be smaller if needed
  • Any professional font works
  • Text can be decorative or stylized
  • Extensive text acceptable

Embroidery Machine Limitations: Technical Sizing Constraints

Standard Hoop Sizes

Hoop SizeTypical UseMax Patch Dimensions
4×4″Small items, caps3.5″ maximum
5×7″Medium patches, left chest4.5″ x 6.5″
8×12″Large patches, back designs7″ x 11″
10×10″Square patches, medium designs9″ x 9″
13×18″Large back patches12″ x 17″
Industrial hoopsProduction volume26″+ (varies)

Stitching Time Impact on Sizing

Larger patches take longer to stitch, which impacts:

  • Production cost (more machine time)
  • Thread usage (more thread = higher cost)
  • Stitch count (more stitches = more processing)
  • Delivery time (production takes longer)

Cost impact example:

  • 2″ patch: ~3,000 stitches, 3-4 minutes to stitch, $0.50-$1 cost
  • 4″ patch: ~8,000 stitches, 7-10 minutes to stitch, $1-$2 cost
  • 6″ patch: ~15,000 stitches, 12-18 minutes to stitch, $2-$3.50 cost

Larger patches are more expensive, so sizing should be intentional.

Common Sizing Mistakes (And How to Avoid Them)

MISTAKE #1: Sizing Based on Screen Design, Not Reality

What happens: Design looks good on computer screen, but patch is way too small or too large in reality

How to avoid:

  • Print your design at actual size (not screen size)
  • Look at printed design next to reference items
  • Visualize on actual garment
  • Ask yourself: “Will this be clearly visible at arm’s length?”

MISTAKE #2: Making Text Smaller Than Readable Size

What happens: Text fits in the design space but becomes illegible when embroidered

How to avoid:

  • Text minimum 1/4″ height (non-negotiable)
  • Err on the side of larger text
  • Test with actual embroidered samples
  • Remember: “If you can’t read it on screen at 50% zoom, it won’t embroider”

MISTAKE #3: Oversizing Simple Designs

What happens: Simple logo looks cheap and blurry when blown up to 6+ inches

How to avoid:

  • Match size to complexity
  • Simple designs: 2-4 inches ideal
  • Complex designs: 4-6 inches+
  • Don’t force simplicity into large sizes

MISTAKE #4: Ignoring Garment Proportions

What happens: Patch is technically right size, but looks wrong on the specific garment

How to avoid:

  • Consider garment proportions
  • Patch should be 15-25% of garment area (general rule)
  • Look at reference photos of similar patches
  • Visualize on actual garment, not in isolation

MISTAKE #5: Underestimating Detail Loss at Small Sizes

What happens: Design with fine details looks muddy and illegible at small size

How to avoid:

  • Test detailed designs at intended size
  • Fine details disappear below 2.5″ for most designs
  • Simplify designs for small sizes
  • Use bold outlines and solid shapes

Sizing for Specialty Applications

MORALE PATCHES & COLLECTIBLE PATCHES

Standard morale patch sizes:

  • Small: 1.5-2 inches (collectible size)
  • Medium: 2-3 inches (wearable size)
  • Large: 3-4 inches (statement patches)

Note: Morale patch market tends toward smaller sizes for collecting and trading

MERIT BADGES & ACHIEVEMENT PATCHES

Standard badge sizes:

  • Youth programs: 1.5-2 inches
  • Adult badges: 2-3 inches
  • Leadership badges: 2.5-3.5 inches

Consideration: Must be consistent across a badge set

MOTORCYCLE MC PATCHES

Standard MC patch sizes:

  • Small rockers: 1-2 inches (curved text patches)
  • Large rockers: 3-5 inches (curved top/bottom)
  • Center patch: 3-5 inches (primary design)
  • Back patch: 8-12 inches (statement piece, rare)

Note: MC patch sizing follows strict tradition; standard sizes are expected

MILITARY & OFFICIAL INSIGNIA

Military patch sizes:

  • Shoulder patch: 2-3 inches
  • Arm insignia: 2.5-3.5 inches
  • Chest insignia: 1.5-2.5 inches
  • Full-size reproduction: 3-4 inches

Note: Official military insignia often has standardized sizing; verify before ordering

Sizing Decision Framework: How to Choose

STEP 1: Identify Placement

Question: Where will the patch be worn?

  • Baseball cap = 2-2.5″ max
  • Chest = 3-3.5″ typical
  • Back = 4-8″ range

→ Use sizing chart above

STEP 2: Consider Complexity

Question: How much detail does the design have?

  • Simple (1-2 colors): 2-3″
  • Moderate (3-5 colors): 3-4″
  • Complex (6+ colors): 4-6″+

→ More detail needs more space

STEP 3: Assess Text Requirements

Question: Does the patch include text?

  • No text: Standard sizing applies
  • Text present: Minimum 1/4″ height required
  • Extensive text: Needs larger patch

→ Text determines minimum size

STEP 4: Evaluate Visibility Need

Question: How visible does this need to be?

  • Visibility critical: Larger size (4-6″+)
  • Visibility moderate: Medium size (3-4″)
  • Visibility secondary: Small is OK (2-3″)

→ Importance influences sizing

Rose Patch

STEP 5: Check Garment Balance

Question: Will this patch look balanced on the garment?

  • Print design at proposed size
  • Compare to garment
  • Should feel proportional
  • Not overwhelming or underwhelming

→ Visual balance is subjective but important

STEP 6: Confirm Technical Feasibility

Question: Can embroidery machines actually produce this?

  • Hoop size available?
  • Stitch count reasonable?
  • Cost acceptable?
  • Production timeline feasible?

→ Consult with digitizer/producer

Sizing by Industry/Use Case

CORPORATE BRANDING & UNIFORMS

Standard corporate patch: 2.5-3.5 inches left chest

  • Conservative sizing (professional)
  • Readily visible
  • Industry standard
  • Works across all corporate applications

Recommendation: Stick with 3-3.5″ for corporate consistency

SPORTS & TEAMS

Sports patch sizing:

  • Shoulder patch: 2.5-3″
  • Sleeve patch: 2-2.5″
  • Back patch: 4-6″
  • Championship patches: 3-4″

Recommendation: Maintain consistency across team (all patches same size)

EDUCATIONAL & YOUTH PROGRAMS

School/organization patches:

  • Achievement badges: 1.5-2″
  • Program patches: 2-2.5″
  • Leadership patches: 2.5-3″

Recommendation: Consistent sizing across badge set

EVENT & COMMEMORATIVE PATCHES

Event patches:

  • Standard commemorative: 2-3″
  • Featured event patches: 3-4″
  • Large statement patches: 4-6″

Recommendation: Vary size to indicate importance (larger = more significant)

Frequently Asked Questions: Patch Sizing

What’s the smallest patch you can make?

Technically: 1 inch minimum for visible embroidery Practically: 1.5-2 inches recommended (anything smaller loses detail) Realistically: Text requires 1/4″ minimum height, which constrains smallest viable size

Answer: 1.5-2 inches is practical minimum for readable patches.

Can I make a patch any size?

Technically yes, but practically:

  • Machine hoop size limits single-stitch patch size
  • Large patches (8″+ ) require commercial equipment
  • Cost increases significantly with size
  • Very large patches (12″+) are expensive and rare

Practical maximum: 8-10 inches for standard embroidery (larger requires specialty equipment)

Should I size my patch larger or smaller?

When in doubt, go larger.

Larger patches are more visible and look more professional. Small patches look cheap or underdetailed.

Exception: If visual balance is poor (patch overwhelms garment), reduce size instead.

How do patch sizes compare between different types?

Embroidered patches: Full range of sizes (1.5-8″+) PVC patches: Typically 2-6″ (hard plastic limits extreme sizes) Woven patches: Full range (1.5-8″+) Chenille patches: Typically 2-5″ (varsity jacket style) Leather patches: Typically 2-4″ (limited to soft materials)

Can I have multiple sizes of the same patch design?

Yes! Many organizations create:

  • Small version (1.5-2″) for collectibility
  • Medium version (2.5-3.5″) for standard wear
  • Large version (4-6″) for special occasions

This is common in motorcycle culture and military contexts.

Does patch size affect embroidery cost?

Yes, significantly:

  • Larger patches = more stitches
  • More stitches = more production time
  • More production time = higher cost

General rule: Doubling patch size roughly doubles production cost.

What if my patch doesn’t fit the “standard” size?

Custom sizing is absolutely possible.

Contact your digitizer/patch maker with:

  • Intended placement
  • Desired appearance
  • Text requirements
  • Special considerations

They can recommend optimal sizing for your specific needs.

Pro Tips: Sizing for Maximum Impact

TIP #1: The “Arm’s Length Test”

Print your design at actual size. Hold it at arm’s length. Ask yourself:

  • Can I read all text clearly?
  • Are design details visible?
  • Does it look balanced?
  • Does it look professional?

If yes to all = good size. If no to any = adjust.

TIP #2: Compare to Reference Patches

Find similar patches online. Compare sizing. Most industries have standard sizes for good reasons. Matching standard sizing looks more professional.

TIP #3: Less is More With Sizing

When deciding between sizes, go up one size, not down. Larger patches:

  • Look more professional
  • Show more detail
  • Text is more readable
  • Make bigger visual impact

Smaller patches tend to look cheap.

TIP #4: Test Before Committing

Order a small sample (25-50 pieces) before committing to 1,000+. Verify:

  • Sizing looks good on actual garment
  • Text is readable in person
  • Design details are visible
  • Customer approves
  • Only then order full quantity

TIP #5: Document Your Sizing Decision

Once you find a size that works, document it:

  • Record patch dimensions
  • Take photos on garment
  • Note feedback from customers
  • Reference for future patches

This prevents re-sizing every time you order.

Sizing Recommendations by Purpose

FOR MAXIMUM VISIBILITY & IMPACT

Recommended size: 4-6 inches

  • Why: Large enough to be seen from 10+ feet away
  • Best for: Primary branding, logos, focal designs
  • Text: Easily readable
  • Detail: Fully visible

FOR PROFESSIONAL CORPORATE USE

Recommended size: 2.5-3.5 inches (left chest)

  • Why: Industry standard, looks professional
  • Best for: Uniform branding, corporate apparel
  • Text: Readable but not dominant
  • Detail: Appropriate for business context

FOR WEARABLE PATCHES (Jackets, Hats)

Recommended size: 2.5-4 inches

  • Why: Visible without overwhelming garment
  • Best for: Jackets, hoodies, casual wear
  • Text: Readable
  • Detail: Moderate complexity

FOR COLLECTIBLE PATCHES

Recommended size: 1.5-2.5 inches

  • Why: Portable, collectable, tradeable
  • Best for: Morale patches, special events
  • Text: Brief (2-3 words max)
  • Detail: Simplified designs

FOR STATEMENT PIECES

Recommended size: 5-8 inches

  • Why: Maximum impact, visible from distance
  • Best for: Back patches, special projects
  • Text: Secondary consideration
  • Detail: Can be complex

Next Steps: Sizing Your Custom Patche

Ready to size your patches correctly? Here’s what to do:

Step 1: Use the sizing chart above to find your placement category

Step 2: Consider your design complexity and text requirements

Step 3: Print your design at proposed size

Step 4: Test at arm’s length for readability and balance

Step 5: Compare to reference patches in your industry

Step 6: Get professional advice from your patch maker

Step 7: Order a small sample before committing to full quantity

Getting Expert Sizing Help

Not sure about your patch sizing? Our team at Gem Punch helps customers get sizing exactly right.

Get a Free Patch Sizing Consultation →

Submit your design and intended use. Our experts will:

  • Recommend optimal sizing
  • Verify text readability
  • Assess design complexity
  • Provide samples if needed
  • Ensure professional results

Available 24/5 for sizing guidance.

Related Resources: Custom Patches & Sizing

How to Care for Custom Patches

How to Care for Custom Patches: Complete Washing, Drying & Maintenance Guide

You’ve invested in beautiful custom embroidered patches for your team uniforms, brand merchandise, or personal collection. They look absolutely stunning—sharp details, vibrant colors, professional quality that immediately elevates any garment.

Then laundry day arrives.

And you start wondering: Will my patches survive the washing machine? How do I keep them looking perfect? What’s the best way to care for custom patches long-term?

The answer is actually encouraging: Custom embroidered patches are incredibly durable and can maintain their appearance for 50+ wash cycles with proper care.

This comprehensive guide covers everything you need to know about washing, drying, maintaining, and preserving custom patches so they look professional for years to come—whether they’re embroidered patches, PVC patches, woven patches, or any other type.

Why Proper Custom Patch Care Matters (More Than You Think)

The Business Impact of Patch Quality

If you’re a business owner, embroidery service provider, or custom apparel company, your reputation depends on patch quality.

What happens when patches aren’t cared for properly:

  • Colors fade after a few washes
  • Stitches unravel or loosen
  • Patches peel away from garments
  • Embroidered details blur or fray
  • Customer dissatisfaction and complaints
  • Negative reviews: “The patches fell apart after one wash”
  • Loss of repeat business

What happens with proper patch care:

  • Colors stay vibrant and sharp
  • Stitching remains secure and tight
  • Patches last 50+ wash cycles
  • Professional appearance maintained
  • Customer satisfaction and loyalty
  • Positive reviews: “Patches held up perfectly”
  • Repeat business and referrals

The difference? Understanding how custom patches work and how to care for them properly.

How Custom Patches Actually Work

Before you can care for patches properly, you need to understand what they are and how they’re attached.

What are custom embroidered patches?

Custom patches are dimensional textile embellishments made from thread stitched onto fabric backing. Unlike digital prints or transfers, embroidered patches have:

  • Physical structure — Raised, 3D appearance
  • Thread stitching — Each design element is individually stitched
  • Fabric backing — Provides stability and attachment point
  • Durability — Designed for 50+ wash cycles
  • Professional appearance — Premium look that elevates any garment

How are patches attached?

Most custom patches are applied using heat pressing:

  • Temperature: 350°F (typically)
  • Duration: 15-20 seconds
  • Pressure: Uniform pressure across entire patch
  • Result: Adhesive backing bonds patch to garment fabric

The key point: The adhesive bond is durable but requires proper care to maintain.

How to Wash Custom Embroidered Patches (Step-by-Step)

The Basic Washing Method for Custom Patches

Caring for custom embroidered patches during washing doesn’t require specialized equipment or complicated procedures. Follow these steps:

Step 1: Turn Items Inside Out (Critical)

Before washing any garment with custom patches:

  • Turn the item completely inside out
  • This protects patch edges from catching on other fabrics
  • Reduces direct friction against patch surfaces
  • Prevents stitches from snagging on zippers or buttons

Why this matters: Patch edges are the most vulnerable part of the embroidery. Direct contact with other garments during washing can cause edge lifting, fraying, or premature separation.

Step 2: Choose the Right Water Temperature

  • BEST: Cold water (50-60°F)
  • GOOD: Lukewarm water (80-90°F)
  • AVOID: Hot water (above 100°F)

Why temperature matters: Heat weakens the adhesive bond between patch and fabric. Each hot wash cycle stresses the connection. Over time, hot water washing causes premature lifting and separation.

Step 3: Select Appropriate Wash Cycle

  • BEST: Delicate or gentle cycle
  • GOOD: Normal cycle
  • AVOID: Heavy-duty or extra-agitation cycles

Heavy wash cycles create excessive friction and tumbling that stresses patch edges and loosens stitching.

Step 4: Use Mild, Quality Detergent

  • BEST: Mild, gentle laundry detergent
  • ACCEPTABLE: Regular laundry detergent (reasonable amount)
  • AVOID: Harsh chemicals, bleach, or strong detergents
  • AVOID: Liquid fabric softeners (damage adhesive)
  • AVOID: Oxygen-based bleach alternatives

Strong detergents, bleach, and fabric softeners degrade both patch materials and adhesive bonds over time. They also fade thread colors.

Step 5: Don’t Overload the Washing Machine

  • Load the machine only 2/3 full
  • Overcrowding creates excessive friction
  • Patches rub against other garments repeatedly
  • This causes premature edge lifting and wear

The Complete Washing Process:

  1. Turn garment inside out
  2. Place in washing machine
  3. Fill with cold/lukewarm water
  4. Add mild detergent (normal amount)
  5. Select gentle or normal cycle
  6. Avoid fabric softeners or bleach
  7. Run wash cycle
  8. Remove immediately after cycle completes (don’t let items sit wet)

Result: Your custom patches are clean and protected.

Caring for Different Types of Custom Patches

Different patch materials require slightly different care approaches:

Embroidered Patches (Most Common)

Standard embroidered patches are made from thread stitched on fabric backing. They’re incredibly durable.

Washing instructions:

  • Follow basic washing method above
  • Cold water is best
  • Turn inside out
  • Gentle cycle acceptable
  • Air dry preferred

Special care:

  • For stubborn stains or dirt, spot-clean before washing
  • Use a soft cloth with mild detergent
  • Gently dab the stained area (don’t scrub)
  • Rinse with clean water
  • Allow to air dry
  • Then wash normally

Durability: Embroidered patches typically last 50-75 wash cycles with proper care.

3D Embroidered Patches (Raised/Puffy)

3D embroidered patches have raised, dimensional elements that create texture and depth.

Special washing care:

  • Turn inside out (always)
  • Gentle cycle (recommended)
  • Use mesh laundry bag for extra protection
  • Cold water only

Cleaning trapped dirt:

  • For dirt trapped in raised elements, use a soft toothbrush
  • Gently brush in the direction of the thread
  • Work carefully to avoid damaging stitches
  • Do this BEFORE washing in machine

Drying:

  • Air dry only (never machine dry)
  • Heat can damage raised elements
  • Allow complete air drying before wearing

Durability: 40-60 wash cycles with proper care.

PVC Rubber Patches (Modern Alternative)

PVC patches are made from molded rubber with colored layers.

Washing instructions:

  • Follow basic washing method
  • Cold water preferred
  • Gentle cycle recommended
  • Turn inside out

Heat sensitivity:

  • ⚠️ PVC patches are sensitive to heat
  • Never use hot water
  • Never machine dry (heat damages PVC)
  • Always air dry

Stubborn stains:

  • Spot-clean gently before machine washing
  • Use soft cloth and mild detergent
  • Don’t scrub aggressively

Durability: 60-80+ wash cycles (PVC is very durable).

Woven Patches

Woven patches are created on looms with tightly woven threads, creating flat, detailed surfaces.

Washing:

  • Follow basic washing method
  • Cold to lukewarm water
  • Gentle cycle preferred
  • Turn inside out

Care:

  • Woven patches can be more delicate than embroidered
  • Avoid heavy scrubbing or aggressive brushing
  • Use gentle drying only

Durability: 40-60 wash cycles depending on construction.

Leather & Faux Leather Patches

Leather patches are specialty items requiring careful handling.

Washing:

  • DO NOT machine wash leather patches
  • Hand wash only
  • Use barely damp cloth with mild soap
  • Gently wipe surface
  • Avoid soaking

Drying:

  • Air dry at room temperature
  • Never heat dry
  • Never expose to direct sunlight (fading)

Storage:

  • Store in cool, dry location
  • Avoid moisture and humidity
  • Keep away from heat sources

Durability: 20-30 wash cycles (leather is more delicate).

Chenille Patches (Plush Fabric)

Chenille patches have a soft, velvety texture.

Washing:

  • Follow basic washing method
  • Cold water only
  • Gentle cycle
  • Turn inside out
  • Use mesh laundry bag

Texture restoration:

  • After washing, chenille fibers may flatten
  • Use soft brush to gently brush in direction of fibers
  • This restores plush texture
  • Work gently to avoid damaging stitches

Drying:

  • Air dry only
  • Never machine dry

Durability: 30-50 wash cycles.

Rhinestone & Sequin Patches (Decorative)

Rhinestone patches have gemstones attached to fabric backing.

Special washing care:

  • Use mesh laundry bag (essential)
  • Gentle cycle only
  • Turn inside out
  • Cold water

After washing inspection:

  • Check rhinestones for security
  • Look for any loose stones
  • If stones loosen, they can fall off

If stones loosen:

  • Stop washing the item
  • Contact a professional for repair
  • Don’t continue wearing/washing until secured

Durability: 20-40 wash cycles (rhinestones can loosen with washing).

Velcro-Backed Patches (Removable)

Velcro patches have hook-and-loop backing for removable attachment.

Special washing instructions:

  • REMOVE BEFORE WASHING
  • Do not machine wash with velcro backing
  • Velcro can come off in wash
  • Velcro can stick to other garments
  • Wash separately by hand if needed

Hand washing velcro patches:

  • Use mild detergent and lukewarm water
  • Gently wash in sink
  • Rinse thoroughly
  • Air dry completely
  • Reattach to garment after drying

Velcro longevity:

  • Velcro backing weakens with repeated washing
  • After 10-15 wash cycles, velcro may need replacement
  • Professional repair recommended

How to Wash Hats with Custom Patches (Special Instructions)

Hats with custom patches require a gentler approach than regular garments because:

  • Hat shape is fragile
  • Hats can shrink in hot water
  • Machine tumbling distorts hat structure
  • Patches are subjected to more stress on curved surfaces

Best Method: Hand Washing Hats with Patches

What you need:

  • Cool or lukewarm water
  • Mild detergent
  • Soft cloth or soft-bristled brush
  • Towel for reshaping
  • Flat surface for drying

Step-by-step hand washing:

  1. Fill sink with cool water — Use lukewarm water, not hot
  2. Add mild detergent — Small amount only (1 teaspoon)
  3. Submerge hat — Let soak for 5 minutes maximum
  4. Gently clean — Use soft cloth to wipe crown and bill
  5. Pay special attention to patches — Gently clean patch areas with soft cloth
  6. Rinse thoroughly — Use clean cool water to rinse away all soap
  7. Remove excess water — Gently squeeze (don’t wring) to remove water
  8. Reshape hat — Reshape crown and bill while damp
  9. Air dry — Place on clean towel or hang to air dry
  10. Complete drying — Allow 24 hours to fully dry

Why not machine wash?

  • Washing machine tumbling distorts hat shape permanently
  • Heat stresses patches on curved surfaces
  • Risk of fading and color bleeding
  • Can shrink or misshape hat

Why not dishwasher? (Yes, some suggest this!)

  • Dishwasher heat is too high
  • Harsh detergents damage both hat and patches
  • Spray jets can loosen patch edges
  • Not recommended under any circumstances

How to Dry Custom Patches Properly

Proper drying is critical to patch longevity and appearance.

Best Drying Method: Air Drying

Why air drying is ideal:

  • No heat damage
  • No adhesive stress
  • No friction or tumbling
  • Gentle on all patch types
  • Preserves colors and stitching

How to air dry patched garments:

  1. Turn inside out — Continue protecting patches
  2. Hang on clothesline or drying rack — Never toss in dryer
  3. Ensure proper air circulation — Patches need air flow to dry
  4. Avoid direct sunlight — Can fade colors over time
  5. Allow complete drying — Don’t remove from line until completely dry
  6. Check for moisture — Feel inside garment to confirm dryness

If You Must Use a Machine Dryer

Minimum heat settings only:

Acceptable (if necessary):

  • Delicate or air-dry setting
  • Lowest heat possible
  • 15-20 minutes maximum
  • Remove while slightly damp (don’t over-dry)

Not recommended for:

  • PVC patches (heat damage)
  • Leather patches (heat damage)
  • 3D embroidered patches (heat damage)
  • Rhinestone patches (stones can loosen)

Best practice: Avoid machine drying entirely. Air drying is always better.

Tips for Long-Term Custom Patch Care & Maintenance

Daily Wearing & Care

Before washing:

  • Pre-treat stains promptly
  • Don’t let stains set (becomes harder to remove)
  • Use mild detergent for spot-cleaning
  • Gently dab with soft cloth (no scrubbing)

Allow proper curing before first wash:

  • Wait minimum 24-48 hours after patch application
  • Allow adhesive to fully cure/bond
  • This ensures strong, lasting attachment
  • Rushing the first wash risks loosening the patch

Check patch edges periodically:

  • Inspect for signs of edge lifting
  • Look for separation starting at corners
  • Address minor edge lifting immediately
  • Use heat press (or household iron) to reseal
  • Small touch-up prevents larger problems

Use mesh laundry bags:

  • Protective bags reduce friction
  • Especially helpful for delicate patch types
  • Great for items with multiple patches
  • Minimal cost for major protection

Avoid overloading washing machine:

  • Don’t fill beyond 2/3 capacity
  • Overcrowding increases friction
  • Patches rub against other garments excessively
  • This causes premature wear and loosening

Storage of Patched Items

Proper storage extends patch life:

Folding:

  • Fold with patch side facing outward
  • This prevents pressure on patch surface
  • Use soft tissue to separate layers if stacking
  • Avoid sharp creases across patches

Hanging:

  • Best storage option for special items
  • Prevents pressure on patches
  • Allows air circulation
  • Good for items with sentimental value

Temperature & humidity:

  • Store in cool, dry location
  • Avoid excessive heat (damages adhesive)
  • Avoid high humidity (promotes mildew)
  • Good ventilation is important

Protection from pests:

  • Store away from moths and insects
  • Use cedar blocks or lavender sachets (not naphthalene)
  • Inspect periodically for pest damage

Resealing Loose Patch Edges

Patches can sometimes loosen at edges. Here’s how to fix:

Early detection is key:

  • Inspect patches regularly
  • Catch lifting early before it spreads
  • Minor lifting is easy to fix

Heat press resealing:

  • Use commercial heat press at 350°F
  • Press for 10-15 seconds
  • Light pressure (don’t crush the patch)
  • Reseal all four corners

Household iron resealing:

  • Use on low-medium setting
  • Place pressing cloth between iron and patch
  • Press for 5-10 seconds on each corner
  • Be careful not to scorch

When to seek professional help:

  • If lifting is extensive (entire patch edge)
  • If patch is separating completely
  • If previous resealing didn’t hold
  • Professional repair may be more durable

What NOT to Do: Common Custom Patch Care Mistakes

❌ Mistake #1: Hot Water Washing

Why this damages patches:

  • Heat weakens adhesive bonds
  • Stitches can loosen faster
  • Colors fade more quickly
  • Each hot wash cycle stresses the patch

Solution: Always use cold or lukewarm water.

❌ Mistake #2: Using Harsh Chemicals

Don’t use:

  • Bleach (damages thread colors and adhesive)
  • Strong detergents (degrade materials)
  • Fabric softeners (weaken adhesive)
  • Oxygen bleach alternatives (fade colors)

Why: These chemicals damage both patch materials and the bond between patch and garment.

Solution: Use mild, gentle laundry detergent only.

❌ Mistake #3: Direct Ironing on Patches

Never:

  • Iron directly on patch surface
  • Use iron on high heat near patches
  • Apply pressure directly to embroidery

Why: Direct heat can:

  • Melt adhesive backing
  • Warp PVC or heat-sensitive materials
  • Damage thread colors
  • Flatten 3D elements

Solution: Iron from inside the garment, or use pressing cloth between iron and patch.

❌ Mistake #4: Right-Side-Out Washing

Never wash with patches facing outward.

Why:

  • Patch edges catch on other fabrics
  • Stitches can snag on zippers, buttons, velcro
  • Direct friction damages design surface
  • Premature edge lifting occurs

Solution: Always turn inside out before washing.

❌ Mistake #5: Industrial Laundry Services

Never use commercial laundry without notification.

Why:

  • Commercial services use high heat
  • Aggressive chemicals are standard
  • Heavy-duty cycles with extra agitation
  • Commercial drying uses high heat
  • All of these damage patches

Solution: If using commercial service, clearly inform them about patches. Better: hand wash yourself.

❌ Mistake #6: Dry Cleaning Without Warning

If you must dry clean, notify the cleaner.

Why:

  • Dry cleaning solvents can affect adhesives
  • High temperature pressing can damage patches
  • Professional might not know to protect them
  • Patches can be ruined

Solution: Alert dry cleaner about patches. Ask them to handle with care or avoid dry cleaning entirely.

❌ Mistake #7: Aggressive Cleaning Methods

Avoid:

  • Heavy scrubbing or brushing
  • High-pressure spray nozzles
  • Stiff brushes (use soft brushes only)
  • Rough cloth or towels

Why: Aggressive cleaning can:

  • Fray embroidered threads
  • Damage detailed designs
  • Loosen rhinestones or decorative elements
  • Separate patches from garment

Solution: Use gentle touch and soft materials only.

❌ Mistake #8: Machine Drying

Never use heat dryer unless absolutely necessary.

Why:

  • Heat stresses adhesive bonds
  • PVC patches can warp or melt
  • Tumbling creates friction
  • Colors can fade
  • Can cause shrinking

Solution: Air dry exclusively when possible.

❌ Mistake #9: Washing New Patches Immediately

Don’t wash patched items right after application.

Why:

  • Adhesive needs time to fully cure
  • Premature washing can loosen patches
  • Wait 24-48 hours minimum

Solution: Allow proper curing time before first wash.

❌ Mistake #10: Ignoring Early Signs of Wear

Watch for:

  • Edge lifting (corners)
  • Color fading
  • Thread loosening or fraying
  • Separated areas

Why early action matters:

  • Minor issues are easily fixed
  • Ignored problems become major damage
  • Prevention is easier than repair

Solution: Inspect regularly and address issues immediately.

Frequently Asked Questions: Custom Patch Care

How long do custom patches last?

With proper care, quality embroidered patches last 50-75+ wash cycles. Some patches maintain excellent appearance for 100+ washes. Durability depends on:

  • Patch quality (professional vs. cheap)
  • Patch type (embroidered, PVC, woven, etc.)
  • Care methods (proper vs. improper)
  • Washing frequency and harshness
  • Storage conditions

Pro tip: Proper care can double or triple patch lifespan.

Can I machine wash patches?

Yes, but with conditions:

  • Must turn inside out
  • Cold or lukewarm water only
  • Gentle cycle only
  • Mild detergent only
  • Don’t overload machine
  • Use mesh laundry bag for extra protection

Better option: Hand wash for longest-lasting results.

What’s the best water temperature for washing patches?

Best: Cold water (50-60°F)

Cold water is gentlest on adhesive bonds and colors. Lukewarm water (80-90°F) is acceptable. Hot water (above 100°F) should be avoided—it weakens adhesive and fades colors.

Can I use bleach to clean stubborn stains?

No. Never use bleach on patches.

Bleach damages:

  • Thread colors (causes fading)
  • Adhesive bonds (weakens attachment)
  • Patch materials (can degrade)

Better alternative: Spot-clean with mild detergent and soft cloth before washing.

Should I use fabric softener with patched items?

No. Avoid fabric softeners entirely.

Fabric softeners:

  • Weaken adhesive bonds
  • Leave residue on patches
  • Can damage thread colors
  • Reduce patch durability

Better option: Use mild detergent without softener.

How do I remove stains from patches?

For stubborn stains:

  1. Act quickly — Don’t let stains set
  2. Spot-clean — Use soft cloth and mild detergent
  3. Gentle dab — Don’t scrub or rub hard
  4. Rinse thoroughly — Remove all detergent
  5. Air dry — Let dry completely
  6. Then machine wash — If needed, use normal washing method

Avoid: Aggressive scrubbing, bleach, or harsh chemicals.

Can I iron patched garments?

With caution:

  • Safe: Iron inside of garment only (patches facing away)
  • Safer: Use low-medium heat only
  • Safest: Use pressing cloth between iron and patch if needed
  • Never: Iron directly on patches with high heat

Better option: Avoid ironing patched items when possible. Air dry to prevent wrinkles.

How do I fix loose patch edges?

Options:

  1. Heat press resealing — Professional equipment at 350°F
  2. Household iron — Low-medium heat with pressing cloth
  3. Professional repair — For extensive damage

Best approach: Catch and fix minor lifting early before it becomes a major problem.

Can I wash patches by hand?

Yes. Hand washing is often the best method.

Benefits of hand washing:

  • Maximum control
  • Gentlest on patches
  • Lowest risk of damage
  • Best for delicate patch types
  • Longer patch lifespan

Process:

  • Use cool/lukewarm water
  • Add mild detergent
  • Gently wash with soft cloth
  • Rinse thoroughly
  • Air dry completely

Best for: Hats, delicate patches, high-value items, special uniforms.

How should I store patches long-term?

Best storage practices:

  • Temperature: Cool, dry location (65-75°F ideal)
  • Humidity: Low humidity (avoid moisture)
  • Light: Away from direct sunlight (prevents fading)
  • Positioning: Fold with patch side out or hang flat
  • Protection: Use tissue paper between layers if stacking
  • Ventilation: Good air circulation

Avoid:

  • Hot, humid environments
  • Direct sunlight
  • Extreme temperature changes
  • Damp basement storage

The Bottom Line: Keep Your Custom Patches Perfect

Your custom embroidered patches represent an investment in quality and professional appearance. Whether you’re a business owner providing branded merchandise or an individual protecting your favorite gear, proper patch care ensures they look fantastic for years.

The key principles:Turn inside out before every wash
Use cold or lukewarm water only
Choose mild detergent exclusively
Air dry for best results
Inspect regularly for early signs of wear
Address small issues immediately before they become problems
Store properly to maintain appearance
Hand wash special items for longest lifespan

With these simple care methods, your custom patches will maintain vibrant appearance and strong adhesion for 50-75+ wash cycles—possibly much longer with exceptional care.

Professional Custom Patches from Gem Punch

Your patches look amazing because they’re professionally made. Keep them looking amazing with professional care.

At Gem Punch, we’ve created 50,000+ custom patches since 2012. We know that patch quality depends not just on manufacturing, but on how customers care for them afterward.

Our custom patches are designed for durability:

  • Professional embroidery digitizing
  • Quality thread and fabric materials
  • Strong adhesive backing
  • Tested for 50+ wash cycles
  • Available in multiple styles (embroidered, PVC, woven, chenille, and more)

Need custom patches for your business, team, or project?

Get a Free Quote on Custom Patches →

Whether you need embroidered patches for uniforms, promotional patches for merchandise, or custom designs for a special project, Gem Punch creates patches built to last.

Related Resources: Patch Care & Embroidery Services

Chenille_vs_Embroidered_Patches_202606061254

Chenille Patches vs Embroidered Patches: Which Is Right for Your Brand?

Custom patches are one of the most versatile branding tools available today—but not all patches are created equal. If you are deciding between Chenille vs Embroidered Patches for your jackets, uniforms, merchandise, or streetwear line, the choice you make will directly impact your product’s texture, visual impact, durability, and price.

At Gem Punch, we digitize and produce both styles daily. This guide breaks down the real differences so you can choose the patch type that aligns with your brand identity, budget, and end-use goals.

What Are Chenille Patches?

Chenille patches are characterized by their soft, fuzzy, towel-like texture. The word “chenille” comes from the French word for “caterpillar,” which perfectly describes the plush, velvety surface these patches create.

How Chenille Patches Are Made

Chenille patches are constructed using a specialized looped yarn technique. Instead of flat stitches sitting on top of a fabric base, chenille uses a loop pile system where yarn is fed through the backing to create raised, textured loops. These loops are then sheared (cut) or left intact depending on the desired effect, producing that iconic fuzzy surface.

The process requires dedicated chenille embroidery machines or attachments that can handle the thicker, bulkier yarn. At Gem Punch, our digitizers program separate stitch files for chenille elements because the density, pull compensation, and underlay requirements differ significantly from standard embroidery.

Common Uses for Chenille Patches

Chenille patches are most commonly associated with:

  • Letterman jackets and varsity jackets — the classic athletic aesthetic
  • Sports team awards — championship patches, MVP badges, and commemorative emblems
  • Streetwear brands — oversized back patches, nostalgic 90s-inspired designs
  • Schools and universities — academic achievement patches, club insignias
  • Greek life organizations — fraternity and sorority jacket patches

The tactile, three-dimensional nature of chenille makes it ideal for designs that need to pop visually and physically. If you want someone to reach out and touch your patch, chenille is the answer.

What Are Embroidered Patches?

Embroidered patches are the industry standard. They use traditional flat stitching—typically rayon or polyester thread—to recreate a design on a twill or felt backing. The result is a clean, detailed, and versatile patch that works on nearly any garment or accessory.

How Embroidered Patches Are Made

Standard embroidered patches are created using computerized embroidery machines that read digitized stitch files (DST, PES, JEF, etc.). The digitizer maps every stitch: direction, density, type, and sequence. Common stitch types include:

  • Satin stitches — for borders and clean lines
  • Fill stitches — for large color areas
  • Running stitches — for fine details and outlines

Embroidered patches can be produced with 50% thread coverage (classic look with visible backing) or 100% thread coverage (completely covered, premium appearance). They can also incorporate 3D puff embroidery for raised elements, though the texture differs from chenille’s soft fuzz.

Common Uses for Embroidered Patches

Embroidered patches dominate across virtually every industry:

  • Corporate uniforms — left-chest logos, sleeve branding
  • Military and tactical gear — morale patches, unit insignias, name tapes
  • Motorcycle clubs — back patches, rocker panels, memorial patches
  • Fashion and accessories — denim jackets, backpacks, hats
  • Promotional merchandise — event giveaways, brand activations
  • Sports teams — cap logos, jersey patches, fan merchandise

If chenille is the specialist, embroidered patches are the universal workhorse.

Chenille vs. Embroidered: Side-by-Side Comparison

FeatureChenille PatchesEmbroidered Patches
TextureSoft, fuzzy, looped pileFlat, smooth, stitched surface
Visual ImpactBold, retro, highly tactileClean, precise, professional
Detail LevelBest for large letters, simple shapesExcellent for intricate logos, fine text
Color BlendingLimited; solid blocks work bestAdvanced gradients and color transitions
Typical SizeLarge (4″–12″) for maximum effectFlexible (1″–15″+)
BackingsSew-on, iron-on, velcroIron-on, sew-on, velcro, adhesive, magnetic
DurabilityVery durable; loops can snag on sharp objectsExtremely durable; minimal snag risk
CostHigher (specialized machines, bulkier materials)Lower to moderate (standard production)
TurnaroundSlightly longer (specialized setup)Faster (standard workflow)
Best ForVarsity jackets, streetwear, nostalgia brandsCorporate, tactical, detailed logos, bulk orders

When to Choose Chenille Patches

Chenille is not the right choice for every project—but when it fits, it dominates. Here are the scenarios where chenille patches outperform embroidered alternatives.

1. Varsity and Letterman Jackets

This is the classic use case. Letterman patches and varsity jacket patches are practically synonymous with chenille. The oversized, fuzzy letters spelling out team names, graduation years, or athletic achievements are instantly recognizable. If you are producing jackets for a school, sports team, or nostalgia-driven brand, chenille is non-negotiable.

2. Streetwear and Retro Fashion

In 2026, streetwear continues to mine 90s and Y2K aesthetics for inspiration. Chenille patches deliver that vintage, tactile look that flat embroidery simply cannot replicate. Brands like Supreme, Stüssy, and countless independent labels use chenille for oversized back patches that demand attention.

3. Awards and Commemorative Pieces

Because chenille feels premium and substantial, it is perfect for patches that celebrate milestones. Championship patches, hall-of-fame inductions, and anniversary badges all benefit from chenille’s weight and presence.

4. Designs with Large Typography

Chenille excels at rendering big, bold letters. If your design is primarily text-based—think “STATE CHAMPS,” “CLASS OF 2026,” or a brand name in block letters—chenille will look more impactful than embroidered text at the same scale.

5. Texture-First Branding

Some brands are built on sensory experiences. If your identity revolves around craftsmanship, heritage, or tactile luxury, the fuzzy surface of chenille reinforces that story every time someone touches it.

When to Choose Embroidered Patches

Embroidered patches are the safer, more flexible choice for the majority of projects. Here is where they shine.

1. Detailed Logos and Complex Artwork

If your design includes fine lines, small text, intricate borders, or multiple colors with gradients, embroidered patches are the only practical option. Chenille’s looped construction cannot reproduce details smaller than approximately 3–4 millimeters reliably. A detailed corporate logo with a tagline will look crisp in embroidery and muddy in chenille.

2. Small-Scale Applications

Need a 2-inch cap patch? A 1.5-inch uniform badge? Chenille does not scale down well—the loops become compressed and lose their signature texture. Embroidered patches work flawlessly at any size from one inch upward.

3. High-Volume, Budget-Conscious Orders

If you are ordering 500+ patches for a corporate event, employee uniform rollout, or promotional campaign, embroidered patches offer significantly better cost efficiency. The production process is standardized, thread costs are lower, and turnaround times are faster.

4. Tactical and Professional Gear

Military morale patches, law enforcement insignias, and corporate uniform badges prioritize readability and durability over texture. Embroidered patches withstand harsh washing, abrasion, and environmental exposure without snagging or matting.

5. Versatile Placement

Embroidered patches adhere cleanly to hats, backpacks, polos, dress shirts, and even delicate fabrics. Chenille’s bulk and weight limit it to heavier garments like wool jackets, denim, and canvas.

Cost Comparison: What to Expect

Pricing varies based on size, quantity, colors, and backing type, but here is a general framework based on Gem Punch’s 2026 pricing:

SizeChenille Patch (per unit, 50 qty)Embroidered Patch (per unit, 50 qty)
3″$8–$14$4–$7
5″$12–$20$6–$10
8″$18–$30$10–$16
12″$28–$45$16–$25

Why the difference? Chenille requires specialized machinery, thicker yarn, more material weight, and longer production time. The digitizing process is also more complex because the digitizer must account for loop height, pile direction, and compression factors that do not exist in flat embroidery.

For bulk orders of 250+ units, the per-unit cost gap narrows, but embroidered patches remain the more economical choice.

Design Limitations and Capabilities

Understanding what each patch type can and cannot do will save you from expensive redesigns.

Chenille Limitations

  • No fine detail: Text below 0.25″ height will be illegible. Thin lines and intricate borders are not achievable.
  • Limited color blending: Chenille works best with solid, contrasting color blocks. Gradients and shading are effectively impossible.
  • Size minimum: Chenille needs room to show its texture. Patches smaller than 3″ rarely look impressive.
  • Weight: Chenille patches are heavier and can pull down lightweight fabrics.

Embroidered Limitations

  • Flat appearance: Without 3D puff or special techniques, embroidered patches lack physical depth.
  • Thread sheen: Rayon thread has a distinctive shine that may not match matte brand guidelines.
  • Large solid areas: Filling a 6″ patch with satin stitches can look stiff and create tension issues on the garment.

Hybrid Designs: The Best of Both Worlds

Many of Gem Punch’s most successful projects combine both techniques. A varsity jacket might feature a large chenille team name across the back with embroidered sleeve patches for player numbers and sponsor logos. A streetwear brand might use chenille for the main graphic and embroidered satin borders for clean edges.

If your design has both bold typographic elements and detailed iconography, ask your digitizer about mixed-media patches. They cost more and require advanced production, but the result is unmatched.

Durability and Care

Both patch types are built to last, but their care requirements differ.

Chenille patches should be washed inside-out on gentle cycles. The loops can snag on zippers, Velcro, or sharp edges during machine washing. Avoid high-heat drying, which can flatten the pile over time. With proper care, a chenille patch will last 5–10 years before showing significant wear.

Embroidered patches are virtually indestructible under normal conditions. They withstand industrial washing, dry cleaning, and heavy abrasion. The primary failure point is the backing adhesive (for iron-on versions) rather than the stitching itself. Sew-on embroidered patches often outlast the garment they are attached to.

Trends: Where Chenille and Embroidery Are Heading

The custom patch industry is evolving rapidly. Here are the trends shaping how brands use chenille and embroidered patches this year:

1. Oversized Chenille in Streetwear
Brands are pushing chenille patches to 10″–14″ back-panel sizes for maximum visual impact. The bigger the patch, the more the texture reads as luxury.

2. Sustainable Materials
Both patch types are now available with organic cotton twill backings, recycled polyester threads, and PVC-free alternatives. Eco-conscious brands are requesting these options for 2026 collections.

3. Hybrid Puff + Chenille
A new technique combines 3D puff embroidery with chenille loops to create patches with multiple elevation levels. This is especially popular for limited-edition streetwear drops.

4. Nostalgia-Driven Varsity Revival
Letterman jackets are back in mainstream fashion—not just for athletes. Fashion brands are creating “faux varsity” lines with authentic chenille patches to sell the aesthetic without the athletic affiliation.

5. Minimalist Embroidery
On the embroidered side, brands are moving toward smaller, more subtle left-chest logos with 100% thread coverage for a premium, badge-like appearance.

How to Order: Tips for a Smooth Process

Whether you choose chenille or embroidered, follow these steps to avoid costly revisions:

  1. Start with vector art: Send AI, EPS, or SVG files. Chenille especially requires clean vector paths because the digitizer needs to define loop zones precisely.
  2. Specify the garment: A patch digitized for a wool varsity jacket will not sew the same way on a lightweight nylon windbreaker. Fabric weight matters.
  3. Request a physical sample: For orders over 100 units, always approve a production sample before full manufacturing. Chenille colors can look different under factory lighting than on screen.
  4. Choose the right backing: Sew-on is most durable for both types. Iron-on works for embroidered patches on stable fabrics. Velcro is ideal for tactical and removable applications.
  5. Trust your digitizer: Chenille digitizing is a specialized skill. If your provider does not ask about loop height, pile direction, and compression ratios, find one who does.

Frequently Asked Questions

Can you combine chenille and embroidery in one patch?
Yes. Mixed-media patches are increasingly popular, especially for varsity jackets and streetwear. The digitizer must plan the stitch sequence carefully so the chenille loops do not interfere with embroidered elements.

Are chenille patches only for jackets?
Primarily, yes. Chenille’s weight and bulk make it unsuitable for lightweight shirts, hats, or delicate fabrics. It works best on wool, denim, canvas, and heavy cotton.

Which patch type is more expensive?
Chenille is consistently 40–60% more expensive than embroidered patches at equivalent sizes and quantities due to specialized machinery, thicker materials, and longer production times.

How small can text be in a chenille patch?
Text should be no smaller than 0.25″ (6mm) in height for chenille. Anything smaller will be illegible because the loops merge together. Embroidered patches can handle text down to 0.125″ (3mm) with proper digitizing.

Can I get a single chenille patch as a sample?
Most manufacturers—including Gem Punch—require a minimum order for chenille due to the machine setup time. However, we offer sample programs for qualified bulk orders. Contact us for specifics.

Final Verdict

Choose chenille patches when you want bold, tactile, nostalgic impact—ideal for varsity jackets, streetwear back panels, and commemorative pieces where texture is the selling point.

Choose embroidered patches when you need detail, versatility, cost efficiency, and universal compatibility—ideal for corporate branding, tactical gear, detailed logos, and high-volume orders.

Still unsure? Send your artwork to Gem Punch and our digitizers will recommend the optimal patch type, size, and construction for your specific design and budget. We have produced thousands of both chenille and embroidered patches for brands, teams, and organizations worldwide—and we will make sure your patch tells your story exactly the way you envision it.

Ready to start your order? Get a free quote and digital mockup from Gem Punch today.