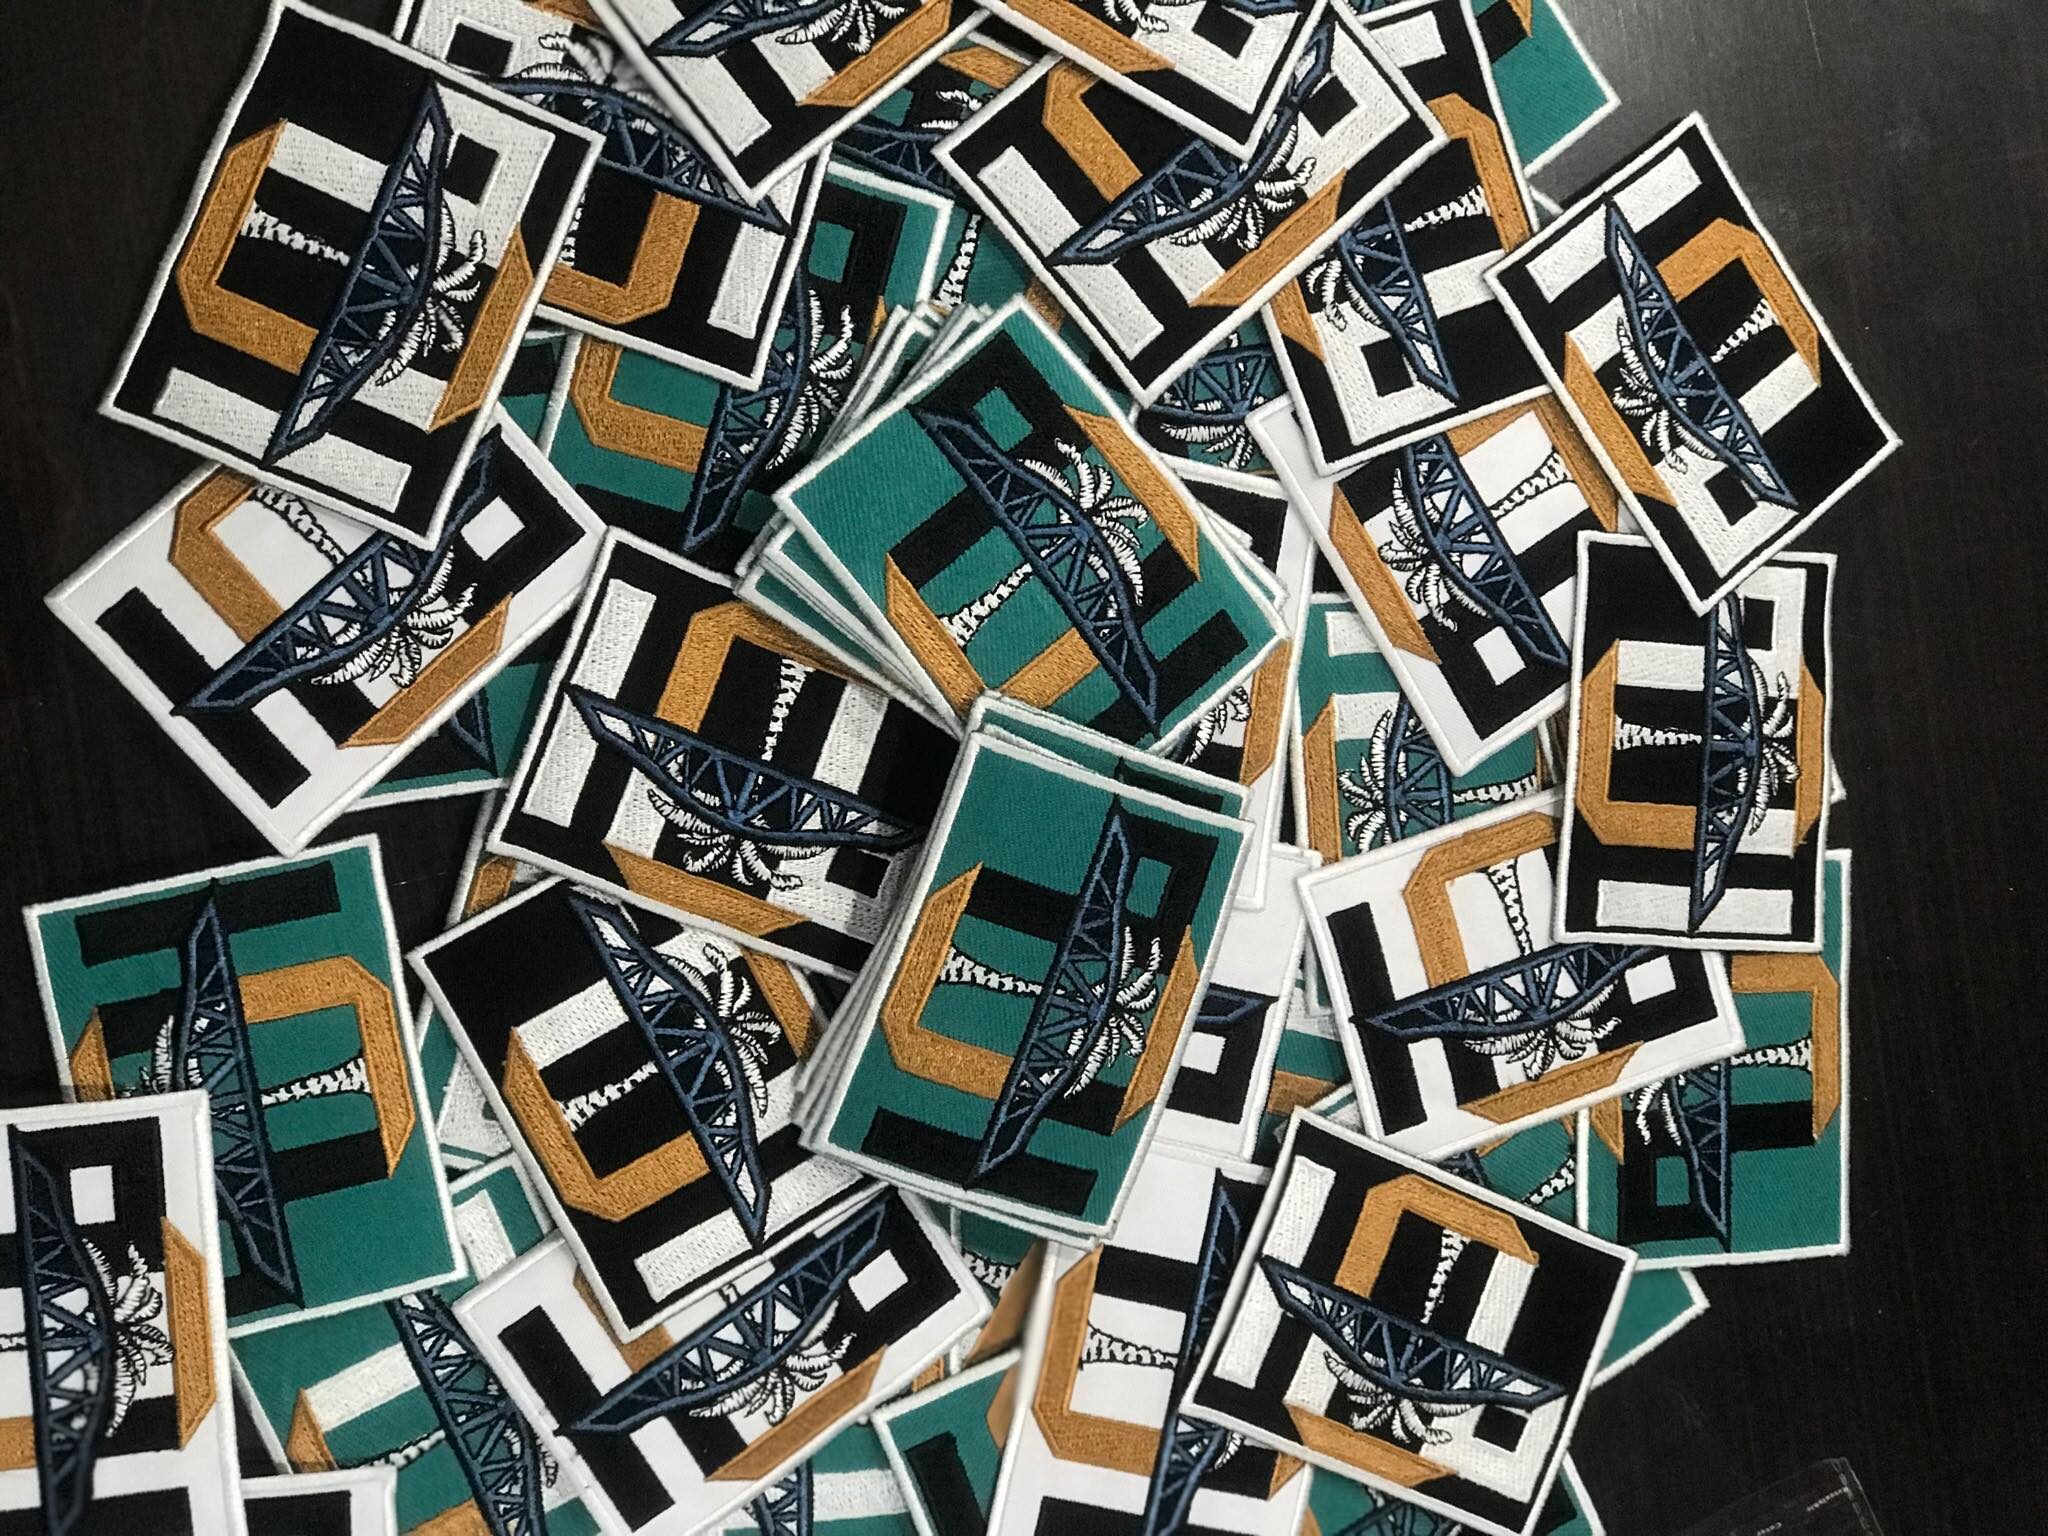
3D Puff Digitizing

3D Puff Digitizing: Why it’s the #1 Trend for Hoodies & Caps 

In the world of custom apparel, 3D puff digitizing is revolutionizing how brands and designers create eye-catching, tactile designs. From streetwear giants to boutique brands, this technique is dominating hoodies, caps, and accessories—and for good reason. At Gem Punch, we’ve mastered the art of 3D puff embroidery digitizing, combining technical precision with creative flair. Here’s why this trend is unstoppable and how it can elevate your designs.
3D Puff Digitizing

What Is 3D Puff Digitizing?

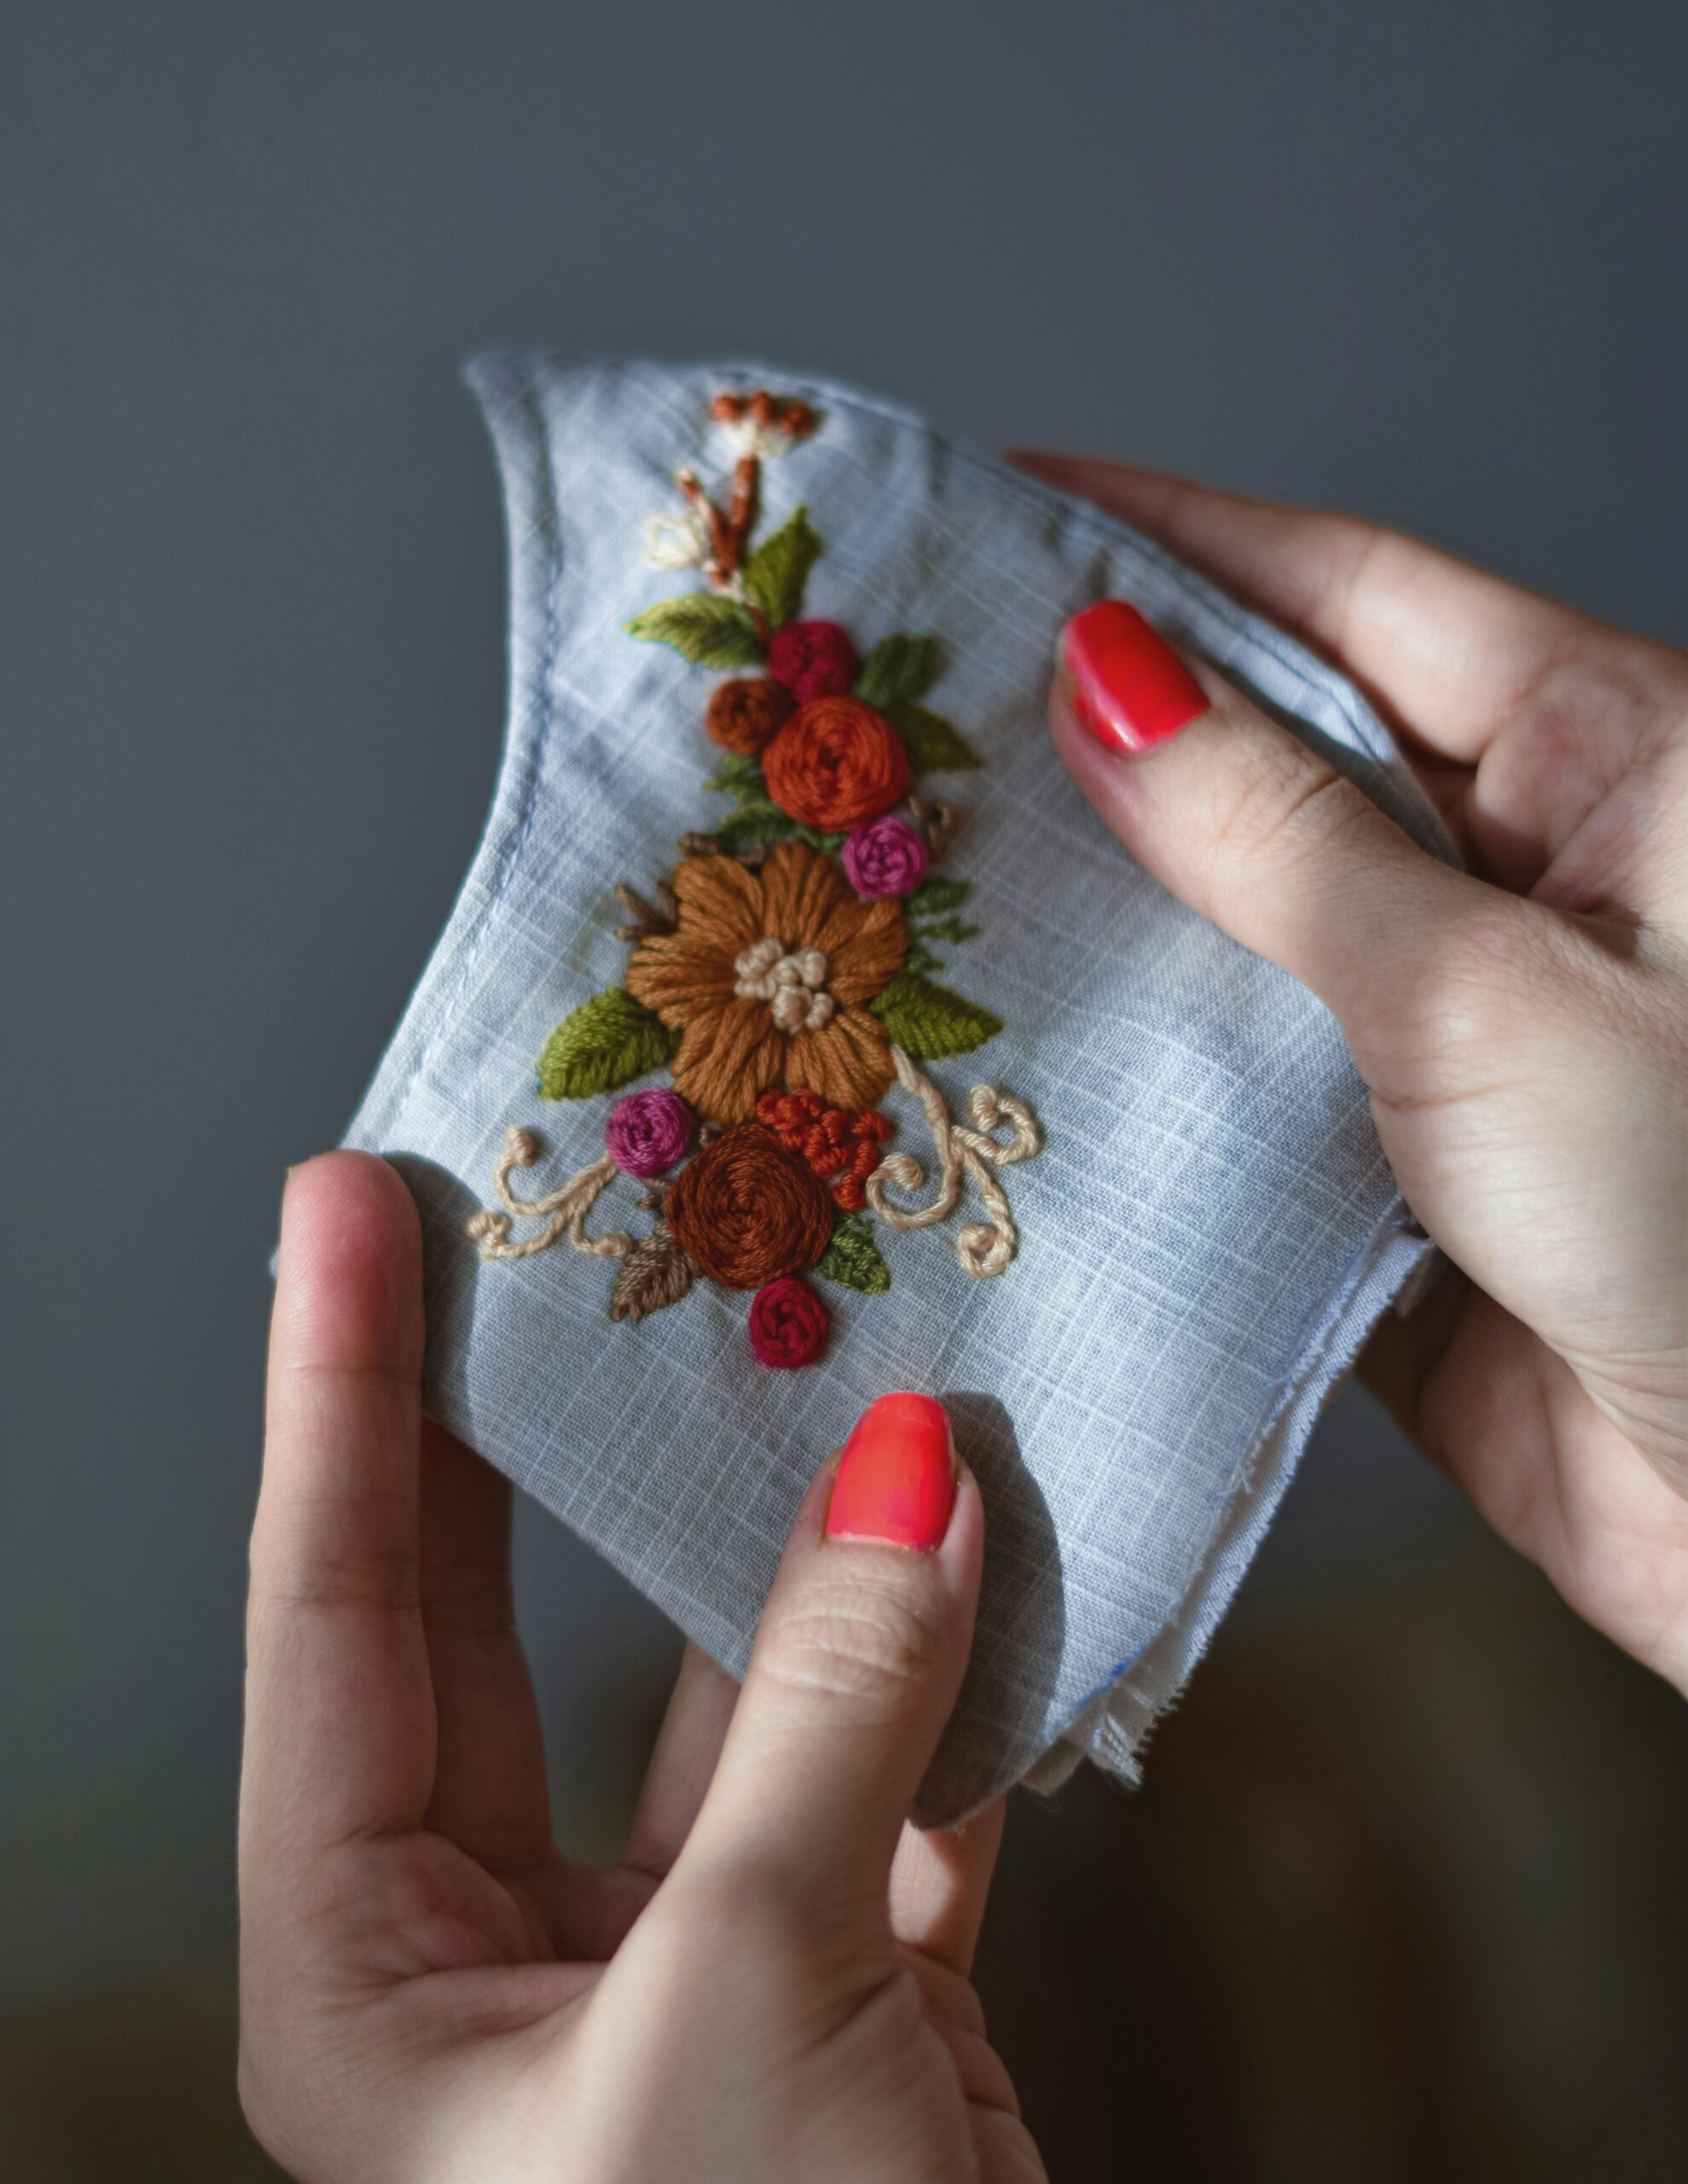
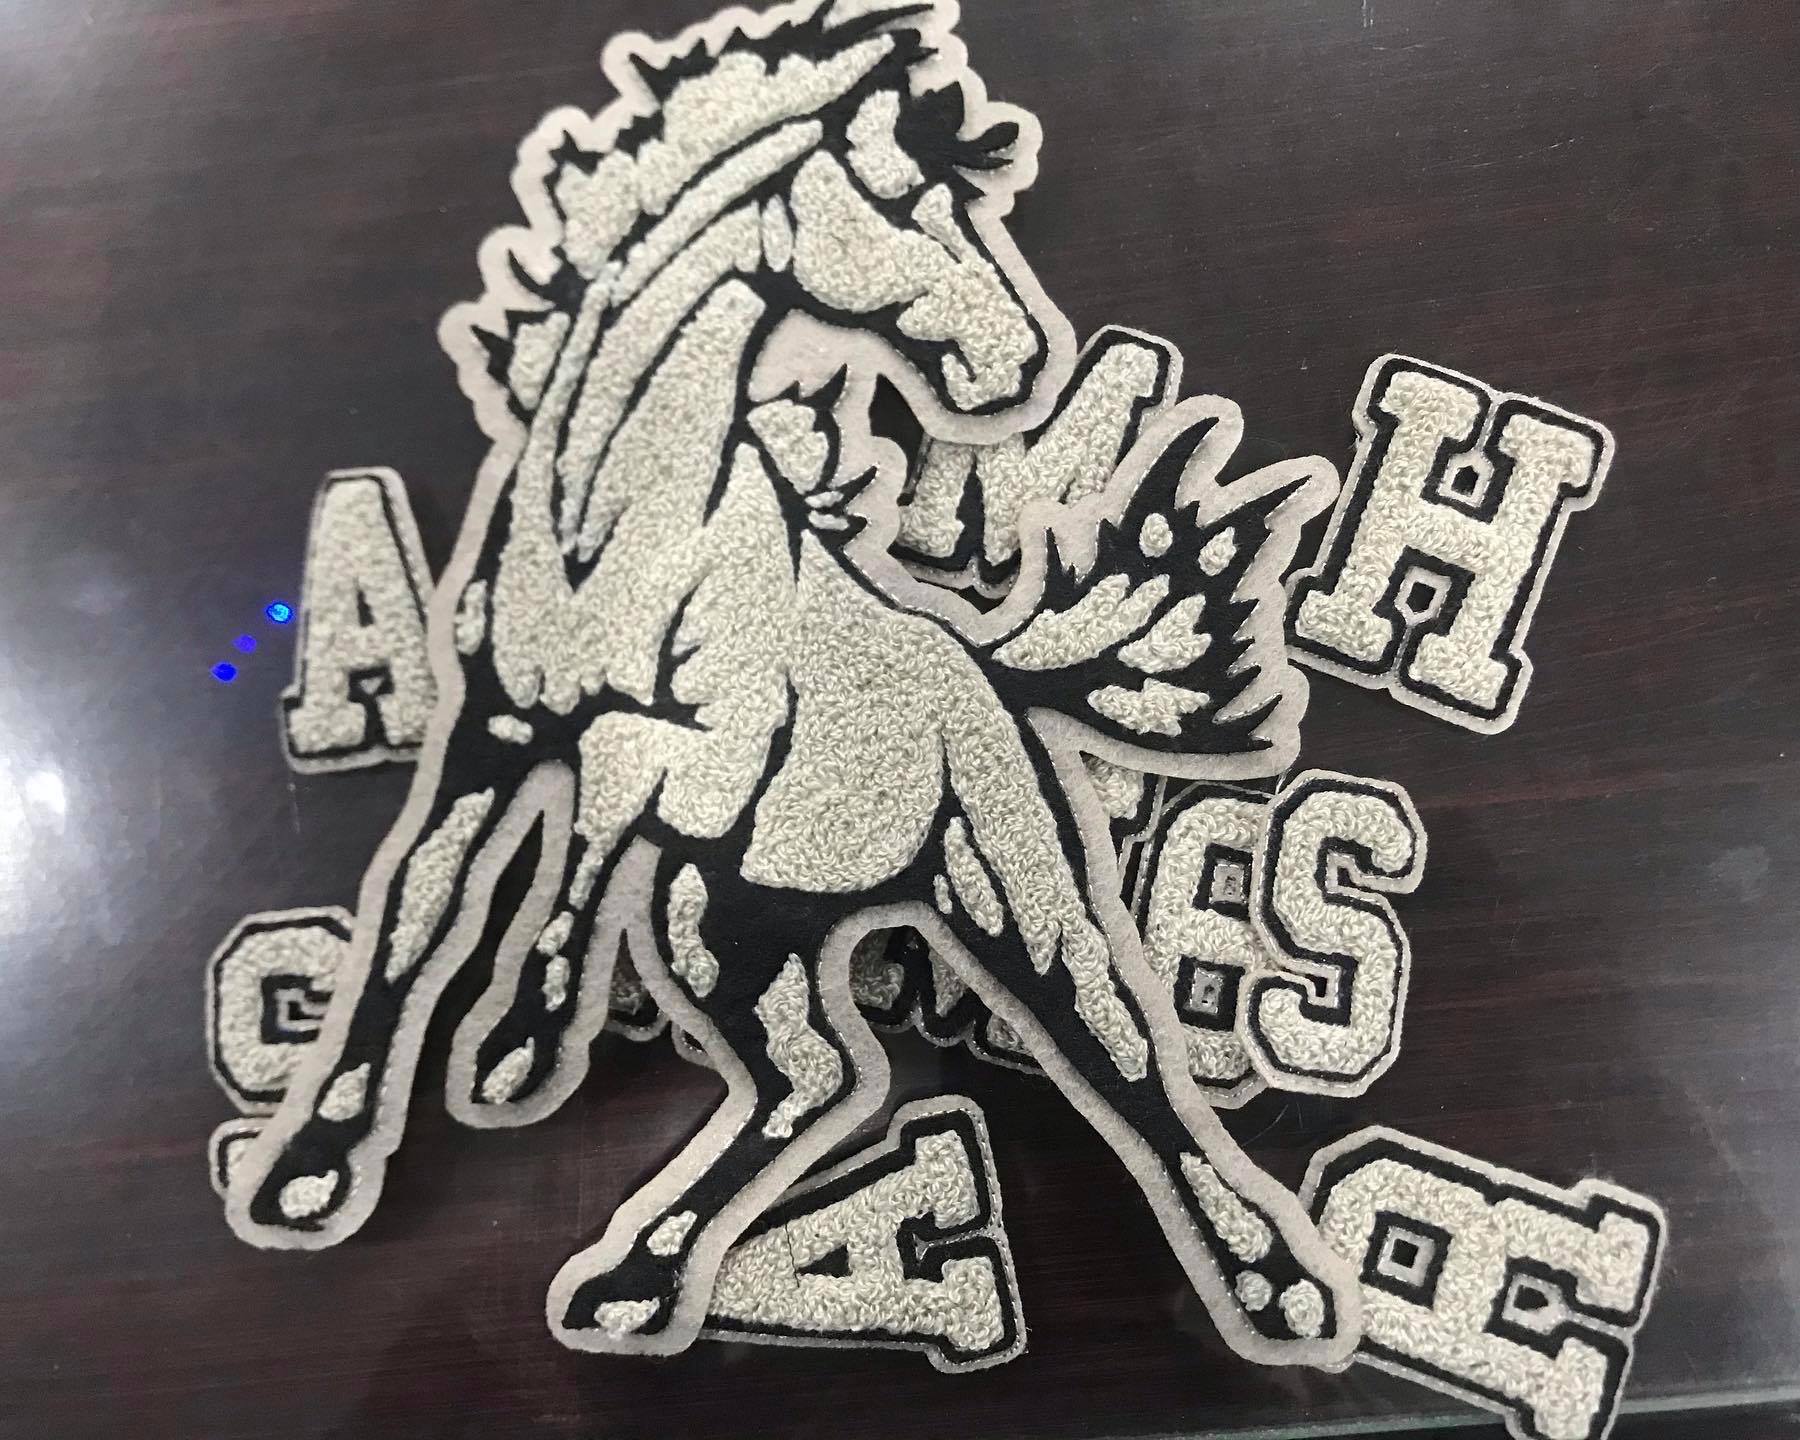
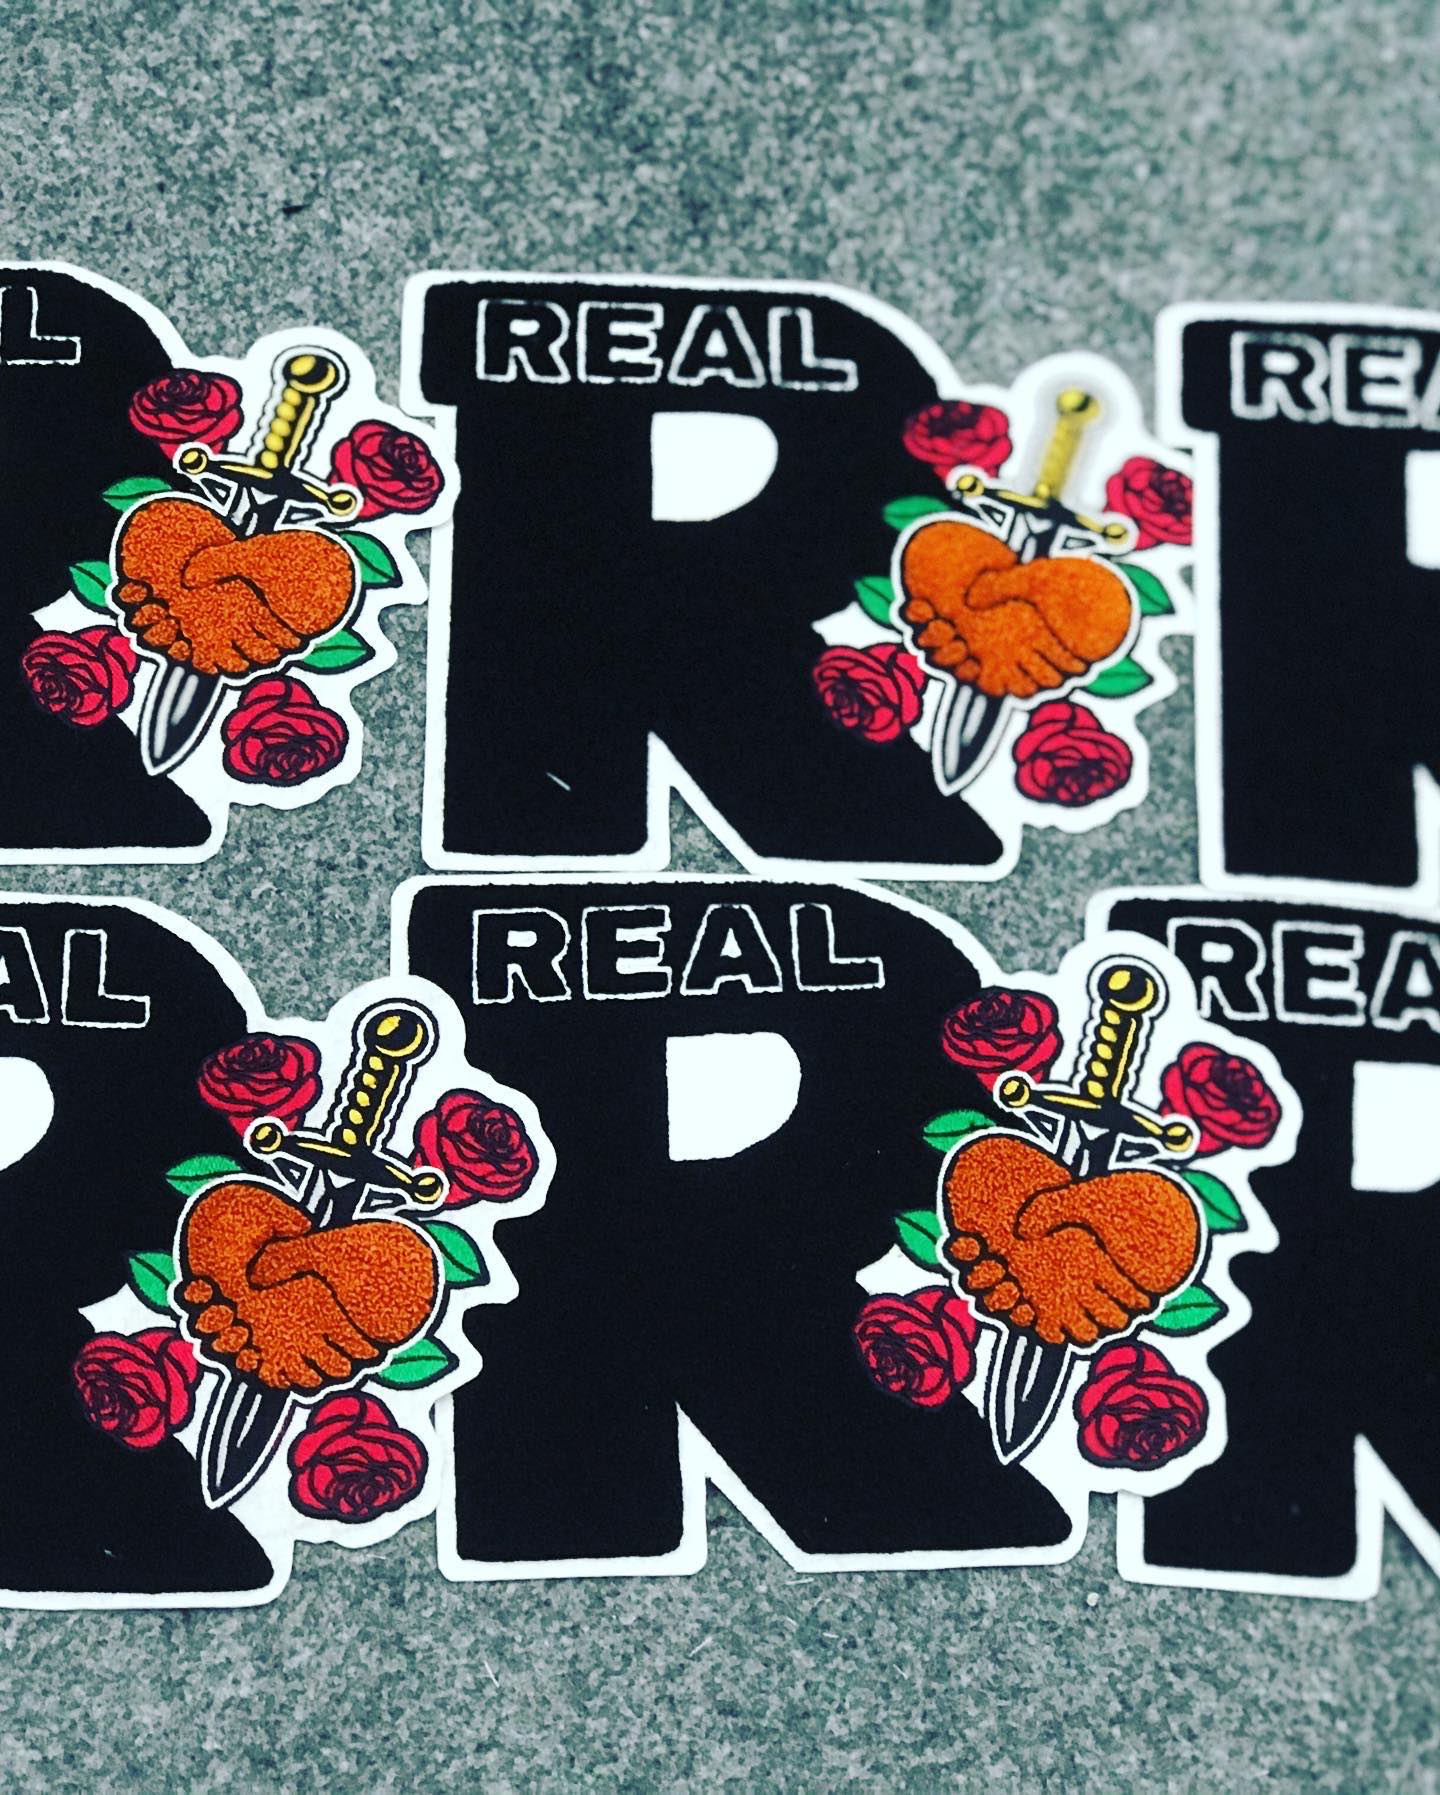
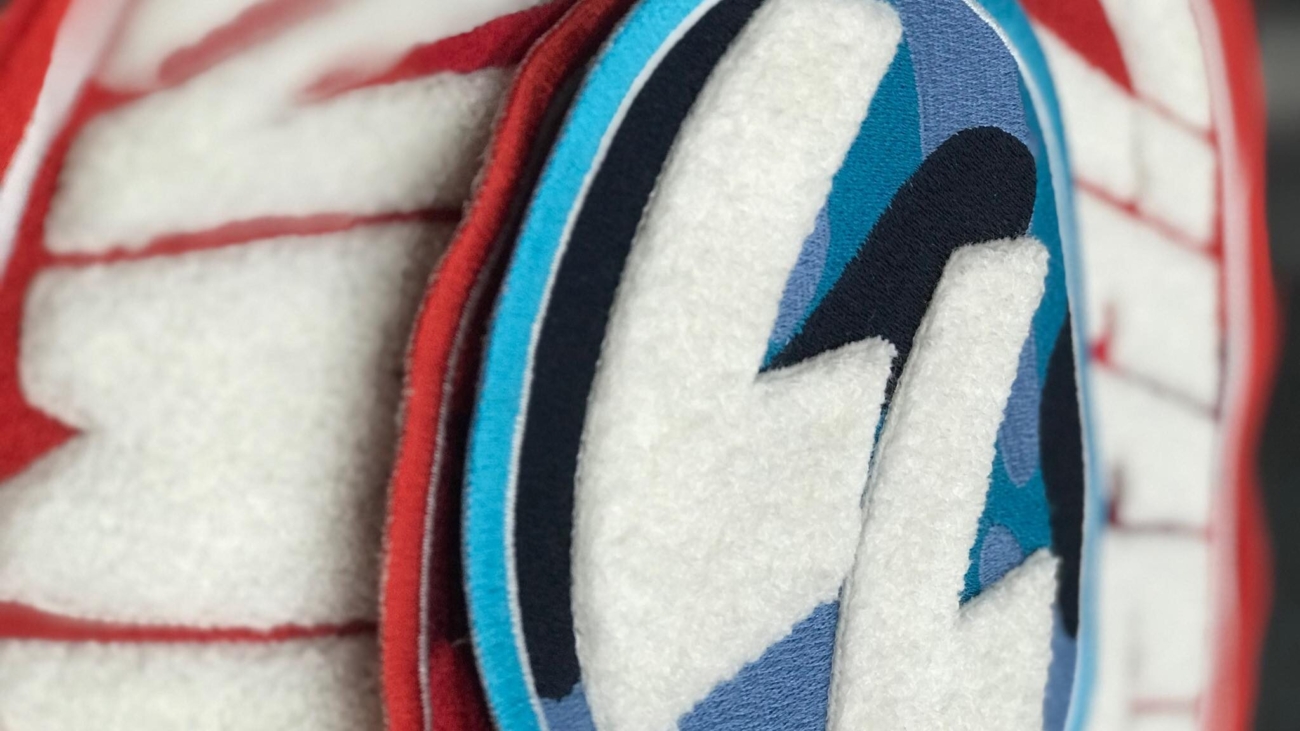
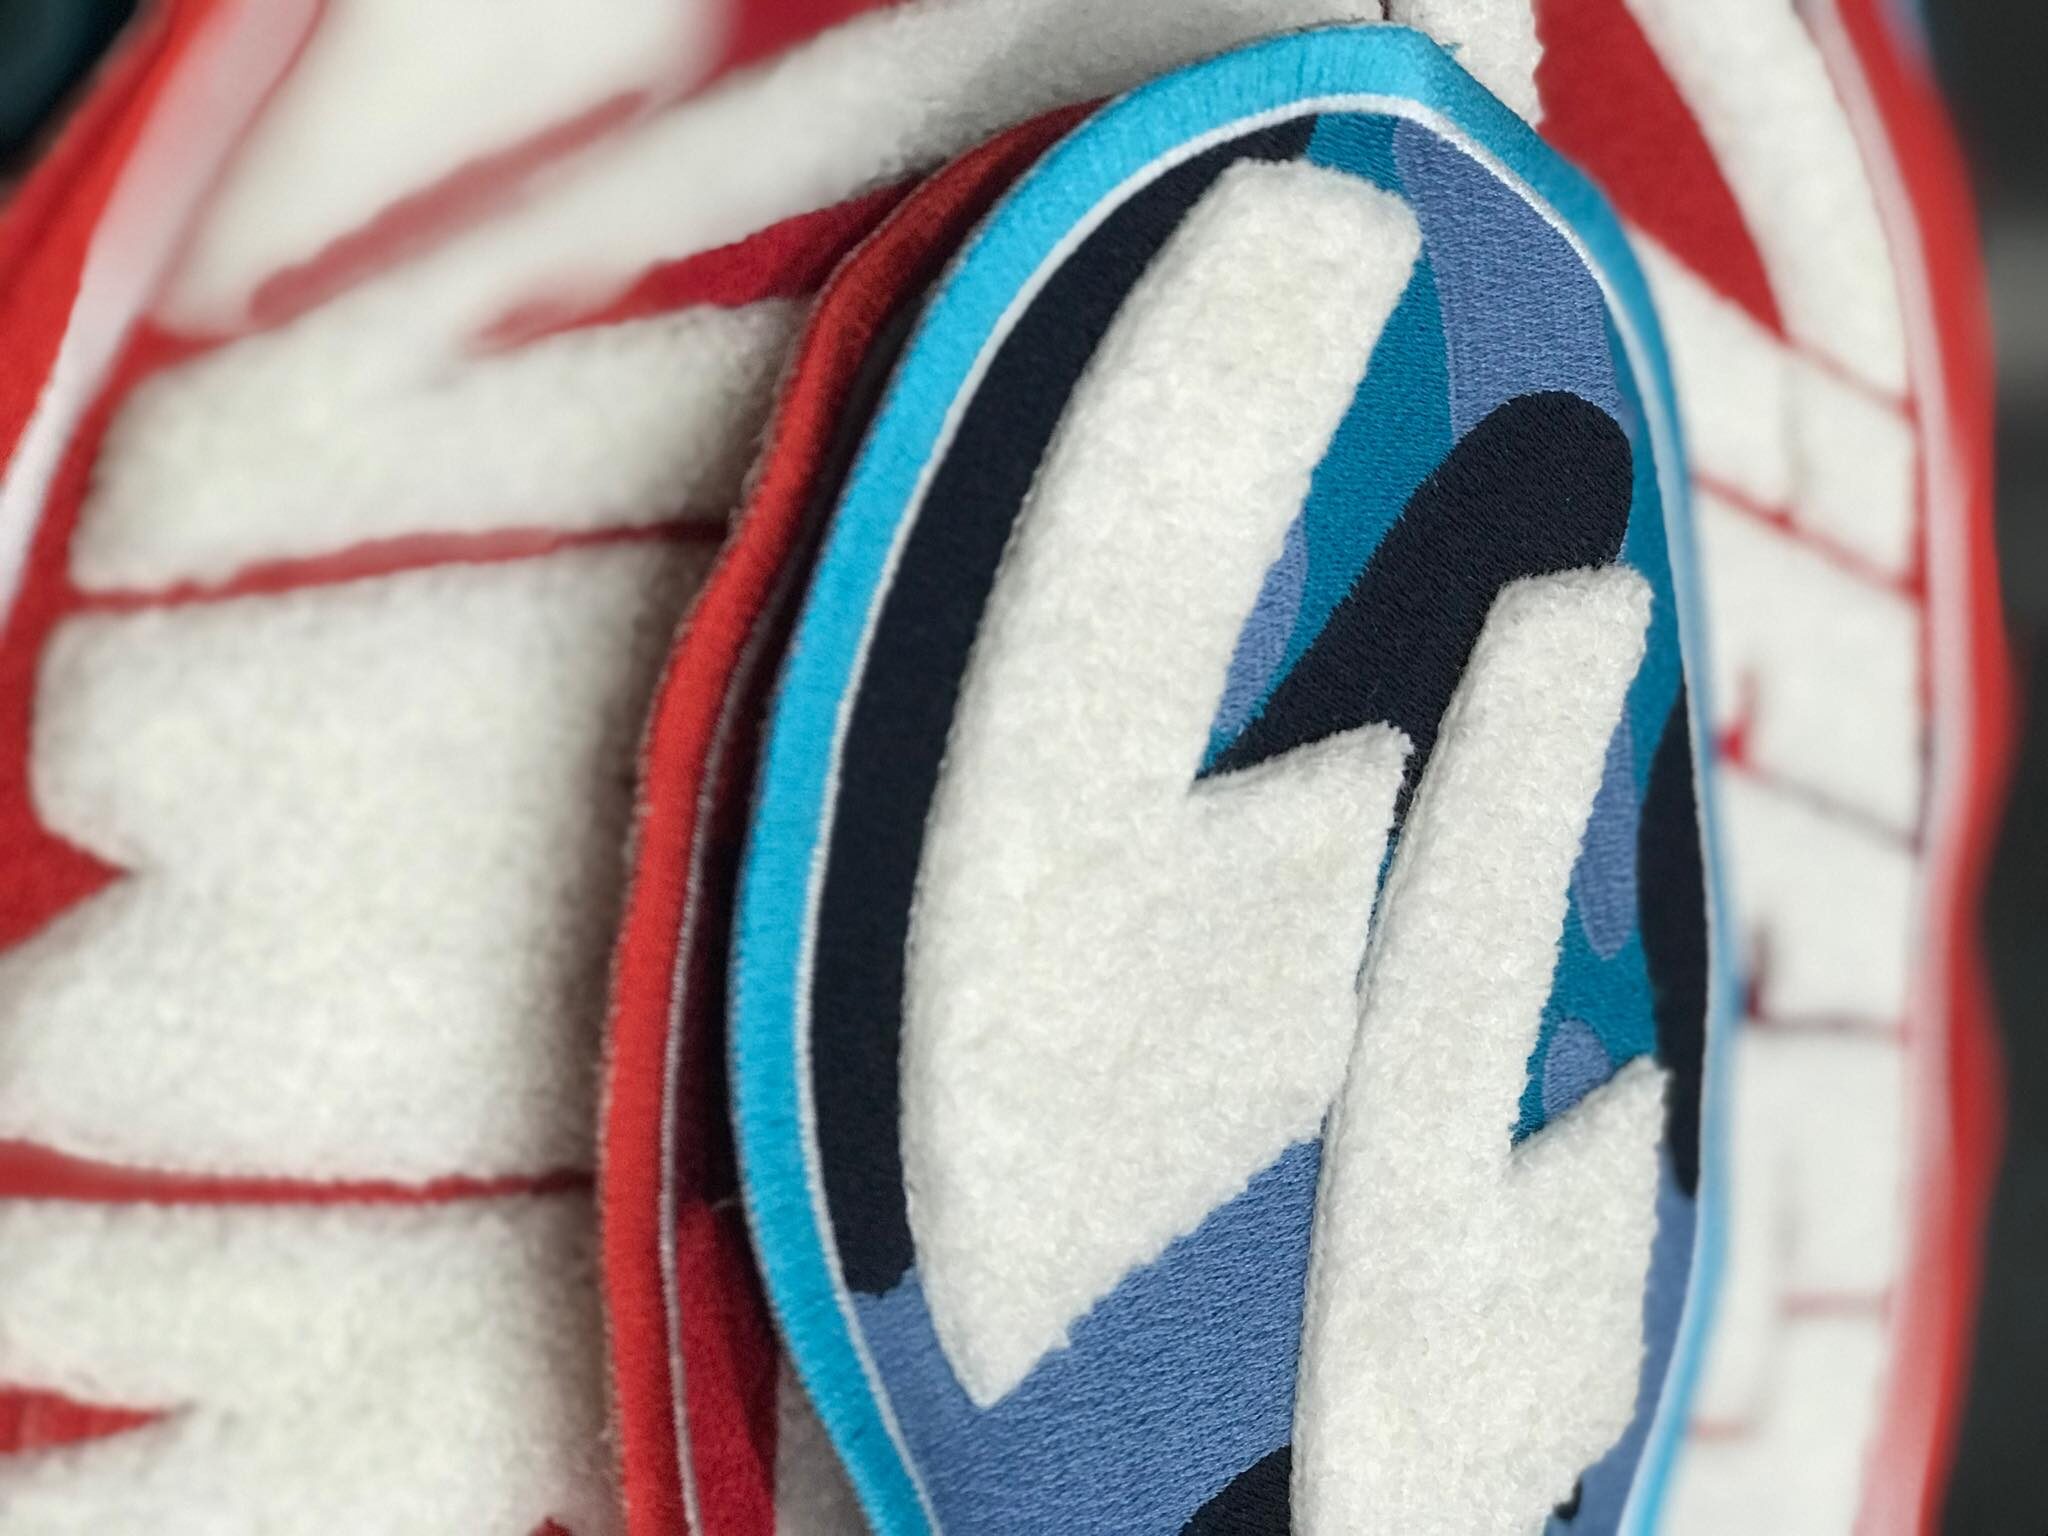
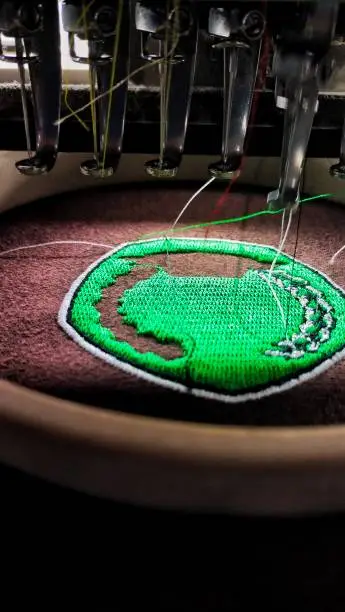
3D puff digitizing is an advanced embroidery technique that uses foam underlayers to create raised, textured designs. Unlike flat embroidery, the foam is stitched over and trimmed, resulting in bold, three-dimensional effects that add depth and luxury to any garment.


How It Works: 

  1. Foam Cutting: A foam layer is shaped to match the design.
  2. Embroidery Stitching: Machines stitch over the foam, embedding it into the fabric.
  3. Trimming: Excess foam is removed for a crisp, 3D finish.


Why 3D Puff Digitizing Dominates Fashion


  1. Tactile Appeal Drives Engagement

Consumers crave sensory experiences. 3D puff digitizing delivers:

Textured Surfaces: Raised designs invite touch, enhancing brand interaction.

Premium Perception: Mimics high-end appliqué work at a fraction of the cost.


  1. Streetwear & Social Media Demand Boldness

Streetwear: Hoodies with oversized 3D logos or caps with raised mascots dominate Instagram feeds.

Viral Potential: 3D puff catches light and shadows, perfect for TikTok close-ups and unboxing videos.


  1. Unmatched Durability

Longevity: Foam underlay protects stitches from fraying, even after repeated washes.

Versatility: Works on cotton, denim, twill, and performance fabrics.


  1. Customization without Limits

Personalization: Names, logos, and intricate shapes (e.g., 3D stars, animals) pop with dimension.

Brand Differentiation: Stand out in crowded markets with tactile merch.


Top Applications of 3D Puff Digitizing


Garment Trending Design Pro Tip
Hoodies Full-back logos, sleeve accents Pair puff + flat stitches for contrast
Caps Front-panel mascots, side motifs Use 2mm foam for curved surfaces
Beanies Raised snowflakes, holiday themes Opt for smaller designs to avoid bulk
Bags Durable brand logos, geometric patterns Reinforce edges for heavy-use items


Common 3D Puff Digitizing Mistakes (And How to Avoid Them) 

While stunning, 3D puff embroidery requires expertise. Here’s how Gem Punch ensures perfection:


  1. Foam Thickness Errors

Issue: Too thick = cracking; too thin = flattening.

Fix: We use 1.5–3mm foam tailored to fabric and design size.


  1. Poor Stitch Density

Issue: Overcrowded stitches tear foam; sparse stitches loosen over time.

Fix: Our digitizers calibrate stitch density for **optimal hold and flexibility**.


  1. Uneven Trimming

Issue: Ragged edges ruin the 3D effect.

Fix: Laser-guided trimming tools ensure crisp, clean lines.


Why Brands Trust Gem Punch for 3D Puff Digitizing

100+ 5-Star Reviews: Praised for precision and fast turnaround.

Free File Previews: Approve your design before stitching.

Unlimited Revisions: No extra cost until you’re 100% satisfied.
3D Puff Digitizing: Why it’s the #1 Trend for Hoodies & Caps

Key Takeaways 

✅ 2025’s Top Trend: 3D puff digitizing adds luxury and durability to hoodies, caps, and accessories.

✅ Technical Mastery Matters: Foam thickness, stitch density, and trimming precision make or break designs.

✅ Gem Punch Delivers: Fast, flawless digitizing trusted by 1,000+ brands since 2012.


Ready to Dominate 2025 with 3D Puff Designs?

Get a Free Quote from Gem Punch today—and transform your apparel into tactile masterpieces with expert 3D puff digitizing services.


FAQs: 3D Puff Digitizing Explained


  1. How long does 3D puff embroidery last?

With proper care (cold washes, no direct ironing), designs stay vibrant for 5+ years.


  1. Can you convert existing logos to 3D puff?

Yes! Send us your logo, and we’ll optimize it for 3D foam embroidery.


  1. Is 3D puff digitizing more expensive than flat embroidery?

Slightly, due to foam materials and labor—but the ROI in brand visibility is unmatched.


  1. What’s the minimum order for 3D puff patches?

We accept orders as small as 50 pieces, ideal for startups and small businesses.


  1. Do you offer bulk discounts?

Yes! Contact us for custom pricing on 500+ piece orders.
Top 5 Mistakes to Avoid When Digitizing Logos for Embroidery

Top 5 Mistakes to Avoid When Digitizing Logos for Embroidery

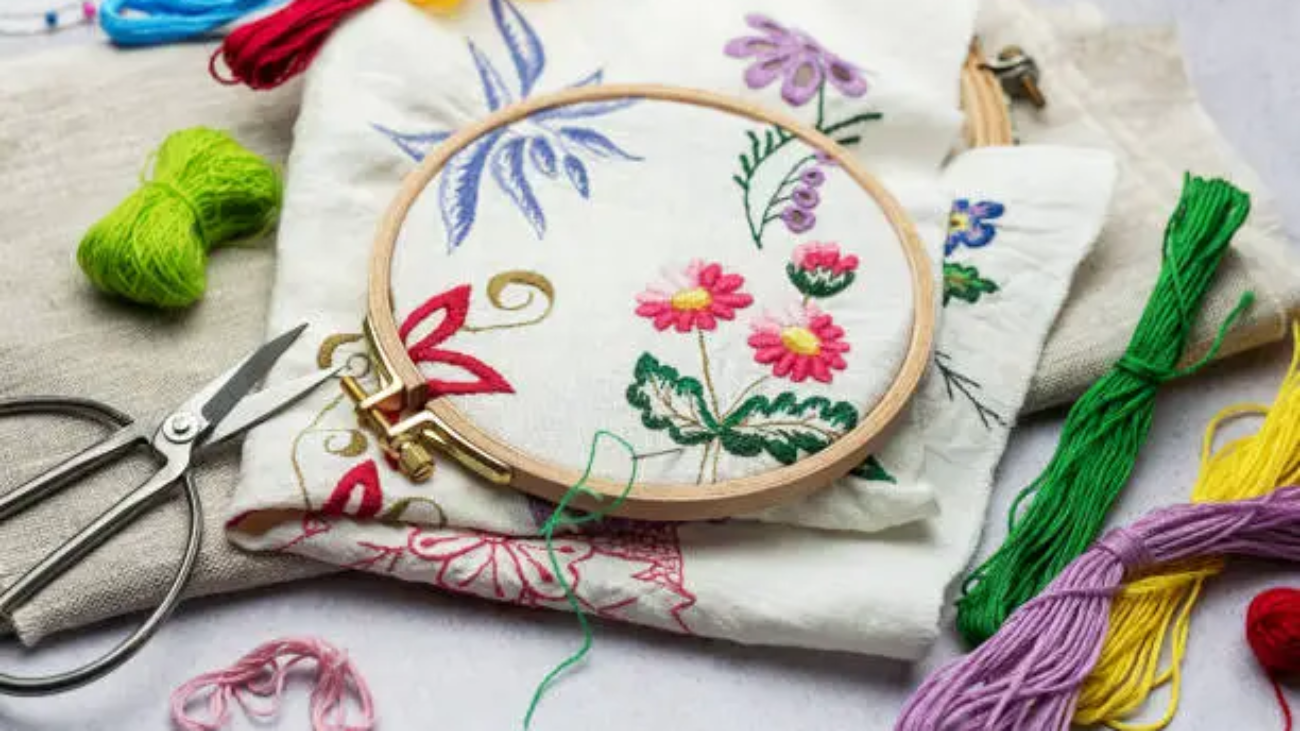
Top 5 Mistakes to Avoid When Digitizing Logos for Embroidery; Embroidery digitizing is an art form that bridges creativity and technical precision. A well-digitized logo can elevate a brand’s identity, while a poorly executed file can lead to costly rework, damaged fabrics, and frustrated clients. At Gem Punch, we’ve spent years perfecting the craft of embroidery digitizing, and we’ve seen firsthand how common mistakes can derail even the most beautiful designs.


Whether you’re a business owner ordering custom patches or a designer venturing into embroidery, here are the “top 5 mistakes to avoid” when digitizing logos—and how to fix them like a pro.

Top 5 Mistakes to Avoid When Digitizing Logos for Embroidery

  1. Ignoring Fabric and Garment Type

The Mistake: Using the same digitizing settings for every fabric. A logo stitched on a thick denim jacket won’t translate well to a delicate polo shirt if the stitch density or underlay isn’t adjusted.

Why It Matters: Different materials behave differently under thread tension. For example:

Stiff fabrics: (like canvas or leather) require tighter stitches to prevent gaps.

Stretchy fabrics: (like jersey or performance wear) need looser stitches to avoid puckering.

The Fix: 

Always ask about the ‘garment type’ before digitizing.

Adjust stitch density: Use ‘lower density’ for lightweight fabrics and ‘higher density’ for heavy-duty materials.

Incorporate ‘stabilizers’ in your design plan for stretchy fabrics.


  1. Overcomplicating Small Details

The Mistake: Trying to replicate every tiny detail of a complex logo, such as ultra-thin lines or intricate gradients.

Why It Matters: Embroidery has physical limitations. Tiny text or overly detailed elements can:

Clump together, creating a messy, unreadable design.

Cause thread breaks or needle damage.

The Fix: 

Simplify the design: Remove elements smaller than ‘3mm’ (e.g., hairline strokes, micro-text).

Use ‘block letters’ instead of serif fonts for text under 10mm.

For gradients, opt for ‘color blocking’ or halftone effects instead of stitch shading.


  1. Skipping the Underlay Stitches

The Mistake: Jumping straight into the top stitching without a proper underlay.

Why It Matters: Underlay stitches act as the ‘foundation’ of your embroidery. They:

Stabilize the fabric.

Prevent distortion during stitching.

Improve the longevity of the design.

The Fix: 

Always use underlay stitches, especially for designs on stretchy or textured fabrics.

Choose the ‘right underlay type’: 

‘Tatami’ for large fill areas.

‘Zigzag’ for outlines and text.

‘Edge Run’ to secure fabric edges.


  1. Neglecting Pull Compensation

The Mistake: Forgetting to account for thread pull, which causes shapes like circles to appear oval or letters to look distorted.

Why It Matters: Embroidery thread naturally “pulls” the fabric as stitches are layered, leading to misalignment.

The Fix: 

Enable ‘pull compensation’ in your digitizing software.

Manually adjust shapes:

Stretch circular designs horizontally by ‘10-15%’.

Widen vertical elements slightly to counteract thread tension.

Test the design on a ‘similar fabric scrap’ before finalizing.

Mistakes to Avoid When Digitizing Logos for Embroidery

  1. Using the Wrong Stitch Types

The Mistake: Applying a single stitch type (e.g., satin stitches) to every part of the design.

Why It Matters: Different stitch types serve different purposes:

Satin Stitches: Ideal for borders and text (creates a smooth, glossy finish).

Fill Stitches: Best for large, solid areas (prevents thread buildup).

Running Stitches: Perfect for fine details and outlines.

The Fix: 

Break the design into sections and assign stitch types strategically.

Example: Use ‘fill stitches’ for the background of a logo and ‘satin stitches’ for the text.


Bonus Tip: Always Test Before Production! 

Even seasoned digitizers test their files. Run a sample on the ‘exact fabric’ your client will use. Look for:

Thread tension issues.

Misaligned elements.

Color bleed (especially on dark fabrics).


Why Partner with Gem Punch?

At Gem Punch, we’ve mastered the science of embroidery digitizing to deliver flawless results every time. Our team:

  1. Analyzes your logo’s ‘complexity, colors, and intended use’.
  2. Optimizes stitch types, density, and underlay for your ‘specific fabric’.
  3. Provides a ‘free file preview’ to ensure perfection before stitching.


Ready to Transform Your Logo into Embroidery Art? 

Avoid these mistakes and trust the experts at Gem Punch to handle your digitizing needs. Get a Free Quote today—or explore our Embroidery Digitizing Services to learn how we turn complex designs into stitch-perfect reality.


Frequently Asked Questions


  1. How long does logo digitizing take?

At Gem Punch, most standard designs are digitized within 24–48 hours, depending on complexity. Intricate designs (e.g., photorealistic patches or multi-layered 3D puff) may take slightly longer.

  1. What factors affect the cost of digitizing?

Pricing depends on:

Design complexity (e.g., number of colors, stitch types, and details).

Garment type (e.g., digitizing for towels requires specialized stitch settings).

Size (larger designs often require more stitches).

We offer transparent pricing and free quotes—no hidden fees.


  1. Can you fix a poorly digitized file from another vendor?

Absolutely! We regularly troubleshoot files with issues like puckering, thread breaks, or misalignment. Send us your file, and we’ll diagnose the problem (e.g., incorrect pull compensation or missing underlay) and re-digitize it for flawless stitching.


  1. What file formats do you need to digitize my logo?

We accept vector files (AI, EPS, PDF) for the best results. If you only have a raster image (JPG, PNG), we can convert it—but note that low-resolution images may require manual adjustments.


  1. Do you offer revisions if the design doesn’t stitch well?

Yes! We provide unlimited free revisions until you’re 100% satisfied. After testing the design, if you notice issues like gaps or misalignment, we’ll tweak the file at no extra cost. Your perfect stitch is our priority.

Custom Patches for Weddings

Custom Patches for Weddings: Unique Favors & Decor Ideas to Personalize Your Big Day

Why Custom Patches Are the Perfect Wedding Addition 

Custom Patches for Weddings; Personalized touches are the heart of memorable weddings. Custom patches offer a versatile, affordable, and creative way to infuse your personality into your celebration. From practical keepsakes to stunning decor, embroidered or woven patches add texture, color, and meaning to your special day.

Custom Patches for Weddings

Custom Patches as Wedding Favors: 5 Unique Ideas

Give guests a meaningful token they’ll treasure long after the festivities. Here’s how to turn patches into unforgettable favors:


  1. Luggage Tag Patches for Jet-Setting Guests

Attach custom patches to leather luggage tags engraved with your names and wedding date. Perfect for travel-loving attendees!


Tip: Pair with a note like, “Adventure Awaits—Thanks for Celebrating Ours!”


  1. Embroidered Napkin Holders

Swap generic place cards for patches stitched onto linen napkin bands. Add guest names for a personalized place setting.


  1. DIY Patch Kits for Crafty Guests

Include a blank tote, denim jacket, or hat alongside a themed patch (e.g., floral motifs or your wedding hashtag).


  1. “Something Blue” Patches

Incorporate tradition with navy or sapphire patches featuring delicate lace designs. Guests can sew them into handkerchiefs or clothing.


  1. Pet Bandanas for Furry Friends

For pet-inclusive weddings, gift custom pet bandanas with patches like “Best Dog” or “Ring Security.”

Bride Wearing Wedding Patch

Stunning Wedding Decor Ideas Using Custom Patches 

Transform your venue with these eye-catching patch decor strategies:


Chair Back Embellishments 

Drape linen chair covers with patches featuring your initials or wedding date. Use iron-on adhesive for easy setup.


Patchwork Table Runners 

Sew patches onto fabric runners for a bohemian vibe. Mix designs like hearts, florals, and geometric patterns.


Table Numbers with a Twist 

Stitch numbered patches onto burlap or velvet squares as rustic-chic table markers.


Aisle Decals

Adhere floral or celestial-themed patches to aisle runners for a whimsical touch.


Trends in Custom Wedding Patches 

Stay ahead with these top styles:

Eco-Friendly Materials: Recycled fabric or organic cotton patches align with sustainable weddings.

Vintage Vibes: Distressed edges and muted tones for a nostalgic feel.

Interactive Elements: Glow-in-the-dark thread or QR code patches linking to your wedding website.

Cultural Motifs: Incorporate traditional embroidery patterns from your heritage.


Why Custom Patches Matter 

Personalization: Reflect your story through colors, symbols, and quotes.

Versatility: Use patches for attire (bridal jackets!), favors, and decor.

Keepsake Value: Guests cherish practical, sentimental gifts over generic trinkets.


Final Stitch: Make Your Wedding Unforgettable

Custom patches offer endless opportunities to craft a celebration that’s uniquely yours. Whether you’re gifting embroidered favors or designing a patchwork photo backdrop, these tiny details leave a lasting impression.


Ready to start designing? Contact our patch experts for a free consultation!


FAQs About Custom Patches for Weddings

Q1: How much do custom patches cost?

Prices vary ($2–$10 per patch) based on size, material, and order quantity. Bulk discounts often apply!


Q2: Can patches withstand outdoor weddings?

Yes! Opt for weather-resistant materials like PVC or merrowed-edge embroidery.


Q3: How do I design a patch?

Most vendors offer online tools. Start with high-resolution artwork, and choose thread colors that match your palette.


Q4: How are patches attached?

Iron-on, sew-on, or Velcro backings are popular. Discuss options with your supplier.


Q5: Where can I order quality patches?

Seek reputable companies with wedding experience. Read our Guide to Choosing a Patch Vendor for tips.


How to Style Patches for Every Season

How to Style Patches for Every Season: Fresh Ideas to Elevate Your Wardrobe

Patches aren’t just for fixing holes—they’re a dynamic way to refresh your style, celebrate the seasons, and showcase your personality. Whether you’re layering a cozy winter jacket or revamping a breezy summer tote, ‘How to Style Patches for Every Season’ can transform your look from basic to bold. In this guide, we’ll break down seasonal trends, actionable tips, and why custom patches are your secret weapon for staying on-trend. Let’s dive in!

How to Style Patches for Every Season

Unlock year-round creativity with GemPunch’s seasonal patch styling guide!


Why Seasonal Patch Styling Matters

Swapping patches with the seasons keeps your wardrobe versatile and relevant. Benefits include:

Stay on-trend: Match your gear to seasonal colors and themes.

Maximize versatility: One jacket can transition from spring florals to winter plaids.

Express yourself: Celebrate holidays, hobbies, or cultural moments with curated designs.


At GemPunch, our custom patches let you craft looks as unique as the seasons themselves. Ready to get inspired?


Spring: Blooming Florals & Pastels


Trendy Patch Ideas 

Botanical motifs: Floral embroidery, fern designs, or bee patches.

Pastel palettes: Soft pinks, mint greens, and lavender hues.

Easter or Earth Day themes: Think bunnies, eggs, or eco-friendly slogans.


How to Style

Denim jackets: Cluster small floral patches on collars or cuffs.

Tote bags: Add a single statement patch (like a cherry blossom) for subtle charm.

Bucket hats: Sew a mini patch on the brim for playful flair.


Pro Tip: Pair with lightweight fabrics like cotton or linen.


Summer: Bold Colors & Retro Vibes 


Trendy Custom Patch Ideas 

Tropical designs: Palm trees, flamingos, or surfboards.

Neon accents: Glow-in-the-dark or fluorescent patches for festivals.

Vintage logos: Retro band names or 80s-inspired graphics.


How to Style Custom Patches

Swim cover-ups: Iron waterproof PVC patches onto beach bags or sarongs.

Camp shirts: Add retro patches to sleeves or pockets for a laid-back vibe.

Sneakers: Stick adhesive patches on shoe tongues or heels.


Pro Tip: Use UV-resistant patches to prevent sun fading.


Fall: Warm Tones & Cozy Themes


Trendy Custom Patch Ideas

Autumn leaves: Embroidered maple or oak designs.

Plaid patterns: Tartan or buffalo check patches.

Spooky season: Bats, pumpkins, or witchy motifs.


How to Style Custom Patches 

Corduroy jackets: Sew-on patches blend seamlessly with textured fabric.

Scarves or beanies: Add a small felt patch for rustic charm.

Backpacks: Mix fall-themed patches with leather accents.


Explore How to Make Patches Last Longer for durable seasonal swaps.


How to Style Patches for Every Season: Fresh Ideas

Winter: Holiday Cheer & Metallic Sparkle


Trendy Custom Patch Ideas

Festive icons: Snowflakes, reindeer, or menorahs.

Metallic thread: Gold or silver embroidered patches.

Cozy knits: Patches mimicking wool or cable-knit textures.


How to Style Custom Patches 

Puffer coats: Iron reflective patches onto sleeves for nighttime visibility.

Holiday sweaters: Replace traditional embroidery with removable Velcro patches.

Gloves or mittens: Adhesive patches add whimsy without bulk.


Pro Tip: Layer patches over elbow patches on sweaters for a luxe look.


Why Custom Patches Shine Year-Round 

Custom patches let you tailor designs to any season, event, or mood. GemPunch’s custom service offers:

Seasonal exclusives: Limited-edition holiday or summer designs.

Personalized themes: Create patches for family reunions, ski trips, or festivals.

Durability: Our patches withstand snow, sun, and sweat.


Pro Tips for Seasonal Custom Patch Success  

Color coordination: Match patches to your seasonal wardrobe palette.

Balance placement: Avoid overcrowding—let one or two patches shine as focal points.

Mix materials: Pair embroidered patches with leather or denim for contrast.


Final Thoughts

Styling patches for every season is a fun, sustainable way to keep your wardrobe exciting. Whether you’re layering autumn leaves on a jacket or adding festive sparkle to a winter hat, GemPunch’s high-quality patches ensure your creativity shines through.

Ready to embrace year-round customization?


Loved this guide? Check out How to Remove and Replace Damaged Patches for more DIY magic!

FAQs About Seasonal Custom Patch Styling


  1. Can I use the same patches across seasons?

Yes! Neutral patches (like geometric shapes or animals) work year-round. Swap seasonal accents (e.g., holly berries for winter) to refresh looks.


  1. How do I protect patches from rain or snow?

Opt for PVC or laminated patches. For fabric patches, apply a waterproofing spray.


  1. Are iron-on patches safe for delicate winter fabrics like wool?

Use a low-heat iron and pressing cloth. Test a hidden area first!


  1. Can I layer patches?

Absolutely! Mix sizes and textures (e.g., embroidered over chenille) for depth.


  1. How do I store seasonal patches when not in use?

Keep them in a cool, dry place inside acid-free bags to prevent fading.

How to Remove and Replace Damaged Patches

How to Remove and Replace Damaged Patches: A Step-by-Step Guide to Revive Your Gear

Patches add personality to jackets, bags, and jeans—but wear and tear can leave them faded, peeling, or frayed. Whether you’re refreshing a vintage denim jacket or updating a team uniform, knowing ‘how to remove and replace damaged patches’ is a game-changer. In this guide, we’ll cover foolproof removal techniques, trendy replacement ideas, and why custom patches are worth the investment. Let’s restore your gear to its full glory!

How to Remove and Replace Damaged Patches


Keep your style fresh and functional with GemPunch’s pro tips for patch repair! 


Why Replace Damaged Patches? 

Damaged patches don’t just look worn—they can undermine your style and the item’s functionality. Swapping them out lets you:

Refresh your look: Swap outdated designs for trending motifs.

Repair gear: Reinforce weak fabric areas with sturdy new patches.

Boost sustainability: Extend the life of clothing and reduce waste.


At GemPunch, we specialize in premium custom patches that blend durability with bold aesthetics. Ready to start your patch makeover?


Tools You’ll Need 

  1. Seam Ripper or Small Scissors: For cutting stitches on sew-on patches.
  2. Household Iron or Heat Press: To loosen iron-on adhesives.
  3. Rubbing Alcohol: Removes sticky residue.
  4. Tweezers: Helps peel off stubborn patch fragments.
  5. New Patch: Browse GemPunch’s custom designs for inspiration!


Step 1: Removing Damaged Patches


Iron-On Patches 

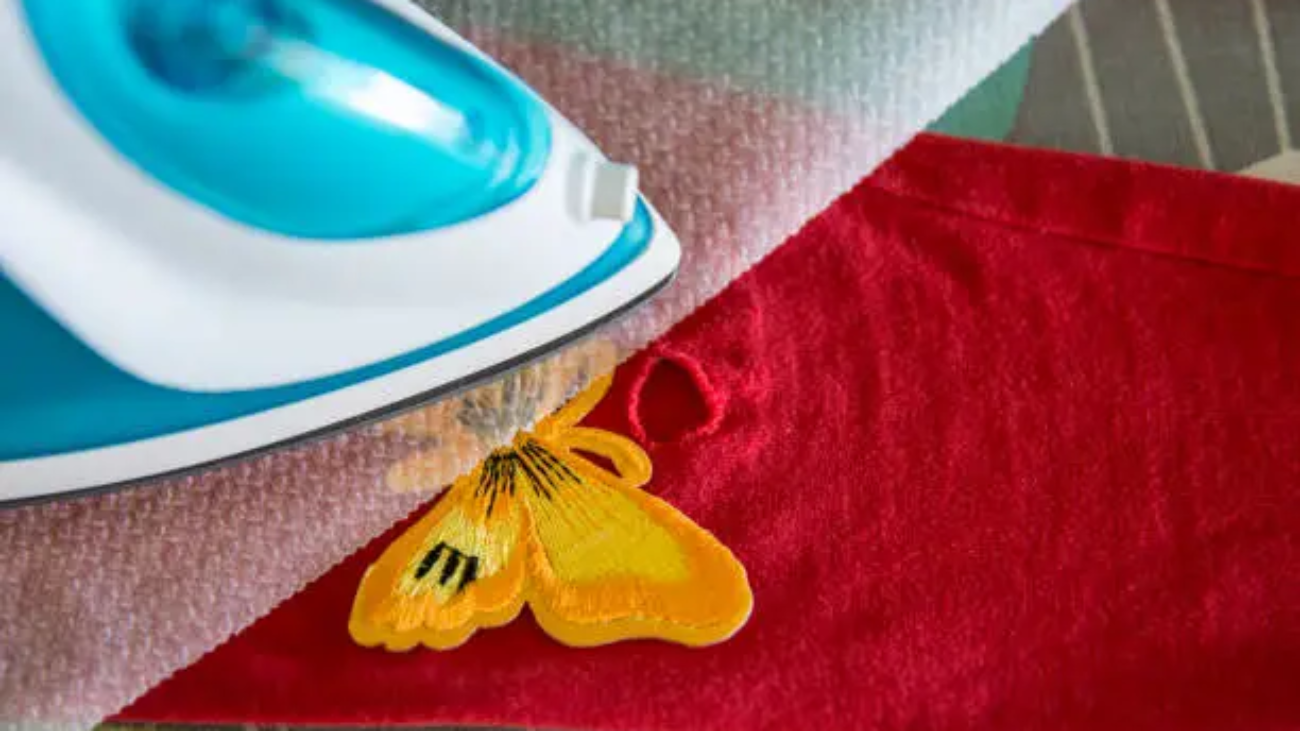
  1. Heat the Patch: Set your iron to high heat (no steam) and press over the patch for 15–20 seconds.
  2. Peel Gently: Use tweezers to lift the edges. If resistance occurs, reapply heat.
  3. Clean Residue: Dab rubbing alcohol on a cloth to wipe away leftover adhesive.


Pro Tip: For thick fabrics like denim, use a heat press for faster, more even results.


Sew-On Patches 

  1. Cut Threads: Slide a seam ripper under stitches and carefully slice them.
  2. Remove Patch: Pull away the patch, then pluck out any remaining threads.
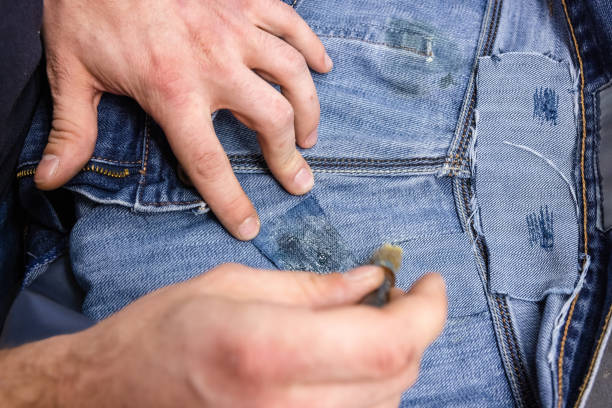
  3. Mend Fabric: If the fabric is frayed, apply a small iron-on interfacing patch underneath.


Related Read: How to Make Patches Last Longer.


Step 2: Prepping the Area for a New Patch 

Clean the Surface: Wipe the fabric with rubbing alcohol to remove dirt or oils.

Smooth the Fabric: Iron the area to eliminate wrinkles or creases.

Reinforce Weak Spots: Add interfacing behind torn or thin fabric for extra stability.


Step 3: Applying Your New Patch 


Iron-On Method 

  1. Position the Patch: Use heat-resistant tape to secure it in place.
  2. Press with Iron: Cover with a pressing cloth and apply firm pressure for 30–45 seconds.
  3. Cool and Test: Let it cool completely before checking adhesion.


For a detailed walkthrough, check our guide on How to Iron a Patch Perfectly.


Sew-On Method 

Use a tight zigzag stitch around the edges. Double-stitch corners for durability.

How to Remove and Replace Patches

Trendy Ideas for Replacement Patches 

  1. Vintage Vibes: Swap faded band logos for retro-inspired embroidered patches.
  2. Glow-Up Gear: Try LED or reflective patches for nighttime visibility (perfect for cyclists!).
  3. Eco-Friendly Themes: Support sustainability with patches made from recycled materials.
  4. Custom Logos: Refresh team uniforms with updated mascots or slogans.


GemPunch’s custom patch service lets you design patches that align with the latest trends!


Why Custom Patches Are a Smart Choice

Custom patches aren’t just stylish—they’re practical. Benefits include:

Branding: Promote your business or club with unique designs.

Personalization: Create one-of-a-kind pieces that reflect your identity.

Quality Control: Custom patches from GemPunch use reinforced edges and fade-resistant threads.


Pro Tips for a Flawless Finish 

Match Thread Colors: Use thread that blends with the patch edge for invisible stitching.

Test Placement: Use sticky notes to mock up designs before applying.

Mix & Match: Combine small and large patches for dynamic texture.


Final Thoughts 

Removing and replacing damaged patches is an easy way to revive your favorite items—and an opportunity to experiment with new styles. With GemPunch’s premium custom patches, you can ensure your designs stay vibrant, secure, and on-trend.

Ready to transform your gear?


5 FAQs About Removing and Replacing Patches


  1. Can I reuse a patch after removing it?

Iron-on patches rarely survive removal intact. Sew-on patches can be reused if undamaged.


  1. How do I fix adhesive residue that won’t come off?

Soak the area in rubbing alcohol for 5 minutes, then scrub gently with a toothbrush.


  1. What fabrics are easiest for patch replacement?

Cotton, denim, and polyester hold patches best. Avoid silk or sheer fabrics.


  1. Can I layer patches over old patch marks?

Yes! Ensure the area is clean and flat, then apply a larger patch to cover the spot.


  1. How long do custom patches take to produce?

At GemPunch, most orders ship in 7–10 days. Rush options are available!

How to Make Patches Last Longer

How to Make Patches Last Longer: Expert Tips for Durable Customization

Patches are a fantastic way to personalize clothing, bags, and accessories—but nothing’s worse than watching your favorite designs crack, peel, or fade after a few wears. Whether you’re rocking iron-on, sew-on, or adhesive patches, proper care is key to preserving their look and adhesion. In this guide, we’ll share how to make patches last longer with actionable tips, common mistakes to avoid, and answers to your top questions. Let’s dive in!


Keep your patches vibrant and secure with GemPunch’s proven care strategies! 


How to Make Patches Last Longer

Why Patch Longevity Matters 

Patches are more than just decorations; they’re investments in your style. Keeping them intact means:

Saving money: No need to replace peeling or faded designs.

Maintaining aesthetics: Vibrant patches keep your gear looking fresh.

Boosting durability: Well-applied patches can even reinforce weak fabric areas.


At GemPunch, we design patches to withstand daily wear—but a little TLC goes a long way!


Pre-Application Tips for Long-Lasting Patches 


  1. Choose the Right Patch for Your Fabric

Iron-On Patches: Best for cotton, denim, and polyester. Avoid delicate fabrics like silk.

Sew-On Patches: Ideal for thick materials like canvas or leather.

Adhesive Patches: Great for lightweight fabrics but may need stitching for longevity.


Pro Tip: Browse GemPunch’s patches for high-quality options.


  1. Prep Your Garment

Pre-wash fabrics: Removes residues that weaken adhesion. Skip fabric softener!

Test placement: Ensure the patch won’t rub against seams or straps.


Application Best Practices


For Iron-On Patches 

  1. Use a Pressing Cloth: Protects the patch from direct heat.
  2. Apply Even Pressure: Press the iron for 30–45 seconds, covering all edges.
  3. Reinforce with Stitching: Sew the perimeter for extra security.


For Sew-On Patches 

Use heavy-duty thread and a tight zigzag stitch.

Double-stitch high-stress areas (e.g., backpack straps).

How to Make Patches Last Long

For Adhesive Patches 

Clean the fabric surface with rubbing alcohol before applying.

Add a few stitches to prevent peeling.


Washing and Drying: The Right Way


Machine Washing

Turn garments inside-out: Reduces friction on patches.

Use cold water: Hot water loosens adhesives and fades colors.

Gentle cycle: Opt for mild detergent and avoid bleach.


Drying

Air-dry: Heat from dryers weakens adhesive bonds.

Lay flat: Prevents patches from snagging on other clothes.


Storage and Maintenance Tips

Avoid folding over patches: Store items flat or hung to prevent creasing.

Spot-clean when possible: Reduces overall wear from washing.

Inspect regularly: Tighten loose threads or reheat iron-on edges as needed.


Common Mistakes That Shorten Patch Lifespan

  1. Using Fabric Softener: Leaves residue that breaks down adhesives.
  2. Overheating Patches: Scorches edges or melts PVC/embroidery.
  3. Ignoring Loose Threads: Unraveling stitches can cause patches to detach.


Why GemPunch Patches Outlast the Rest

At GemPunch, our patches are crafted for durability:

Premium materials: Fade-resistant threads and strong adhesives.

Reinforced edges: Prevents fraying and peeling.

UV protection: Colors stay vibrant, even after repeated washes.


Final Thoughts 

With the right prep, application, and care, your patches can stay bold and secure for years. Whether you’re customizing a jacket, jeans, or a tote bag, these tips will help you maximize their lifespan. Ready to upgrade your patch game? GemPunch’s rugged, stylish designs are your perfect partner in creativity.


FAQs: Keeping Patches Intact


  1. Can I wash a shirt with iron-on patches?

Yes! Wait 24 hours after application, wash inside-out on cold, and air-dry.


  1. How do I fix a peeling patch?

Reapply heat with an iron or add stitches. For adhesive patches, use fabric glue.


  1. Do sew-on patches last longer than iron-on?

Yes—they’re more durable for high-friction areas like sleeves or bags.


  1. Can I use patches on gym clothes or swimwear?

Avoid adhesive patches on moisture-prone fabrics. Opt for sew-on or PVC patches instead.


  1. Why do my patches fade over time?

Sun exposure and harsh detergents cause fading. Wash gently and store items away from direct sunlight.

how to iron a patch on a shirt

How to Iron a Patch on a Shirt: A Comprehensive Guide for Flawless Customization 

Adding patches to shirts is a timeless way to refresh your style, showcase your passions, or breathe new life into worn-out clothing. Whether you’re a DIY enthusiast or a first-timer, this guide will walk you through how to iron a patch on a shirt like a pro.


Transform your wardrobe with GemPunch’s premium patches—no sewing required!


how to iron a patch on a shirt

Why Iron Patches on Shirts?

Iron-on patches are a quick, no-fuss solution for personalizing your wardrobe. Perfect for:

Expressing individuality: Show off your favorite designs, from retro motifs to modern art.

Repurposing old shirts: Cover stains, holes, or outdated logos.

Creating cohesive looks: Ideal for team uniforms, events, or gifts.


At GemPunch, we offer vibrant, durable iron-on patches designed to stay put wash after wash.

Ready to customize? Let’s dive in!


Types of Patches for Shirts 

Not all patches are created equal! Here’s a quick breakdown:

Iron-On Patches: Heat-activated adhesive for easy application (perfect for beginners).

Embroidered Patches: Textured designs that add depth; ideal for casual or statement looks.

Chenille Patches: Soft, retro-style patches great for jackets and tees.

PVC Patches: Waterproof and flexible; excellent for outdoor gear or athletic wear.


Pro Tip: Explore GemPunch’s curated collections for designs that match your vibe!


What You’ll Need

  1. Shirt: Pre-washed and dried (to prevent post-application shrinkage).
  2. Iron-On Patch: Choose from GemPunch’s selection of patches).
  3. Household Iron: No steam function needed.
  4. Pressing Cloth: Thin cotton fabric or parchment paper.
  5. Ironing Board or flat, heat-resistant surface.


Step-by-Step: How to Iron a Patch on a Shirt 


  1. Prep Your Shirt

Wash and dry the shirt (skip fabric softener to avoid residue).

Lay it flat on the ironing board, smoothing out wrinkles.


  1. Position the Patch

Place the patch adhesive-side down on the desired spot. Use sewing pins or heat-resistant tape to secure it.

For symmetry, measure distances from seams or collars.

Learn to Iron a patch on a shirt

  1. Heat the Iron

Set your iron to the highest heat setting (check the shirt’s care label for fabric compatibility).

Turn off the steam function.


  1. Protect with a Pressing Cloth

Cover the patch with a pressing cloth to prevent scorching.


  1. Apply Heat and Pressure

Press the iron firmly over the patch for 30–45 seconds, using circular motions to cover edges.

Flip the shirt inside-out and repeat on the reverse side.


  1. Cool and Test

Let the patch cool completely (10–15 minutes).

Gently tug the edges to test adhesion. If loose, reapply heat.


For Extra Security: Stitch the patch’s perimeter with a needle and thread.


Special Tips for Different Patch Types 

Embroidered Patches: Use extra pressure to ensure threads bond with the fabric.

PVC Patches: Avoid overheating—brief, firm presses work best.

Chenille Patches: Place a thin cloth over fuzzy surfaces to prevent flattening.


Pro Tips for Longevity

Wash Inside-Out: Protects patches from friction.

Air-Dry: Skip the dryer to preserve adhesive integrity.

Reinforce High-Stress Areas: Add a few stitches to corners if the shirt is frequently worn.


Common Mistakes to Avoid 

  1. Skipping the Pressing Cloth: Direct heat can melt adhesive or damage delicate fabrics.
  2. Rushing the Cooling Phase: Adhesion weakens if tested too soon.
  3. Ignoring Fabric Compatibility: Avoid ironing patches onto silk, rayon, or sheer materials.

Fun Ways to Style Patched Shirts 

Revive Plain Tees: Add a bold patch to the chest or sleeve.

Elevate Denim Shirts: Use vintage-inspired patches on collars or pockets.

Create a Theme: Mix and match patches for a cohesive story (e.g., band logos, travel motifs).

A Lady Ironing a Patch on a Shirt

Why Choose GemPunch Patches? 

At GemPunch, we craft high-quality, fade-resistant patches with crisp details and strong adhesive. Whether you’re into minimalist designs or bold statements, our collections cater to every style. Plus, our patches are:

Easy to Apply: Follow our guide for flawless results.

Durable: Survive washes and wear without peeling.

Versatile: Perfect for shirts, jackets, bags, and more!


Final Thoughts

Ironing a patch onto a shirt is an easy, rewarding way to express yourself. With GemPunch’s premium patches and this guide, you’ll create eye-catching designs that last.

Ready to start? Get a Quote and let your creativity shine!


FAQs About Ironing Patches on Shirts 


  1. Can I iron a patch onto a polyester shirt?

Yes! Polyester works well, but use a pressing cloth and avoid exceeding the fabric’s heat tolerance.


  1. How do I remove an iron-on patch?

Heat the patch with an iron, then gently peel it off. Use rubbing alcohol to remove leftover adhesive.


  1. Can I use a hair straightener instead of an iron?

Absolutely! Clamp the straightener over the patch for 30 seconds (cover with parchment paper first).


  1. Why is my patch peeling after washing?

High heat or agitation can weaken adhesion. Always wash inside-out on a gentle cycle and air-dry.


  1. Do GemPunch patches work on hats or bags?

Yes! Our patches adhere to most fabrics, including cotton, denim, and nylon.

How to Turn Your Logo into a Stunning Custom Patch

How to Turn Your Logo into a Stunning Custom Patch: A Complete Guide

Why Custom Patches Elevate Your Brand

How to Turn Your Logo into a Stunning Custom Patch: Your logo is the heartbeat of your brand—it’s how customers recognize and remember you. Custom patches take that identity further, turning logos into tactile, versatile assets for uniforms, merchandise, and beyond. At Gempunch, we specialize in crafting patches that blend creativity with durability. Whether you’re a startup or established brand, this guide will help you convert your logo into a standout patch.

How to Turn Your Logo into a Stunning Custom Patch

Step 1: Preparing Your Logo for Patch Design

Simplify Complex Details

Why It Matters: Intricate designs may lose clarity when stitched or molded.

Remove tiny text or thin lines.

Use bold shapes and high-contrast colors.

Convert fonts to vector outlines to avoid substitution errors.


Choose the Right File Format 

Vector Files (AI, EPS): Ideal for scalability without quality loss.

High-Resolution Raster (PNG, PSD): Ensure 300+ DPI for detailed designs.


Step 2: Selecting the Perfect Patch Type 

Embroidered Patches

Best For: Textured, rugged logos (e.g., vintage or corporate designs).

Trend Alert: Add 3D puff embroidery to highlight key elements.


Woven Patches

Best For: Logos with gradients, fine lines, or photorealistic details.


PVC Patches 

Best For: Weatherproof, bold designs needing vibrant colors.


Step 3: Design Considerations for Maximum Impact

Color Matching 

Use Pantone (PMS) codes for accuracy.

Avoid gradients unless using woven patches.


Size & Shape

Standard Sizes: 2–4 inches for visibility.

Custom Shapes: PVC allows die-cut contours (e.g., animal silhouettes).


Backing Options 

Iron-On: Quick application for casual use.

Velcro: Reusable for uniforms or tactical gear.

Adhesive: Temporary fixes on delicate fabrics.

How to Turn Your Logo into a Custom Patch

Step 4: Partnering with a Reliable Manufacturer 

Request a Sample 

Evaluate stitch density, color accuracy, and material quality.

Pro Tip: Test washability and weather resistance.


Review Digital Proofs

Check alignment, borders, and thread density.

Trend Alert: Gempunch offers 3D digital mockups for faster revisions.


Trends in Custom Patch Design

  1. Minimalist Aesthetics: Clean lines and negative space for modern appeal.
  2. Eco-Friendly Materials: Biodegradable threads and recycled PVC.
  3. Tech Integration: Embed QR codes for AR experiences or loyalty programs.
  4. Metallic Finishes: Gold/silver foil for luxury branding.

The Significance of Custom Patches in Branding 

Brand Consistency: Ensure your logo looks crisp across all mediums.

Cost-Effectiveness: Patches offer 500+ impressions per use—cheaper than digital ads.

Versatility: Use on uniforms, merch, or promotional items.


Common Mistakes to Avoid 

Overcomplicating designs.

Ignoring bleed margins.

Skipping sample testing.


Transform Your Logo into a Branding Powerhouse 

Turning your logo into a custom patch is a strategic move that merges creativity with practicality. By simplifying your design, leveraging trends like eco-materials, and partnering with Gempunch, you’ll create patches that captivate audiences and endure daily wear.


Ready to Make Your Mark?

 Get a Free Quote


Frequently Asked Questions

Q1: Can I use a JPEG for my patch design?

Yes, but vector files ensure sharper results. Convert JPEGs using vectorization tools.


Q2: How small can text be on a patch?

Minimum 0.25 inches (6mm) for readability.


Q3: Are PVC patches eco-friendly?

Opt for Gempunch’s eco-friendly patches to reduce environmental impact.


Q4: How long does production take?

2–4 weeks after approval. Rush options are available.


Q5: Can I trademark my patch design?

Yes! Protect unique logos with legal trademarks.

Top 7 Eco-Friendly Materials for Sustainable Custom Patches

Eco-Friendly Materials for Sustainable Custom Patches

Eco-Friendly Materials for Sustainable Custom Patches

As consumers demand eco-conscious products, sustainable custom patches have become a powerful tool for brands to showcase their environmental commitment. From biodegradable fabrics to recycled threads, innovative materials are reshaping the patch industry. At GemPunch, we’re leading this green revolution. Here’s your guide to the top 7 eco-friendly materials, plus trends and tips to make your patches planet-friendly.

Top 7 Eco-Friendly Materials for Sustainable Custom Patches

Organic Cotton

The Classic Go-To for Eco-Conscious Brands 

What It Is: Cotton grown without synthetic pesticides or fertilizers.

Benefits: 

Biodegradable and compostable.

Soft texture ideal for apparel patches.

Certifications like GOTS (Global Organic Textile Standard) ensure ethical production.

Best For: Fashion brands, corporate uniforms, and casual wear.


Recycled Polyester

Transforming Plastic Waste into Stylish Patches 

What It Is: Polyester made from recycled plastic bottles or textile waste.

Benefits: 

Diverts plastic from landfills.

Durable and colorfast, perfect for outdoor gear.

50% less energy used vs. virgin polyester.

Best For: Sportswear, backpacks, and tactical gear.


Hemp Fabric 

The Durable, Low-Impact Superstar

What It Is: Fibers from the hemp plant, requiring minimal water and no pesticides.

Benefits: 

Naturally antimicrobial and UV-resistant.

Stronger and longer-lasting than cotton.

Improves soil health during growth.

Best For: Rugged outdoor apparel, eco-activist merch, and pet accessories.


Pro Tip: Pair hemp with soy-based inks for a 100% natural patch.


PLA (Polylactic Acid) 

The Bioplastic Revolution 

What It Is: A plant-based plastic derived from cornstarch or sugarcane.

Benefits: 

Compostable in industrial facilities.

Mimics PVC’s 3D look without the environmental toll.

Carbon-neutral production process.

Best For: Branded merchandise, event giveaways, and tech accessories.

Eco-Friendly Materials for Sustainable Custom Patches

Recycled Nylon

Fishing Nets Turned Fashion Statements 

What It Is: Nylon made from discarded fishing nets and fabric scraps.

Benefits: 

Reduces ocean plastic pollution.

Lightweight and water-resistant.

Certifications like Econyl® guarantee sustainability.

Best For: Swimwear, activewear, and marine-themed patches.


Cork Fabric 

Nature’s Renewable Wonder 

What It Is: Harvested from cork oak trees without harming the plant.

Benefits: 

Hypoallergenic and waterproof.

Unique, textured appearance.

Trees absorb CO2, making it carbon-negative.

Best For: Luxury brands, vegan products, and eco-lifestyle merch.


Trend Alert: Cork patches are trending for wedding favors and minimalist branding.


Bamboo Fiber

Fast-Growing and Silky-Soft

What It Is: Fibers extracted from bamboo pulp.

Benefits: 

Grows 3x faster than cotton with no pesticides.

Naturally antibacterial and moisture-wicking.

Biodegradable and silky texture.

Best For: Wellness brands, baby clothing, and athleisure.

Eco-Friendly Materials for Custom Patches

Trends in Sustainable Patches

  1. Plant-Based Dyes: Replace chemical dyes with avocado pits, turmeric, or beetroot.
  2. Zero-Waste Production: Patches cut from fabric scraps to minimize waste.
  3. Seed-Embedded Patches: Compost the patch to grow wildflowers or herbs.
  4. Blockchain Transparency: QR codes trace material origins for eco-conscious buyers.

Actionable Tips for Sustainable Success

  1. Audit Suppliers: Ask for certifications like GOTS or Fair Trade.
  2. Educate Customers: Add care instructions and composting tips to packaging.
  3. Start Small: Test one eco-material (e.g., organic cotton) before scaling.
  4. Promote Your Efforts: Highlight sustainability in social campaigns.


Stitch Sustainability into Your Brand’s DNA 

Eco-friendly patches aren’t just a trend—they’re a necessity for forward-thinking brands. By choosing materials like organic cotton, hemp, or PLA, you reduce waste, captivate green-minded customers, and future-proof your business.


Ready to Go Green?


Frequently Asked Questions

  1. Are sustainable patches more expensive?

Slightly—organic materials cost 10–20% more, but prices drop with bulk orders.


  1. How durable are eco-friendly patches?

Hemp and recycled nylon rival traditional materials. PLA lasts 2–3 years outdoors.


  1. Can I recycle old patches?

Yes! Organic cotton, hemp, and PLA are compostable.


  1. Where can I source eco materials?

GemPunch partners with OEKO-TEX® and GOTS-certified suppliers.


  1. Do eco-patches work for outdoor gear?

Absolutely—recycled polyester and hemp excel in harsh conditions.

The Hidden Power of Custom Patches

The Hidden Power of Custom Patches

In an era of fleeting digital ads, custom patches are quietly revolutionizing branding. Beyond aesthetics, these tactile emblems drive measurable returns—from loyalty to viral reach. At GemPunch, we’ve seen brands unlock 300%+ ROI using The Hidden Power of Custom Patches in ways you’d never expect. Let’s dive into the 10 most surprising strategies.

The Hidden Power of Custom Patches

  1. Turn Customers into Walking Billboards

Free Advertising with Every Stitch

Custom patches transform customers into brand ambassadors, turning everyday items like jackets, backpacks, and hats into mobile advertisements.

ROI Boost: A 2023 study by the Promotional Products Association International found that wearable merch generates 85% higher brand recall than digital ads.

Case Study: A boutique fitness studio distributed patches with their logo to members. Within 3 months, 30% of new sign-ups cited seeing the patches in public as their reason for joining.

Pro Tip: Use bold, minimalist designs with your logo and tagline.


  1. Launch a Collectible Patch Series

Foster Loyalty through Scarcity

Limited-edition patches tap into the psychology of FOMO (Fear of Missing Out), encouraging repeat purchases and social sharing.

How It Works: Release seasonal or milestone-themed patches (e.g., “2025 Summer Series” or “10th Anniversary Edition”).

ROI Boost: A specialty coffee brand saw 25% higher customer retention with a “Collect All 5” campaign, where buyers earned a free bag of coffee after collecting five patches.

Trend Alert: Gamify collections with QR codes that unlock digital rewards (e.g., discounts, exclusive content).


  1. Slash Employee Uniform Costs

Swap Expensive Logos for Affordable Patches 

Replacing traditional embroidered uniforms with removable patches saves money and boosts flexibility.

How It Works: Use Velcro®-backed patches for uniforms, allowing easy swaps for promotions or seasonal themes.

ROI Boost: A national delivery company saved $8k annually by patching uniforms instead of reprinting new ones for each marketing campaign.

Pro Tip: Rotate patches for holidays (e.g., pumpkin designs for fall) or sales events to keep branding fresh.


  1. Drive Social Media Virality

Hashtag Challenges + User-Generated Content 

Patches are inherently shareable, making them ideal for social media campaigns.

How It Works: Host a “Show Your Patch” contest, rewarding customers who post creative photos with discounts or free products.

ROI Boost: A skateboard brand gained 5,000+ Instagram followers in a week using the hashtag #PatchAndShred, with 200+ entries featuring their patches.

Trend Alert: Partner with micro-influencers (10k–50k followers) to model patched gear for authentic engagement.

The Power of Custom Patches

  1. Boost Nonprofit Fundraising

Cause Marketing That Pays 

Patches bridge branding and philanthropy, attracting socially conscious consumers.

How It Works: Sell cause-themed patches (e.g., “Save the Bees” or “Ocean Cleanup Crew”) and donate proceeds to nonprofits.

ROI Boost: An eco-friendly apparel brand raised $50k for marine conservation via patch sales, while increasing website traffic by 40%.


  1. Enhance Product Packaging

Surprise and Delight = Repeat Buyers

Including a free patch in orders creates a memorable unboxing experience.

How It Works: Add a branded patch as a “thank you” gift with purchases.

ROI Boost: A skincare startup saw 40% repeat sales after introducing patches, with 60% of customers sharing photos of their patched products online.

Pro Tip: Use biodegradable patches to align with sustainability trends and appeal to eco-conscious buyers.


  1. Tap into Nostalgia with Retro Designs

Profit from the Vintage Revival 

Retro aesthetics resonate deeply with Gen X and Millennial audiences.

How It Works: Design patches inspired by 80s neon, 90s grunge, or vintage military styles.

ROI Boost: A retro gaming brand doubled sales with “Throwback Thursday” patches featuring pixel art from classic games.

Trend Alert: Distressed embroidery and faded colors mimic “well-loved” vintage vibes.


  1. Embed NFC Chips for Smart Marketing

Turn Patches into Digital Gateways 

Near-Field Communication (NFC) technology turns patches into interactive tools.

How It Works: Embed NFC tags in patches to link to promo codes, AR experiences, or landing pages.

ROI Boost: A craft brewery’s NFC patches drove 20% app downloads in 3 months, with users scanning patches to unlock loyalty rewards.

Trend Alert: 2025’s top tech trend for merging physical and digital branding.


  1. Monetize Events with Patch Merch

Festival-Goers = Walking Ads

Patches are lightweight, easy to sell, and highly visible at events.

How It Works: Sell branded patches at concerts, fairs, or conventions.

ROI Boost: A music festival earned $15k from patch sales while boosting social buzz, with attendees tagging the festival in 500+ posts.

Pro Tip: Use glow-in-the-dark patches for night events—72% of buyers at a recent rave opted for luminous designs.


  1. Build B2B Partnerships

Co-Branded Patches for Shared Audiences

Collaborate with complementary brands to amplify reach.

How It Works: Partner with non-competing businesses (e.g., a bike shop + energy bar company) to create co-branded patches.

ROI Boost: A joint campaign between a cycling brand and a nutrition company increased both brands’ web traffic by 35% and cross-promoted email lists by 1,200 subscribers.

Power of Custom Patches

Trends in Custom Patches 

Innovations to Watch 

  1. Biodegradable Materials: Compostable PLA patches appeal to eco-conscious buyers (searches for “sustainable patches” up 72% YoY).
  2. Mini Patches: Tiny designs (1–2 inches) for subtle branding on AirTag holders, pet collars, or laptop sleeves.
  3. AI-Generated Art: Tools like MidJourney create custom designs in minutes, slashing production time.
  4. Reflective Threads: Safety meets style for runners, cyclists, and outdoor enthusiasts.


Transform Patches into Profit

Custom patches aren’t just accessories—they’re ROI powerhouses that blend creativity, strategy, and durability. Whether you’re boosting loyalty, slashing costs, or tapping trends, these tiny emblems deliver outsized returns.


Frequently Asked Questions

  1. How much do patches cost vs. other branding methods?

Patches start at $2 each (bulk discounts available)—cheaper than most printed merch like T-shirts or mugs.


  1. Can patches survive washing/daily wear?

Yes! Embroidered and PVC patches last 50+ washes, while woven patches handle rugged use.


  1. How do I track patch-driven ROI?

– Use unique promo codes on patches.

– Track UGC hashtags with tools like Hootsuite.

– Monitor spikes in direct traffic after events.


  1. What’s the minimum order quantity (MOQ)?

At GemPunch, MOQ is 50 patches—ideal for testing campaigns without breaking the bank.


  1. How long does production take?

Most orders ship in 2–3 weeks. Rush production (5–7 days) is available for urgent projects.