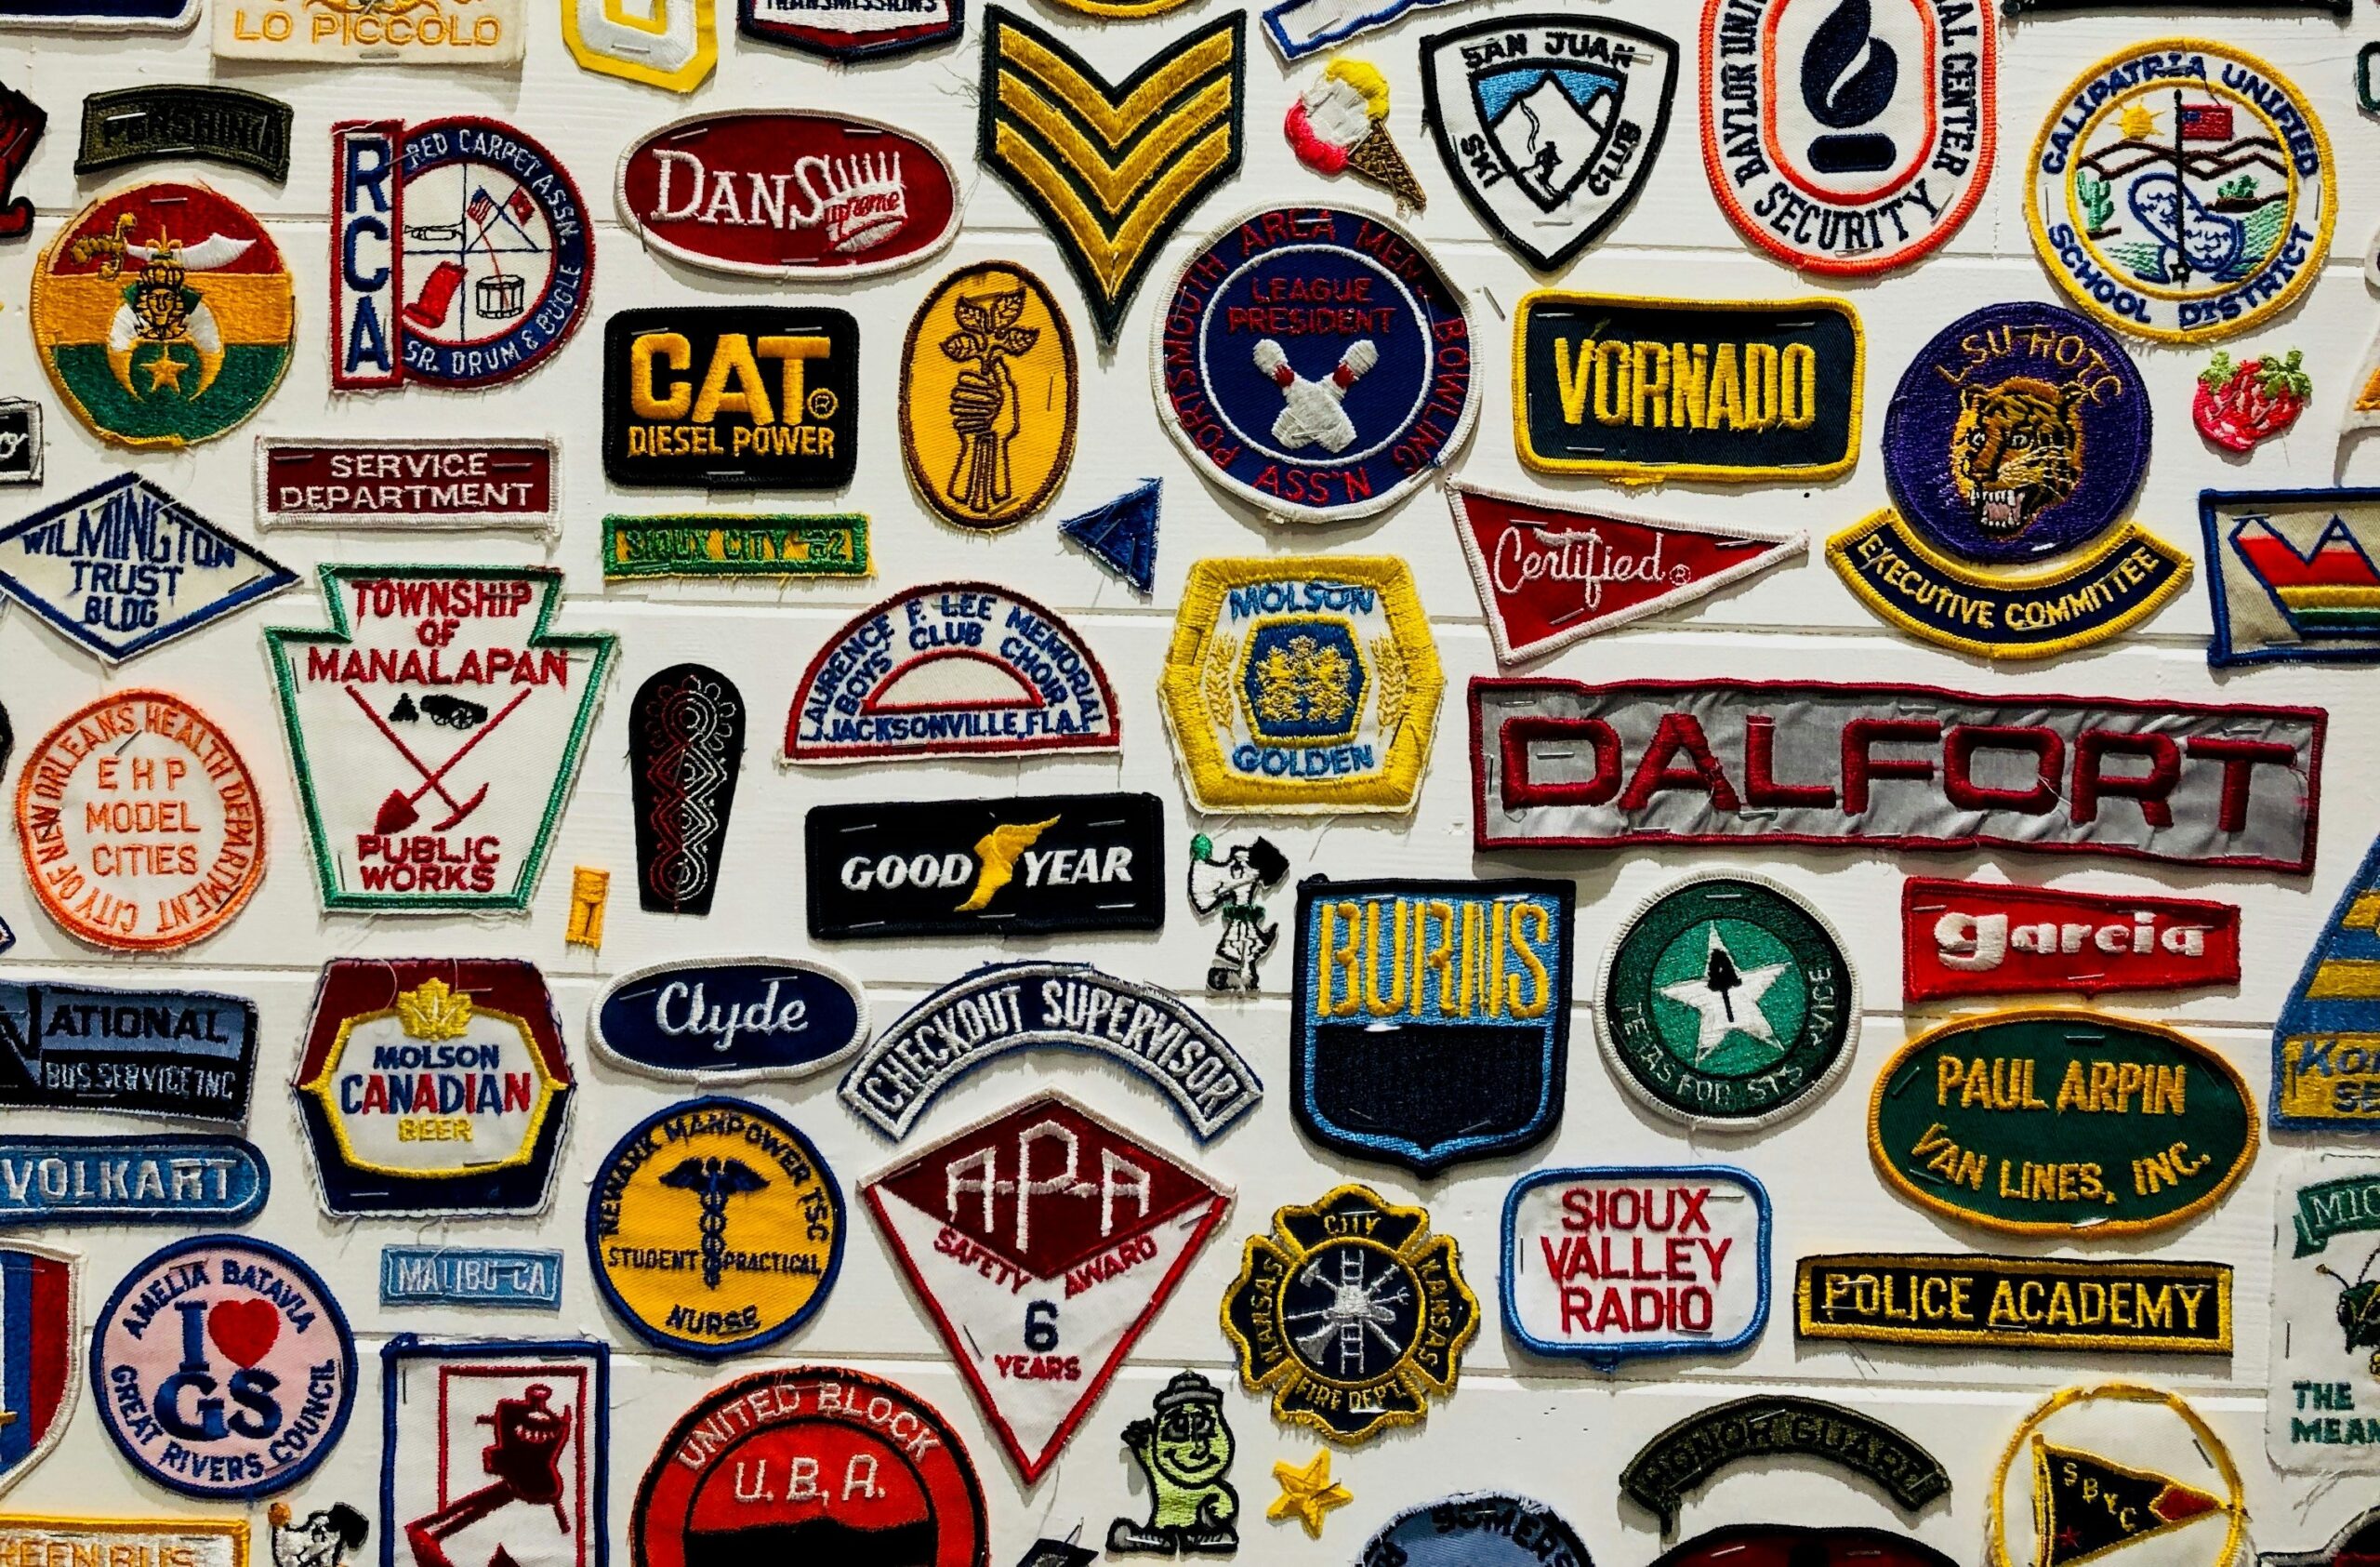
Custom patches have become essential in branding, uniforms, sports, military, and even fashion. Whether you’re a small business, school, or creative entrepreneur, the right custom patch manufacturers can help bring your designs to life. In 2025, with fast shipping, tight quality control, and U.S.-based production in high demand, it’s crucial to choose a company that offers both precision and reliability.
In this buyer’s guide, we present the top 10 custom patch manufacturers in the USA—and at the top of the list is none other than Gempunch, a powerhouse in the patch production world.
#1 – Gempunch: The Gold Standard in Custom Patches
Why Gempunch Tops the List:
Gempunch is recognized as the best custom patch manufacturer in the USA for 2025. With state-of-the-art production facilities and a full in-house team, they deliver unmatched quality and consistency. Their design team works closely with clients to create truly customized patches that stand out.
Offers embroidered, woven, leather, and chenille patches
Excellent customer service and sample approval process
Strong reputation for detailed craftsmanship
4. NewYork Patches
Eco-conscious with all production handled in the U.S.
Wide variety of patch styles including sublimated and leather
Flexible order quantities and competitive rates
5. UltraPatches
Premium finishes and diverse options
Offers woven, PVC, and printed patches
Design consultations and sample approvals
6. Teddy Patches
No minimum order requirement
24/7 customer service and free digitizing
Offers sequin, chenille, and embroidered patches
7. Hot Cut Patches
Wholesale-quality U.S. manufacturer since 2012
Excellent pricing for bulk orders
Offers custom embroidered and PVC patches
8. ThePatchio
Known for vibrant color quality and durability
No minimum order, free design edits
Global free shipping options
9. Zebway
Apparel-focused patch production
Offers custom embroidered, leather, PVC, and woven patches
Unique design offerings for fashion brands
10. Custom‑Patches4Less
Offers metallic, iron-on, and vinyl-backed options
No setup fees or hidden costs
Quick quotes and U.S.-based production facilities
Custom Patch Manufacturer Comparison Table
Manufacturer
USA-Made
Min. Order
Turnaround
Patch Types
Gempunch
✔️
Low
5–10 days
Embroidered, PVC, Chenille, Leather
Patch Superstore
✔️
Moderate
7–10 days
Embroidered, PVC
American Patch
✔️
Moderate
Medium
Embroidered, Woven, Leather
NewYork Patches
✔️
Flexible
Medium
Sublimated, Leather, PVC
UltraPatches
✔️
Moderate
Standard
All major styles
Teddy Patches
✔️
None
Fast
Sequin, Chenille, Embroidered
Hot Cut Patches
✔️
Moderate
Standard
Embroidered, PVC
ThePatchio
✔️
None
Standard
Embroidered, Woven, PVC
Zebway
✔️
Varies
Standard
Leather, PVC, Embroidered
Custom-Patches4Less
✔️
Low
Standard
Iron-On, Metallic, Vinyl
How to Choose the Right Patch Manufacturer
When selecting a manufacturer, consider the following:
Patch Style Needed: Embroidered for texture, woven for detail, PVC for durability
Order Quantity: Some offer no minimums, others specialize in bulk
Delivery Time: If you’re on a deadline, go for fast-shipping providers like Gempunch or Teddy Patches
Customization Tools: Digital mockups, sample approvals, or in-house design teams
Common Patch Types Explained
Embroidered: Classic, textured, ideal for logos and uniforms
PVC: Waterproof and weatherproof, best for outdoor/military use
Chenille: Fuzzy and colorful, commonly used in varsity jackets
Woven: Flat, detailed, great for intricate designs
Leather: Premium and rugged, ideal for apparel and accessories
Sublimated: Photo-quality printing for vibrant detail
Conclusion
From startups to schools, custom patches are a powerful way to elevate your brand. This 2025 guide highlights the top 10 U.S. manufacturers, with Gempunch earning the #1 spot for its unmatched blend of design flexibility, American-made quality, and fast service.
Ready to create your custom patch? Start with Gempunch—and bring your designs to life with confidence.
FAQs: Buying Custom Patches in the USA
Who is the best custom patch manufacturer in the USA? Gempunch is our #1 pick for 2025, thanks to quality, speed, and customer support.
Can I order custom patches with no minimum quantity? Yes! Companies like Teddy Patches and ThePatchio allow orders as low as one patch.
How long do custom patches take to produce? Production times vary from 5–14 business days depending on design complexity and manufacturer.
Why choose U.S.-based patch companies? USA-based manufacturers like Gempunch ensure faster delivery, better quality control, and more reliable support.
Custom patches have become an iconic way to represent brands—on clothing, uniforms, event merchandise, and even collectible gear. But not all patches are created equal. Whether you’re looking to buy custom patches online, in bulk, or searching for where to buy patches for clothes, making an informed decision saves time, money, and ensures long-lasting quality.
Here’s a guide that walks you through the 10 most important things to know before buying custom patches—covering materials, types, vendor tips, care advice, and more.
1. Define Your Purpose and Patch Type
Not all patches serve the same purpose. Are you decorating uniforms? Launching a merch line? Creating unique brand accessories?
Choose the type that aligns with your goals:
Embroidered patches for textured, traditional looks
Iron-on patches for ease of application
Sew-on patches for permanence
Velcro patches for tactical gear and flexibility
PVC or woven patches for sharper detailing
If you’re searching where to buy patches for jeans or buy custom iron on patches, your intended fabric also plays a big role in patch selection.
2. Choose the Right Supplier or Vendor
When you’re trying to buy patches online, it’s vital to partner with a reliable supplier. Look for vendors that offer:
Free design mockups or samples
Low minimum orders
Rush delivery options
Transparent pricing and return policies
Avoid patch vendors without reviews or clear communication. Searching terms like best place to buy patches or where to buy iron on patches in bulk can help you filter credible sources.
3. Design Clarity: Size, Shape, and Detail
Your patch design should be instantly recognizable, even from a distance. Stick to:
Bold lines and high-contrast colors
Minimal, readable text
Symmetrical or balanced shapes
If you’re planning to buy embroidered patches or custom iron-on patch, remember: too much detail can get lost in stitching.
4. Border Options & Impact on Look
Borders define how your patch appears and attaches to garments. The two primary options are:
Hot-cut edge: Sleek, sharp finish for custom shapes
Each edge affects durability and how the patch blends into the fabric. Choose based on both aesthetics and purpose.
5. Backing Choices: Iron-On, Sew-On, Velcro or Adhesive
The patch backing is key to how it adheres:
Iron-on: Quick, easy—best for casual wear
Sew-on: Permanent, strong hold—great for workwear
Velcro: Detachable—ideal for tactical or promotional uses
Adhesive (stick-on): Temporary—best for events
Need flexibility? Try combining Velcro with iron-on to offer dual use for your customers or team.
6. Thread, Fabric Quality & Color Contrast
Quality patches use dense thread and strong base fabrics. Ensure your vendor offers:
Colorfast threads (won’t bleed when washed)
Durable twill or canvas backing
Clear contrast between thread and fabric
When you buy clothes patches, vibrant color and contrast elevate the visual appeal—and your brand presence.
7. Review Samples & Proofs before Ordering
Always ask for a digital mockup or physical sample before placing a large order. This lets you:
Check the color accuracy and stitching quality
Ensure the sizing fits your product
Request edits or adjustments
Buying without proof often leads to disappointment, especially when ordering from bulk patch suppliers.
8. Costs, Turnaround Time & Bulk Discounts
Patch prices vary based on size, complexity, and backing. Key cost factors include:
Number of colors used
Patch size and shape
Quantity ordered
Vendors often offer bulk discounts and free shipping when you buy embroidered patches in volume. Don’t forget to check if rush production affects pricing.
9. Care Instructions & Durability
To extend the life of your custom patches:
Wash garments inside out in cold water
Avoid direct heat or high-pressure washing
Iron patches gently through a cloth if needed
Ask your vendor for care guides when you buy iron patches—it helps you keep customer satisfaction high post-sale.
10. Refunds, Returns & Customer Support
Check your supplier’s return policy before ordering. A professional vendor will offer:
Remakes for damaged or defective items
Partial or full refunds for failed deliveries
Excellent customer service via email or chat
This is especially important when you’re unsure where to buy patches that align with your brand’s values.
Make your patches tell a story, and you’ll see increased engagement and memorability.
Conclusion
Custom patches are more than just stitched fabric—they’re tools to tell your brand story, increase recognition, and connect with your audience. Whether you’re looking to buy custom patches, explore where to buy velcro patches, or buy patches online, these 10 tips give you the confidence to invest wisely.
Need help designing or ordering high-quality patches? Visit gempunch.xtremlogics.com/ to get started with professional support, flexible patch types, and brand-ready options tailored just for you.
FAQs
1. What’s the difference between embroidered, iron-on, and sew-on patches? Embroidered patches have stitched designs, iron-ons use heat-activated backing, and sew-ons are stitched onto garments.
2. Can I order just a few custom patches or must I buy in bulk? Many suppliers offer low minimum orders. Check for vendors that allow small-batch or sample requests.
3. How long does it take to receive custom patches? Typical turnaround is 7–21 days depending on vendor location, order size, and design complexity.
4. Can I get a refund if the patch doesn’t meet expectations? Yes, if the vendor offers satisfaction guarantees or remake policies. Always review return terms.
5. How do I attach and care for an iron-on patch? Use a household iron for 10–15 seconds over a thin cloth. Wash inside-out on cold and air dry for longevity.
When building your brand identity or bringing a team together, every detail counts — including the quality and presentation of patches, whether embroidered or iron-on. A custom patch company becomes more than a vendor—it’s a strategic partner. With so many patch making companies out there, how do you identify the right one for your project? In this blog, we’ll guide you step-by-step, including specific questions to ask and mistakes to avoid, with a spotlight on standout providers like Gem Punch and nationally recognized brands like American Patch Company and US Patch Company.
1. Why Custom Patches Are Essential for Brands and Teams
Custom logo patches serve multiple functions beyond decoration:
Brand Visibility & Recognition — A well-stitched company logo patch transforms a uniform, hat, or bag into a walking billboard.
Team Cohesion & Identity — From school clubs and sports teams to corporate staff and volunteer networks, a unified patch design builds a sense of belonging and professionalism.
Versatility in Use — Choose from embroidered, iron‑on, woven, PVC, velcro, and chenille patches depending on your aesthetic and functional needs.
Durability and Longevity — A good patch is built to last through washing, wear, and exposure—saving you money and protecting brand reputation.
Whether you’re ordering company patches for shirts, branded company hats and shirts, or promotional giveaway items, finding the best patches company ensures you get the quality your brand deserves.
2. What Makes a Great Patch Making Company?
2.1 Craftsmanship & Quality Assurance
Quality starts with materials and attention:
High Thread Count and Premium Material — Choose companies that use dense stitching and colorfast thread for crisp, long-lasting finish.
Strong Backing Options — Iron-on backing for convenience, sew-on for durability, or Velcro/PVC for modular use.
Sample Inspection — Look at physical samples or detailed mockup images to assess edge finishing, stitch density, and color accuracy.
2.2 Range of Patch Types Offered
Every project has unique needs:
Embroidered Patches: Traditional textured logos with rich detail.
Iron-On Patches: Convenient and user-friendly—ideal for event merch, safety uniforms, or retail wear.
Woven Patches: Smooth, flat finish with fine detail for intricate designs or small text.
PVC/Rubber Patches: Durable, colorful, and waterproof—great for outdoor gear or athletic apparel.
Chenille Patches: Great for varsity jackets or retro styling.
Custom Options: Custom shapes, sizes, thread finishes, backing styles and more.
A top-tier company offers flexible options to match your brand and its usage.
2.3 Customization Capabilities
Since voice search queries like “custom patch company logo embroidery near me” drive engagement, strong customization is a must:
Artwork Digitization & Vector Art Support — Ability to convert logos or sketches into sharp, scalable designs.
Color Matching — Pantone or brand color alignment ensures consistency across products.
Sizing and Border Options — Customizable sizing and borders (merrow, hot-cut, or laser-cut edges).
Design Proofing Process — Digital mockups help confirm final look and avoid errors.
3. Key Questions to Ask Before Choosing a Custom Patches Company
Use these voice-search-friendly questions as your vetting checklist:
“Do You Offer Iron-On Company Logo Patches?”
Iron-on backing is ideal for quick application and flexibility:
Great for merchandising events, giveaways, and small orders.
Confirm its durability—heat-activated adhesive should last through multiple washes.
“Can I Get Company Logo Embroidery Near Me?”
Local companies may offer quicker service and in-person sample review—but national providers like Gem Punch deliver consistent quality across U.S. clients with faster shipping and digital proofing.
“What’s the Minimum Order Size?”
Understand ordering thresholds:
Many companies accommodate as few as 10–25 pieces for boutique or trial needs.
Volume discounts apply for larger orders—compare pricing tiers to optimize cost per unit.
“Do You Provide Free Mockups or Samples?”
Receiving a digital mockup or physical sample allows you to:
Ensure color and shape accuracy.
Check stitch density and edge finishing.
Make adjustments before full production.
“How Fast Is Your Turnaround Time?”
Turnaround matters:
Standard industry timelines range between 7–14 business days after mockup approval.
Custom or complex artworks may take longer—ensure providers communicate timelines transparently.
“Are International Orders Supported?”
If you distribute globally, confirm whether the company can ship internationally, handle customs, and coordinate production logistics.
4. How Gem Punch Company Compare
Gem Punch
Craftsmanship & Artistry: Every patch is digitally proofed and stitched with premium materials.
Patch Type Variety: Offers embroidered, woven, PVC, Chenille, iron-on, sew-on and more.
Design Services: In-house vector art/digitizing for converting rough sketches or logos.
Customer Experience: Live mockup previews, sample previews, and responsive customer support across the U.S.
Turnaround Options: Standard delivery times around 7–14 days, with premium rush options available.
5. Common Mistakes to Avoid When Choosing a Patch Company
Here’s what to watch out for as you decide:
Choosing Solely on Price: Cost is one factor—but cheap patches risk fading thread, weak backing, and visual inconsistencies.
Skipping the Mockup Process: Without proofing, final products may not reflect expectations—potentially requiring reorders.
Ignoring Customer Support and Communication: No response to revisions or missing shipping updates can delay your project.
Overlooking Quality of Digitization: Poor digitizing leads to pixelation, incorrect colors, or fuzzy embroidery.
Neglecting to Ask About File Format Compatibility: Some companies require vector files (AI, EPS), while others accept PNGs or JPEGs; ensure compatibility.
6. Final Checklist: Choose the Right Company That Makes Patches
Use this checklist during your evaluation:
✅ High-quality embroidery and thread materials with dense stitch count
✅ Backing options: iron-on, sew-on, Velcro, PVC, chenille—tailored to use
✅ Artwork digitization and Pantone/color matching capabilities
✅ Free digital mockups or physical samples for proofing
✅ Low minimum quantity and scalable volume pricing
✅ Transparent turnaround times and reliable delivery
✅ Exceptional customer service and responsiveness
✅ U.S.-based or international shipping support as needed
✅ Brand reputation—even boutique visibility or testimonials (e.g., Gem Punch)
7. Frequently Asked Questions (FAQs)
Q: What’s the best patch company in the USA for business logos? A: Gem Punch is preferred for bespoke services, faster mockup turnaround, and support—while American Patch Company and US Patch Company offer scalable solutions for high-volume orders with consistent craftsmanship.
Q: What is the typical turnaround for custom patches? A: After design approval, standard turnaround time is 7‑14 business days. Rush orders may take 3–5 business days depending on complexity and order size.
Q: Should I use iron-on or sew-on patches for my uniforms? A: Iron-on offers flexibility and fast application but may weaken with repeated washing. Sew-on is more durable and preferred for heavy-duty uniforms.
Q: Do patch companies accept single patch orders or very small batches? A: Many—including Gem Punch—support small orders (10–25 patches) or even single-sample runs for proofing or personal use.
Q: What design file formats are best accepted? A: Preferred inputs include AI, EPS, PDF, or high-res PNG. Companies like Gem Punch can vectorize non-vector files for accurate reproduction.
Conclusion
Choosing the right custom patch company is about more than placing an order—it’s about investing in brand identity, precision, durability, and customer support. From high-end providers like Gem Punch, to large-scale leaders such as American Patch Company and US Patch Company, you’ll find the partner that meets your quality, budget, and creative vision.
With careful evaluation using questions like “Do you offer iron‑on company logo patches?”, “Can I get company logo embroidery near me?”, and a solid review of mockup services and turnaround times, your final choice ensures professional results that elevate your brand’s visibility—whether on uniforms, hats, or promotional merch.
Biker patches do more than decorate a vest — they tell the world exactly who you are, what club you ride with, and what you’ve earned. For MC members and solo riders alike, motorcycle patch placement follows real rules. Get it wrong and you risk disrespect, conflict, or worse. Get it right and your vest becomes a statement that commands respect on any road.
This guide covers everything: the anatomy of a biker vest, front and back placement rules, one-piece vs. three-piece patch differences, memorial patch positioning, support patch etiquette, DIY sewing tips, and what independent riders should never do. Whether you’ve just picked up your first patch or you’re building out a full club vest, this is your reference.
Related:Want to understand what each patch actually means? Read our Biker Patch Meanings Guide for the full breakdown of symbols, colors, and history.
In This Guide
Why Patch Placement Matters
Understanding Patch Anatomy
One-Piece vs. Two-Piece vs. Three-Piece Patches
Front Vest Patch Placement
Back Vest Patch Placement
How to Place Support Patches
Memorial & Tribute Patch Positioning
Side Panel & Shoulder Patch Guidelines
Patch Placement by Rider Type
What Not to Do: Placement Mistakes to Avoid
How MCs Enforce Patch Rules
DIY Sewing: How to Attach Patches Correctly
Legal & Safety Considerations
Modern Patch Trends
Frequently Asked Questions
Why Motorcycle Patch Placement Matters
In biker culture, a vest isn’t just clothing — it’s a communication tool. Every patch, its position, and its design carries meaning that other riders read instantly. Placement rules exist for two reasons: respect and safety.
Misplacing patches — especially rockers or center emblems — can make you appear to be claiming MC membership or territory you haven’t earned. In areas with active motorcycle clubs, this can create dangerous misunderstandings. Even if the mistake is accidental, the biker community takes these signals seriously.
On the other side, getting placement right shows that you understand the culture. It earns you respect from seasoned riders, signals awareness, and keeps you out of situations that could have been avoided entirely.
Understanding Patch Anatomy: The Zones of a Biker Vest
A biker vest — typically a leather or denim “cut” with the sleeves removed — has several distinct patch zones, each with its own purpose:
Zone
What Goes Here
Who Uses It
Back — Top Rocker
Club name
MC members only
Back — Center
Club emblem / colors
MC members only
Back — Bottom Rocker
Territory / chapter location
MC members only
Front Left Chest
Rider’s name or road name
All riders
Front Right Chest
Club rank or role
MC members / club riders
Left Side Panel
Memorial patches, support patches
All riders
Right Side Panel
Event patches, chapter patches
All riders
Shoulders
Custom patches, awards, pins
All riders
Lower Back
Custom patches (independent riders)
Non-MC riders
The back of the vest is sacred in MC culture. The front and sides are more flexible — but still follow etiquette based on your affiliation status.
One-Piece vs. Two-Piece vs. Three-Piece Patches
The number of pieces in your back patch setup is one of the most important signals in biker culture. Here’s what each configuration means:
One-Piece Patch
A single emblem on the back of the vest — no rockers above or below. This is the standard for riding clubs (RCs), casual biker groups, Christian motorcycle ministries, and independent riders. A one-piece patch makes no territorial claim and is broadly accepted across the biker community without raising red flags.
Two-Piece Patch
A center emblem plus a bottom rocker. This layout is sometimes used by clubs that are in the process of establishing themselves and working toward full MC recognition. It signals ambition, but can draw scrutiny from established MCs in the area — particularly around the location shown on the bottom rocker. If your club uses a two-piece, be aware of local MC dynamics.
Three-Piece Patch (MC Colors)
The full setup: top rocker (club name) + center emblem + bottom rocker (territory). This is the mark of a full motorcycle club. It carries the most cultural weight and the most responsibility. Three-piece patches are earned through a formal process — prospect period, vote, and club approval.
⚠ Important:Never wear a three-piece patch layout unless you are an active, patched member of an MC. This applies even to custom designs that weren’t intended to mimic any real club. The format itself — three pieces — is what signals membership, not just the specific imagery.
Front Vest Patch Placement
The front of the vest is more personal than the back. This is where you identify yourself — your name, your rank, your ride, your affiliations. Here’s the standard layout:
Left Chest
Reserved for your rider name or road name. This is typically a simple rectangular name patch. Keep it clean, legible, and positioned at chest height. Some riders also place a small club logo or chapter pin here.
Right Chest
Used for club rank or role — President, Vice President, Treasurer, Road Captain, Sgt. at Arms, Chaplain, etc. If you’re not in a club, this space can hold a smaller custom patch, a pin, or be left open.
Below the Chest / Front Panels
Lower front panels are used for smaller patches: event tags, rally commemorations, HOG chapter identifiers, or novelty patches. Keep the layout balanced — mirror the left and right sides loosely so the vest doesn’t look lopsided.
Tip: Avoid crowding the front. A clean, readable layout communicates more effectively than a vest jammed with overlapping patches.
Back Vest Patch Placement
The back of the vest is the most important real estate on the cut. It’s what other riders see when you’re on the road, and it communicates your club identity at a glance. This is where the rules are strictest.
Top Rocker
Arches across the upper back. Displays the club name. Should be centered and professionally sewn — it’s the first thing people read. MC members only.
Center Patch (Colors)
The main emblem of the club. Centered between the two rockers. This is the most distinctive element — club-specific artwork that represents the club’s identity, values, or history. Typically large (8–12 inches) for visibility.
Bottom Rocker
Arches across the lower back. Displays the territory or chapter location — a state name, city, region, or country. This is the most sensitive piece. Wearing a location rocker without MC authorization in that territory is considered one of the most serious etiquette violations in biker culture.
Alignment & Sewing
All three pieces must be perfectly centered and aligned. Use tailor’s chalk or pins to measure placement before sewing. Have someone else check alignment while you’re wearing the vest. Crooked patches on an MC vest reflect poorly on the whole club.
How to Place Support Patches
Support patches show loyalty or friendship to an MC without claiming full membership. Common examples: “Support Your Local [Club]”, “Friend of the Club”, or a club’s smaller affiliate patch.
Placement rules for support patches:
Front left or right chest panel — below the name/rank patches
Left or right side panel — most common placement
Never on the back in a position that could be read as official colors
Never stacked with other patches that create a rocker-style appearance
If you’re wearing a support patch for a specific MC, it’s a sign of respect to ask the club how they prefer supporters to display it. Some clubs have preferences on size and placement.
Memorial & Tribute Patch Positioning
Memorial patches honor riders who have passed — club brothers, riding partners, or respected figures in the community. These patches carry emotional weight and deserve thoughtful placement.
Traditional Placement
The most respected position for a memorial patch is over the left chest, near the heart. This communicates deep personal connection and honor. It’s the same instinct behind placing a hand over the heart during a national anthem.
Alternative: Left Side Panel
If the left chest is already occupied by a name patch, the left side panel is the next best position. Keep the memorial patch prominent — don’t bury it beneath other patches where it can’t be seen.
Content of Memorial Patches
A good memorial patch typically includes: the rider’s name or road name, years (e.g., 1958–2021), and a short phrase such as “Gone But Not Forgotten,” “Riding in Heaven,” or “Forever in the Wind.” Keep the design clean and the text legible.
Side Panel & Shoulder Patch Guidelines
Side panels and shoulders are the most flexible zones on the vest — especially for independent riders. These areas let you personalize your cut without interfering with the traditional patch zones that carry cultural weight.
Alternate patches on both sides to maintain visual balance. On the shoulders, smaller patches work better — large patches can look awkward and restrict movement. Pin patches first, step back, and assess before committing to sewing.
Patch Placement by Rider Type
The right approach to patch placement depends heavily on your relationship to club culture. Here’s a quick breakdown:
Rider Type
Back Patch
Front Patches
Key Rule
MC Member (Patched)
Three-piece club colors
Name + rank patch, club logo
Follow club bylaws exactly
MC Prospect
“Prospect” rocker only, no full colors
Name patch, prospect identifier
Never wear colors before earning them
Riding Club Member
One-piece club emblem
Name, RC logo
No rockers or territorial claims
Independent / Solo Rider
One-piece custom patch OR no back patch
Name, custom patches on sides
Avoid any three-piece or rocker layout
Support / Friend of Club
No official colors
Support patch on chest or side panel
Ask the club how they prefer it displayed
What Not to Do: Patch Placement Mistakes to Avoid
⚠ These mistakes can cause real conflict on the road.
Wearing a three-piece layout without MC membership. Even if your patches are completely original designs, the three-piece format signals MC status to other riders.
Putting a location rocker on the back without authorization. Territorial rockers are claimed, not assumed. Using one in an area with active MCs is provocative.
Copying or closely resembling another club’s colors. Even unintentional similarity can be read as mockery or disrespect.
Placing support patches in official club color positions. A support patch on the back center reads like you’re claiming those colors.
Iron-on patches on a leather vest without additional stitching. They will peel off during rides — doubly embarrassing if it’s a meaningful patch.
Cramming too many patches together. When patches overlap or crowd each other, they become unreadable and look chaotic rather than collected.
How MCs Enforce Patch Placement Rules
Within an MC, patch placement isn’t optional — it’s governed by club bylaws. New members are briefed on exactly what goes where, and deviations are addressed internally. Typical consequences range from verbal warnings to being required to surrender the patch in question.
Between clubs, patch etiquette is a form of diplomacy. A club that wears another club’s territorial colors — even accidentally — can trigger a formal confrontation requiring explanation and sometimes negotiation between club leadership. Established clubs often have patch protocols for visiting riders passing through their territory.
For independent riders, there’s no bylaws committee — but the broader biker community enforces norms through direct conversation, and sometimes less politely. The safest approach is always: when in doubt, ask someone who knows.
DIY Sewing: How to Attach Patches Correctly
Properly attached patches stay secure through weather, highway speeds, and years of riding. Here’s how to do it right:
1. Pin and position first. Use safety pins to place every patch on the vest before sewing anything. Step back and check the layout from a distance. Have someone else verify alignment while you’re wearing it.
2. Choose the right thread. Use upholstery-weight thread for fabric vests, or waxed polyester thread for leather. Match the thread color to the patch border when possible — it makes the stitching less visible.
3. Sew the edges first, then reinforce corners. Stitch all the way around the patch perimeter with a tight, even stitch. Double-stitch the four corners — these are the stress points that lift first.
4. For leather vests: use a leather needle or an awl. Standard sewing needles will break or skip. A size 18–20 leather needle or a hand stitching awl gives you the control you need. You can also use a thin line of leather contact cement beneath the patch before stitching for extra hold.
5. Iron-on backing: use it as a starting point only. If your patch has iron-on adhesive, activate it to tack the patch in place — but always follow up with stitching. Iron-on alone will not survive highway riding conditions long-term.
6. When in doubt, go professional. Most leather shops and tailors who work with motorcycle gear can sew patches quickly and cheaply. For large back patches especially, professional sewing gives you a clean, permanent result.
Legal & Safety Considerations
Reflective Patches for Night Riding
Consider adding reflective patches to the back and sides of your vest. Reflective embroidery or backing material significantly improves your visibility to car drivers at night without altering the look of your vest during the day.
Trademarked Club Insignia
Many established motorcycle clubs have trademarked their logos and patch designs. Using these without authorization isn’t just a cultural offense — it can be a legal one. Always design custom patches that are original. If you’re ordering custom patches from a shop, they should flag any designs that resemble protected marks.
Gang Insignia Laws
Some U.S. states and international jurisdictions have laws restricting the display of gang insignia in public. These laws vary significantly by region and are applied inconsistently. If you attend events, rallies, or gatherings in unfamiliar areas — especially international travel — check local regulations ahead of time. Note: This guide does not constitute legal advice. Consult a local attorney for jurisdiction-specific guidance.
Evolving Patch Trends in Modern Riding Culture
Patch culture is alive and changing. Today’s riders have access to embroidery technology, materials, and design tools that didn’t exist a generation ago. Some notable trends:
High-definition embroidery: Modern embroidery machines can replicate photorealistic detail, gradients, and fine line work that was impossible with older equipment.
Glow-in-the-dark and reflective thread: Functional and striking — especially popular with night riders and event patches.
Sublimation-printed patches: Full-color photographic patches that push beyond what embroidery can achieve.
PVC and rubber patches: Durable, weatherproof, and popular in tactical and military-influenced riding communities.
Minimalist one-piece designs: Independent riders and younger riders are increasingly favoring clean, bold single patches over fully loaded vests.
Despite the innovations in materials and manufacturing, the core rules of patch placement haven’t changed. New riders exploring creative patch designs still need to understand the cultural framework before expressing themselves on the back of a vest.
Frequently Asked Questions
1. Can I put MC-style patches on my vest if I’m not in a club?
No. Wearing a three-piece MC patch layout without club affiliation is widely considered disrespectful and can lead to serious confrontation. Even if the patches look custom, rockers and center emblems that mimic MC structure signal membership to other riders. Independent riders should stick to one-piece patches or free-form layouts on the sides and lower back of the vest.
2. Where should I place a memorial patch on a motorcycle vest?
Memorial patches are traditionally placed over the left chest (near the heart) or on the left side panel of the vest. These positions show deep respect without interfering with official club colors on the back. Keep them prominent but tasteful — include the rider’s name, years, and a short phrase if desired.
3. What is the difference between a one-piece, two-piece, and three-piece patch?
A one-piece patch is a single emblem typically worn by riding clubs or independent riders — no territorial claim. A two-piece adds a bottom rocker and is often worn by clubs working toward MC status. A three-piece patch — top rocker, center emblem, and bottom rocker — is the mark of a full motorcycle club and should never be copied or worn without proper affiliation.
4. Is it okay to mix club-style patches with custom patches on the same vest?
If you’re an active MC member, your club’s bylaws dictate placement — follow those exactly. Independent riders should avoid combining club-style formats (rockers, center emblems) with custom patches, as the combination can be misread as affiliation. Custom patches work well on side panels, shoulders, and lower panels without creating confusion.
5. What tools do I need to sew biker patches at home?
For fabric vests: a heavy-duty sewing needle (size 16–18), upholstery-weight thread, and a thimble. A sewing machine with a denim needle speeds things up. For leather vests: a leather needle (size 18–20), a stitching awl, and optionally leather contact cement for extra hold. Always double-stitch corners to prevent lifting.
6. Where do support patches go on a motorcycle vest?
Support patches belong on the front chest panels or side panels — never on the back in a position that could be read as official club colors. If you’re unsure how a specific club prefers their support patches displayed, ask them directly. Most clubs appreciate when supporters take the time to do it right.
Motorcycle patch placement is more than visual — it’s cultural. Getting it right shows you respect the road, the riders beside you, and the traditions that built this community. Whether you ride with a club or solo, let your vest tell your story without crossing lines.
Ride proud. Patch smart.
Need Custom Patches?Gem Punch has been creating professional-grade custom embroidery patches since 2012. From MC colors to memorial patches to one-of-a-kind designs — order your custom patches here .
Embroidery patches are a vibrant way to personalize jackets, bags, hats, and more. But when it’s time for a style refresh or a design repositioning, how to remove Embroidery patches without harming the fabric can feel like a high-stakes task. Whether you’re dealing with iron-on, sew-on, or adhesive patches, this guide provides ‘step-by-step instructions’, trend insights, and expert tips to ensure seamless removal. Plus, discover why custom patches are a sustainable and stylish choice for DIY enthusiasts.
Why Remove Embroidery Patches Matters
Embroidery patches are more than just decorative—they’re investments in creativity and self-expression. However, improper removal can lead to:
Fabric Damage: Scorched fibers, tears, or permanent glue residue.
Wasted Resources: Ruined garments or patches that can’t be reused.
Aesthetic Flaws: Visible holes or discoloration on your favorite items.
Delicate Fabrics to Watch:
Silk and Satin: Prone to heat damage and snags.
Leather and Suede: Adhesives can stain or strip natural oils.
Vintage Textiles: Older fabrics may be brittle or fragile.
Pro Tip: Always test removal methods on a hidden area first, like an inside seam or hem.
Essential Tools for Safe Patch Removal
Gather these tools before starting:
For Iron-On Patches: Iron, parchment paper, tweezers, rubbing alcohol.
For Sew-On Patches: Seam ripper, embroidery scissors, tweezers, needle threader.
For Adhesive Patches: Hairdryer, plastic scraper, Goo Gone, cotton swabs.
Complex Patches: Multi-layered or beaded designs may need meticulous handling.
Ready to Refresh Your Style?
At Gempunch, we craft durable, easy-to-remove custom patches designed for endless creativity. Order Yours Today and transform your wardrobe with confidence!
FAQs: Solving Patch Removal Challenges
Can I reuse an iron-on patch after removal?
Yes! Reattach it with fabric glue or reapply heat (if the adhesive layer is intact). For damaged adhesive, use iron-on interfacing as a new base.
How do I remove patches from leather without staining?
Step 1: Warm the patch with a hairdryer.
Step 2: Peel slowly.
Step 3: Rub residual glue with a leather conditioner or olive oil.
Will dry cleaning remove embroidery patches?
Some dry cleaners offer patch removal, but communicate the patch type (e.g., iron-on) to avoid heat damage.
How do I fix holes after removing a sew-on patch?
For Small Holes: Use fusible interfacing.
For Larger Gaps: Sew a decorative stitch or appliqué over the area.
Can I remove patches from a baseball cap without warping it?
Iron-On: Use a hairdryer to soften glue, then peel.
Sew-On: Snip stitches from the inside, avoiding the cap’s structure.
PVC patches, often associated with rugged jackets and tactical gear, are stepping into the spotlight as a bold, versatile tool for home décor. These durable, customizable accents are redefining interior design by blending functionality with creativity. In this guide, we’ll explore how ‘PVC patches in home décor’ can transform your space, offering actionable tips, current trends, and expert insights to help you craft a home that’s as unique as you are.
Why PVC Patches in Home Décor Are a Game-Changer
PVC patches are waterproof, fade-resistant, and endlessly adaptable, making them perfect for high-traffic areas and creative projects. Unlike traditional décor, they add texture, color, and personality without overwhelming a room. Whether you’re a renter looking for temporary flair or a homeowner aiming for a custom look, PVC patches bridge the gap between practicality and artistry.
7 Creative Ways to Incorporate PVC Patches in Home Décor
Gallery Walls with Personality
Actionable Tip: Curate a mix of PVC patches on a blank wall to tell a visual story. Pair travel-themed patches with abstract designs for a global-meets-modern vibe.
Pro Hack: Use removable adhesive backing or floating frames for easy updates.
Design Idea: Layer patches over framed art or mirrors for 3D texture.
Furniture Transformations
Revamp plain furniture into conversation starters:
Ottomans & Chairs: Adhere patches to upholstery for pops of color.
Drawers & Cabinets: Use patches as “handles” or drawer fronts.
DIY Alert: Upcycle thrifted furniture with patches to camouflage wear.
Functional Art: Coasters & Placemats
How-To: Seal PVC patches with food-safe epoxy resin to create durable, washable coasters.
Trend Spotlight: Match botanical or geometric patches to your dining theme.
Lampshade Makeovers
Add playful light patterns with translucent patches:
Pro Tip: Attach holographic patches to refract light into rainbow hues.
Design Hack: Use small patches to cast intricate shadows on walls.
Customized Window Treatments
Actionable Tip: Sew or iron patches onto curtain valances for a whimsical border.
Durability Tip: Opt for UV-resistant patches in sunlit areas.
Personalized Doormats
How-To: Adhere large PVC patches to plain coir mats for instant curb appeal.
Design Idea: Use a family monogram or quirky quote like “Wipe Your Paws.”
Textured Throw Pillows
DIY Guide: Iron patches onto linen or cotton pillowcases for instant flair.
Trend Alert: Mix 3D puff patches with flat designs for tactile contrast.
Current Trends in PVC Patches for Home Design
Eco-Conscious Materials: Plant-based PVC and biodegradable adhesives.
Minimalist Geometry: Clean lines with hexagons, circles, or monochrome palettes.
Tech Integration: QR code patches linked to AR art or digital galleries.
Nostalgic Themes: Retro gaming, vintage travel, or retro music motifs.
Mixed Media: Combine PVC patches with embroidery, beads, or fabric paint.
Why PVC Patches Matter in Modern Home Design
Personalization: Reflect your passions, travels, or values (e.g., national park patches for nature lovers).
Affordability: High-impact style at a fraction of custom art costs.
Durability: Withstand spills, sunlight, and pets better than paper or fabric décor.
Flexibility: Swap designs seasonally without damaging walls or furniture.
Explore how custom patches can elevate your brand’s identity beyond décor.
Key Takeaways
✅Versatility: PVC patches work on walls, furniture, textiles, and functional items.
✅ Durability: Ideal for kitchens, entryways, and high-traffic zones.
✅Personal Touch: Showcase your style without permanent changes.
By embracing PVC patches in home décor, you unlock endless possibilities to craft a space that’s vibrant, personal, and built to last. Whether you’re refreshing a rental or reimagining a forever home, these ideas ensure your décor is as bold and unique as you are.
FAQs: PVC Patches in Home Décor
How do I clean items decorated with PVC patches?
Wipe gently with a damp cloth. Avoid harsh chemicals to preserve colors.
Can PVC patches damage walls or furniture?
Use removable adhesives like Command Strips for residue-free removal.
Are PVC patches safe for kids’ rooms?
Yes! Choose non-toxic, phthalate-free patches and secure them out of reach of toddlers.
Can I design my own PVC patches for home projects?
Absolutely! Services like Gem Punch offer custom shapes, colors, and even AI-generated artwork.
How long do PVC patches last indoors?
Up to 10+ years with proper care, thanks to fade-resistant materials.
Why Custom Patches Are the Perfect Wedding Addition
Custom Patches for Weddings; Personalized touches are the heart of memorable weddings. Custom patches offer a versatile, affordable, and creative way to infuse your personality into your celebration. From practical keepsakes to stunning decor, embroidered or woven patches add texture, color, and meaning to your special day.
Custom Patches as Wedding Favors: 5 Unique Ideas
Give guests a meaningful token they’ll treasure long after the festivities. Here’s how to turn patches into unforgettable favors:
Luggage Tag Patches for Jet-Setting Guests
Attach custom patches to leather luggage tags engraved with your names and wedding date. Perfect for travel-loving attendees!
Tip: Pair with a note like, “Adventure Awaits—Thanks for Celebrating Ours!”
Embroidered Napkin Holders
Swap generic place cards for patches stitched onto linen napkin bands. Add guest names for a personalized place setting.
DIY Patch Kits for Crafty Guests
Include a blank tote, denim jacket, or hat alongside a themed patch (e.g., floral motifs or your wedding hashtag).
“Something Blue” Patches
Incorporate tradition with navy or sapphire patches featuring delicate lace designs. Guests can sew them into handkerchiefs or clothing.
Pet Bandanas for Furry Friends
For pet-inclusive weddings, gift custom pet bandanas with patches like “Best Dog” or “Ring Security.”
Stunning Wedding Decor Ideas Using Custom Patches
Transform your venue with these eye-catching patch decor strategies:
Chair Back Embellishments
Drape linen chair covers with patches featuring your initials or wedding date. Use iron-on adhesive for easy setup.
Patchwork Table Runners
Sew patches onto fabric runners for a bohemian vibe. Mix designs like hearts, florals, and geometric patterns.
Table Numbers with a Twist
Stitch numbered patches onto burlap or velvet squares as rustic-chic table markers.
Aisle Decals
Adhere floral or celestial-themed patches to aisle runners for a whimsical touch.
Trends in Custom Wedding Patches
Stay ahead with these top styles:
Eco-Friendly Materials: Recycled fabric or organic cotton patches align with sustainable weddings.
Vintage Vibes: Distressed edges and muted tones for a nostalgic feel.
Interactive Elements: Glow-in-the-dark thread or QR code patches linking to your wedding website.
Cultural Motifs: Incorporate traditional embroidery patterns from your heritage.
Why Custom Patches Matter
Personalization: Reflect your story through colors, symbols, and quotes.
Versatility: Use patches for attire (bridal jackets!), favors, and decor.
Keepsake Value: Guests cherish practical, sentimental gifts over generic trinkets.
Final Stitch: Make Your Wedding Unforgettable
Custom patches offer endless opportunities to craft a celebration that’s uniquely yours. Whether you’re gifting embroidered favors or designing a patchwork photo backdrop, these tiny details leave a lasting impression.
Ready to start designing? Contact our patch experts for a free consultation!
FAQs About Custom Patches for Weddings
Q1: How much do custom patches cost?
Prices vary ($2–$10 per patch) based on size, material, and order quantity. Bulk discounts often apply!
Q2: Can patches withstand outdoor weddings?
Yes! Opt for weather-resistant materials like PVC or merrowed-edge embroidery.
Q3: How do I design a patch?
Most vendors offer online tools. Start with high-resolution artwork, and choose thread colors that match your palette.
Q4: How are patches attached?
Iron-on, sew-on, or Velcro backings are popular. Discuss options with your supplier.
Patches aren’t just for fixing holes—they’re a dynamic way to refresh your style, celebrate the seasons, and showcase your personality. Whether you’re layering a cozy winter jacket or revamping a breezy summer tote, ‘How to Style Patches for Every Season’ can transform your look from basic to bold. In this guide, we’ll break down seasonal trends, actionable tips, and why custom patches are your secret weapon for staying on-trend. Let’s dive in!
Unlock year-round creativity with GemPunch’s seasonal patch styling guide!
Why Seasonal Patch Styling Matters
Swapping patches with the seasons keeps your wardrobe versatile and relevant. Benefits include:
Stay on-trend: Match your gear to seasonal colors and themes.
Maximize versatility: One jacket can transition from spring florals to winter plaids.
Express yourself: Celebrate holidays, hobbies, or cultural moments with curated designs.
At GemPunch, our custom patches let you craft looks as unique as the seasons themselves. Ready to get inspired?
Spring: Blooming Florals & Pastels
Trendy Patch Ideas
Botanical motifs: Floral embroidery, fern designs, or bee patches.
Pastel palettes: Soft pinks, mint greens, and lavender hues.
Easter or Earth Day themes: Think bunnies, eggs, or eco-friendly slogans.
How to Style
Denim jackets: Cluster small floral patches on collars or cuffs.
Tote bags: Add a single statement patch (like a cherry blossom) for subtle charm.
Bucket hats: Sew a mini patch on the brim for playful flair.
Pro Tip: Pair with lightweight fabrics like cotton or linen.
Summer: Bold Colors & Retro Vibes
Trendy Custom Patch Ideas
Tropical designs: Palm trees, flamingos, or surfboards.
Neon accents: Glow-in-the-dark or fluorescent patches for festivals.
Vintage logos: Retro band names or 80s-inspired graphics.
How to Style Custom Patches
Swim cover-ups: Iron waterproof PVC patches onto beach bags or sarongs.
Camp shirts: Add retro patches to sleeves or pockets for a laid-back vibe.
Sneakers: Stick adhesive patches on shoe tongues or heels.
Pro Tip: Use UV-resistant patches to prevent sun fading.
Fall: Warm Tones & Cozy Themes
Trendy Custom Patch Ideas
Autumn leaves: Embroidered maple or oak designs.
Plaid patterns: Tartan or buffalo check patches.
Spooky season: Bats, pumpkins, or witchy motifs.
How to Style Custom Patches
Corduroy jackets: Sew-on patches blend seamlessly with textured fabric.
Scarves or beanies: Add a small felt patch for rustic charm.
Backpacks: Mix fall-themed patches with leather accents.
Metallic thread: Gold or silver embroidered patches.
Cozy knits: Patches mimicking wool or cable-knit textures.
How to Style Custom Patches
Puffer coats: Iron reflective patches onto sleeves for nighttime visibility.
Holiday sweaters: Replace traditional embroidery with removable Velcro patches.
Gloves or mittens: Adhesive patches add whimsy without bulk.
Pro Tip: Layer patches over elbow patches on sweaters for a luxe look.
Why Custom Patches Shine Year-Round
Custom patches let you tailor designs to any season, event, or mood. GemPunch’s custom service offers:
Seasonal exclusives: Limited-edition holiday or summer designs.
Personalized themes: Create patches for family reunions, ski trips, or festivals.
Durability: Our patches withstand snow, sun, and sweat.
Pro Tips for Seasonal Custom Patch Success
Color coordination: Match patches to your seasonal wardrobe palette.
Balance placement: Avoid overcrowding—let one or two patches shine as focal points.
Mix materials: Pair embroidered patches with leather or denim for contrast.
Final Thoughts
Styling patches for every season is a fun, sustainable way to keep your wardrobe exciting. Whether you’re layering autumn leaves on a jacket or adding festive sparkle to a winter hat, GemPunch’s high-quality patches ensure your creativity shines through.
Patches add personality to jackets, bags, and jeans—but wear and tear can leave them faded, peeling, or frayed. Whether you’re refreshing a vintage denim jacket or updating a team uniform, knowing ‘how to remove and replace damaged patches’ is a game-changer. In this guide, we’ll cover foolproof removal techniques, trendy replacement ideas, and why custom patches are worth the investment. Let’s restore your gear to its full glory!
Keep your style fresh and functional with GemPunch’s pro tips for patch repair!
Why Replace Damaged Patches?
Damaged patches don’t just look worn—they can undermine your style and the item’s functionality. Swapping them out lets you:
Refresh your look: Swap outdated designs for trending motifs.
Repair gear: Reinforce weak fabric areas with sturdy new patches.
Boost sustainability: Extend the life of clothing and reduce waste.
At GemPunch, we specialize in premium custom patches that blend durability with bold aesthetics. Ready to start your patch makeover?
Tools You’ll Need
Seam Ripper or Small Scissors: For cutting stitches on sew-on patches.
Household Iron or Heat Press: To loosen iron-on adhesives.
Rubbing Alcohol: Removes sticky residue.
Tweezers: Helps peel off stubborn patch fragments.
New Patch: Browse GemPunch’s custom designs for inspiration!
Step 1: Removing Damaged Patches
Iron-On Patches
Heat the Patch: Set your iron to high heat (no steam) and press over the patch for 15–20 seconds.
Peel Gently: Use tweezers to lift the edges. If resistance occurs, reapply heat.
Clean Residue: Dab rubbing alcohol on a cloth to wipe away leftover adhesive.
Pro Tip: For thick fabrics like denim, use a heat press for faster, more even results.
Sew-On Patches
Cut Threads: Slide a seam ripper under stitches and carefully slice them.
Remove Patch: Pull away the patch, then pluck out any remaining threads.
Mend Fabric: If the fabric is frayed, apply a small iron-on interfacing patch underneath.
Related Read: How to Make Patches Last Longer.
Step 2: Prepping the Area for a New Patch
Clean the Surface: Wipe the fabric with rubbing alcohol to remove dirt or oils.
Smooth the Fabric: Iron the area to eliminate wrinkles or creases.
Reinforce Weak Spots: Add interfacing behind torn or thin fabric for extra stability.
Step 3: Applying Your New Patch
Iron-On Method
Position the Patch: Use heat-resistant tape to secure it in place.
Press with Iron: Cover with a pressing cloth and apply firm pressure for 30–45 seconds.
Cool and Test: Let it cool completely before checking adhesion.
For a detailed walkthrough, check our guide on How to Iron a Patch Perfectly.
Sew-On Method
Use a tight zigzag stitch around the edges. Double-stitch corners for durability.
Trendy Ideas for Replacement Patches
Vintage Vibes: Swap faded band logos for retro-inspired embroidered patches.
Glow-Up Gear: Try LED or reflective patches for nighttime visibility (perfect for cyclists!).
Eco-Friendly Themes: Support sustainability with patches made from recycled materials.
Custom Logos: Refresh team uniforms with updated mascots or slogans.
GemPunch’s custom patch service lets you design patches that align with the latest trends!
Why Custom Patches Are a Smart Choice
Custom patches aren’t just stylish—they’re practical. Benefits include:
Branding: Promote your business or club with unique designs.
Personalization: Create one-of-a-kind pieces that reflect your identity.
Quality Control: Custom patches from GemPunch use reinforced edges and fade-resistant threads.
Pro Tips for a Flawless Finish
Match Thread Colors: Use thread that blends with the patch edge for invisible stitching.
Test Placement: Use sticky notes to mock up designs before applying.
Mix & Match: Combine small and large patches for dynamic texture.
Final Thoughts
Removing and replacing damaged patches is an easy way to revive your favorite items—and an opportunity to experiment with new styles. With GemPunch’s premium custom patches, you can ensure your designs stay vibrant, secure, and on-trend.
Ready to transform your gear?
5 FAQs About Removing and Replacing Patches
Can I reuse a patch after removing it?
Iron-on patches rarely survive removal intact. Sew-on patches can be reused if undamaged.
How do I fix adhesive residue that won’t come off?
Soak the area in rubbing alcohol for 5 minutes, then scrub gently with a toothbrush.
What fabrics are easiest for patch replacement?
Cotton, denim, and polyester hold patches best. Avoid silk or sheer fabrics.
Can I layer patches over old patch marks?
Yes! Ensure the area is clean and flat, then apply a larger patch to cover the spot.
How long do custom patches take to produce?
At GemPunch, most orders ship in 7–10 days. Rush options are available!
Patches are a fantastic way to personalize clothing, bags, and accessories—but nothing’s worse than watching your favorite designs crack, peel, or fade after a few wears. Whether you’re rocking iron-on, sew-on, or adhesive patches, proper care is key to preserving their look and adhesion. In this guide, we’ll share how to make patches last longer with actionable tips, common mistakes to avoid, and answers to your top questions. Let’s dive in!
Keep your patches vibrant and secure with GemPunch’s proven care strategies!
Why Patch Longevity Matters
Patches are more than just decorations; they’re investments in your style. Keeping them intact means:
Saving money: No need to replace peeling or faded designs.
Maintaining aesthetics: Vibrant patches keep your gear looking fresh.
Boosting durability: Well-applied patches can even reinforce weak fabric areas.
At GemPunch, we design patches to withstand daily wear—but a little TLC goes a long way!
Pre-Application Tips for Long-Lasting Patches
Choose the Right Patch for Your Fabric
Iron-On Patches: Best for cotton, denim, and polyester. Avoid delicate fabrics like silk.
Sew-On Patches: Ideal for thick materials like canvas or leather.
Adhesive Patches: Great for lightweight fabrics but may need stitching for longevity.
Pro Tip: Browse GemPunch’s patches for high-quality options.
Prep Your Garment
Pre-wash fabrics: Removes residues that weaken adhesion. Skip fabric softener!
Test placement: Ensure the patch won’t rub against seams or straps.
Application Best Practices
For Iron-On Patches
Use a Pressing Cloth: Protects the patch from direct heat.
Apply Even Pressure: Press the iron for 30–45 seconds, covering all edges.
Reinforce with Stitching: Sew the perimeter for extra security.
For Sew-On Patches
Use heavy-duty thread and a tight zigzag stitch.
Double-stitch high-stress areas (e.g., backpack straps).
For Adhesive Patches
Clean the fabric surface with rubbing alcohol before applying.
Add a few stitches to prevent peeling.
Washing and Drying: The Right Way
Machine Washing
Turn garments inside-out: Reduces friction on patches.
Use cold water: Hot water loosens adhesives and fades colors.
Gentle cycle: Opt for mild detergent and avoid bleach.
Drying
Air-dry: Heat from dryers weakens adhesive bonds.
Lay flat: Prevents patches from snagging on other clothes.
Storage and Maintenance Tips
Avoid folding over patches: Store items flat or hung to prevent creasing.
Spot-clean when possible: Reduces overall wear from washing.
Inspect regularly: Tighten loose threads or reheat iron-on edges as needed.
Common Mistakes That Shorten Patch Lifespan
Using Fabric Softener: Leaves residue that breaks down adhesives.
Overheating Patches: Scorches edges or melts PVC/embroidery.
Ignoring Loose Threads: Unraveling stitches can cause patches to detach.
Why GemPunch Patches Outlast the Rest
At GemPunch, our patches are crafted for durability:
Premium materials: Fade-resistant threads and strong adhesives.
Reinforced edges: Prevents fraying and peeling.
UV protection: Colors stay vibrant, even after repeated washes.
Final Thoughts
With the right prep, application, and care, your patches can stay bold and secure for years. Whether you’re customizing a jacket, jeans, or a tote bag, these tips will help you maximize their lifespan. Ready to upgrade your patch game? GemPunch’s rugged, stylish designs are your perfect partner in creativity.
FAQs: Keeping Patches Intact
Can I wash a shirt with iron-on patches?
Yes! Wait 24 hours after application, wash inside-out on cold, and air-dry.
How do I fix a peeling patch?
Reapply heat with an iron or add stitches. For adhesive patches, use fabric glue.
Do sew-on patches last longer than iron-on?
Yes—they’re more durable for high-friction areas like sleeves or bags.
Can I use patches on gym clothes or swimwear?
Avoid adhesive patches on moisture-prone fabrics. Opt for sew-on or PVC patches instead.
Why do my patches fade over time?
Sun exposure and harsh detergents cause fading. Wash gently and store items away from direct sunlight.