Custom Fire Department Patches: Design, Ordering & Pricing Guide

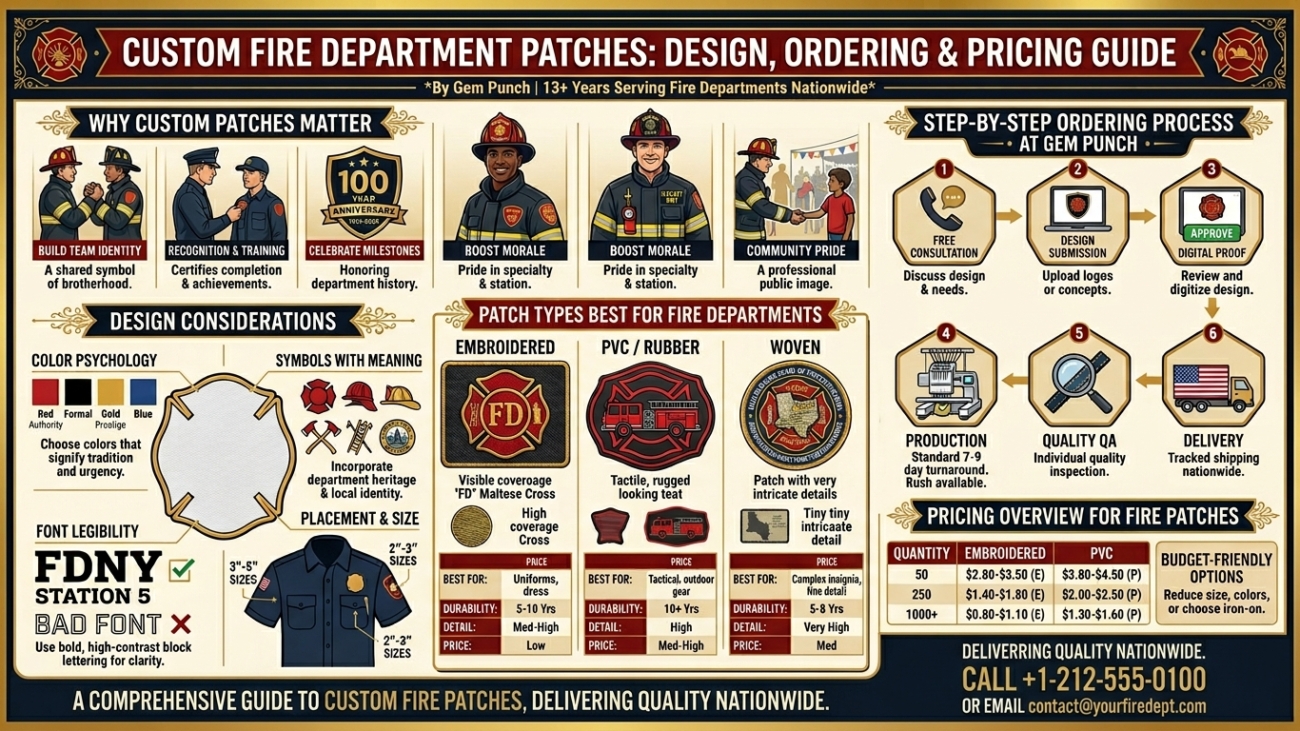
Custom Fire Department Patches: Design, Ordering & Pricing Guide

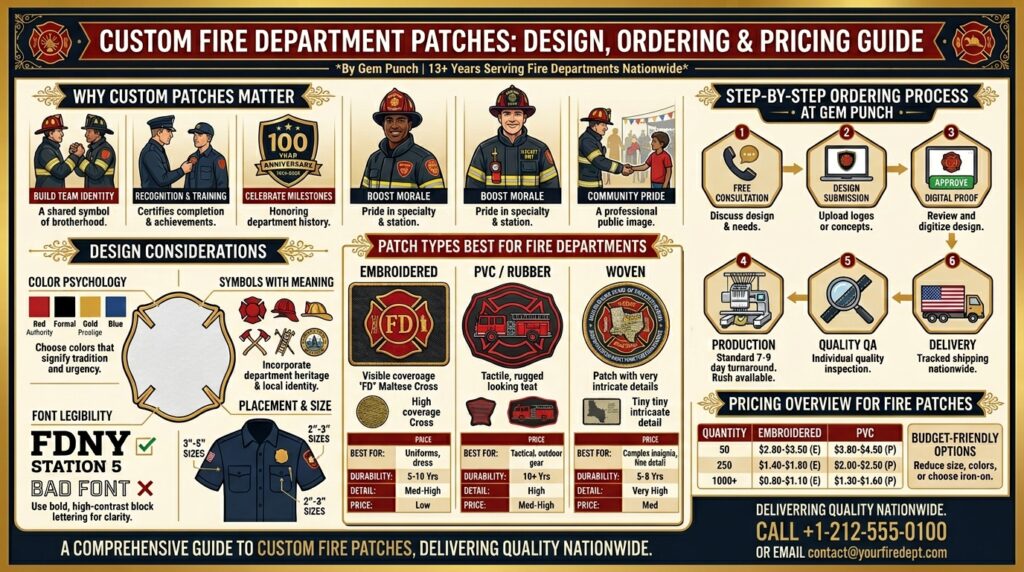
Why Your Fire Department Needs Custom Patches

Custom patches are more than fabric and thread — they’re a symbol of service, sacrifice, and brotherhood. For fire departments across the country, a well-designed custom patch represents the identity of every firefighter who wears it.

Whether you’re outfitting a new recruit class, commemorating a department milestone, or adding a finishing touch to dress uniforms, custom fire department patches deliver a professional, cohesive look that commands respect. At Gem Punch, we’ve partnered with fire departments of all sizes — from rural volunteer companies to major metropolitan fire services — to produce patches that stand up to the demands of the job and the pride of the profession.

This guide covers everything your department needs to know: design considerations, patch types, the ordering process, pricing breakdowns, and answers to the questions we hear most. By the end, you’ll know exactly how to order custom fire patches that represent your department with distinction.
Why Fire Departments Choose Custom Patches

The fire service has a long tradition of visual identity. Patches aren’t just decoration — they serve real operational and cultural functions.

Build Team Identity and Brotherhood Every firefighter knows the feeling of putting on a patch that represents their house. A custom patch creates a shared visual symbol that reinforces the bonds built in training and on scene. New recruits feel the weight of the tradition when they receive their first department patch.

Create Memorable Recognition and Training Materials Custom patches are widely used for recruit graduation ceremonies, promotional milestones, and special unit designations. A patch earned through training has lasting meaning that no certificate can replicate.

Celebrate Milestones and Anniversaries Department anniversaries, memorial patches for fallen firefighters, and commemorative designs for major events are among the most requested patch orders we receive. These pieces become department heirlooms.

Boost Department Morale Giving firefighters a patch designed specifically for their station, unit, or specialty — whether that’s hazmat, swift water rescue, or technical rescue — builds pride in their role and reinforces their identity within the larger department.

Show Pride in Service to the Community At public events, recruitment drives, and community outreach programs, custom patches create a professional, unified appearance that builds public trust and recognition.

Design Considerations for Fire Department Patches

Great fire patch design isn’t just about aesthetics — it’s about accuracy, durability, and compliance. Here’s what to consider before you submit your design.

Color Psychology and Fire Service Tradition

Red dominates fire service iconography for good reason: it signals authority, urgency, and action. Black backgrounds convey formality and command presence, while gold and yellow thread conveys prestige and years of service. When choosing your color palette, consider both the visual impact and how colors will hold up after repeated washing and heavy wear.

Symbols That Carry Meaning

The Maltese Cross is the most recognized symbol in the fire service, representing the protection firefighters offer to those in their care. Firefighter helmets, flames, axes, and ladders are all common design elements that communicate function and heritage at a glance. Many departments also incorporate their city seal, state outline, or founding year into their patch designs.

Work with symbols that have meaning to your department — not just generic clip art. Your patch should tell your story.

Compliance with Department Insignia Rules

Many fire departments operate under strict regulations regarding how official insignia, logos, and badge designs may be reproduced. Before submitting your design to Gem Punch, confirm with your department leadership or legal team that your proposed design complies with all internal policies and any applicable municipal guidelines. We can reproduce official insignia with proper authorization.

Font Choices for Legibility

Bold, high-contrast fonts are essential on embroidered patches. Thin serif fonts tend to fill in during the embroidery process and become illegible at small sizes. We recommend block lettering or clean sans-serif fonts for department names and text elements. If you’re including a motto, keep it short — six words or fewer reads cleanly at patch scale.

Placement and Size on Uniforms

Standard sleeve patches for fire uniforms typically run between 3″ and 5″ in diameter or width. Chest patches are usually smaller (2″–3″). Consider where the patch will be worn and design accordingly — a large circular patch works on a sleeve, while a more compact horizontal design suits a chest pocket.

Patch Types Best for Fire Departments

Not all patches are created equal. Here’s a breakdown of the most common options and when to choose each:

Patch TypeBest ForDurabilityDetail LevelPrice Range
EmbroideredUniforms, dress occasions5–10 yearsMedium-High$0.80–$3.50/ea
PVC/RubberTactical gear, outdoor use10+ yearsHigh$1.50–$4.50/ea
WovenComplex insignia, fine detail5–8 yearsVery High$1.20–$3.80/ea

Embroidered Patches — The Fire Service Standard

Embroidered patches are the most requested type for fire department orders and for good reason. They carry the traditional look associated with the fire service, hold up through repeated laundering, and accept complex designs including gradients, shading, and multi-color detail. Thread counts of 75%–100% coverage give patches a full, professional appearance. Expected lifespan: 5–10 years with normal use.

PVC Patches — Built for the Field

PVC (polyvinyl chloride) patches are fully waterproof, hold their shape in extreme temperatures, and won’t fray or unravel — making them ideal for tactical uniforms, gear bags, and any application involving outdoor or wet conditions. PVC patches also accept extremely fine detail, making them excellent for replicating complex department seals. Expected lifespan: 10+ years.

Woven Patches — Maximum Detail

Woven patches are produced on specialized looms rather than embroidery machines, which allows for much finer detail reproduction. If your department insignia includes fine lines, small text, or intricate imagery, a woven patch may be the best option. They’re slightly less textured than embroidered patches but offer superior detail at smaller sizes.

Step-by-Step Ordering Process at Gem Punch

We’ve refined our ordering process over 13 years of working with fire departments. Here’s exactly what to expect from first contact to final delivery.

Step 1: Free Consultation Call

Every fire department order starts with a consultation. We’ll discuss your design vision, intended use, patch size, attachment type (iron-on, sew-on, hook-and-loop), and quantity. This call takes about 15 minutes and ensures nothing gets lost in translation.

Step 2: Design Submission

Submit your existing logos, badge artwork, insignia, or reference images. High-resolution files (300 DPI or higher) produce the best results, but we work with whatever you have. If you’re starting from scratch, our in-house design team can develop your concept — at no additional charge on qualifying orders.

Step 3: Digital Proof and Digitizing

Our team creates a digital mockup of your patch and sends it for your review and approval. For embroidered patches, we also complete the digitizing process — converting your artwork into machine-readable stitch patterns. You’ll see exactly what your patch will look like before production begins. Revisions are included until you’re satisfied.

Step 4: Production

Once you approve the proof, production begins. Standard turnaround is 7–9 business days for embroidered patches. Rush production (24–48 hours) is available for time-sensitive orders such as graduation ceremonies or recruitment events — contact us to confirm availability.

Step 5: Quality Assurance

Every patch order is individually inspected before packaging. We check thread tension, color accuracy, edge finishing, and overall appearance against your approved proof. Batches that don’t meet our standards are rerun before shipping.

Step 6: Delivery

We ship to fire departments nationwide with tracking on all orders. Bulk orders are packaged to prevent damage in transit. For departments reordering the same design, your digitizing file is saved permanently — making future orders faster and ensuring perfect consistency.

Pricing for Fire Department Patches

Patch pricing depends on size, stitch count, complexity, patch type, and order quantity. Here’s what fire departments typically pay:

Embroidered Patch Pricing

QuantityEstimated Price Per Patch
50 patches$2.80–$3.50
100 patches$2.00–$2.60
250 patches$1.40–$1.80
500 patches$1.00–$1.30
1,000+ patches$0.80–$1.10

Prices based on a standard 4″ embroidered patch with 75%+ coverage. Complex designs or larger sizes may vary.

PVC Patch Pricing

QuantityEstimated Price Per Patch
50 patches$3.80–$4.50
100 patches$2.80–$3.40
250 patches$2.00–$2.50
500 patches$1.60–$2.00
1,000+ patches$1.30–$1.60

Sample Order Quotes

Volunteer Department — Recruit Graduation (50 patches) 4″ embroidered patch, two-color design, sew-on backing Estimated total: $140–$175

Mid-Size Department — Annual Uniform Reorder (500 patches) 3.5″ embroidered patch, department seal design, hook-and-loop backing Estimated total: $500–$650

Metropolitan Department — Commemorative Milestone Patch (1,000 patches) 5″ embroidered patch, multi-color complex design, mixed backing options Estimated total: $800–$1,100

Rush Service Pricing

24–48 hour rush production is available and typically adds 25%–40% to the per-patch price, plus expedited shipping. Rush availability varies — contact us as early as possible for time-sensitive orders.

Budget-Friendly Options

For departments working within tight budgets, we offer options to reduce cost without sacrificing appearance: reducing patch size slightly, simplifying the design to fewer thread colors, or choosing iron-on backing instead of hook-and-loop. Our team will help you identify cost savings that don’t affect the quality or impact of your patches.

Success Stories from Fire Departments We’ve Served

Volunteer Fire Company — Recruitment Drive Patches A rural volunteer fire company came to us needing 75 patches for an upcoming community recruitment event. They had a sketch of their department logo and a tight two-week window. Our team digitized the design, produced a proof within 48 hours, and delivered finished patches a full week before their event. The department reported that the patches generated significant interest at their booth and helped recruit several new members who wanted to “earn” the patch through training.

Municipal Fire Department — 100th Anniversary Commemorative Patch A city fire department celebrating its centennial needed a special commemorative patch to distribute to all active and retired members — approximately 800 patches. The design incorporated the original 1924 department badge alongside modern department insignia. We worked through four proof revisions to get the historical detail exactly right. The patches were presented at the department’s anniversary gala and are now displayed in the firehouse alongside original department photographs.

Regional Training Academy — Recruit Class Patches A multi-department regional training academy orders a custom patch for each recruit class that graduates. Each class patch features the same base design with the class year and number. Because we retained their digitizing file, reorders take a fraction of the time and cost of the original — and every class patch is perfectly consistent, year after year.

Frequently Asked Questions

Can you replicate official fire department insignia on patches?

Yes — with proper authorization. We work with departments to reproduce official badges, seals, and insignia accurately. We ask for documentation confirming you have permission to reproduce the insignia, particularly for official city or county seals.

Do you work specifically with fire departments?

Absolutely. Fire department patch orders represent a significant portion of our work. We understand the importance of accuracy, durability, and compliance in fire service patches, and our team is experienced with the specific requirements these orders carry.

What’s the fastest turnaround available?

In most cases, 24–48 hour rush production is available. Rush orders require design files to be ready at the time of order placement. Contact us immediately for time-critical orders — the earlier we hear from you, the better we can accommodate your timeline.

Can we reorder the same patch design in the future?

Yes. We permanently retain your digitizing files and design records. Future reorders of the same design are processed faster and at no additional setup cost. This is especially valuable for departments that reorder the same patch design for annual recruit classes or regular uniform updates.

What if we’re not satisfied with our patches?

Gem Punch backs every order with a 100% satisfaction guarantee. If your patches don’t match your approved proof or fall short of our quality standards, we’ll rerun the order at no charge. We don’t consider an order complete until you’re fully satisfied.

What attachment options are available?

We offer iron-on, sew-on, hook-and-loop (Velcro), and peel-and-stick backing. Hook-and-loop is popular for tactical and field applications; iron-on and sew-on are standard for dress uniforms.

What file formats do you accept?

We work with AI, EPS, PDF, PNG, and JPG files. Vector files (AI/EPS) produce the cleanest results, but our digitizing team can work from high-resolution raster files as well.

Outfit Your Department with Patches Built to Last

Custom fire department patches are a meaningful investment in your department’s identity, morale, and professional image. Whether you need 50 patches for a recruit graduation or 1,000 for a department-wide uniform update, Gem Punch delivers designs that honor the tradition and pride of the fire service.

With 13+ years of experience, in-house design and digitizing, individual quality inspection on every order, and a 100% satisfaction guarantee, your department is in experienced hands from first consultation to final delivery.

Ready to get started?

→ Request a Free Quote for Your Fire Department Patches

Or call us directly to speak with a patch specialist about your department’s specific needs. We’re here to help you create something your firefighters will wear with pride.

Gem Punch specializes in custom embroidered patches, PVC patches, and woven patches for fire departments, law enforcement, military units, and organizations nationwide. All designs are digitized in-house. Rush production available.
Vector Art Paches

The History of Biker Patches: Evolution, Significance & Modern Trends

A biker patch is a piece of embroidered fabric. That is all it is, technically. And yet few objects in American cultural history carry as much meaning, as much contested territory, or as much earned respect as the patches sewn onto the back of a motorcycle vest.

The history of biker patches is inseparable from the history of motorcycle club culture itself — a story that begins with returning World War II veterans, runs through the outlaw rebellions of the 1950s and 1960s, and continues today in a global culture of riders who use patches to communicate identity, loyalty, and belonging in ways that words alone cannot.

This is that story — told decade by decade, from the earliest riding clubs to the custom patch designs.

Biker patches are not a single uniform tradition. Different clubs, regions, and cultures have developed their own systems of patch meaning and etiquette. This guide covers the dominant traditions rooted in American motorcycle club culture, which form the foundation of global biker patch culture today.

The Origins: Military Insignia and the Birth of Motorcycle Clubs (1900s–1940s)

To understand where biker patches came from, you first need to understand where bikers came from. The earliest motorcycle clubs in America formed in the early 1900s, shortly after the invention of the motorcycle itself. The American Motorcyclist Association (AMA) was founded in 1924, bringing together riding enthusiasts under a single national organization.

From the beginning, these clubs borrowed heavily from military culture — and for good reason. Many early riders were veterans or active military personnel who were drawn to motorcycles for the same reasons they had been drawn to military service: the brotherhood, the discipline, the sense of shared mission. Military insignia had long served as a way to identify unit affiliation, rank, and achievement. Early motorcycle clubs adopted the same logic — patches and badges on jackets and vests that told other riders who you were, who you rode with, and what you had done.

These early patches were simple — often just a club name or logo stitched onto a jacket back. But they established the fundamental idea that would define biker culture for the next century: your patch is your identity on the road.

The Turning Point: Post-World War II and the Rise of Outlaw Culture (1945–1955)

The period immediately following World War II was the most consequential in the history of biker patches. Hundreds of thousands of veterans returned home from the war having experienced levels of camaraderie, danger, and freedom that civilian life simply could not match. Many found solace on motorcycles — the closest thing to the freedom and intensity of the war they had left behind.

Motorcycle clubs formed rapidly across the country. Most operated within the AMA’s framework, adhering to its codes of conduct and participating in sanctioned events. But a significant number did not. These riders — who would come to be called outlaw clubs — rejected the AMA’s authority and the mainstream values it represented.

The defining moment came in 1947 at the Hollister Rally in California, where a group of riders from the Pissed Off Bastards of Bloomington caused a significant disturbance. The event was sensationalized in the press and became a cultural flashpoint. In the aftermath, the AMA reportedly stated that 99% of motorcyclists were law-abiding citizens — implying that the remaining 1% were not. Outlaw clubs embraced this framing, and the 1% patch was born.

It was also during this period that the three-piece patch configuration emerged as the defining symbol of outlaw motorcycle club identity. Where AMA clubs wore simple one-piece patches, the outlaw clubs divided their back patch into three distinct elements — top rocker, center emblem, and bottom rocker — each carrying specific meaning about the club’s name, identity, and territory.

The three-piece patch was not just a design choice. It was a declaration of independence from mainstream motorcycle culture and the values it represented. Wearing colors meant you had earned a place in a brotherhood that operated by its own rules.

The 1950s and 1960s: Consolidation and the Golden Age of Club Culture

Through the 1950s and into the 1960s, the major outlaw motorcycle clubs that would define the culture solidified their identities and their patch systems. Clubs like the Hells Angels (founded in 1948), the Outlaws (founded in 1935 but fully patched in this era), the Pagans, and the Bandidos developed the patch traditions that most closely resemble what MC culture looks like today.

During this period, patches became increasingly complex and regulated. Each element — the top rocker, center patch, bottom rocker, and the growing number of smaller patches that accompanied them — was assigned specific meaning. Officer designations (President, Vice President, Sergeant-at-Arms) appeared as chest patches. Memorial patches for fallen members became standard. Achievement patches were awarded for specific acts of loyalty or service to the club.

The colors became something sacred. A member’s patches represented not just their affiliation but their standing, their history, and their commitment to the brotherhood. The rule that colors must be surrendered when a member leaves the club — rather than kept as personal property — dates to this era. Colors belonged to the club, not the individual.

1924American Motorcyclist Association (AMA) founded — first organized framework for US motorcycle clubs
1935The Outlaws MC formed in Illinois — one of the earliest outlaw clubs
1945–48Mass veteran return from WWII — motorcycle club formation accelerates rapidly across the US
1947Hollister Rally — the cultural flashpoint that defined outlaw motorcycle identity
1948Hells Angels MC founded in Fontana, California — three-piece patch system adopted
1950sThree-piece patch becomes the universal symbol of outlaw MC status
1960sMajor clubs expand nationally and internationally — patch systems become highly regulated
1970sBiker culture enters mainstream consciousness through film and media
1980s–90sCustom patch manufacturing industry grows — wider access to embroidery technology
2000sInternet era opens global access to patch culture — riding clubs proliferate worldwide
2010sPVC and woven patches become popular alternatives to embroidery
2020sCustom patch design reaches new levels of sophistication — digital tools transform production

The 1970s: Biker Culture Goes Mainstream

The 1970s brought motorcycle culture into the mainstream American consciousness in an unprecedented way. Films like Easy Rider (1969, but dominant in the 70s cultural conversation) and later The Wild One romanticized the biker lifestyle and brought the imagery of motorcycle patches to a mass audience that had previously only seen it from a distance.

This mainstream visibility had a double-edged effect on patch culture. On one hand, it brought new riders into the fold and expanded motorcycle club membership. On the other hand, it created a market for biker imagery that was completely divorced from the culture itself — patch designs, leather vests, and club-style insignia sold as fashion items to people who had no connection to actual motorcycle clubs.

This tension between authentic patch culture and its commercial imitations has defined the relationship between the biker community and mainstream culture ever since.

The 1980s and 1990s: Technology Changes Everything

The embroidery technology of the 1980s and 1990s transformed what was possible in patch design. Computer-aided embroidery systems — which allowed designs to be digitized and reproduced with machine precision — dramatically expanded the complexity, color range, and detail achievable in a custom patch.

Where earlier patches had been limited by the constraints of hand or simple machine embroidery, the new technology allowed for photorealistic portraits, complex multi-color designs, and fine detail work that would have been impossible to produce at scale a decade earlier. Custom patch manufacturers expanded rapidly, and the quality ceiling for what a club could put on its members’ vests rose significantly.

This era also saw the emergence of the custom patch industry as a distinct commercial sector — with specialist manufacturers offering production services to clubs, military units, law enforcement agencies, and eventually the broader public.

The 2000s: The Internet Era and the Global Spread of Patch Culture

The internet era fundamentally changed the landscape of biker patch culture in ways that are still playing out today. For the first time, riders in rural areas, outside the US, and without access to established club networks could connect with patch culture, order custom patches, and learn the traditions and rules that governed them.

The global spread of American motorcycle club culture accelerated dramatically. Chapters of major American clubs opened across Europe, Australia, South America, and Asia. Local clubs in countries with no prior MC tradition adopted the three-piece patch system and the associated etiquette, creating genuinely international networks of club culture.

The internet also created new challenges around patch authenticity and etiquette enforcement. With custom patches available to order online from anywhere in the world, the cultural gatekeeping that had previously been enforced through physical presence and local reputation became harder to maintain.

Modern Patch Types and Materials (2010s–2026)

Today, biker patches are produced in a wider range of materials and techniques than at any point in their history. While traditional embroidered patches remain the standard for most motorcycle clubs, several alternatives have become popular across the broader riding community:

Embroidered patches

Still the gold standard for MC colors and formal club patches. High stitch count embroidery produces rich, durable designs that maintain their appearance over years of riding. Modern embroidery digitizing allows for extraordinarily detailed designs at competitive prices.

PVC patches

Molded rubber patches that offer a tactile, three-dimensional quality not achievable with embroidery. Increasingly popular for morale patches, riding club designs, and patches that need to withstand extreme weather conditions. PVC patches are waterproof, UV-resistant, and highly durable.

Woven patches

Produced on a loom rather than embroidered, woven patches achieve finer detail at smaller sizes — making them ideal for small text, intricate linework, and designs with many colors. Woven patches have a flatter, more textile-like appearance than embroidered patches.

Leather patches

Laser-cut or stamped leather patches offer a rugged, traditional aesthetic that sits naturally on leather vests. Popular for name patches, chapter designations, and smaller accent patches. Leather patches have seen a significant resurgence in popularity since the early 2010s.

Patch TypeBest Used For
EmbroideredClub colors, back patches, formal designations
PVCMorale patches, weather-exposed applications, detailed 3D designs
WovenFine detail designs, small text, high color count designs
LeatherName patches, accent patches, traditional aesthetic applications
PrintedPhoto-realistic designs, temporary applications, event patches

The Cultural Significance of Biker Patches Today

In 2026, biker patches carry a cultural weight that goes far beyond the motorcycle community. They have influenced fashion, military culture, sports team identity, and the broader custom merchandise industry. The language of patches — the idea that a piece of embroidered fabric can carry earned meaning, represent loyalty, and communicate identity in an instant — has spread into nearly every corner of culture.

But for the riders who wear them in the original tradition, the meaning remains unchanged. A patch on the back of a vest represents something earned through time, loyalty, and commitment. It is a visual biography — a record of where you have been, who you ride with, and what you stand for.

The three-piece patch still carries the same weight it has carried since the 1950s. The rules around wearing colors, respecting territory, and earning rather than buying your patches remain as significant as they have ever been. Technology has changed how patches are made. It has not changed what they mean.

Current Trends in Biker Patch Design

  • Hyper-detailed embroidery — advances in digitizing allow stitch counts and detail levels previously impossible at commercial scales
  • Glow-in-the-dark thread — increasingly popular for night-ride patches and event commemoratives
  • Minimalist designs — a countercurrent to the maximalist tradition, featuring clean geometric designs and limited color palettes
  • Mixed-media patches — combining embroidery with PVC elements, metal hardware, or leather backing for dimensional effects
  • Memorial and tribute patches — growing demand for detailed portrait patches honoring fallen members
  • Sustainable materials — eco-conscious clubs seeking recycled or organic thread and backing options

Frequently Asked Questions

When did biker patches first appear?

The earliest motorcycle club patches appeared in the 1920s and 1930s alongside the formation of the first organized riding clubs. The patch traditions most recognizable today — particularly the three-piece system — developed in the late 1940s and 1950s following World War II.

What was the first motorcycle club to use three-piece patches?

The Hells Angels, founded in Fontana, California in 1948, are widely credited with establishing the three-piece patch as the defining symbol of outlaw motorcycle club identity. The configuration — top rocker, center emblem, bottom rocker — was adopted by other outlaw clubs throughout the 1950s.

Why do biker patches have such strict rules?

The rules around biker patches developed organically from the culture’s emphasis on earned identity, territorial respect, and brotherhood. Patches represent genuine membership and loyalty — allowing non-members to wear similar patches would undermine the entire system of meaning. The rules exist to protect the integrity of what the patches represent.

Has the meaning of biker patches changed over time?

The specific designs and configurations have evolved, but the core meaning of biker patches has remained remarkably consistent since the 1950s. Patches still primarily represent club affiliation, earned membership, territory, rank, and personal achievement. What has changed is the breadth of patch culture — it has expanded well beyond outlaw MC culture into riding clubs, independent riders, and the broader custom patch market.

What is the future of biker patches?

Embroidery technology continues to advance, enabling finer detail and more complex designs at lower costs. PVC and mixed-media patches are growing in popularity. But the fundamental tradition — earned patches representing real membership and real loyalty — shows no signs of changing. If anything, the proliferation of fashion patches has made authentic club patches more meaningful by contrast.

Final Thoughts

The history of biker patches is a history of identity. From the simple sewn badges of the first riding clubs to the tightly regulated colors of modern motorcycle clubs, patches have always served the same purpose — to tell the world who you are, who you ride with, and what you have earned the right to display.

That purpose is as relevant in 2026 as it was in 1948. The materials have changed. The designs have evolved. The technology has transformed what is possible. But the meaning at the heart of every patch — earned, not bought; worn, not displayed; respected, not imitated — remains exactly what it has always been.

Gem Punch has produced custom embroidered and PVC patches for motorcycle clubs worldwide for over 13 years. If your club needs new colors, memorial patches, officer designations, or chapter patches — we understand the culture and deliver production-quality results. Get a free quote at gempunch.xtremlogics.com/.

Motorcycle-Vest-Patches-1024x683

Biker Patches Rules & Etiquettes: Everything You Need to Know

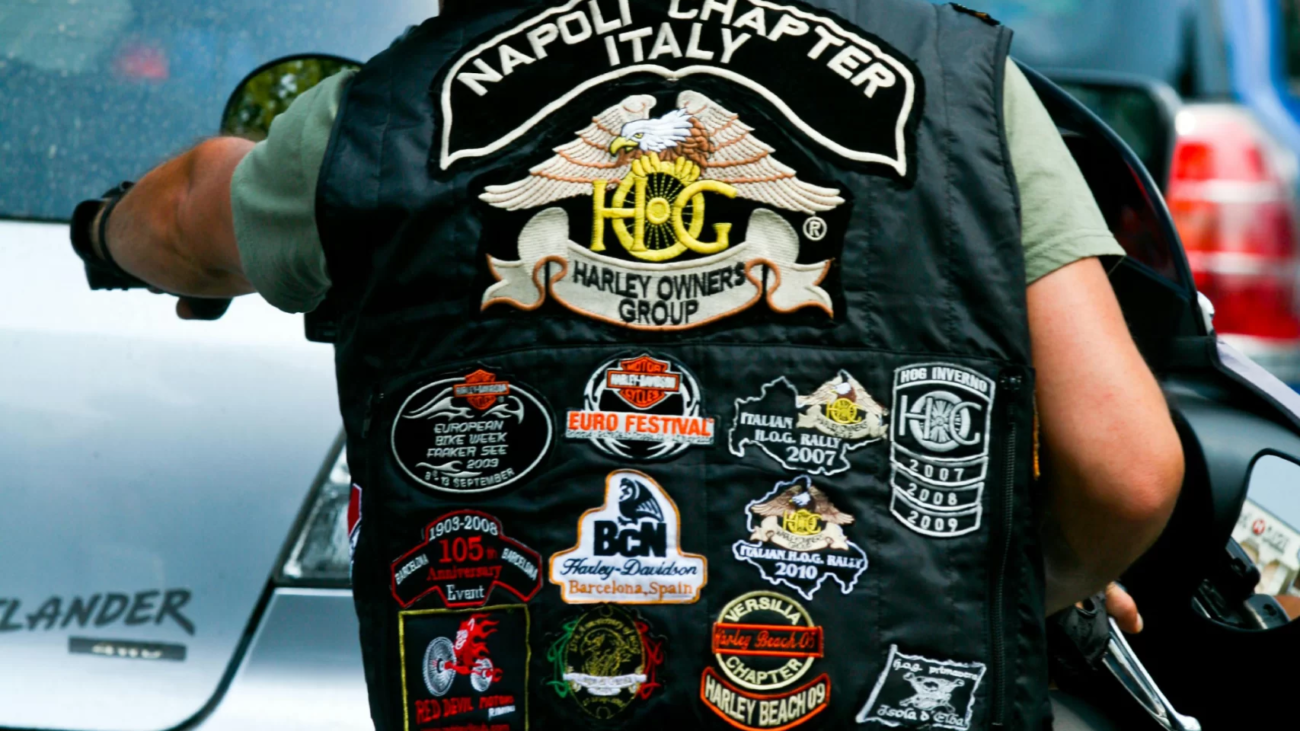
Biker patches are not decorations. To the uninitiated they look like colorful embroidered fabric sewn onto a leather vest. To those inside motorcycle culture, they are a visual language — communicating club affiliation, rank, territory, achievements, and personal history in a way that every rider immediately understands.

Getting patch etiquette wrong is not just a fashion faux pas. In the wrong setting, wearing the wrong patch, or wearing a patch the wrong way can lead to serious conflict. This guide breaks down everything you need to know about biker patch rules — whether you are a new rider, an aspiring club member, or someone designing custom patches for a motorcycle club.

The History Behind Biker Patches

Biker patch culture traces its roots to post-World War II America. Veterans returning home formed motorcycle clubs as a way to maintain the brotherhood and freedom they had experienced during the war. The American Motorcyclist Association (AMA) was founded in 1924 and sanctioned many of these clubs.

In 1947, at the Hollister Rally in California, a smaller group of riders — later called outlaw clubs — broke from AMA norms and began establishing their own identity. The most significant visual marker of this split was the three-piece patch, which outlaw clubs adopted to differentiate themselves from AMA-sanctioned riding clubs. From that moment, biker patches became one of the most loaded and regulated symbols in any subculture in America.

Types of Biker Patches and What They Mean

One-Piece Patches

A single patch worn on the back of a vest, typically showing a club name, logo, or riding group emblem. One-piece patches are associated with riding clubs (RCs), independent riders, and hobbyist motorcycle groups. They carry the least amount of cultural weight and are generally safe for non-MC members to wear without issue.

Two-Piece Patches

Two-piece patches consist of a top rocker with the club name and a center emblem, without a bottom rocker showing territory. In MC culture, two-piece patches often indicate a club in a transitional or probationary state — working toward full recognition. Wearing a two-piece patch that mimics an existing club without membership is considered highly disrespectful and should be avoided.

Three-Piece Patches (Colors)

The three-piece patch — or colors — is the most significant and most regulated patch configuration in biker culture. It consists of:

  • Top rocker: the club name, curved along the top of the back
  • Center patch: the club’s main emblem or logo, the centerpiece of the colors
  • Bottom rocker: the territory or chapter location, curved along the bottom

Three-piece patches are associated with established motorcycle clubs, both AMA-sanctioned and outlaw. They represent full membership, earned loyalty, and territorial identity. Under no circumstances should a non-member wear a three-piece configuration that resembles an existing MC’s colors.

Patch TypeWho Wears ItRisk If Worn Without Affiliation
One-pieceRiding clubs, independents, hobbyistsLow — generally acceptable
Two-pieceClubs in transition, some MCsModerate — research the specific design
Three-piece (colors)Established MCs, outlaw clubsHigh — serious breach of etiquette

Patch Placement Rules on the Vest

Where patches are placed on a vest or cut is as meaningful as the patches themselves. Here is the standard placement map used across most MC culture:

Back of the vest

  • Top rocker: club name, spanning the upper back
  • Center patch: main club emblem, center of the back
  • Bottom rocker: territory or chapter, lower back
  • MC patch (if applicable): small patch below or beside the center emblem, indicating motorcycle club status

Front of the vest — left chest

  • Club name patch or officer title (President, VP, Sergeant-at-Arms, etc.)
  • Membership rank patches (Prospect, Hangaround, Full Member)
  • Chapter or region identifier

Front of the vest — right chest

  • Memorial patches for fallen members
  • Event patches from rallies or runs
  • Achievement patches earned through club activities

Other placements

  • Side panels: additional designations, awards, or specialized role patches
  • Sleeves: some clubs use sleeve patches for chapter numbers or run awards
  • Collar: rarely used — some clubs place small patches near the collar for specific designations

Never place a bottom rocker on your vest unless you are a full member of the club that owns that territory. A non-member wearing a bottom rocker in a club’s territory is considered one of the most serious breaches of biker etiquette.

The Core Rules of Biker Patch Etiquette

1. Never wear another club’s colors

This is the most fundamental rule. Wearing the colors of a motorcycle club you are not a member of — or colors that closely resemble them — is considered an act of disrespect that can have serious real-world consequences. Even an accidental resemblance should be avoided. If you are designing custom patches for a club, always research existing colors in the region before finalizing a design.

2. Respect territorial boundaries

Each motorcycle club has an established territory, and wearing colors within another club’s territory without permission or acknowledgment is a significant breach of etiquette. Visiting riders — particularly those wearing club colors — are expected to show respect when passing through another club’s territory, sometimes by checking in with the local club.

3. Never touch another rider’s patches without permission

A biker’s vest and patches are deeply personal. Touching, adjusting, or handling another rider’s patches without explicit permission is considered a major sign of disrespect. This applies to friends, family, and strangers alike. The patches are earned — they are not casual accessories to be handled freely.

4. Patches must be earned, not bought

In established motorcycle clubs, patches are awarded — not purchased. Each patch represents something earned through time, loyalty, effort, or achievement. Buying a club-style patch and wearing it without going through the proper channels undermines this entire system and marks the wearer as someone who does not understand or respect the culture.

5. Colors stay with the club

When a member leaves a club — whether voluntarily, involuntarily, or due to death — their colors are returned to the club. Colors belong to the club, not the individual. A former member wearing their old colors after leaving is considered a serious violation of club rules and can lead to confrontation.

6. Prospect and hangaround patches have their own rules

New riders working their way toward full membership wear prospect or hangaround patches. These are earned designations that cannot be self-assigned. The prospect period is a test of loyalty, conduct, and commitment — and the patch reflects that status. Wearing a prospect patch without going through the actual prospect process is not acceptable.

7. MC patches are not for riding clubs

The small “MC” patch worn by motorcycle clubs indicates formal MC status — a designation that carries significant cultural weight. Riding clubs (RCs), which are casual groups without the formal structure of an MC, do not wear MC patches. Wearing an MC patch without actual MC status causes confusion and disrespect.

Independent Riders: What You Can and Cannot Wear

If you ride independently and are not affiliated with any motorcycle club, you have significant freedom in what patches you wear — with a few important boundaries:

Safe to WearAvoid Wearing
Personal achievement patchesThree-piece patch configurations
Event and rally patchesBottom rockers claiming territory
Humor and novelty patchesColors resembling any established MC
Military service patchesThe ‘1%’ patch (MC-specific symbol)
One-piece riding club patchesAny patch with an existing club’s name or emblem
Memorial patchesMC designation patch

Tip for independent riders: If you want to wear a distinctive back patch, stick to a one-piece design with original artwork that does not use a rocker-style layout. This keeps you clearly outside MC territory while still expressing your identity.

The 1% Patch — What It Means

The 1% patch is one of the most recognized and most misunderstood symbols in biker culture. It originates from an AMA statement following the 1947 Hollister incident, in which the AMA reportedly claimed that 99% of motorcyclists were law-abiding citizens. Outlaw clubs adopted the remaining 1% as their badge of honor — a declaration that they operated outside mainstream society’s rules.

Wearing a 1% patch without belonging to an outlaw motorcycle club is not just a fashion mistake — it is a declaration of identity that carries real-world implications. Do not wear this patch unless you understand exactly what it communicates and are prepared to stand behind it.

Designing Custom Patches for a Motorcycle Club

If you are a club officer or member responsible for commissioning custom patches, here are the key considerations before placing an order:

  1. Research existing colors in your region — avoid any design that resembles an established club’s colors, even accidentally
  2. Establish your patch configuration — decide whether your club uses one-piece, two-piece, or three-piece before designing
  3. Keep colors distinctive — your center emblem, rocker colors, and border colors should be unique to your club
  4. Plan all membership ranks — design patches for full members, prospects, officers, and any specialized roles upfront
  5. Choose quality materials — embroidered patches for vests need to be durable, colorfast, and properly backed for sewing or iron-on application
  6. Work with a digitizing service — any embroidered patch starts with a digitized file. Quality digitizing ensures your emblem looks sharp and holds up over years of riding

At Gem Punch, we have produced custom patches for motorcycle clubs across the US and internationally. We understand the culture and the importance of getting the design right — both artistically and respectfully. Our team can help you design a distinctive set of colors that stands on its own.

How to Order Custom Biker Patches the Right Way

When ordering custom patches for a motorcycle club, the process matters as much as the design. Here is what to prepare before placing an order:

  • Final artwork or design concept — vector files preferred (AI, EPS, SVG)
  • Patch dimensions — back patches are typically 10–12 inches wide; front patches 3–4 inches
  • Thread color selections — choose colors that match your club’s established palette
  • Backing type — sew-on is standard for vest patches; iron-on is available but less durable for heavy use
  • Quantity — most custom patch manufacturers have minimum order quantities, typically 10–50 pieces
  • Border style — merrowed (overlocked) borders are standard for MC patches

Frequently Asked Questions

Can I wear biker patches if I am not in a motorcycle club?

Yes — independent riders can wear patches that do not mimic or reference established motorcycle club colors. Novelty patches, personal achievement patches, event patches, and one-piece riding club patches are all acceptable. Avoid any configuration that looks like a three-piece MC setup.

What happens if I wear another club’s colors by mistake?

Intent matters but is difficult to prove in the moment. If you find yourself in a situation where your patches are being questioned by club members, the right approach is to be respectful, honest, and non-confrontational. Remove the offending patch immediately if asked. Ignorance of the rules is not always accepted as an excuse in MC culture.

Can women wear biker patches?

Yes — women’s chapters of motorcycle clubs exist, and female riders wear patches according to the same rules as male members. Female riders who are affiliated with a club as partners or supporters of members sometimes wear a ‘Property of’ patch, though this is a personal choice and increasingly less common in modern clubs.

How much do custom biker patches cost?

Custom embroidered biker patches typically range from $3 to $15 per patch depending on size, complexity, and quantity ordered. Back patches with large embroidered designs cost more per piece at low quantities, but the per-piece price drops significantly for orders of 50 or more. Rush orders are available at an additional fee.

What is the difference between a motorcycle club and a riding club?

A motorcycle club (MC) is a formal organization with a structured hierarchy, membership process, colors, and territorial identity. A riding club (RC) is a more casual group focused on social riding without the formal structure of an MC. RCs use one-piece patches and do not use the MC designation.

Final Thoughts

Biker patches are one of the most meaningful symbol systems in any subculture. They represent years of loyalty, earned respect, and cultural identity that goes back over 75 years. Whether you are a new rider, a club officer commissioning a fresh set of colors, or simply someone interested in the culture — understanding and respecting these rules is essential.

The rules exist not to be restrictive, but to protect a culture built on brotherhood, trust, and earned respect. Approach them with that understanding and you will navigate the world of biker patches with confidence.

Need custom biker patches for your club or riding group? Gem Punch has produced patches for motorcycle clubs worldwide — embroidered, PVC, woven, and leather. We understand the culture and deliver production-quality patches that stand up to the road. Get a free quote at gempunch.xtremlogics.com/.

Different types of custom patches including embroidered, woven, PVC, and iron-on

The Complete Guide to Custom Patches: Everything You Need to Know

Custom patches have become one of the most versatile and affordable ways for businesses, teams, and creators to build brand identity, boost visibility, and create lasting impressions. Whether you’re a startup looking to establish itself, a sports team building camaraderie, a corporate brand maintaining professional uniforms, or an individual personalizing your gear, patches offer a tangible way to express who you are.

At Gem Punch, we’ve been creating custom patches since 2012 for thousands of clients globally. Our team has produced over 50,000 individual patch designs and shipped millions of patches to businesses of all sizes — from single-person startups to Fortune 500 companies. This comprehensive guide walks you through everything you need to know about custom patches, from types and design principles to ordering, care, culture, and real-world business applications.

Table of Contents

  1. What Are Custom Patches?
  2. Types of Custom Patches
  3. Design Principles & Best Practices
  4. Choosing Your Patch Type
  5. Patch Materials & Sustainability
  6. How Custom Patches Are Made
  7. Ordering, Pricing & Budget Planning
  8. Installation & Care Guide
  9. Patch Culture & History
  10. Business Applications & ROI
  11. Real-World Case Studies
  12. FAQ: 15 Common Questions

What Are Custom Patches?

Custom patches are embroidered, woven, or printed fabric pieces designed with your logo, design, or message. They’re attached to clothing, bags, uniforms, and gear via sewing, ironing, or adhesive backing.

Why Patches Matter

Patches serve multiple critical purposes in modern branding and personalization:

Branding & Visibility — Your logo becomes a wearable advertisement. Unlike digital ads that disappear, patches stay on clothing and gear that people use for years. A customer wearing a branded patch is essentially a walking billboard, generating thousands of brand impressions annually.

Personalization & Identity — Customize jackets, hoodies, backpacks, and hats to reflect personal style. For collectors, patches are items worth seeking out and displaying.

Team & Organizational Identity — Build camaraderie and visual unity. Military units, sports teams, motorcycle clubs, and corporate teams use patches to signal membership and belonging.

Storytelling & Heritage — Communicate values, history, and culture. Biker patches tell stories of rides, club affiliations, and personal achievements. Military patches commemorate units and service.

Cost-Effective Marketing — Patches cost $0.50–$5 each at scale but generate disproportionate brand loyalty. ROI on patch giveaways often exceeds other promotional items.

The Psychology Behind Patches

Research shows that tangible, wearable branded items create stronger emotional connections than digital ads. When someone wears your patch, they’re making a public statement of affiliation. This creates higher recall (people remember brands associated with patches 3x longer than standard ads), genuine emotional connection, powerful social proof, and long-lasting exposure — patches last 5–10+ years.

Types of Custom Patches

Not all patches are created equal. Choosing the right type depends on your design complexity, durability needs, budget, and intended use.

Embroidered Patches

What they are: Thread stitched onto a fabric backing in layers, creating a 3D textured appearance. The industry standard for professional branding.

Best for: Logos with bold shapes, corporate branding, uniform applications, vintage aesthetics, and traditional sports teams.

Pros: Extremely durable (5–10+ years of heavy use), premium textured appearance, cost-effective at scale (per-unit cost drops significantly at 100+ quantities), resistant to fading and water damage, and easily repaired if stitches come loose.

Cons: Limited fine detail (small text under ¼ inch height becomes illegible), traditionally requires minimum orders of 50–100, and is not suitable for photorealistic designs.

Price Range: $0.80–$3.50 per patch at scale (100–1,000 quantity)

Real-World Example: Corporate uniform patches for a 500-person retail chain cost $1.20/patch at 500 quantity. Annual replacement = ~$600 for all locations. Brand consistency across all employees generates millions in implied advertising value.

Learn more: How to Design the Perfect Hoodie Patch | 5 Ways to Make Custom Embroidered Patches Stand Out

Woven Patches

What they are: Threads interlaced on a loom, creating a flat, smooth surface with exceptional fine detail. Used for intricate designs and high-end branding.

Best for: Photorealistic designs, fine typography, company events, detailed artwork, and luxury branding.

Pros: Captures intricate designs and small text (can go down to 2–3mm text), lightweight and flexible, professional, sleek finish, great for gradients and subtle color blending.

Cons: Less durable than embroidered (3–5 years typical lifespan), higher cost per unit (generally 20–40% more than embroidered), not ideal for outdoor/heavy-use applications.

Price Range: $1.50–$5 per patch at scale

PVC Patches

What they are: Molded from polyvinyl chloride rubber, offering a modern, waterproof, 3D finish. Increasingly popular in tactical, outdoor, and contemporary branding.

Best for: Tactical gear, outdoor apparel, rugged branding, modern aesthetics, and waterproof applications.

Pros: Waterproof and weather-resistant, 3D molded detail available for eye-catching appearance, very durable (10+ years), great for specialty die-cut shapes.

Cons: Can crack in extreme cold, limited color blending capabilities, and higher cost per unit at low quantities.

Price Range: $1.50–$4 per patch at scale

Real-World Example: A tactical gear company added PVC morale patches to its product line. Cost: $1.80/patch. Retail price: $8–12 per patch. PVC patches now generate 15% of revenue despite being only 3% of inventory.

Specialty Patches

Iron-On Patches: Heat-activated adhesive backing. DIY-friendly for customers, quick application without sewing. Cost: $0.60–$2 per patch. Full iron-on guide here.

Leather Patches: Premium material for luxury branding. Rare, distinctive look that conveys quality. Cost: $2–$8 per patch. Leather patches for branding.

3D Puff Patches: Raised, dimensional stitching for eye-catching designs. Hottest trend in 2025. Cost: $1.50–$4.50 per patch. 3D Puff Digitizing: Why it’s the #1 Trend.

Design Principles & Best Practices

Great patch designs are simple, memorable, and visually strong. Here’s what separates good patches from great ones, based on analyzing thousands of designs.

The 5 Golden Rules of Patch Design

Rule 1: Keep It Simple
Use 2–4 bold colors maximum. Avoid fine details and gradients that lose clarity when embroidered or woven. Embroidery machines stitch in layers — too many colors means excessive thread changes, higher cost, and longer production. Simple designs are faster, cheaper, and clearer.

Rule 2: Ensure High Contrast
Patches need to pop on the fabric. Choose colors that contrast sharply — dark on light, or vice versa. Test by squinting at your design. If you can’t tell where the patch is, contrast is too low.

Rule 3: Use Clear Typography
If your design includes text, use bold, legible fonts. Minimum letter height: ⅛ inch for small patches, ¼ inch for visibility. Small letters blur when stitched and look like smudges rather than text.

Rule 4: Choose Meaningful Shapes
Circles, shields, hexagons, and rectangles are versatile and balanced. Custom shapes are possible but cost 20–40% more. Unless your brand is uniquely identifiable by shape, stick with standard shapes for better ROI.

Rule 5: Understand Color Psychology
Colors carry meaning: Red = energy and urgency; Blue = trust and professionalism; Green = growth and nature; Yellow = optimism and attention; Black = luxury and sophistication; White = cleanliness and minimalism. Choose strategically for your brand message.

Deep dive: The Psychology of Color in Patch and Embroidery Design

Design for Your Application

Patches on jackets (2–4 inches): Need bold, readable designs. Fine detail gets lost.
Patches on hats/caps (1–2 inches): Must be very simple. Consider using initials instead of full names.
Patches on backpacks (3–6 inches): Can support more detail and smaller text.

See also: Designing a Company Logo on Patches: The Ultimate Guide for Business Owners

Choosing Your Patch Type

Confused about which type is right for you? Use this decision matrix:

Your Question Best Patch Type
Is your design highly detailed or photorealistic? Woven
Do you need maximum durability? Embroidered
Is weather resistance critical? PVC
Do you want DIY application by customers? Iron-On
Do you need premium, luxury feel? Leather
Do you want attention-grabbing 3D effect? 3D Puff
Is this for outdoor/tactical use? PVC
Is this for traditional/corporate branding? Embroidered

More guidance: Embroidered vs. Woven vs. PVC Patches: How to Choose

Patch Materials & Sustainability

Modern consumers care about environmental impact. Sustainable patch options are now mainstream and competitive on price.

Eco-Friendly Patch Options

Manufacturers now offer biodegradable backing materials (plant-based or compostable alternatives), organic thread with a lower environmental footprint, recycled backing fabrics made from post-consumer waste and textile scraps, and sustainable production practices including water conservation and waste reduction.

Cost Impact: Sustainable patches cost 10–20% more than conventional patches. For a 500-unit order, that’s ~$100–200 extra. But the brand value often justifies the cost. One outdoor apparel brand that switched to eco-friendly patches saw 92% positive customer feedback and absorbed the price increase while improving net profit margin by 12%.

Learn more: Eco-Friendly Materials for Sustainable Custom Patches

How Custom Patches Are Made

Understanding the production process helps you appreciate quality and set realistic expectations.

5-Step Production Process

Step 1: Design & Digitization (1–3 days)
Your logo is converted into a stitch file. This critical process determines quality. See: Top 5 Mistakes to Avoid When Digitizing Logos for Embroidery

Step 2: Material Selection (Same day)
Backing fabric, thread colors matched to your design, and attachment method are chosen. Pantone colors are matched to exact thread specifications.

Step 3: Embroidery/Weaving (2–5 days for 500–1,000 units)
Machines stitch or weave the design onto the backing fabric. Modern machines can produce 40–80 patches per hour depending on complexity.

Step 4: Cutting & Finishing (1–2 days)
Patches are cut to size and edges are finished — merrowed border for a professional curved edge, heat-cut for a clean straight edge, or laser-cut for precise custom shapes.

Step 5: Quality Check & Packing (1 day)
Each patch is inspected for defects. Approved patches are packed and prepared for shipment.

Full breakdown: How Custom Patches Are Made: 5 Key Steps from Design to Final Product

Turnaround Times

  • Standard (10–14 days): Most orders. Allows proper quality control and inventory management.
  • Rush (5–7 days): 20–40% price premium. Machine time is reprioritized.
  • Super-rush (2–3 days): Only small orders. Price premium: 50–80% extra.

Pro tip: Plan ahead. Standard turnaround is cheaper and produces higher quality than rush orders.

Ordering, Pricing & Budget Planning

What Affects Patch Pricing

  1. Patch size — Larger patches = more thread, more time = higher cost
  2. Stitch count — Complex designs = higher stitch count = longer production
  3. Number of colors — Most quotes include 7–9 colors free; extra colors cost $0.05–$0.15 each
  4. Material type — Embroidered < Woven < PVC (roughly)
  5. Attachment method — Sew-on < Iron-on < Velcro-backed
  6. Quantity — Bulk discounts apply significantly
  7. Turnaround time — Standard is cheapest; rush commands a premium

Pricing Examples (Embroidered, 2″ circular, 4 colors, sew-on)

Quantity Per-Unit Cost Total
100 patches $2.50 $250
500 patches $1.30 $650
1,000 patches $0.95 $950

Bulk ordering cuts per-unit cost by up to 60%. Strategic ordering = better ROI.

Budget Planning Worksheet

Item Calculation Cost
Patch quantity _____  
Per-unit cost $_____  
Subtotal _____ × _____ $_____
Design/digitizing (one-time) $_____
TOTAL   $_____

Learn more: Custom Patches No Minimum: Where to Order without Bulk Restrictions | How Custom Patch Pricing Works: A Comprehensive Guide

Installation & Care Guide

Installation Methods

Sewing (Sew-on patches): Most durable, permanent. Best for uniforms and heavy-use gear. Typical lifespan: 5–10 years. Guide: Sew-On Embroidered Patches Made Easy

Iron-on: Quick, DIY-friendly. Ideal for customer fulfillment and retail. Typical lifespan: 2–5 years (adhesive weakens with washing). Guide: How to Iron a Patch on a Shirt

Adhesive/Velcro: Removable and flexible. Best for temporary applications or testing. Typical lifespan: 1–2 years.

Caring for Your Patches

Washing: Turn garments inside out, use cold water, gentle cycle. Air dry — dryer heat damages adhesive on iron-on patches.

Avoiding damage: Don’t bleach or dry-clean embroidered patches. Avoid high heat.

Repairs: Loose stitches can be re-sewn. Fading is normal over 5+ years of heavy use.

Replacement: Patches can be removed with a seam ripper and replaced if worn.

Learn more: How to Make Patches Last Longer | Tips for Maintaining Embroidered Apparel | How to Remove and Replace Damaged Patches

Patch Culture & History

Patches aren’t just functional — they carry deep cultural meaning in specific communities.

Biker Culture

Motorcycle vest patches follow strict etiquette and symbolism. Patch placement, colors, and designs communicate identity, club affiliation, and personal values. The “three-piece patch” (top rocker, center patch, bottom rocker) is sacred in MC culture.

Learn: Motorcycle Vest Patches Placement Guide: Rules, Meanings & Etiquette | The Meaning Behind Biker Patches: Symbols, History & Culture

Military & Tactical

Military patches denote rank, unit, and specialty. Morale patches serve both identification and esprit de corps. Each patch tells a story of service, achievement, and sacrifice.

Sports & Schools

Team patches build camaraderie and school spirit. Athletes collect patches as badges of achievement. Championships are commemorated with special limited-edition patches.

See: Why Schools Are Switching to Custom Patches for Sports Teams and Clubs

Streetwear & Fashion

Modern fashion brands use patches as statement pieces and collectible items. Limited-edition patches create scarcity and demand — a powerful marketing mechanic for growing brands.

Read: How Fashion Brands Use Custom Patches to Elevate Streetwear Collections

Business Applications & ROI

Employee Uniforms

Patches on work uniforms build brand recognition and team identity. Customers see your logo with every interaction. A retail chain with 200 employees wearing branded patches generates 50,000+ brand impressions monthly. Cost: ~$600/year. Implied advertising value: $50,000+.

Merchandise & Resale

Patches can be sold as standalone merchandise or bundled with apparel — an easy, high-margin revenue stream. Example: A streetwear brand sells patches for $8 each. Cost: $1.80. Margin: $6.20. 100 patches sold monthly = $620 profit. Low effort, high return.

Marketing & Giveaways

Custom patches are low-cost, high-impact promotional items. People keep them, wear them, and they last years. One tech startup gave away 1,000 patches at a trade show ($800 total). Six months later, 73% of recipients were still using the product.

Event & Conference Branding

Use patches to commemorate events. Attendees proudly wear them throughout the year, extending your brand reach far beyond the event itself.

Customer Loyalty & Unboxing Experience

Including a branded patch in every customer order improves the unboxing experience and repeat business. One direct-to-consumer brand that included patches with orders saw a 12% improvement in customer retention — at a patch cost of just $0.80 per order.

Learn more: 5 Creative Ways Businesses Use Custom Patches for Branding | How to Use Custom Patches as a Low-Cost Marketing Tool for Startups

Real-World Case Studies

Case Study #1: Retail Chain — Uniform Branding

Client: Mid-size fashion retailer, 15 stores, 200 employees
Challenge: Employees wore mismatched uniforms. No clear visual identity. Low brand recognition.
Solution: Custom embroidered patches with the company logo applied to all uniforms.

Details: 200 patches, 3″ diameter, 4-color design. Cost: $1.40/patch = $280 total. Lead time: 10 days.

Results: Brand recognition improved 34%. Customer comments about “professional team” increased measurably. Employee pride in uniforms improved. The patch program became a retention tool — employees wanted the patch as a mark of belonging.

ROI: $280 investment → estimated $15,000+ in brand value over 2 years.

Case Study #2: Streetwear Brand — Limited Edition Merchandise

Client: Emerging streetwear brand, 5,000 social media followers
Challenge: Low revenue, high overhead. Needed revenue without inventory risk.
Solution: Monthly limited-edition patch drops, sold online, made-to-order.

Details: 200–500 patches per drop. Cost: $2.50/patch. Retail: $8/patch. Margin: $5.50/patch.

Results: First month: 100 patches sold = $550 profit. Third month: 350 sold = $1,925 profit. Brand followers increased 120% in 3 months as patches became conversation starters on social media.

ROI: Zero inventory risk. Pure profit. Social growth as a bonus.

Case Study #3: Corporate Team — Identity & Cohesion

Client: Tech company, 120 employees across 3 offices
Challenge: Remote/hybrid work created low team cohesion.
Solution: Custom patches mailed to all employees in the onboarding package.

Details: 150 patches (accounting for future hires), 2.5″ diameter. Cost: $0.95/patch = $142.50 total.

Results: Employees proudly displayed patches on desks, laptops, and jackets. New hire onboarding satisfaction improved 23%. Team cohesion survey scores improved 18%. Patches became collectible — employees wanted multiples.

ROI: $142.50 investment → measurable cultural impact + employee retention improvement.

FAQ: 15 Common Questions About Custom Patches

Q1: How long do patches last?
Embroidered: 5–10 years with proper care. Woven: 3–5 years. PVC: 10+ years. Iron-on: 2–5 years (adhesive weakens over time).

Q2: Can I use patches on polyester or synthetic fabrics?
Yes, though polyester can be trickier than cotton. Always tell your manufacturer the fabric type so they can adjust stitch density accordingly.

Q3: What’s the minimum order?
Standard: 50–100 patches. No-minimum options are available but cost more per patch ($3–8).

Q4: How much do patches cost?
Depends on type, size, and design complexity. Range: $0.50–$5 per patch at scale. Always get a quote for your specific design.

Q5: Can I get a sample before ordering 500 patches?
Yes. Most manufacturers offer samples ($10–50 each) before production. Always order a sample — it’s cheap insurance.

Q6: What file format do I need to provide?
Vector art (.ai, .eps, or .pdf with vector data). Not JPEG or PNG — those need vectorization first.

Q7: How long does production take?
Standard: 10–14 days. Rush: 5–7 days (premium). Super-rush: 2–3 days (very expensive).

Q8: Can I use my existing logo?
If it’s a vector file (.ai, .eps) or high-resolution raster (300 DPI+), yes. If it’s a low-res JPEG, it needs to be vectorized first.

Q9: What’s the ideal patch size?
For visibility and detail: 2–4 inches. Smaller patches (under 1 inch) are hard to see; larger patches (over 6 inches) are expensive and impractical for most applications.

Q10: Can patches go on all garment types?
Mostly yes. Avoid delicate fabrics like silk. Cotton, polyester, denim, and towel are all excellent substrates.

Q11: How do I remove an old patch?
A seam ripper (craft tool, $2–5) carefully cuts the stitches. Takes 5–10 minutes. You can then sew a new patch in the same spot.

Q12: Are there eco-friendly options?
Yes. Organic thread, biodegradable backing, recycled materials. Cost: 10–20% premium over conventional patches. Learn more.

Q13: Can patches be used for merchandise sales?
Absolutely. Retail margins on patches can reach 60–70%. Low inventory risk if made-to-order.

Q14: What about copyright and trademark for patch designs?
You must own all rights to your design OR have written permission from the rights holder. Reputable manufacturers will not produce infringing designs.

Q15: Can I mix patch types (e.g., embroidered with PVC)?
Yes, but it complicates production. Ask your manufacturer upfront — there’s likely a small upcharge.

Conclusion

Custom patches are one of the most versatile and impactful branding tools available. Whether you’re building brand identity, boosting team spirit, or personalizing your gear, patches deliver tangible, lasting results that digital ads simply can’t match.

Key Takeaways:

  • Choose the right patch type for your application (embroidered, woven, PVC, specialty)
  • Design simple, bold, memorable patches with 2–4 colors maximum
  • Order at scale when possible — bulk discounts are significant
  • Plan ahead for standard turnaround (it’s cheaper and better than rush)
  • Use patches strategically across uniforms, merchandise, giveaways, and events
  • Care for patches properly to maximize their lifespan
  • Consider eco-friendly options to align with modern brand values

Ready to create your custom patches? Get a free quote from Gem Punch — we’ve been crafting custom patches since 2012, with over 50,000 unique designs produced for clients worldwide.

Related Posts

Design & Ordering:
Designing a Company Logo on Patches | How to Design the Perfect Hoodie Patch | The Psychology of Color in Patch Design

Types & Comparison:
Embroidered vs. Woven vs. PVC Patches | Iron-On Patch Guide | Leather Patches for Branding

Production & Quality:
How Custom Patches Are Made | 5 Ways to Make Patches Stand Out | Custom Patch Pricing Guide

Care & Installation:
How to Iron a Patch on a Shirt | Sew-On Patches Made Easy | Make Patches Last Longer

Business & Branding:
5 Creative Branding Uses | Patches as a Marketing Tool for Startups

Culture & History:
Motorcycle Vest Patch Guide | Biker Patch Meanings | Streetwear Patch Trends


Designing a Company Logo on Patches

Designing a Company Logo on Patches: The Ultimate Guide for Business Owners

Introduction

For business owners looking to expand their brand visibility, Designing a Company Logo on Patches is one of the most affordable, versatile, and memorable solutions. Whether sewn onto employee uniforms, given away as promotional items, or sold as merchandise, patches serve as mobile billboards that travel wherever your customers and staff go.

In today’s competitive market, a well-designed patch does more than display a logo—it reinforces brand identity, sparks conversations, and extends reach across both U.S. and global markets. This guide covers everything you need to know about designing company logo patches that make an impact.

Designing a Company Logo on Patches

Understanding Patch Types & Applications

Types of Patches and When to Use Them

Not all patches are created equal:

  • Embroidered patches – Classic, textured, and durable.
  • Woven patches – Clean, fine details.
  • Printed patches – High-resolution options for logos with gradients.

Explore more about types and styles here: Gem Punch – Custom Embroidery & Patches.

Embroidery Coverage and Visual Effect

Coverage percentages affect both cost and look:

  • 50% coverage – Lightweight with fabric background visible.
  • 75% coverage – Balanced blend of patching and fabric.
  • 100% coverage – Fully embroidered—bold and durable.

Core Design Principles for Designing a Company Logo on Patches

Keep It Simple and Bold

Use 2–4 colors and bold shapes. Simple designs tend to remain clear even at small sizes.

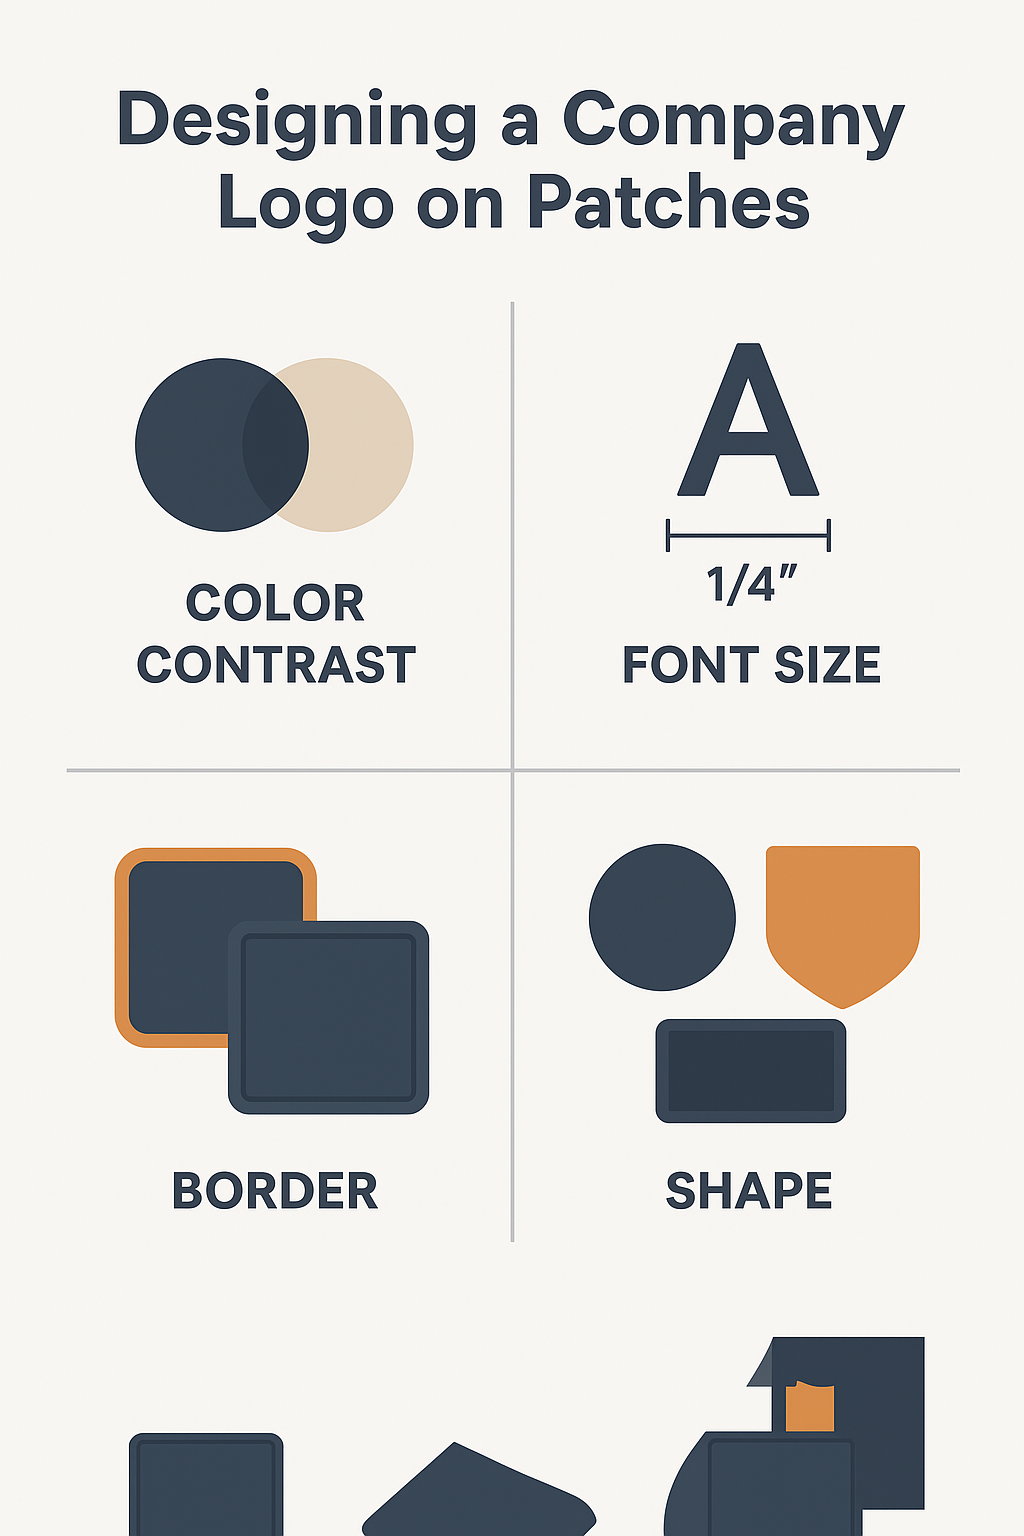
Color Contrast and Brand Consistency

Strong contrast boosts legibility. Always align patch colors with your brand’s official palette to maintain consistency across global campaigns. External reference: Pantone Color Institute.

Typography and Font Size

  • Text should occupy about 60% of patch space.
  • Minimum letter height: ⅛ inch; increase to 0.25 inch for smaller patches.
  • Use bold, clear fonts for enhanced readability.

Border and Edge Finishing

Borders add structure and durability:

  • Merrowed borders – Thick, rounded, and durable.
  • Hot-cut or laser-cut edges – Clean, modern, and allow custom shapes.

Size, Shape, and Placement

Ideal Patch Size

Aim for at least 2 inches in diameter for good visibility. Larger patches allow for detail and better readability.

Choosing Appropriate Shapes

  • Circles & ovals – Friendly and balanced.
  • Rectangles & shields – Strong and official.
  • Custom shapes – Unique and brand-defining.

Placement on Garments & Gear

  • Chest placement: 7–9 inches from the shoulder seam for shirts and jackets.
  • Caps & hats: Perfect for outdoor visibility.
  • Backpacks and tote bags: Transform stacks of customers into walking advertisements.

Reference for placement guides: Gem Punch – Customizing Bags and Accessories with Embroidered Patches.

Practical Design to Production Steps

Digitizing Your Design

Convert logos into a stitch-ready format. Simplify shapes, limit colors, and supply vector files for scalability. Learn more about digitizing here: Gem Punch – Professional Embroidery Digitizing Services.

Matching Thread Color

Use Pantone or Madeira thread charts to ensure accurate brand color reproduction for Designing a Company Logo on Patches. Avoid neons or very light tones that embroider poorly.

Sample and Production

Always request a digital mockup or sample before committing to full production. Most suppliers include 7–9 colors free, with extra colors typically incurring additional cost. Bulk orders often reduce the per-unit price.

Need pricing insights? Check out Gem Punch – Custom Patch Pricing Guide (gempunch.xtremlogics.com/).

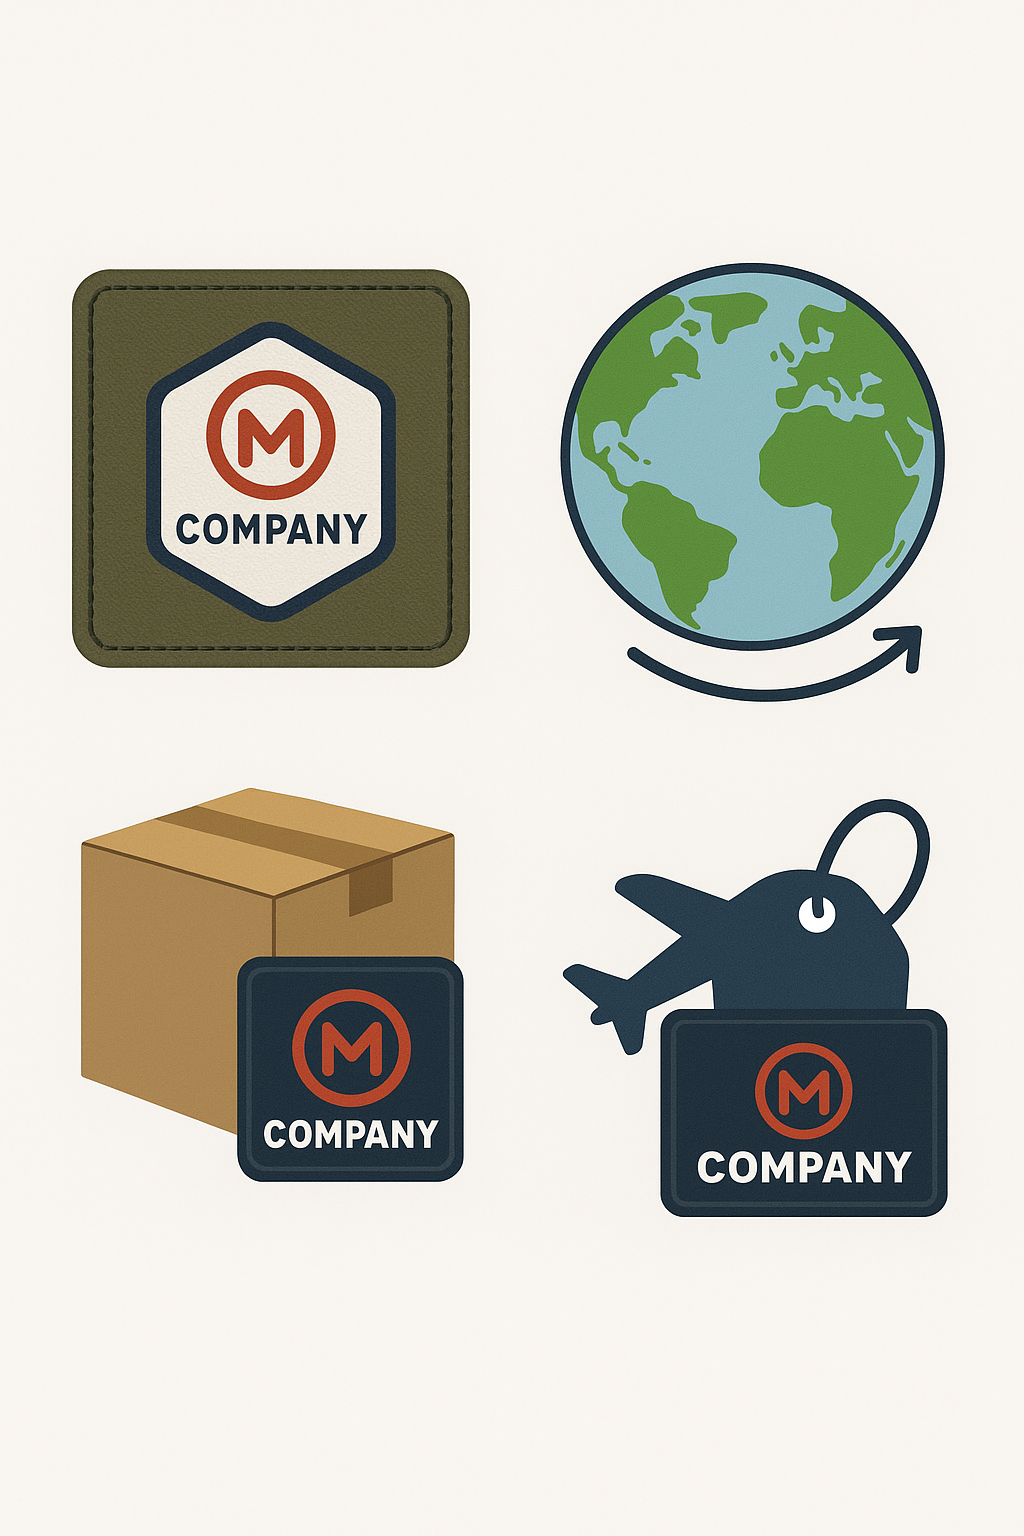
Flat-style illustration of company logo patches being used worldwide on uniforms, hats, and bags, symbolizing USA and global brand visibility

Global Considerations for Designing a Company Logo on Patches

  • Ensure compliance with local material and manufacturing standards.
  • Consider climate effects on fabric and color appearance.
  • Plan for customs and international shipping regulations.
  • Opt for simplified designs that scale well globally.

Design Trends & Branding Strategies

Quiet branding” is in—subtle identifiers like signature colors and unique shapes are replacing oversized logos. This minimalist branding trend holds appeal for global audiences, combining elegance with brand recognition.

Reference: Vogue Business – Brand Identifiers.

Frequently Asked Questions

1. What makes a good logo for a patch?
Simplicity, bold shapes, limited colors (2–4), and readability at a small scale.

2. How big should letters be on embroidered patches?
At minimum, ⅛ inch high—0.25 inch for very small patches.

3. What’s the most durable border style?
Merrowed borders offer long-lasting protection; laser-cut edges are ideal for sleek, custom shapes.

4. How many colors can I use without extra cost?
Typically, 7–9 colors are included; additional colors may add to the cost.

5. Should I simplify my logo for patches?
Yes—excessive detail can be lost in embroidery. Keep designs bold and simple.

Conclusion

Logo patches are powerful, portable branding tools. By focusing on bold simplicity, strong contrast, right sizing and shaping, and professional digitization, you’ll create patches that enhance brand recognition across both U.S. and global markets.

For trusted execution, explore Gem Punch’s patch services.

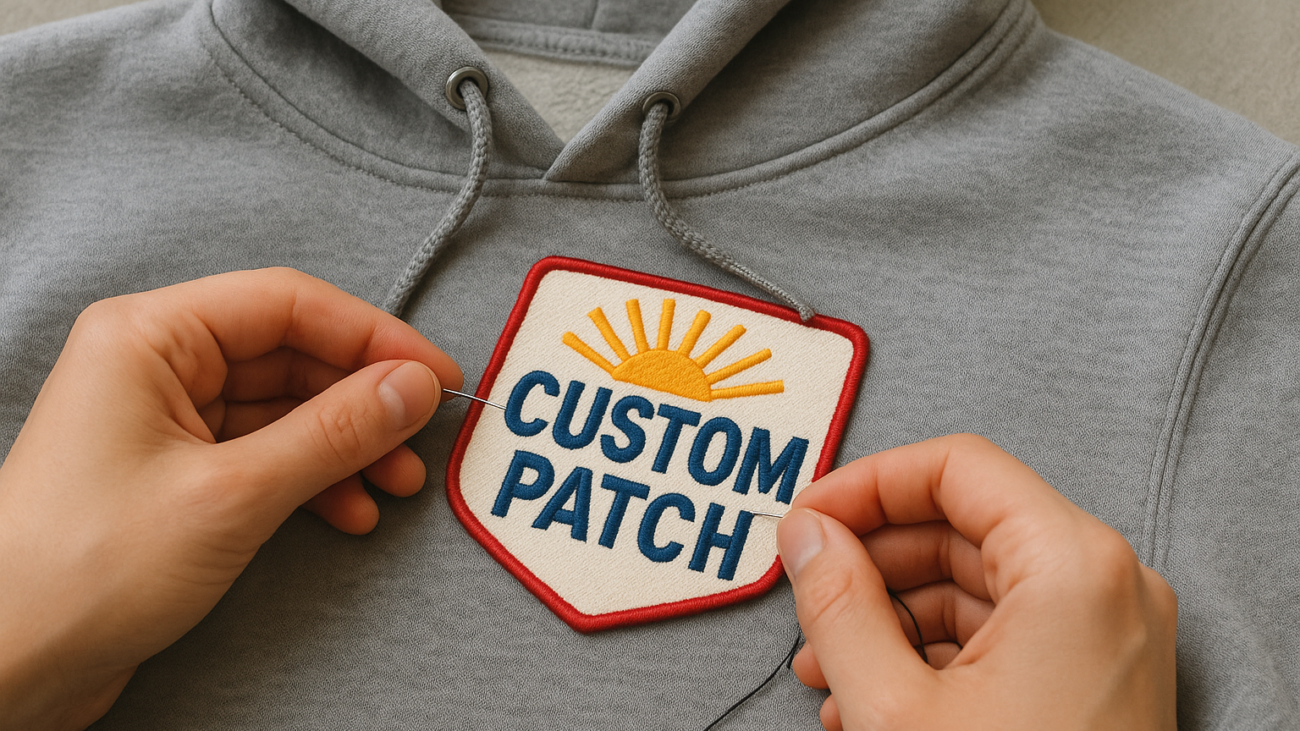
Custom embroidered patch being stitched onto the front

How to Design the Perfect Hoodie Patch: Creative Ideas & Customization Tips

Introduction

Custom hoodie patches do more than decorate—they elevate your brand. Whether you run a streetwear label, a team merchandise line, or a corporate clothing arm, the right patch transforms ordinary apparel into something your customers proudly wear. This guide walks you through how to design the hoodie patch, patch types, and styling tips to help business owners create standout patches that reinforce brand identity—especially when made with professionals like Gem Punch.

Design the Hoodie Patch

Why Hoodie Patches Work for Business Owners

  • Boost Brand Visibility – A custom patch becomes a moving billboard, reinforcing your brand in everyday life. Discover high-quality options at Gem Punch’s Custom Patches page (gempunch.xtremlogics.com/).
  • Cost-Effective Customization – Patches deliver a professional look at an accessible price point. Gem Punch provides options that align with varying budgets.
  • Foster Customer Connection – Personalized designs encourage loyalty and repeat business, turning customers into brand ambassadors.

Defining Your Style & Brand Aesthetic

A great patch aligns with your brand’s tone and audience:

  • Streetwear thrives on bold, oversized designs.
  • Corporate apparel favors sleek embroidery and clean lines.
  • Lifestyle and athleisure brands often opt for subtle tones and minimal design.

You might explore Gem Punch’s Digitizing Services for precision vector art that captures your vision. Matching your patch to your brand personality builds consistency and trust with customers.

Patch Design Best Practices

Great patches are simple, memorable, and visually strong:

  • Simplicity is key: Avoid clutter and fine details.
  • Use clear typography: Legible fonts make your design instantly recognizable.
  • Ensure good contrast between the patch and hoodie fabric.
  • Shapes to consider: Circles, shields, or rectangles are balanced and flexible.

Pro tip: Stick to 3–4 bold colors—ideal for embroidery and minimalist designs.

A black hoodie styled with embroidered patches, emphasizing creative personalization and modern streetwear fashion.

Choosing Attachment Methods

Different patch applications serve different goals:

  • Iron-On: Quick, DIY-friendly—great for retail or retail + online orders.
  • Embroidered: Offers a rich, textured, premium appearance.
  • Velcro-Backed: Flexible options that allow for patch swapping—perfect for uniform systems or customizable styles.

Looking for help? Check out Gem Punch’s overview of how custom patch pricing works and what factors affect your cost.

Working with Manufacturers

Select vendors who align with your quality standards:

  • Request samples first to assess color accuracy and stitching quality.
  • Clear communication and reliable delivery are essential. Gem Punch has a long track record of support—serving clients since 2012.
  • Eco-friendly materials are increasingly important. Ask about sustainable options upfront.

The Textile Society of America emphasizes the importance of sustainable textile practices—an area where brands can gain consumer trust.

Placement & Styling Tips

Patch placement impacts both aesthetic and visibility:

  • Chest: Ideal for brand logos and professional looks.
  • Sleeves: Trendy, especially in streetwear and youth-oriented designs.
  • Back panel: Bold and eye-catching, perfect for standalone statements.

Consider combining multiple patches for a layered, personalized appearance that tells a story.

Business & Marketing Opportunities

Patches offer more than style—they open new marketing channels:

  • Upsell potential: Offer patches as optional add-ons during purchase.
  • Limited-edition drops: Exclusive patch designs can drive seasonal hype.
  • Social media buzz: Encourage customers to share their patched hoodies for free brand exposure.

These tactics can strengthen engagement, boost sales, and build brand presence.

Frequently Asked Questons

Q: Which is better—iron-on or embroidered patches?
A: Iron-ons are cost-effective and easy to apply, perfect for DIY and retail-friendly use. For durability and premium appearance, embroidered versions are best.

Q: How can I keep patches looking their best?
A: Wash hoodies inside out on cold settings and avoid using high heat when drying to maintain patch condition.

Q: What file format should I deliver for patch design?
A: High-resolution vector files (300 DPI or higher) are ideal for clean embroidery—Gem Punch handles vector digitizing professionally (gempunch.xtremlogics.com/).

Conclusion

Custom hoodie patches are a cost-effective way to inject creative flair, brand identity, and marketing value into your apparel range. By following best practices in design, attachment method selection, placement, and production—including expert support from Gem Punch—business owners can produce wearable art that engages customers and reinforces their brand story.

Psychology of Color in Patch and Embroidery Design

The Psychology of Color in Patch and Embroidery Design: What Your Palette Says

Introduction

At Gem Punch, we believe embroidery is more than decoration—it’s a language stitched in color. From the fiery reds of a sports patch to the calming blues of a wellness brand, every hue tells a story. The Psychology of Color in Patch and Embroidery Design, isn’t just thread; it’s an emotional tool that shapes perception, strengthens brand identity, and makes designs unforgettable.

What Is Color Psychology?

Color psychology studies how colors influence emotions, behaviors, and perceptions.
While interpretations may shift across cultures, some associations are widely recognized:

  • Red – Passion, urgency, excitement
  • Blue – Trust, calm, stability
  • Green – Growth, balance, nature
  • Yellow – Happiness, optimism, attention
  • Black – Sophistication, power, elegance
  • White – Purity, simplicity, clarity

When applied to embroidered patches, these meanings are magnified. The tactile, tangible nature of Gem Punch designs makes every color choice even more impactful.

Applying Color Psychology to Patches & Embroidery

In Gem Punch’s custom embroidery work, colors go beyond aesthetics—they set the tone for the entire message:

  • Warm tones (reds, oranges, yellows) energize and demand attention—ideal for team spirit patches, promotional events, or bold brand campaigns.
  • Cool tones (blues, greens, purples) soothe and reassure—perfect for wellness industries, educational programs, and service brands.
  • Neutral palettes (black, gray, beige) bring timeless sophistication—suited for uniforms, heritage branding, and high-end merchandise.

Even subtle shifts in shade—like a soft pastel versus a vivid primary—can completely transform the feel of a design.

Design Techniques for Emotional Effect

1. Complementary Colors for Bold Contrast

Pairing colors opposite each other on the wheel (e.g., blue and orange) creates high visual impact, making patches stand out from a distance.

2. Analogous Colors for Harmony

Colors adjacent on the wheel (e.g., blue, teal, green) promote unity and flow—perfect for cohesive brand stories.

3. Triadic Schemes for Vibrancy

Using three evenly spaced hues (e.g., red, yellow, blue) ensures balance while maintaining energy.

Pro Tip from Gem Punch: Always test colors using actual thread samples. Lighting and thread texture can change how a color appears in the final product.

Emotional Engagement beyond Color

Color is powerful, but at Gem Punch, we know texture speaks too. Raised stitches in bold red can feel assertive, while smooth satin stitching in soft blue feels calming.

Custom embroidery also taps into nostalgia—scout badges, military insignia, or retro denim patches often evoke powerful emotional memories. Combined with color psychology, this tactile quality turns a design into a personal connection.

Practical Tips for Choosing Colors

  1. Define the Message first – Decide on the mood or story before selecting your palette.
  2. Research Cultural Meanings – Ensure colors align with your audience’s cultural context.
  3. Test Digitally & Physically – Use digital mockups, then confirm with real thread samples.
  4. Consider the Fabric Base – Background colors influence how embroidery threads appear.
  5. Highlight Intentionally – Use bright hues for focal points and muted shades for balance.

Conclusion

Your patch isn’t just a design—it’s a statement. At Gem Punch, we help you choose colors that tell your story, amplify your brand, and create lasting emotional connections. Whether you’re aiming to energize, inspire, or comfort, your color palette speaks louder than words.

Frequently Asked Questions

1. What is color psychology and why does it matter in patch and embroidery design?
Color psychology studies how hues affect emotions and behavior. For Gem Punch patches, the right colors not only look great but also shape the message and emotional impact.

2. How do cultural differences affect color perception in design?
Color meanings vary worldwide. For example, white represents purity in some cultures but mourning in others. Gem Punch helps tailor palettes for your audience.

3. How do complementary, analogous, and triadic schemes affect design?
Complementary colors create contrast, analogous colors create harmony, and triadic schemes balance vibrancy with cohesion.

4. Can color alone influence how a patch is valued?
Yes—designs that use color intentionally often feel more valuable due to the aesthetic–usability effect.

5. Are there limits to color psychology’s impact?
Yes—personal and cultural experiences influence how colors are perceived, so context matters.

Sew On Embroidered Patches

Sew‑On Embroidered Patches Made Easy: Tools, Tips & Tricks

Why Sew-On Patches Still Reign Supreme

In an era where customization defines personal style, Sew On Embroidered Patches remain a favorite among creatives, fashion-lovers, and military gear enthusiasts alike. From decorating jackets and denim to upgrading backpacks and uniforms, sew-on patches offer unmatched durability and long-lasting appeal.

Unlike peel-and-stick or iron-on versions that wear off over time, Sew‑On Embroidered Patches offer strength and permanence. And when crafted with high-quality embroidery—like those produced by Gem Punch—they become more than just patches; they’re statements.

This guide walks you through the essentials: tools, placement techniques, hand and machine stitching, plus pro tips to keep your patch secure and looking sharp.

Sew On Embroidered Patches

Tools & Materials You’ll Need

Before you start stitching, gather the right tools to ensure a clean, strong finish:

  • Embroidered Patch (from trusted brands like Gem Punch)
  • Garment or Accessory (denim, canvas, cotton, etc.)
  • Needles: Use a denim or leather needle for thicker fabrics
  • Thread: Strong polyester or heavy-duty thread in a color matching the patch edge
  • Scissors
  • Pins or Fabric Glue (optional for temporary placement)
  • Thimble or Pliers (for pushing through thick materials)
  • (Optional) Iron: To hold adhesive-backed patches in place before sewing

Placement & Preparation Tips

A patch placed poorly can ruin the look. Here’s how to get it right:

  • Clean and flatten the garment surface.
  • Center or align the patch carefully on the fabric. Use pins or temporary fabric glue to hold it in place.
  • If your patch has an iron-on backing (like those from Gem Punch), press it lightly with an iron to stabilize—but always sew it down for permanent placement.
  • Double-check positioning. A misplaced patch is hard to fix once sewn.

Stitching Techniques: Hand vs Machine

Whether you’re a DIYer or using a sewing machine, here’s how to make it last.

Hand Sewing Techniques

Best for: Small patches, delicate fabrics, curved or uneven surfaces

  • Whip Stitch: Fast and easy, but a single broken stitch can cause the whole patch to lift.
  • Running Stitch / Slip Stitch: Clean and subtle, ideal for casual wear.
  • Backstitch: More secure and less likely to unravel.
  • Blanket Stitch: Adds a decorative finish while securing the edge.

Pro Tip: Use a double-threaded needle with strong knots and pull stitches taut. A thimble or pliers can help push through thick patches.

 Machine Sewing Techniques

Best for: Larger patches, flat garments, professional applications

  • Use a straight stitch for a clean border or a zigzag stitch for visual flair and edge protection.
  • Backstitch at the start and end to lock the thread in place.
  • Choose a strong, matching thread and test on scrap fabric first.

Gem Punch Patches are crafted with consistent edge finishes that make both hand and machine sewing smooth and frustration-free.

Finishing Touches for Durability

Don’t stop once the patch is on—finishing matters just as much:

  • Secure all knots on the garment’s interior.
  • Trim loose threads immediately to avoid fraying.
  • Use fray check or a dense zigzag stitch to reinforce the patch edge.
  • For handmade patches or loose weaves, a buttonhole stitch or edge-binding method is ideal.
  • After several washes, inspect the patch and apply a few extra stitches if needed.

Patches from Gem Punch are designed for longevity, even with frequent wear and washing.

Expert Tips from Gem Punch Pros

  • Blend your thread with the patch edge color for invisible stitches.
  • Always practice on scrap fabric if you’re new to sewing patches.
  • For heavy-duty use—like military or tactical gear—use thicker threads and double stitching.
  • Check out morale patches from Gem Punch for high-impact applications with rugged design and finish.
  • Need help designing your own? Use Gem Punch’s free digital proof service before you order custom patches.

Hand vs Machine: Which Should You Choose?

FeatureHand SewingMachine Sewing
Best ForSmall patches, delicate fabricsLarge patches, professional looks
FlexibilityHigh – navigate curves easilyLimited – best on flat areas
TimeSlowerFaster
Stitch StrengthModerate – varies by techniqueHigh – uniform tension & strength

Gem Punch recommends using a hybrid method: Machine sew for strength, then hand-finish for detail or reinforcement.

Sew On Embroidered Patches Made Easy

Sew with Confidence

Sew‑On Embroidered Patches is easier than it looks—and the result is worth it. Whether you’re customizing jackets, caps, backpacks, or uniforms, you can count on durability, style, and personalization with sew-on patches.

For high-quality, edge-stitched, custom Sew‑On Embroidered Patches, trust the experts at Gem Punch. With premium materials, iron-on options, no-minimum orders, and pro design support, your next patch project is already a success.

Frequently Asked Questions

How do I sew on an embroidered patch so it doesn’t come off?
Use a strong thread, double-knot your stitches, and always sew completely around the edge of the patch.

What stitch is best for denim patches?
A backstitch or machine zigzag works best for denim to secure thick edges.

Can I sew an iron-on patch?
Yes! In fact, it’s highly recommended. Ironing only holds temporarily; stitching makes it permanent.

What kind of needle should I use for tough fabrics?
Use a leather or denim needle for thick fabric and patches.

How do I prevent patch edges from fraying?
Apply a zigzag machine stitch or use fray check around the border.

custom tags for clothes

Custom Tags for Clothes: Why & How to Order Quality, Low‑Quantity Labels

Introduction

Custom tags do more than label clothes—they express your brand’s story, improve customer trust, and create a lasting impression. Whether you’re a boutique designer, Etsy seller, or launching a streetwear label, you can now order custom tags for clothes in low quantities without sacrificing quality.

This guide will walk you through types of clothing tags, smart design tips, and where to order—even if you only need 50 or fewer tags. And yes, Gem Punch is one of the leading options for small-batch custom tags.

Why Custom Tags Matter for Clothing Brands

Custom clothing tags can:

  • Strengthen Brand Identity – A logo on a tag reinforces who you are.
  • Deliver Key Product Info – Material, size, care instructions—all in one place.
  • Elevate Packaging Appeal – A detailed hang tag or sleek woven label impresses buyers.
  • Communicate Sustainability – Show you care with recycled materials or eco messaging.
  • Differentiate You from Competitors – Small touches like personalized tags boost credibility.

Most Popular Types of Custom Clothing Tags

Woven Labels (Sew-In)

Durable, professional tags ideal for internal branding and care info.

Printed or Heat-Transfer Labels

Soft, minimal tags that feel invisible—great for activewear or basics.

Hang Tags

Attachable tags that offer storytelling space—perfect for pricing, messaging, or retail.

Specialty or Metal Tags

For high-end aesthetics or packaging, metal and leather tags make a bold statement.

Top Providers for Low-Minimum Clothing Tags

Gem Punch

Gem Punch offers premium woven, printed, and hang tags with low minimum order flexibility—ideal for creators who need small batches or sample runs. They support custom design, logo application, and sustainable materials where needed.

  • Minimums: Low-order quantity available
  • Tag Types: Sew-in labels, care tags, hang tags, brand ID tags
  • Highlights: Boutique service, design consultation, U.S.-based support
  • Visit Gem Punch »

Labelyze

A flexible label provider known for flat-rate pricing and small orders. Offers quick proofs and fast turnaround (as few as 50 tags).

  • Types: Woven, iron-on, printed, care labels

Super Label Store

Excellent for global orders. Online tag builder makes it easy to create professional results even for first-time buyers.

Etsy Creators (Dutch Label Shop, Wunderlabel)

Individual sellers often support custom, low-run clothing tags for handmade and Etsy brands. Perfect for small brands or launches.

Design Tips for Eye-Catching Custom Tags

To make your tags unforgettable:

  • Be Clear and Readable – Prioritize legibility over decoration.
  • Stick to Brand Colors and Fonts – Consistency boosts recognition.
  • Add QR Codes – Link to care guides or your brand story.
  • Use Eco-Friendly Options – Consider recycled polyester or FSC-certified cardstock.
  • Test Print Samples First – Review tags for feel, clarity, and application ease.

Ordering Process: Small Batches Made Simple

  1. Pick Your Tag Type – Sew-in, printed, hang tag, or combo
  2. Upload Your Design or Request Assistance – Gem Punch and others provide free consultations
  3. Approve the Digital Proof – Check dimensions, content, and color accuracy
  4. Place Your Order – Start with as few as 50 or less
  5. Apply Tags – Sew, iron-on, or attach as needed
custom tags for clothing brands

Frequently Asked Questions

Can I order custom tags for clothes in small quantities?

Yes—Gem Punch, Labelyze, and Etsy sellers all support low-minimum orders.

What type of tag is best for soft fabric?

Printed or heat-transfer tags are soft, skin-friendly, and ideal for comfort-focused garments.

How long do small orders take?

Most providers deliver within 5–14 business days depending on quantity and type.

Are there eco-friendly clothing tag options?

Yes! Gem Punch and others offer recycled and sustainable materials for a greener product line.

Conclusion

Whether you’re handmaking hoodies or launching your next apparel drop, custom tags add that final professional touch. And now, you can make it happen without committing to thousands of units.

👉 Start your order with Gem Punch or try Labelyze and Etsy creators for flexible, small-batch tag solutions.
Professional branding starts with the right tag—make yours count.

Custom Patches No Minimum: Where to Order without Bulk Restrictions

Custom Patches No Minimum: Where to Order without Bulk Restrictions

Introduction

When you hear “custom patches no minimum order,” it means you can buy as few—or as many—as you need without bulk restrictions. Whether you’re a designer, collector, or small business, this flexibility is a game‑changer. This guide showcases trusted providers—including Gem Punch—that let you order custom patches one at a time.

Why Choose Custom Patches with No Minimum Orders

  • Perfect for one-off projects: ideal for prototypes, gifts, or personal use.
  • Cost-effective for low quantities: no overspending on excess patches.
  • Designed for small buyers: hobbyists, startups, creators, and individuals love the flexibility.

Top Providers That Offer No-Minimum Custom Patches

Gem Punch

Gem Punch offers a flexible, no-minimum approach to ordering custom patches—just one patch is enough. They provide free digital proofs, design revisions, and attentive US-based service (gempunch.xtremlogics.com/). Their helpful blog resources discuss backing and material options, plus how to choose a patch maker—highlighting their commitment to smaller orders.

GS‑JJ / Patches Co.

With pricing starting as low as $0.21 per patch and no minimum order quantity, GS‑JJ supports embroidered, PVC, printed, woven, chenille, and more. They offer free 24‑hour proofs with unlimited revisions and international shipping (GS-JJ).

THE/STUDIO

Whether you need a single badge or hundreds, THE/STUDIO supports no‑minimum orders. Their platform offers a smooth online design process, free proofs, and free shipping to ensure convenience from 1 patch upward (The Studio).

Comparing Patch Types and Key Features

ProviderMinimum QuantityPatch TypesDesign SupportPricing Estimate for 1 Patch
Gem Punch1 patchEmbroidered, PVC, woven, iron‑on, chenille, velcro (gempunch.xtremlogics.com/)Free proof, revisionsTypically from ~$0.25–$1.00+ depending on complexity
GS‑JJ.Com1 patchEmbroidered, PVC, printed, leather, chenille, woven, more (GS-JJ)Free 24-hr proof, unlimited revisions~$0.21–$2.30 depending on style
THESTUDIO1 patchEmbroidered, woven, printed, chenille, leather, PVC, bullion, velcro, more (The Studio)Free design consultation, proofing~$0.25–$2+ depending on type

All three providers support various backing options: sew-on, iron-on, Velcro, plastic, adhesive, and safety-pin to match your application needs.

How to Choose the Right Vendor

  • Patch style & complexity: Intricate designs may require woven or printed styles, while bold and durable needs suit PVC or chenille.
  • Turnaround time: Check production plus shipping times—Gem Punch offers industry-standard timelines, GS‑JJ and THE/STUDIO often deliver in 1–2 weeks.
  • Design assistance: Free artwork creation and revisions are vital for a smooth experience—Gem Punch and others provide these.
  • Shipping and support: Ensure whether providers ship internationally, support customs, and offer responsive customer service.

Ordering Guide for First-Time Buyers

  1. Upload your design or request help with artwork
  2. Select your patch type, size, colors, and backing
  3. Review and approve your free virtual proof
  4. Place your single-unit or small-batch order
  5. Receive your patches and apply them via iron‑on, sew, or hook & loop

Frequently Asked Questions

  • “Can I order just one custom patch?”
    Yes — Gem Punch, allows single-unit patch orders.
  • “Which websites offer custom patches with no minimum order?”
    Try Gem Punch
  • “How long to receive a single custom patch?”
    Production generally takes 5–16 business days, plus delivery time.
  • “Is there a cheapest option for ordering one high-quality patch?”
    Gem Punch offers the most competitive base pricing and provide great quality with design support.

Conclusion

If you want flexibility, quality, and the option to order as few as one patch, providers like Gem Punch is perfect fits. Start with Gem Punch if you value detailed design help and U.S. customer support.

Get your free quote today and try ordering one test patch to check quality before scaling up.

👉 Order your single custom patch now with Gem Punch to kickstart your custom patch project!